Linux入门之Linux系统里的yum------Linux下如何安装python中的requests模块(CentOs)
如何安装python中的requests模块
- 概述
- yum命令
- 安装操作
- 更新操作
- 查找和显示操作
- 卸载操作
- 清除缓存操作
- 综合示例
概述
Yum是一个在Fedora和RedHat以及CentOS中的Shell前端软件包管理器。基于RPM包管理,能够从指定的服务器自动下载RPM包并且安装并自动处理依赖性关系(即,一次性安装所有依赖的软件包,无须多次下载、安装)。yum提供了查找、安装、删除某一个、一组甚至全部软件包的命令,且命令简洁而又好记。
特点:
1. 配置文件简洁
2. 自动解决安装或卸载软件时遇到的倚赖性问题
3. 可以同时配置多个资源库
4. 保持与RPM数据库的一致性
5. 使用方便
yum命令
语法:yum 【操作】 软件名
常用操作:
| 命令 | 功能 |
|---|---|
| yum install yum-fastestmirror | 自动搜索镜像插件 |
| yum install yumex | 安装图形窗口插件 |
| yum grouplist | 查看可能批量安装的列表 |
安装操作
| 命令 | 功能 |
|---|---|
| yum install | 安装全部程序徐 |
| yum install 程序名 | 安装指定的程序 |
| yum groupinsall 程序组名 | 安装程序组 |
示例:
简单安装相关软件
[root@CentOs7 ~]# yum install bzip2
Loaded plugins: fastestmirror
base                                                                                             | 3.6 kB  00:00:00
extras                                                                                           | 2.9 kB  00:00:00
updates                                                                                          | 2.9 kB  00:00:00
。。。。。。
Installed:
   bzip2.x86_64 0:1.0.6-13.el7
 Complete!
更新操作
| 命令 | 功能 |
|---|---|
| yum update | 更新全部程序 |
| yum update 程序名 | 更新指定程序 |
| yum check-update | 检查可更新的程序 |
| yum upgrade 程序名 | 升级指定程序 |
| yum groupupdate 程序组名 | 升级程序组 |
示例:
常见的指定软件更新操作
[root@CentOs7 ~]# yum update bzip2
Loaded plugins: fastestmirror
Loading mirror speeds from cached hostfile
 * base: mirrors.huaweicloud.com
 * extras: mirrors.huaweicloud.com
 * updates: mirrors.aliyun.com
No packages marked for update
查找和显示操作
| 命令 | 功能 |
|---|---|
| yum info 程序名 | 显示目标程序信息 |
| yum list | 显示所有已经安装和可以安装的程序 |
| yum list 程序名 | 显示指定程序包安装情况 |
| yum groupinfo | 程序组名 显示程序组信息 |
| yum search string | 根据关键字string查找安装包 |
示例:
查看指定程序的相关信息
[root@CentOs7 ~]# yum info zip
Loaded plugins: fastestmirror
Loading mirror speeds from cached hostfile
 * base: mirrors.huaweicloud.com
 * extras: mirrors.huaweicloud.com
 * updates: mirrors.aliyun.com
Installed Packages
Name        : zip
Arch        : x86_64
Version     : 3.0
Release     : 11.el7
Size        : 796 k
Repo        : installed
From repo   : base
Summary     : A file compression and packaging utility compatible with PKZIP
URL         : http://www.info-zip.org/Zip.html
简单显示指定程序安装情况
[root@CentOs7 ~]# yum list zip
Loaded plugins: fastestmirror
Loading mirror speeds from cached hostfile
 * base: mirrors.huaweicloud.com
 * extras: mirrors.huaweicloud.com
 * updates: mirrors.aliyun.com
Installed Packages
zip.x86_64
卸载操作
| 命令 | 功能 |
|---|---|
| yum remove 程序名 | 卸载指定程序 |
| yum groupremove 程序组名 | 删除指定程序组 |
| yum deplist 程序名 | 查看指定程序的依赖情况 |
示例:
尝试将刚刚安装的软件卸载
[root@CentOs7 ~]# yum remove bzip2
Loaded plugins: fastestmirror
Resolving Dependencies
--> Running transaction check
---> Package bzip2.x86_64 0:1.0.6-13.el7 will be erased
--> Finished Dependency Resolution
。。。。。。。
Removed:
  bzip2.x86_64 0:1.0.6-13.el7
Complete!
清除缓存操作
| 命令 | 功能 |
|---|---|
| yum clean packages | 清除缓存目录下的软件包 |
| yum clean headers | 清除缓存目录下的 headers |
| yum clean oldheaders | 清除缓存目录下旧的 headers |
| yum clean all | 清除缓存目录下的软件包及旧的header |
示例:
尝试清除残余的安装文件
[root@CentOs7 ~]# yum clean packages
Loaded plugins: fastestmirror
Cleaning repos: base extras updates
0 package files removed
[root@CentOs7 ~]#
综合示例
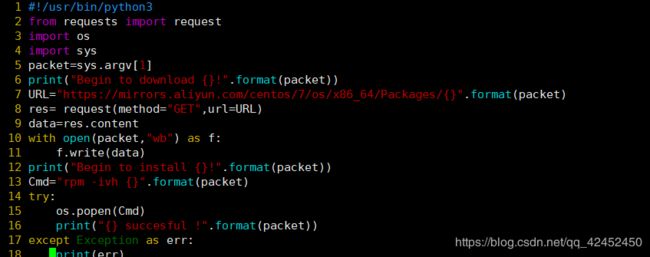
经过上面的学习让我们建立一个小的脚本来更深入了解yum的工作原理
  1 #!/usr/bin/python3
  2 from requests import request
  3 import os
  4 import sys
  5 packet=sys.argv[1]
  6 print("Begin to download {}!".format(packet))
  7 URL="https://mirrors.aliyun.com/centos/7/os/x86_64/Packages/{}".format(packet)
  8 res= request(method="GET",url=URL)
  9 data=res.content
 10 with open(packet,"wb") as f:
 11     f.write(data)
 12 print("Begin to install {}!".format(packet))
 13 Cmd="rpm -ivh {}".format(packet)
 14 try:
 15     os.popen(Cmd)
 16     print("Begin to install {} succesful !".format(packet))
 17 except Exception as err:
 18     print(err)
 19
图例:

接下来让我们检验脚本的实际能力,首先利用yum命令查询目标软件包版本
root@localhost Shell]# yum list zip
Loaded plugins: fastestmirror
Loading mirror speeds from cached hostfile
 * base: mirrors.aliyun.com
 * extras: mirrors.aliyun.com
 * updates: mirrors.aliyun.com
Available Packages
zip.x86_64                                                3.0-11.el7                                                 base
[root@localhost Shell]#
然后利用我们开发的脚本下载,我们可以看到脚本已经下载到文件夹下
[root@localhost Shell]# ./yump zip.x86_64 0:3.0-11.el7
Begin to download zip.x86_64!
Begin to install zip.x86_64!
zip.x86_64 succesful !
[root@localhost Shell]# ls
yump  zip.x86_64
注意事项
对于初学者而言,python的使用会存在诸多问题,针对我个人遇到的问题,我将经验总结如下:
- 如果运行脚本时提示python里无法导入requests模块,这是由于python-pip里没有安装requests,需要利用cd命令到/usr/bin目录下用pip或者pip3命令安装requests模块,(即pip3 install requests)安装完成后重启即可。
- 如果requests模块由于网络原因更新失败的话,这是由于python里的源是国外网站的,国内访问国外有诸多限制,所以可以将python的源改为阿里的。主要操作方式如下:
- 首先利用cd命令回到用户目录下(即cd ~)
[root@localhost Shell]# cd
[root@localhost ~]# ls
anaconda-ks.cfg get-pip.py get-pip.py.1 practicec Shell test- 然后创建 .pip目录,并在该目录下创建pip.conf文件
[root@localhost ~]# mkdir .pip
[root@localhost ~]# cd .pip
[root@localhost .pip]# vim pip.conf
3.利用vim命令在pip.conf里面输入下列代码,保存退出即可
  1 [global]
  2 trusted-host=mirrors.aliyun.com
  3 index-url=http://mirrors.aliyun.com/pypi/simple
4.最后重启系统并安装requests包即可