Android Studio依赖管理与Nexus私服搭建
![]()
近日有消息称:腾讯目前正与多家银行谈判,希望能再获得20亿美元(约合人民币140亿元)的贷款,是五年期“子弹式贷款”(一次性还本贷款)。为了与阿里、百度竞争,腾讯目前正在多个领域展开大规模投资,包括游戏、娱乐、云计算、在线金融等,导致“地主家”也缺钱呐!
作者简介明天又是周末啦,按耐不住激动的心情,先提前祝大家周末愉快!
本周的最后一篇文章来自 Javen205 的投稿,分享了AS中几种依赖方式以及如何搭建Nexus私服,图片步骤很详细,虽然是Mac下,但是Windows套路都一样的,希望能帮助到大家。
Javen205 的博客地址:
Android引入依赖的多种方式http://www.jianshu.com/u/9be31238fda1
引入方式一
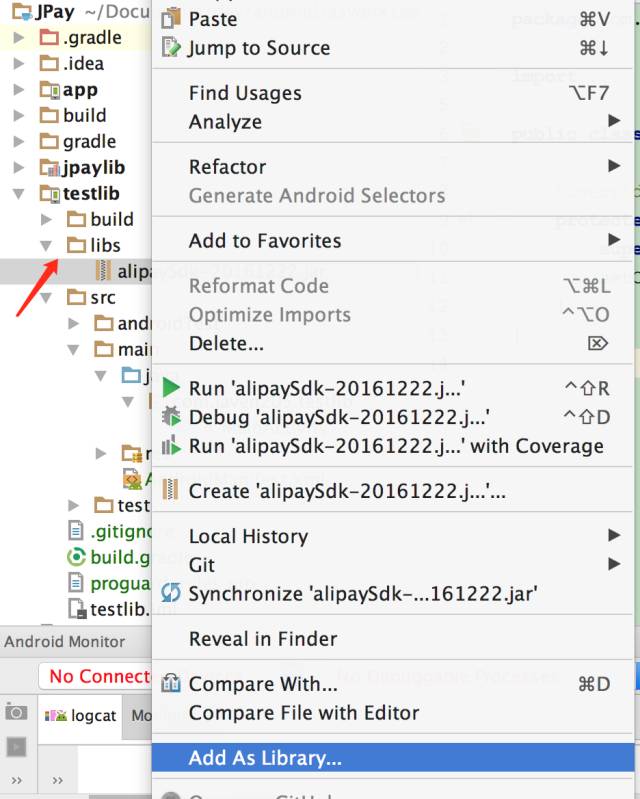
AS切换project视图 > 新建libs目录(高版本AS默认存在libs目录)> copy jar 包 > add as library
下面以我开源的 支付宝以及微信app支付项目:
https://github.com/Javen205/JPay.git
为例引入相关的jar。
方式一:add as library
直接使用 Gradle-Sync Now
引入方式二(module>aar)
import module > Project Structure > 选择对应的Module > module dependent
我们知道jar包是不能引入资源文件的,如果以module模式引入资源文件同样可以使用。
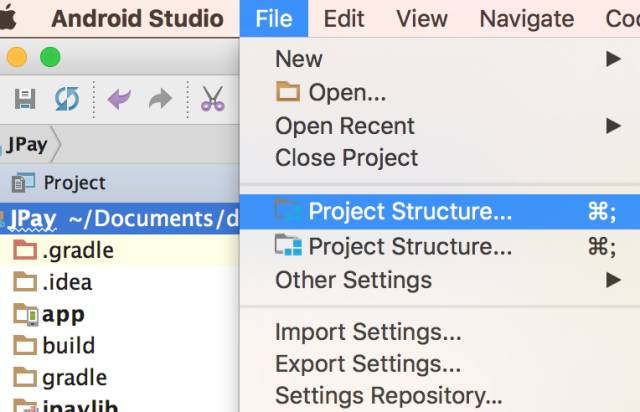
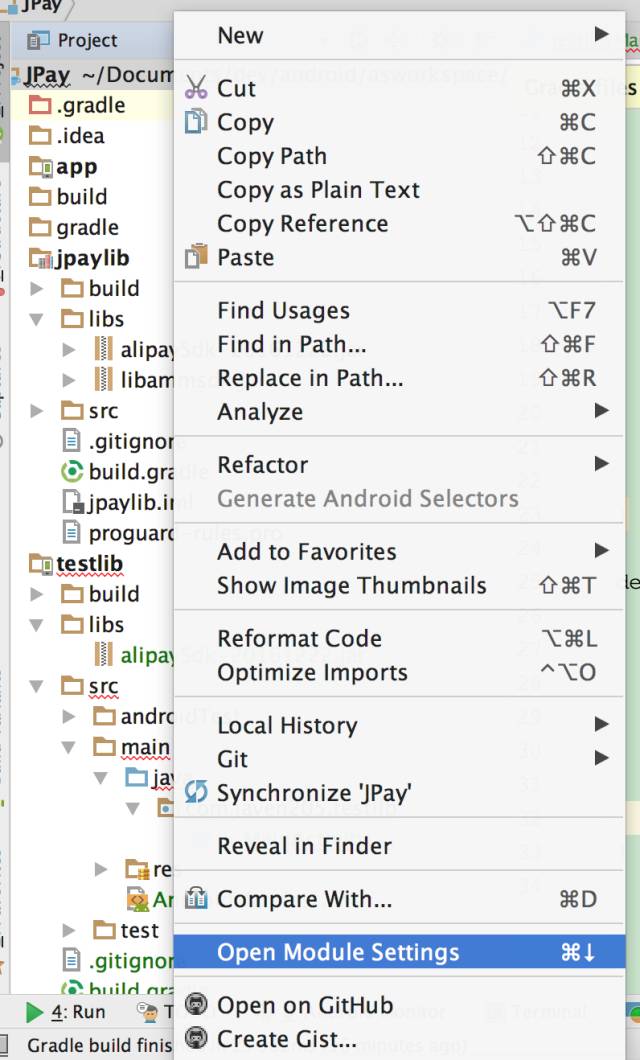
打开Project Structure-方式1
打开Project Structure-方式2
Project Structure
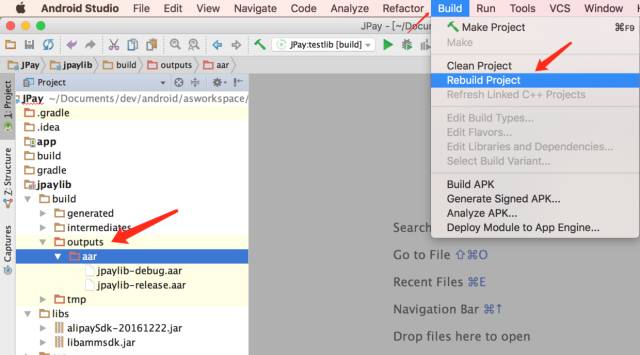
Lib Module 生成aar
New Module > Android Library > 实现包功能并生成aar文件
构建生成aar
项目中引用aar文件:
引用aar文件
以上两种引入jar依赖弊端就是jar包升级之后需要Copy替换换新的jar并修改对应的配置文件。
引入方式三(推荐)
从仓库中下载引用
找到jar对应的build.gradle > compile(jcenter、mavencenter、mavenlocal) > 通过Nexue搭建私服
https://bintray.com/bintray/jcenter
http://search.maven.org
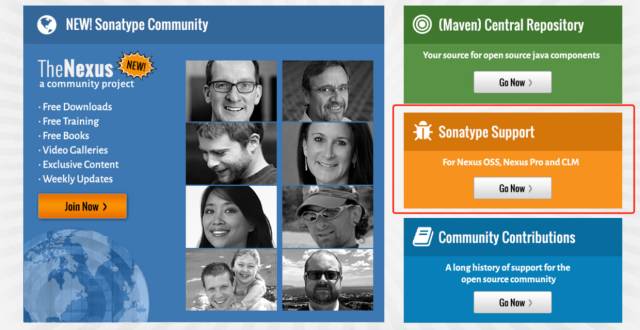
http://www.sonatype.org
部分网站访问需要科学上网,你懂的哈
Android Studio最新版默认使用的是 jcenter,好处就是jar包升级自需要修改版本号,构建项目会自动从仓库中下载(只会下载一次,下载以后会从本地引入)。
如何引入仓库中的jar
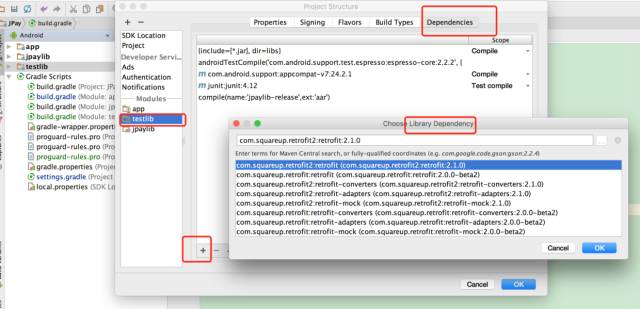
下面以引入 retrofit 为例:
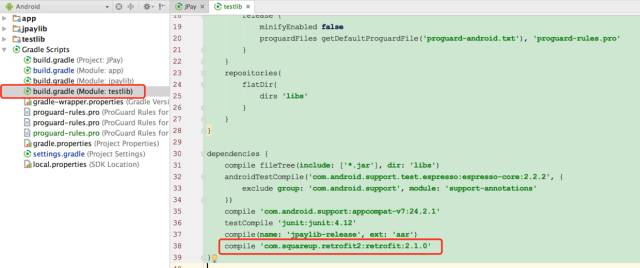
或者直接在对应项目 Module 的 build.gradle 中 dependencies节点 添加:
compile 'com.squareup.retrofit2:retrofit:2.1.0'
最终配置
相互依赖的包也会下载下来,retrofit 依赖 okhttp 依赖 ikoi
多平台Nexus私服搭建
为什么要搭建 nexus 私服,原因很简单,有些公司都不提供外网给项目组人员,因此就不能使用 maven 访问远程的仓库地址,所以很有必要在局域网里找一台有外网权限的机器,搭建 nexus 私服,然后开发人员连到这台私服上,这样的话就可以通过这台搭建了 nexus私服 的电脑访问 maven 的远程仓库。
http://www.sonatype.org
http://books.sonatype.com/nexus-book/3.0/reference/index.html
Note: The GUI installer distribution development is suspended and is no longer an install option until further notice.
Nexus Repository Manager 3.1.0-04 开始并没有提供GUI的安装程序。建议JDK使用1.8版本。
官网首页
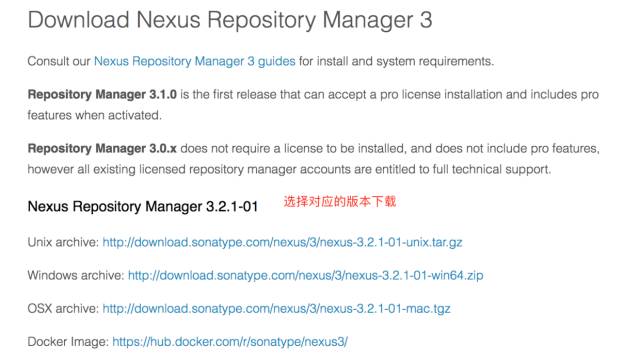
选择最新版本Nexus3
下载
安装介绍资料:
http://books.sonatype.com/nexus-book/3.0/reference/install.html#installation-archive
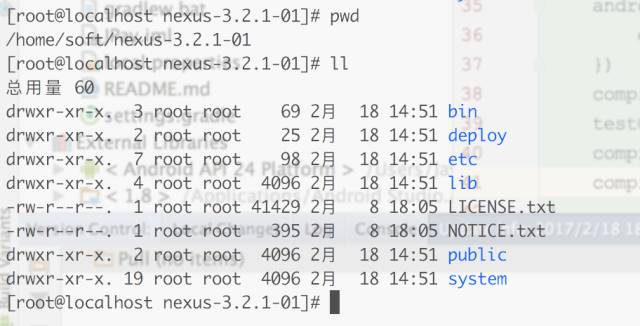
解压下载的nexus
$ tar xvzf nexus-3.0.2-02-mac.tgz
$ tar xvzf nexus-3.0.2-02-unix.tar.gz
The bin folder contains the generic startup scripts for Unix-like platforms called nexus. The Windows platform equivalent is called nexus.exe. To start the repository manager from the bin folder on a Unix-like platform like Linux use
./nexus run
The equivalent invocation on Windows requires a / in front of the run and any other commands.
nexus.exe /run
简单解释就是Mac、Linux平台使用 ./nexus run。Window平台使用 nexus.exe /run 运行Nexus Repository Manager。
MAC:OSX archive下载解压
Linux:Unix archive解压
进bin目录,执行 ./nexus run:
运行Nexus服务
Nexus Repository Manager 依赖的是 Java开发环境,最新版JDK得1.8或者以上
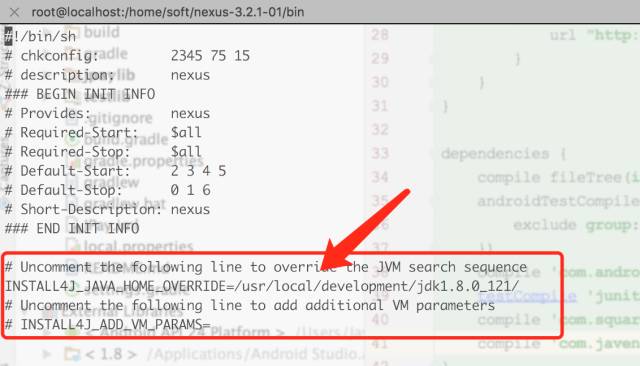
提示设置INSTALL4J_JAVA_HOME_OVERRIDE
在nexus的 bin目录 修改 nexus,设置 INSTALL4J_JAVA_HOME_OVERRIDE
修改nexus
配置默认的JAVA_HOME
启动Nexus
关闭防火墙 默认端口8081:
systemctl stop firewalld
参考资料:
http://books.sonatype.com/nexus-book/3.0/reference/install.html#installation-java
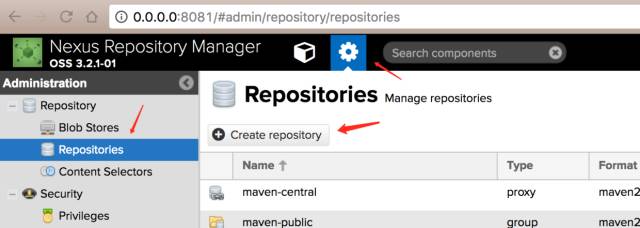
创建自己的仓库
创建用户
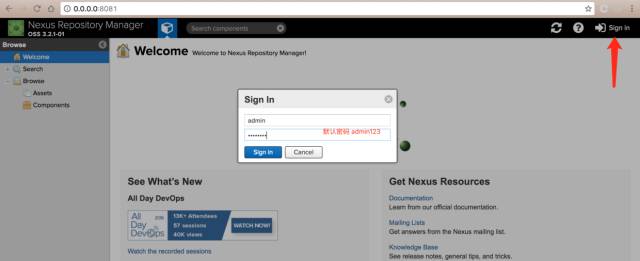
首先使用管理员密码登陆到 Nexus私服 并添加用户:
登录
创建用户
使用新创建的用户登录Nexus并创建仓库:
创建仓库1
创建仓库2
创建仓库3
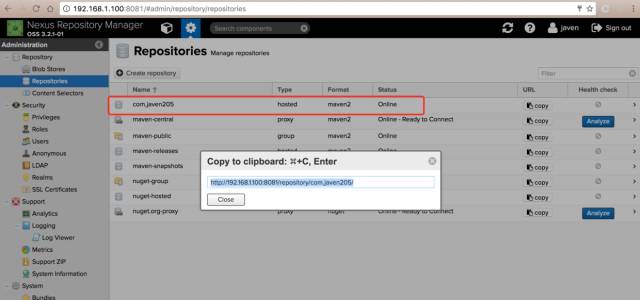
创建完成
上传自己的Module到仓库
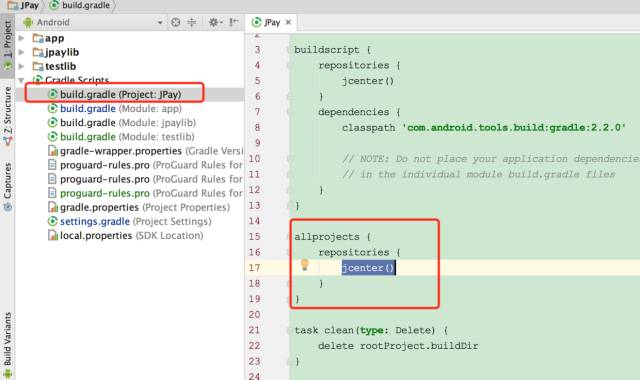
第一 在项目级别的 build.gradle 中的 allprojects 下 repositories节点 添加 mavenLocal():
配置本地maven引用
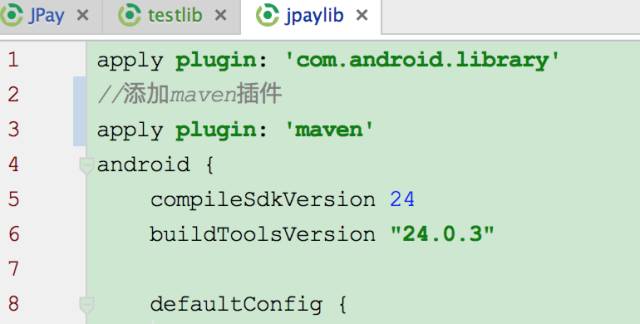
第二 在 Lib Module 级别的 build.gradle 中添加 maven 插件 apply plugin: 'maven':
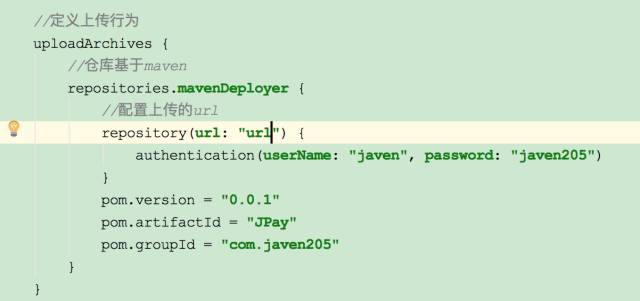
第三 在 Lib Module 级别的 build.gradle 中 android节点 添加上传行为:
定义上传行为
解析:
compile 'com.android.support:appcompat-v7:24.2.1'
pom.version = "24.2.1"
pom.artifactId = "appcompat-v7"
pom.groupId ="com.android.support"
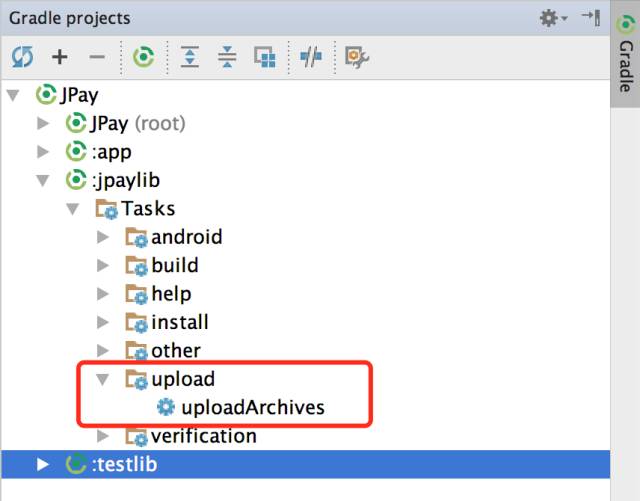
第四 使用Gradle插件上传aar到Maven私服,点击 uploadArchives 自动上传:
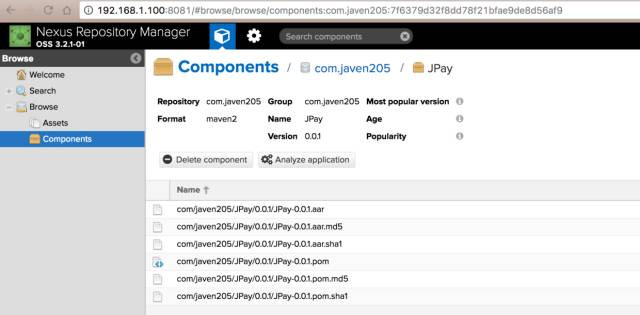
上传aar到服务器
刷新页面重新查看
引用私服中的Module
在需要依赖 Module 的 build.gradle 中添加如下节点,其中URL就是上文中创建仓库的url:
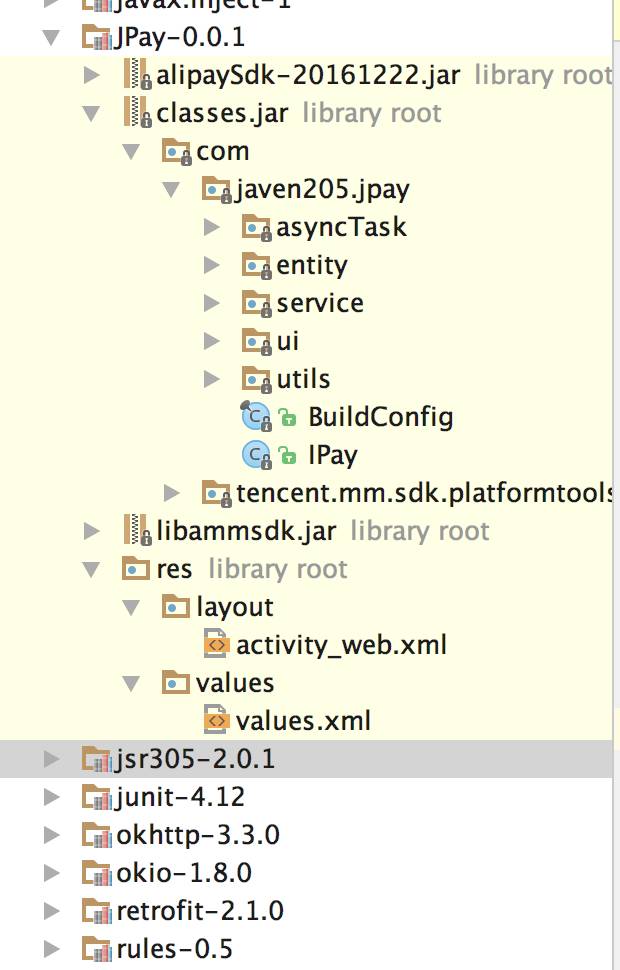
compile 'com.javen205:JPay:0.0.1'
查看 External Libraries:
记录学习的点滴,以此勉励不断奋斗的自己✌️✌️✌️。
更多每天学习累了,看些搞笑的段子放松一下吧。关注最具娱乐精神的公众号,每天都有好心情。
![]()
如果你有好的技术文章想和大家分享,欢迎向我的公众号投稿,投稿具体细节请在公众号主页点击“投稿”菜单查看。
欢迎长按下图 -> 识别图中二维码或者扫一扫关注我的公众号:
![]()
