Android自定义弹窗——右上角悬浮关闭
今天打开QQ音乐时,看到更新界面右上角悬浮关闭按钮,本来想应该挺简单的,于是就想顺手写一个,但是不试不知道,一试就出问题咯。

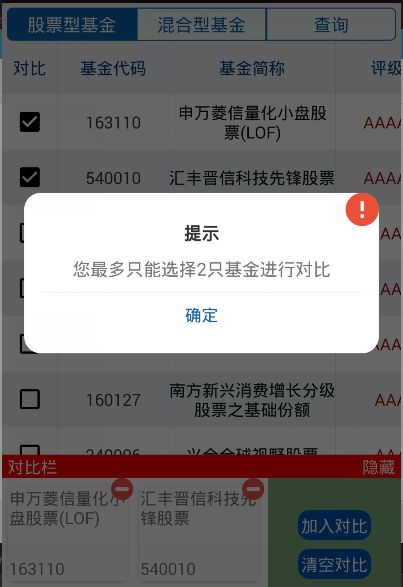
于是在原有自己封装的dialog中进行修改,原有样式

本来以为只要加个margin,然后右上角加个图片,应该就没问题了。先贴上原来的代码和布局,方便查看和修改。
- 布局
<RelativeLayout xmlns:android="http://schemas.android.com/apk/res/android"
    android:layout_width="match_parent"
    android:layout_height="match_parent"
    android:gravity="center"
    android:orientation="vertical">

    <LinearLayout
        android:id="@+id/layout"
        android:layout_width="@dimen/mydialog_width"
        android:layout_height="wrap_content"
        android:layout_gravity="center"
        android:orientation="vertical"
        android:scrollbars="vertical">

        <TextView
            android:id="@+id/title"
            android:layout_width="match_parent"
            android:layout_height="wrap_content"
            android:layout_margin="@dimen/mydialog_title_margin"
            android:gravity="center"
            android:text="提示"
            android:textColor="@color/black"
            android:textSize="@dimen/mydialog_title_size"
            android:textStyle="bold" />

        <View
            android:id="@+id/customdialog_fenge"
            android:layout_width="match_parent"
            android:layout_height="0.1dp"
            android:background="@color/dim_foreground_disabled_material_dark"
            android:visibility="gone" />

        <LinearLayout
            android:id="@+id/dialog_LinearLayout"
            android:layout_width="match_parent"
            android:layout_height="wrap_content"
            android:gravity="center"
            android:orientation="vertical">

            <TextView
                android:id="@+id/message"
                android:layout_width="match_parent"
                android:layout_height="wrap_content"
                android:layout_marginLeft="@dimen/mydialog_title_margin"
                android:layout_marginRight="@dimen/mydialog_title_margin"
                android:gravity="center"
                android:text="文本信息"
                android:textSize="@dimen/mydialog_title_size" />

            <EditText
                android:id="@+id/dialog_edt"
                android:layout_width="match_parent"
                android:layout_height="@dimen/topbar_height"
                android:layout_margin="@dimen/mydialog_title_margin"
                android:background="@drawable/bg_edittext"
                android:paddingLeft="3dp"
                android:paddingRight="3dp"
                android:textSize="@dimen/mydialog_title_size" />
        LinearLayout>

        <LinearLayout
            android:layout_width="match_parent"
            android:layout_height="0.1dip"
            android:layout_marginTop="@dimen/mydialog_title_margin"
            android:background="@color/fragment_body_text_line_color" />

        <LinearLayout
            android:layout_width="match_parent"
            android:layout_height="@dimen/topbar_height"
            android:orientation="horizontal">

            <Button
                android:id="@+id/left_btn"
                android:layout_width="match_parent"
                android:layout_height="match_parent"
                android:layout_weight="1"
                android:background="@drawable/bg_dialog_btn_left"
                android:text="取消"
                android:textColor="@color/blue"

                android:textSize="@dimen/mydialog_btntext_size" />

            <LinearLayout
                android:id="@+id/single_line"
                android:layout_width="1dp"
                android:layout_height="match_parent"
                android:background="@color/fragment_body_text_line_color"
                android:orientation="horizontal" />

            <Button
                android:id="@+id/middle_btn"
                android:layout_width="match_parent"
                android:layout_height="match_parent"
                android:layout_weight="1"
                android:background="@drawable/bg_dialog_btn_middle"
                android:text="隐藏"
                android:textColor="@color/blue"
                android:textSize="@dimen/mydialog_btntext_size" />

            <LinearLayout
                android:id="@+id/second_line"
                android:layout_width="1dp"
                android:layout_height="match_parent"
                android:background="@color/fragment_body_text_line_color"
                android:orientation="horizontal" />

            <Button
                android:id="@+id/right_btn"
                android:layout_width="match_parent"
                android:layout_height="match_parent"
                android:layout_weight="1"
                android:background="@drawable/bg_dialog_btn_right"
                android:text="确定"
                android:textColor="@color/blue"
                android:textSize="@dimen/mydialog_btntext_size" />
        LinearLayout>
    LinearLayout>
RelativeLayout>- 代码
public class MyOwnDialog extends Dialog {
    public MyOwnDialog(Context context) {
        super(context);

    }

    public MyOwnDialog(Context context, int theme) {
        super(context, theme);
    }

    public interface OnCustomDialogListener {
        public void back(String name);
    }

    public static class Builder {

        private Context context;
        private String title;
        private String message;
        private String right_btnText;
        private String left_btnText;
        private String middle_btnText;
        private View contentView, v;
        private String edt;
        /* 按钮监听事件 */
        private OnClickListener right_btnClickListener;
        private OnClickListener left_btnClickListener;
        private OnClickListener middle_btnClickListener;
        private OnCustomDialogListener customDialogListener;//自己定义接口(返回edt的值)

        private EditText dialogEdt;
        private TextView dialogTitle, dialogMessage;
        private Button leftBtn, middleBtn, rightBtn;

        private LinearLayout middleLeftLine, middleRightLine;

        public Builder(Context context) {
            this.context = context;
        }

        public Builder setMessage(String message) {
            this.message = message;
            return this;
        }

        public Builder setEdit(String edt) {
            this.edt = edt;
            return this;
        }

        public Builder setTitle(String title) {
            this.title = title;
            return this;
        }

        public Builder setContentView(View v) {
            this.contentView = v;
            return this;
        }

        /*
        *带编辑框的按钮
        * */
        public Builder setRightButton(String right_btnText, OnCustomDialogListener listener) {
            this.right_btnText = right_btnText;
            this.customDialogListener = listener;
            return this;
        }

        /*
        * 不带编辑框
        * */
        public Builder setRightButton(String right_btnText,
                                      OnClickListener listener) {
            this.right_btnText = right_btnText;
            this.right_btnClickListener = listener;
            return this;
        }

        public Builder setLeftButton(String left_btnText,
                                     OnClickListener listener) {
            this.left_btnText = left_btnText;
            this.left_btnClickListener = listener;
            return this;
        }

        public Builder setMiddleButton(String middle_btnText,
                                       OnClickListener listener) {
            this.middle_btnText = middle_btnText;
            this.middle_btnClickListener = listener;
            return this;
        }

        //设置位置(传listview的item过来)
        public Builder setLocation(View v) {

            this.v = v;
            return this;
        }

        public MyOwnDialog create() {
            LayoutInflater inflater = (LayoutInflater) context
                    .getSystemService(Context.LAYOUT_INFLATER_SERVICE);
            //主题可以换
            final MyOwnDialog dialog = new MyOwnDialog(context,
                    R.style.mystyle);
            View layout = inflater.inflate(R.layout.customdialog, null);
            dialog.addContentView(layout, new LayoutParams(
                    LayoutParams.MATCH_PARENT, LayoutParams.WRAP_CONTENT));
            //标题
            dialogTitle = ((TextView) layout.findViewById(R.id.title));
            dialogTitle.setText(title);
            //三个按钮
            leftBtn = (Button) layout.findViewById(R.id.left_btn);
            middleBtn = (Button) layout.findViewById(R.id.middle_btn);
            rightBtn = (Button) layout.findViewById(R.id.right_btn);
            //编辑框
            dialogEdt = (EditText) layout.findViewById(R.id.dialog_edt);
            dialogMessage = (TextView) layout.findViewById(R.id.message);
            middleLeftLine = (LinearLayout) layout.findViewById(R.id.single_line);
            middleRightLine = (LinearLayout) layout.findViewById(R.id.second_line);
            if (title == null || title.trim().length() == 0) {
                dialogMessage.setGravity(Gravity.CENTER);
            }
            if (message != null) {
                dialogMessage.setVisibility(View.VISIBLE);
                dialogMessage.setText(message);
            } else {
                dialogMessage.setVisibility(View.GONE);
            }
            //当有编辑框时
            if (edt != null) {
                dialogEdt.setText(edt);
                dialogEdt.setSelection(edt.length());
                dialogEdt.setVisibility(View.VISIBLE);
            } else {
                dialogEdt.setVisibility(View.GONE);
            }
            //有位置(暂时定义的是根据条目位置来定dialog)
            if (v != null) {
                int[] location = new int[2];
                v.getLocationOnScreen(location);
                DisplayMetrics displayMetrics = context.getResources().getDisplayMetrics();
                WindowManager.LayoutParams params = dialog.getWindow().getAttributes();
                params.gravity = Gravity.BOTTOM;
                params.y = displayMetrics.heightPixels - location[1];
                dialog.getWindow().setAttributes(params);
            }

            /*只有中间按钮*/
            if (middle_btnText != null && left_btnText == null && right_btnText == null) {
                leftBtn.setVisibility(View.GONE);
                rightBtn.setVisibility(View.GONE);
                middleLeftLine.setVisibility(View.GONE);
                middleRightLine.setVisibility(View.GONE);
                middleBtn.setText(middle_btnText);
                /*设置中间按钮bg*/
                middleBtn.setBackgroundResource(
                        R.drawable.bg_dialog_btn_middle);
                middleBtn.setOnClickListener(new View.OnClickListener() {
                    public void onClick(View v) {
                        middle_btnClickListener.onClick(dialog,
                                DialogInterface.BUTTON_NEUTRAL);
                    }
                });

            }
            /*只有左右两个按钮*/
            if (left_btnText != null && right_btnText != null && middle_btnText == null) {
                middleBtn.setVisibility(View.GONE);
                leftBtn.setText(left_btnText);
                rightBtn.setText(right_btnText);
                middleRightLine.setVisibility(View.GONE);
                if (left_btnClickListener != null) {
                    leftBtn.setOnClickListener(new View.OnClickListener() {
                        public void onClick(View v) {
                            left_btnClickListener.onClick(dialog,
                                    DialogInterface.BUTTON_NEGATIVE);
                            dialog.dismiss();
                        }
                    });
                } else {
                    leftBtn.setOnClickListener(new View.OnClickListener() {
                        @Override
                        public void onClick(View v) {
                            dialog.dismiss();
                        }
                    });
                }

                if (right_btnClickListener != null) {//非编辑框
                    rightBtn.setOnClickListener(new View.OnClickListener() {
                        public void onClick(View v) {
                            right_btnClickListener.onClick(dialog,
                                    DialogInterface.BUTTON_POSITIVE);
                            dialog.dismiss();
                        }
                    });
                } else if (customDialogListener != null) {//编辑框情况下调用
                    rightBtn.setOnClickListener(new View.OnClickListener() {
                        @Override
                        public void onClick(View v) {
                            customDialogListener.back(dialogEdt.getText() + "");
                            dialog.dismiss();
                        }
                    });

                }
            }

            dialog.setContentView(layout);
            return dialog;
        }

    }
}
以上代码纯手工封装,好了,开始我们的修改。在布局中加入imageview
 <ImageView
        android:layout_width="30dp"
        android:layout_height="30dp"
        android:layout_alignParentRight="true"
        android:src="@drawable/ic_error" />
中间布局加入margin
<LinearLayout
        android:id="@+id/layout"
        android:layout_width="@dimen/mydialog_width"
        android:layout_height="wrap_content"
        android:layout_gravity="center"
        android:layout_margin="15dp"
        android:orientation="vertical"
        android:scrollbars="vertical">
刚好是图片的一半,我们看下效果图
什么鬼,这是啥,整个内容布局撑大了啊,图片还在布局里面啊,我们发现父布局里面的宽度是match,我们得设置它和内容布局一样宽,这样margin才能让子布局收缩啊,于是改成这样:
<RelativeLayout xmlns:android="http://schemas.android.com/apk/res/android"
    android:layout_width="@dimen/mydialog_width"
    android:layout_height="match_parent"
    android:gravity="center"
    android:orientation="vertical">
效果和上面一模一样,就不再次放图了,我们得看下自己定义的dialog样式啊,别急着写啊,样式是自己定义的
整个窗体是圆形的一个布局,所以再怎么搞,最外面都是圆形白背景,于是开始修改,窗体背景删除,但是要圆形效果怎么办,将子布局的背景设为圆形不就行了吗!
  "@+id/layout"
        android:layout_width="@dimen/mydialog_width"
        android:layout_height="wrap_content"
        android:layout_gravity="center"
        android:orientation="vertical"
        android:background="@drawable/bg_dialog"
        android:layout_margin="15dp"
        android:scrollbars="vertical">
看看效果
哇哦!这下看起来有点意思,不过后面背景又是什么鬼?
我明明设置了窗体背景透明啊,怎么还有阴影呢,这是因为本来dialog就是这种样式啊,我们得设置下背景透明度才行。
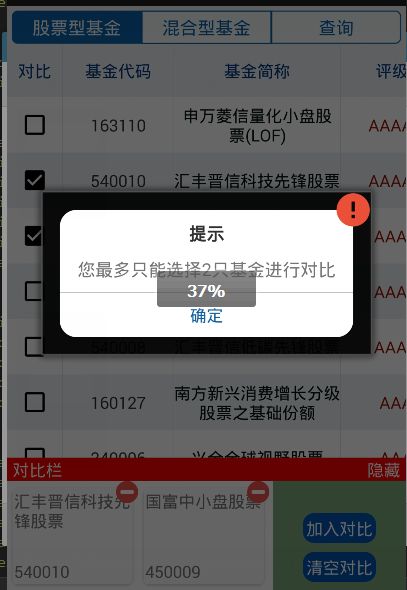
最后看一下实现效果图:

界面有点丑陋,考虑到没有美工,凑合看吧,功能齐全,没有bug!
总结:看着比较简单的功能,但是放到dialog中去,就变得稍微有点复杂了,不过总体还是不难,就是得慢慢爬坑才行。设计这种dialog方式不一样,可能代码写法上也各有不同,以上代码,仅供参考!