ConstraintLayout入门笔记
文章目录
- 1.尺寸
- 2. View居中
- 3. 指定View的宽高比
- 4.指示线
- 5. 与LinearLayout效果类似的layout_weight
- 6. 角度定位
- 7.临界线(Barrier)
ConstraintLayout翻中文为约束布局,已经出来一阵子了,话说它有减少布局层级并优化布局的功效(其实是我很懒,因为AS默认布局换成了ConstraintLayout,我懒得改才开始学习这个Layout),记录一下自己学习的过程。
1.尺寸
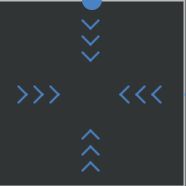
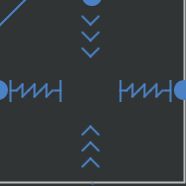
ConstraintLayout下的view尺寸与一般像RelativeLayout,LinearLayout下的尺寸有些区别,不存在了Match_Parent属性,取而代之的是Match Constraints属性,不过你在写时,需要写成“0dp”。这里先说到这里,因为要使用好 ConstraintLayout,还需要了解一下约束的意义,先了解一下这个我们好画图。
| Fixed | Wrap Content | Match Constraints | |
|---|---|---|---|
| 类别 | 精确值 | 爱多大你就大 | 类似与match_parent,但是有区别 |
| 举例 | width=“120dp” | width=“wrap_content” | width=“0dp” |
| 在AS中显示的形式 | 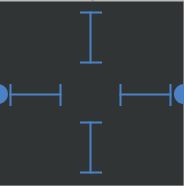 |
 |
 |
2. View居中
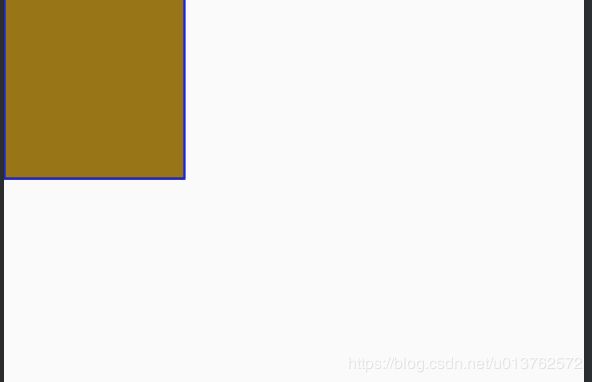
我们先来画一个简单的View:
 |
 |
|---|
如果我们需要将View展示到中间,则需要添加如下代码:
<View
android:id="@+id/id_view1"
android:layout_width="120dp"
android:layout_height="120dp"
app:layout_constraintStart_toStartOf="parent"
app:layout_constraintEnd_toEndOf="parent"
android:background="#970" />
其中app:layout_constraintStart_toStartOf表明我这个view的左边需要靠到我父View的左边,换句话说我的左侧需要和我的父组件左边对齐,相当于RL中alignLeft属性;同理app:layout_constraintEnd_toEndOf表明我的右侧与父组件的右侧对齐。如下图:

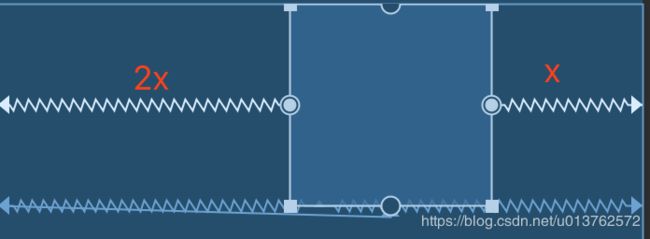
我们可以想象成这样,这个id_view1左右两边被相同的力拉着,那么id_view1到父组件两边的距离是一致的,如果我想view到左边的距离是到右边的两倍呢?
ConstraintLayout给出的属性是:
app:layout_constraintHorizontal_bias=“0.66”
2x + x = 1 => x = 0.33
layout_constraintHorizontal_bias指的就是水平的偏移量,当然还有layout_constraintVertical_bias就是竖直方向的偏移量。这里有一个非常经典的例子,我们经常会用到FloatingActionButton,像下图:
用ConstraintLayout就很简单了:
    <View
        android:id="@+id/id_view1"
        android:layout_width="60dp"
        android:layout_height="60dp"
        android:background="#970"
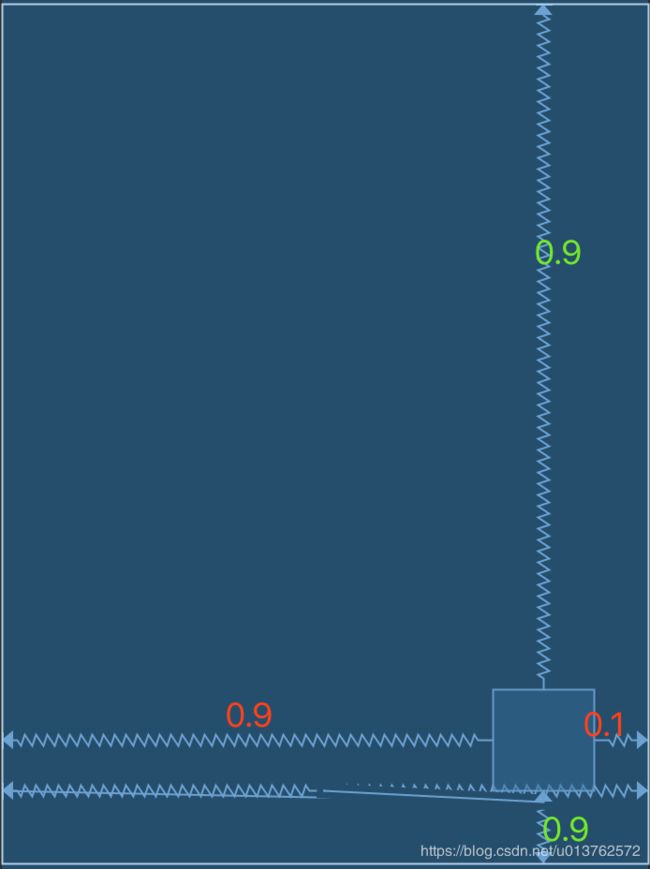
        app:layout_constraintVertical_bias="0.9"
        app:layout_constraintHorizontal_bias="0.9"
        app:layout_constraintTop_toTopOf="parent"
        app:layout_constraintLeft_toLeftOf="parent"
        app:layout_constraintRight_toRightOf="parent"
        app:layout_constraintBottom_toBottomOf="parent" />
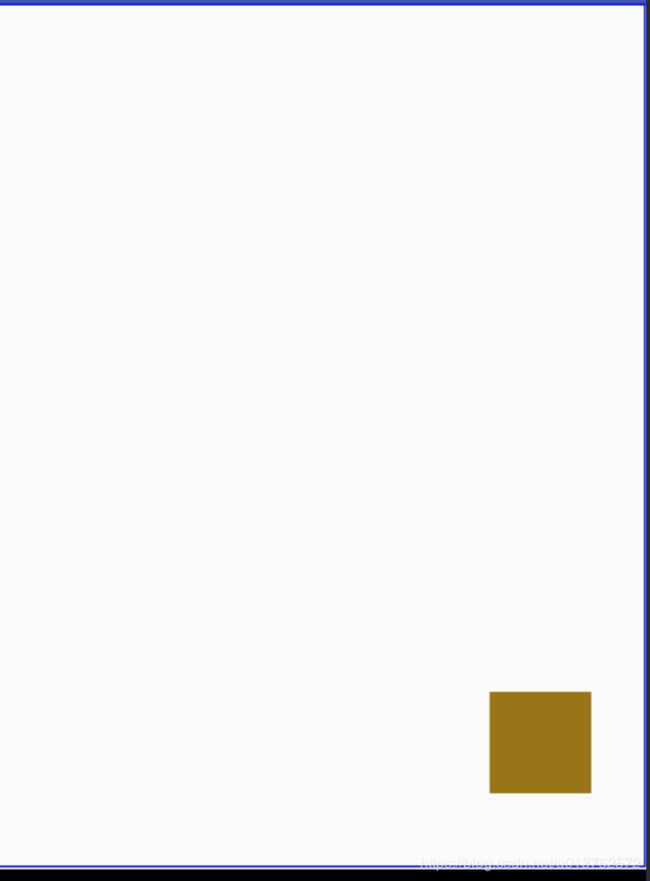
水平和竖直直接使用偏移量就行了:
 |
 |
|---|
这里主要介绍了这几个属性:
layout_constraintLeft_toLeftOf :当前View的右侧和另一个View的右侧位置对齐,与RelativeLayout的alignLeft属性相似
***layout_constraintLeft_toRightOf ***:当前view的左侧会在另一个View的右侧位置 与RelativeLayout的toRightOf属性相似

layout_constraintRight_toLeftOf :当前view的右侧会在另一个View的左侧位置 与RelativeLayout的toLeftOf属性相似
layout_constraintRight_toRightOf :当前View的右侧和另一个View的右侧位置对其,与RelativeLayout的alignRight属性相似

layout_constraintTop_toTopOf :头部对齐,与alignTop相似
layout_constraintTop_toBottomOf :当前View在另一个View的下侧 与below相似
layout_constraintBottom_toTopOf :当前View在另一个View的上方 与above相似
layout_constraintBottom_toBottomOf :底部对齐,与alignBottom属性相似
layout_constraintBaseline_toBaselineOf :文字底部对齐,与alignBaseLine属性相似

layout_constraintStart_toEndOf :同left_toRightOf
layout_constraintStart_toStartOf :同left_toLeftOf
layout_constraintEnd_toStartOf :同right_toLeftOf
layout_constraintEnd_toEndOf :同right_toRightOf
属性没有必要记,用的时候多用几次就差不多熟悉了,只需要记住你在确定View的位置时,水平和竖直至少有一个约束限制,如果缺少约束,view的位置就会偏离我们定义的位置。
3. 指定View的宽高比
曾几何时,我们需要指定某个View的宽高比例,比如一个banner的宽高比例是5:3,一般都是重写这个banner,然后onMeasure里面重新赋值宽高:
    @Override
    protected void onMeasure(int widthMeasureSpec, int heightMeasureSpec) {
        super.onMeasure(widthMeasureSpec, heightMeasureSpec);

        int measuredWidth = getMeasuredWidth();
        setMeasuredDimension(measuredWidth , (int) (measuredWidth * 0.6f));
    }
现在在ConstraintLayout直接可以使用属性layout_constraintDimensionRatio控制了:
    <TextView
        android:id="@+id/id_tv_2"
        android:layout_width="0dp"
        android:layout_height="0dp"
        android:background="#780"
        android:gravity="center"
        android:text="Banner"
        app:layout_constraintDimensionRatio="W,3:5"
        app:layout_constraintLeft_toLeftOf="parent"
        app:layout_constraintRight_toRightOf="parent" />
这个功能还比较实用吧,可以记录一下:
 app:layout_constraintDimensionRatio="W,3:5"
 app:layout_constraintDimensionRatio="H,5:3"
大致的功能,大家可以手写一下看看效果就可以了。
4.指示线
我们先来看一下Guideline的用法,等会再列举它的用处和特点:
<android.support.constraint.Guideline
        android:id="@+id/id_guide_line"
        android:layout_width="wrap_content"
        android:layout_height="wrap_content"
        android:orientation="vertical"
        app:layout_constraintGuide_percent="0.3" />

    <android.support.constraint.Guideline
        android:id="@+id/id_guide_line2"
        android:layout_width="wrap_content"
        android:layout_height="wrap_content"
        android:orientation="horizontal"
        app:layout_constraintGuide_percent="0.3" />
这里有两条指示线,在图中是这个样子的:

指示线本身并没什么卵用,在用户界面它是不显示的,即Visibility始终为gone,width也是0,只是给我们开发者定义一个任意位置的锚点,使得其他的view可以借此锚点约束自己。Guideline有关自己的属性为:
android:orientation="horizontal | vertical"  //指示线是水平的还是竖直的
app:layout_constraintGuide_percent="0.3"   //指示线距离父容器左边缘的距离,这个属性的值是一个百分比,表示距离占父容器宽度的比例

layout_constraintGuide_begin:指示线距离父容器左边缘的绝对距离
layout_constraintGuide_end:指示线距离父容器右边缘的绝对距离
说完了属性,我们举个例子,需要有个view左侧距离是父控件宽度的30%,有人说使用layout_constraintHorizontal_bias就完了,这个不对,我们来做个试验:
 <android.support.constraint.Guideline
        android:id="@+id/id_guide_line2"
        android:layout_width="wrap_content"
        android:layout_height="wrap_content"
        android:orientation="horizontal"
        app:layout_constraintGuide_percent="0.3" />

    <View
        android:id="@+id/id_view2"
        android:layout_width="40dp"
        android:layout_height="40dp"
        app:layout_constraintStart_toStartOf="parent"
        app:layout_constraintEnd_toEndOf="parent"
        app:layout_constraintHorizontal_bias="0.3"
        android:background="#09a" />

    <View
       andorid:id="@+id/id_view3"
        android:layout_width="40dp"
        app:layout_constraintStart_toStartOf="@id/id_guide_line"
        app:layout_constraintTop_toTopOf="parent"
        android:layout_marginTop="40dp"
        android:background="#F23"
        android:layout_height="40dp"/>
id_view3是使用guideline,id_view2是使用layout_constraintHorizontal_bias,我们可以看一下结果:

这里我们可以看出,使用layout_constraintHorizontal_bias设置为0.3,那么它到左边的距离是这么计算的:
distanceLeft = (parentWidth - viewWidth) * 0.3 ;
而使用Guideline就非常直接,直接就是:
distanceLeft = parentWidth * 0.3
将不计算view本身的宽度。
5. 与LinearLayout效果类似的layout_weight
看下图我们使用LinearLayout外加使用width=“0dp” weight平分实现的效果:

那么我们使用ConstraintLayout怎么实现呢?它也提供了类似的api
layout_constraintHorizontal_weight
看名字就知道,与LinearLayout的weight的含义类似,那么这个代码就应该这么写:
 <TextView
        android:id="@+id/id_tv_tab1"
        android:layout_width="0dp"
        android:layout_height="48dp"
        android:background="#278"
        app:layout_constraintBottom_toBottomOf="parent"
        app:layout_constraintHorizontal_weight="1"
        app:layout_constraintLeft_toLeftOf="parent"
        app:layout_constraintRight_toLeftOf="@id/id_tv_tab2" />

    <TextView
        android:id="@+id/id_tv_tab2"
        android:layout_width="0dp"
        android:layout_height="48dp"
        android:background="#786"
        app:layout_constraintBottom_toBottomOf="parent"
        app:layout_constraintHorizontal_weight="1"
        app:layout_constraintLeft_toRightOf="@id/id_tv_tab1"
        app:layout_constraintRight_toLeftOf="@id/id_tv_tab3" />

    <TextView
        android:id="@+id/id_tv_tab3"
        android:layout_width="0dp"
        android:layout_height="48dp"
        android:background="#d08"
        app:layout_constraintBottom_toBottomOf="parent"
        app:layout_constraintHorizontal_weight="1"
        app:layout_constraintLeft_toRightOf="@id/id_tv_tab2"
        app:layout_constraintRight_toRightOf="parent" />
我们可以看到三个textview的app:layout_constraintHorizontal_weight都是1,如果其中一个为2呢?跟LinearLayout+weight显示差不多,这里就不做展示了。我的问题是,与LinearLayout相比,ConstraintLayout这种方式有什么优势呢?
ConstraintLayout还有一个属性:
app:layout_constraintHorizontal_chainStyle="packed | spread | spread_inside"
还是用代码来展示一下样式吧:
| 代码 | 显示样式 | |
|---|---|---|
| packed |  |
 |
| spread | 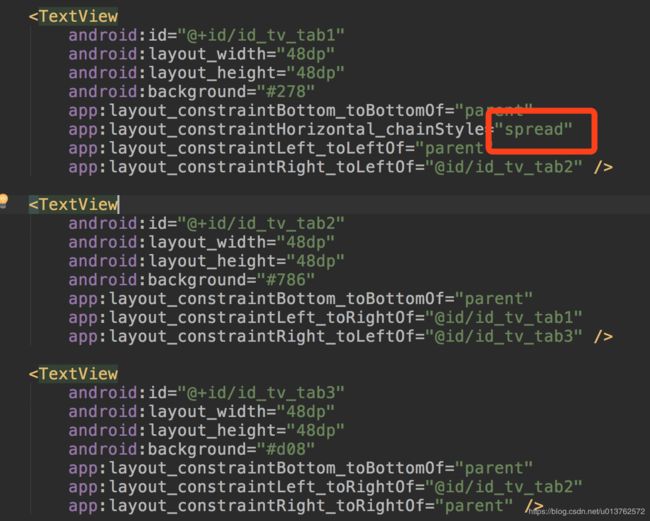 |
 |
| spread_inside | 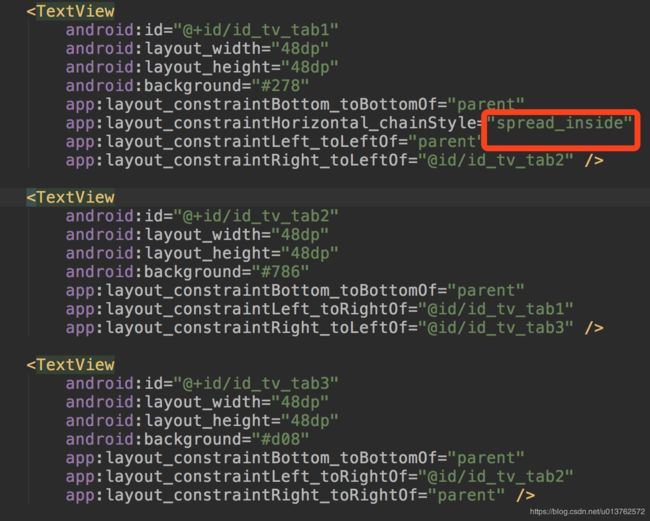 |
 |
| packed+bias | 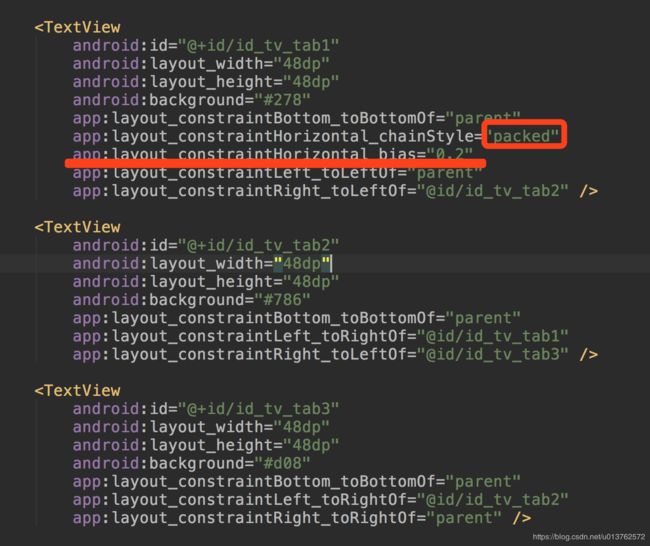 |
 |
加上刚才平分的样式,可以看出ConstraintLayout能展示出各种花式技巧,不多说了,都记下来吧。
6. 角度定位
我们开来看这张图:
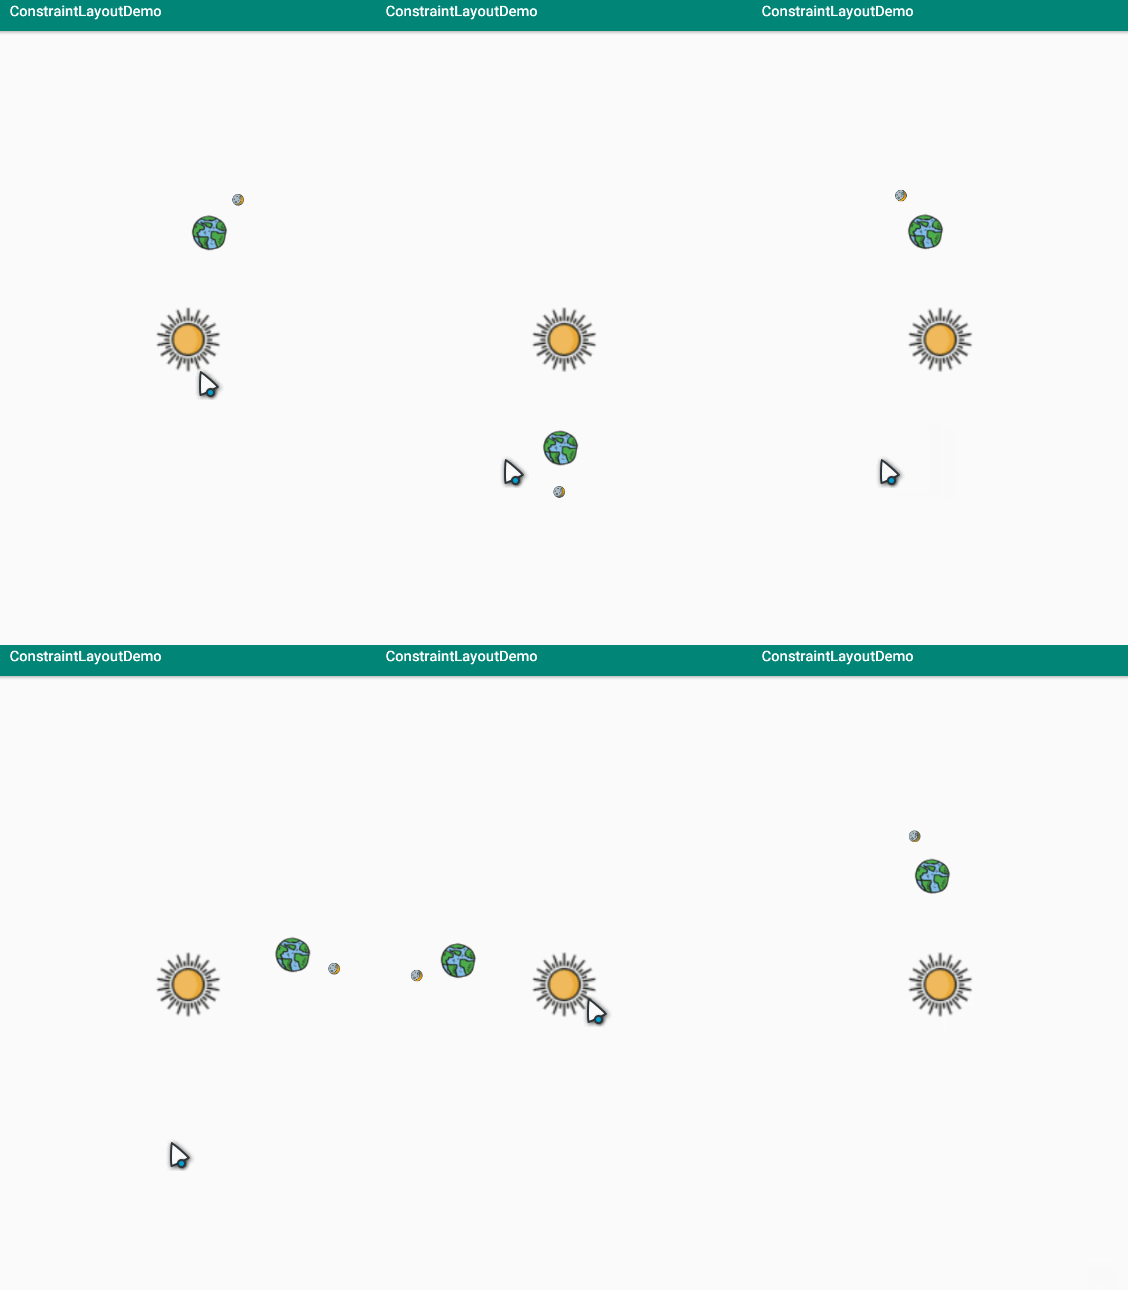
三个元素:太阳、地球和月亮是通过角度定位开固定位置的,来看一下XML代码:
<androidx.constraintlayout.widget.ConstraintLayout
        xmlns:android="http://schemas.android.com/apk/res/android"
        xmlns:app="http://schemas.android.com/apk/res-auto"
        xmlns:tools="http://schemas.android.com/tools"
        tools:ignore="MissingConstraints"
        android:id="@+id/id_parent_layout"
        android:layout_width="match_parent"
        android:layout_height="match_parent">

    <androidx.appcompat.widget.AppCompatImageView
            android:layout_width="100dp"
            app:layout_constraintTop_toTopOf="parent"
            app:layout_constraintStart_toStartOf="parent"
            app:layout_constraintEnd_toEndOf="parent"
            app:layout_constraintBottom_toBottomOf="parent"
            android:id="@+id/id_sun"
            android:src="@drawable/sun"
            android:layout_height="100dp"/>

    <androidx.appcompat.widget.AppCompatImageView
            android:layout_width="60dp"
            app:layout_constraintCircleRadius="150dp"
            app:layout_constraintCircleAngle="0"
            app:layout_constraintCircle="@id/id_sun"
            android:id="@+id/id_earth"
            android:src="@drawable/earth"
            android:layout_height="60dp"/>

    <androidx.appcompat.widget.AppCompatImageView
            android:layout_width="16dp"
            android:id="@+id/id_moon"
            android:layout_height="16dp"
            app:layout_constraintCircle="@id/id_earth"
            app:layout_constraintCircleAngle="0"
            app:layout_constraintCircleRadius="60dp"
            android:src="@drawable/moon"/>
非常简单,也主要是三个带有Circle属性的设置:
      app:layout_constraintCircle          			围绕着谁转动
      app:layout_constraintCircleAngle				转动的角度
      app:layout_constraintCircleRadius				围绕的半径
很简单,基本上就不扯了,至于动画,只需要改变LayoutParams就行了:
 moonAnimation = ValueAnimator.ofFloat(0f, 360f).apply {
     duration = 5000
     interpolator = LinearInterpolator()
     repeatCount = -1

     addUpdateListener {
          val moonAngle = it.animatedValue as Float
          val layoutParams = id_moon.layoutParams as ConstraintLayout.LayoutParams
          layoutParams.circleAngle = moonAngle

          id_moon.requestLayout()
          }
     }
7.临界线(Barrier)
先看一下我们平常过程中的需求:
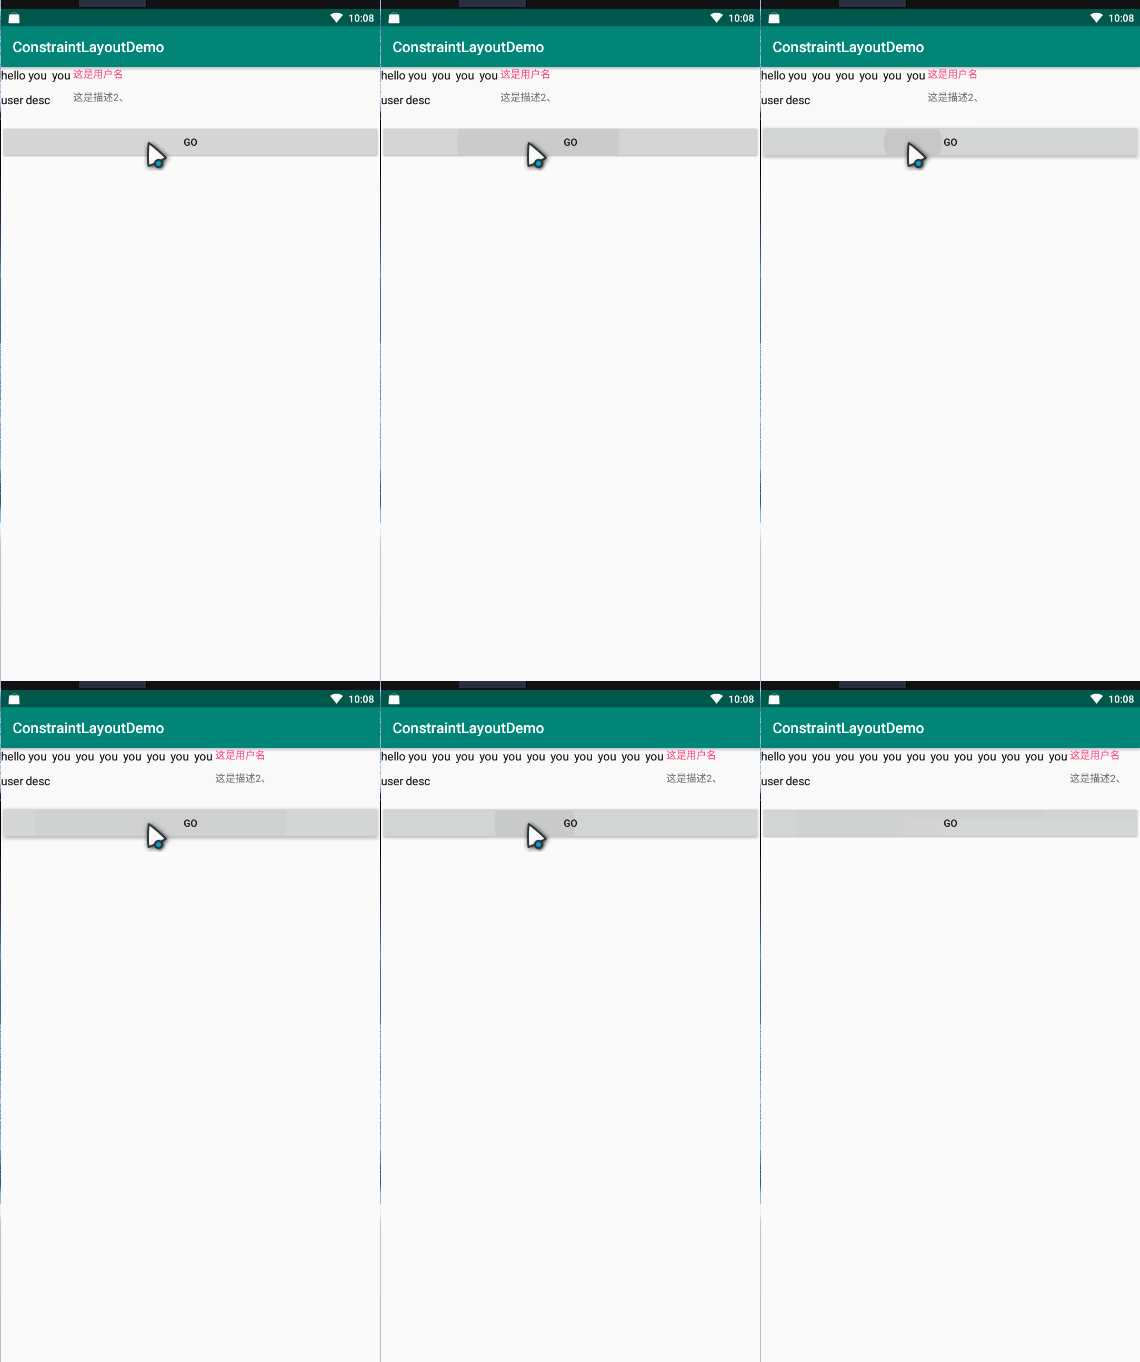
这个需求比较平常,放在以前 我们肯定是左边的两个TextView外层需要套一个Layout,然后通过子View的测量,来确定最大的宽度,这样布局层级就比较深了。使用Barrier就很容易减少这个层级。
<TextView android:layout_width="wrap_content"
              app:layout_constraintTop_toTopOf="parent"
              app:layout_constraintStart_toStartOf="parent"
              android:textSize="16sp"
              android:textColor="#111"
              android:id="@+id/id_tv1"
              android:text="user name"
              android:layout_height="wrap_content"/>

<TextView android:layout_width="wrap_content"
              android:layout_height="wrap_content"
              app:layout_constraintTop_toBottomOf="@id/id_tv1"
              android:textSize="16sp"
              android:layout_marginTop="12dp"
              android:textColor="#111"
              android:text="user desc"
              app:layout_constraintStart_toStartOf="parent"
              android:id="@+id/id_tv2"/>

<androidx.constraintlayout.widget.Barrier
            android:id="@+id/barrier"
            android:layout_width="wrap_content"
            android:layout_height="wrap_content"
            app:barrierDirection="end"
            app:constraint_referenced_ids="id_tv1,id_tv2"/>

<TextView android:layout_width="wrap_content"
              android:text="@string/desc_str"
              android:textColor="#f47"
              app:layout_constraintStart_toEndOf="@id/barrier"
              android:id="@+id/id_tv_3"
              app:layout_constrainedWidth="true"
              app:layout_constraintTop_toTopOf="parent"
              android:layout_height="wrap_content"/>
主要是
<androidx.constraintlayout.widget.Barrier
            android:id="@+id/barrier"
            android:layout_width="wrap_content"
            android:layout_height="wrap_content"
            app:barrierDirection="end"
            app:constraint_referenced_ids="id_tv1,id_tv2"/>
barrierDirection有上下左右四个参数,可以自己调整测试一下,constraint_referenced_ids表示自己关联的view Id,是哪几个view需要进行管理,这个可以上手看一下。这里有篇文章很不错:https://constraintlayout.com/basics/barriers.html
国内也有翻译过来的:http://www.jcodecraeer.com/a/anzhuokaifa/androidkaifa/2017/1017/8601.html
有兴趣的童靴可以体验体验Barrier更深层次的用法。
这是目前学习的过程中了解的ConstraintLayout,当然在项目的运用过程中也发现了一些问题,记录如下:
- 有时候margin会失效的问题,也google了一下这个问题,有人说是ConstraintLayout的自身的bug,也有人说我们的用法不对,总之这个问题时常会发生,目前也没有非常好的解决方案;
- 目前来说,我在真实项目中用到ConstraintLayout也只是比较简单的一些UI图,对于一些比较复杂的UI结构,还是倾向于自己熟悉的RL或者LL。对于ConstraintLayout所说的可以改善布局的功能,可能还真的需要一些时间吧。
