TextView 高级教程
前言
光看题目,估计有人已经忍不住吐槽了:尼玛,TextView 这么简单的控件,还有什么高级用法吗?放在以前,我也会这么想,但是随着开发经验的积累,我愈发觉得 TextView 简直就是一座宝藏,里面有很多宝贝值得研究。
本文基于 @Chiuki 的讲座,并结合我自己的经验整理而成。
- 视频地址:Youtube
- 讲稿地址:Github
- 部分 demo 对应的代码地址:Github
文章中的大部分图片和代码均摘自讲稿,感谢原作者的分享。
Compound Drawable
如下图1中的效果,我们可以用 LinearLayout 里面嵌套 ImageView 和 TextView 实现,也可以只用一个带 Drawable 的 TextView 做到。
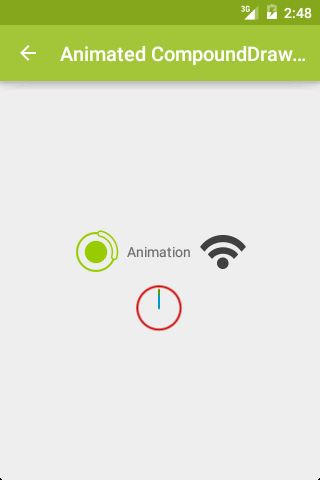
相比而言,后者 View 个数更少,层级更少,是优化层级的常用方法。
我们可以通过 drawablePadding 属性来调整图片资源和文字间的间距。但是,在 xml 中,没有对应的属性去调整图片的大小,也就是说,图片会按照原始尺寸进行展示,而没有 ImageView 的各种 ScaleType 可选,除非在 Java 代码中使用 setCompoundDrawables() 方法,或者使用自定义 View。使用 setCompoundDrawables() 控制图片尺寸的用法如下:
        Drawable drBottom = getResources().getDrawable(R.mipmap.hi);
        // drBottom.setBounds(0, 0, 200, 200);
        drBottom.setBounds(0, 0, drBottom.getIntrinsicWidth(), drBottom.getIntrinsicHeight());
        textView.setCompoundDrawablePadding(3);
        textView.setCompoundDrawables(null, null, null, drBottom);
而且,这里的 Drawable 不仅仅是图片,还可以是动画等资源文件,以此达到动画效果,如图2:
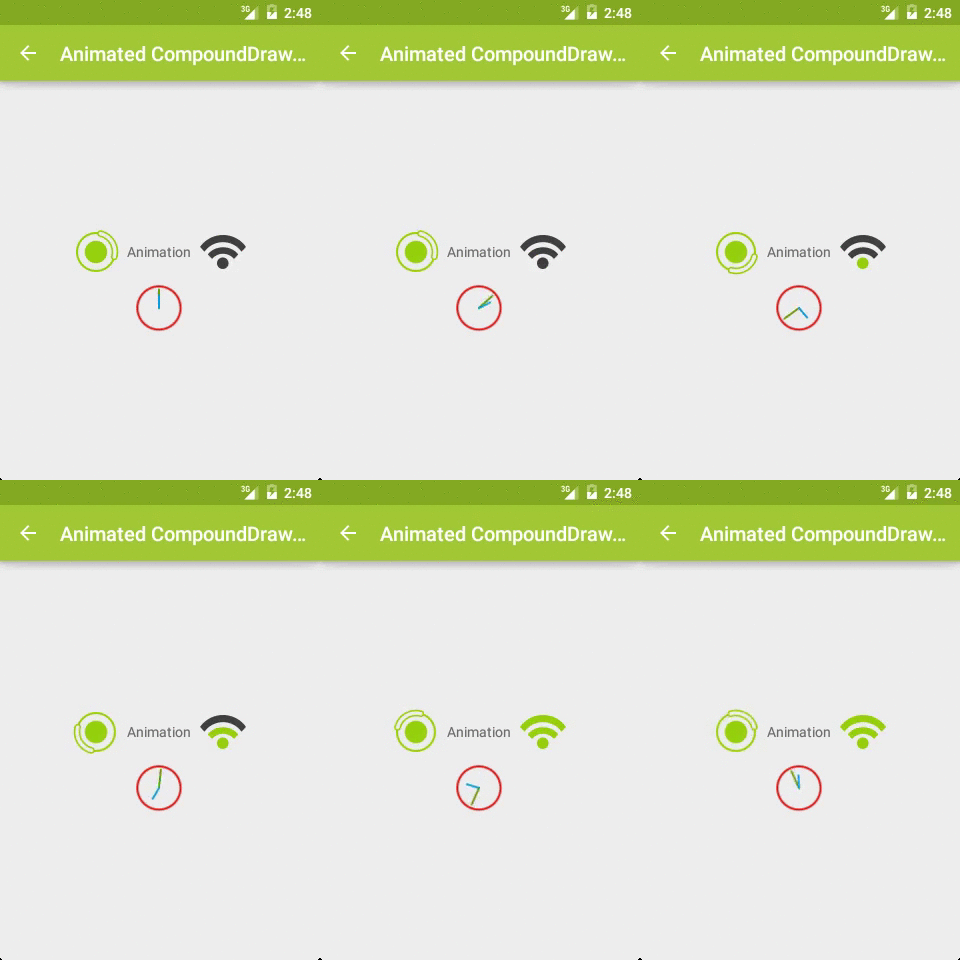
关键代码:
AnimatedRotateDrawable
AnimationDrawable
AnimatedVectorDrawable
private void startAnimation(
    TextView textView) {
  Drawable[] drawables
      = textView.getCompoundDrawables();
  for (Drawable drawable : drawables) {
    if (drawable != null &&
        drawable instanceof Animatable) {
      ((Animatable) drawable).start();
    }
  }
}
阴影效果
效果:

代码:
注意,shadowDx,shadowDy,shadowRadius 的值的单位是 px,而非 dp。为了让阴影完全显示,记得设置合适的 padding。
通过综合使用这些属性,我们可以做到更多效果,如图4:
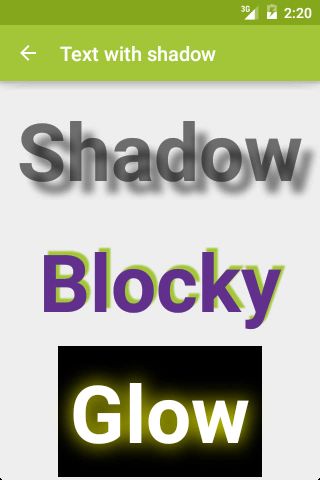
Blocky 和 Glow 效果对应的代码:
Blocky
Glow
自定义字体
效果:

代码:
Typeface typeface = Typeface.createFromAsset(getAssets(), "Ruthie.ttf");

textView.setTypeface(typeface);
渐变色
效果:
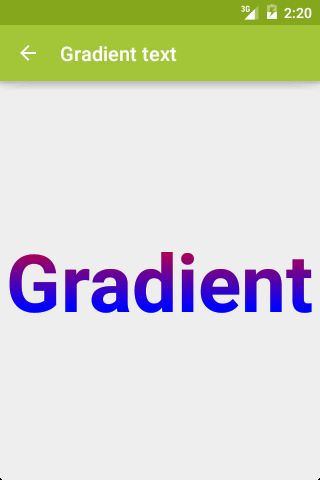
代码:
Shader shader = new LinearGradient(
    0, 0, 0, textView.getTextSize(),
    Color.RED, Color.BLUE,
    Shader.TileMode.CLAMP);

textView.getPaint().setShader(shader);
图片填充
效果:

代码:
Bitmap bitmap = BitmapFactory.decodeResource(
    getResources(),
    R.drawable.cheetah_tile);

Shader shader = new BitmapShader(
    bitmap,
    Shader.TileMode.REPEAT,
    Shader.TileMode.REPEAT);
textView.getPaint().setShader(shader);
多样式
效果:
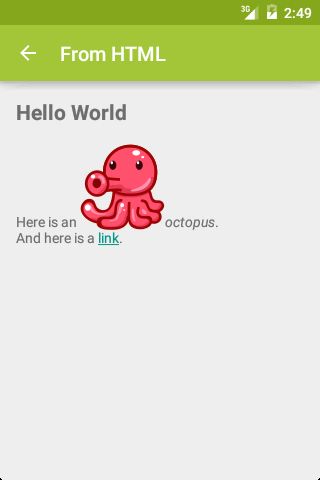
如果上述效果用 HTML 实现,其代码为:
HTML
Hello World
Here is an
octopus.

And here is a

link.
其实,使用一个 TextView 也可以实现这种效果:
Hello World
Here is an
octopus.

And here is a

link.
]]>
setMovementMethod
String html = getString(R.string.from_html_text);
textView.setMovementMethod(
    LinkMovementMethod.getInstance());
textView.setText(Html.fromHtml(
    html, new ResourceImageGetter(this), null));
ResourceImageGetter
private static class ResourceImageGetter
    implements Html.ImageGetter {
  // Constructor takes a Context
  public Drawable getDrawable(String source) {
    int path = context.getResources().getIdentifier(
        source, "drawable", context.getPackageName());
    Drawable drawable = ContextCompat.getDrawable(context, path);
    drawable.setBounds(0, 0,
       drawable.getIntrinsicWidth(),
       drawable.getIntrinsicHeight());
    return drawable;
  }
}
各种 Sapn
span 是指连续的一段范围,对该范围范围内的内容做修饰。
比如该效果:One two three。
该字符串,从第 4 个到第 6 个字符,用下划线修饰。对应的的代码便是:
spannableString.setSpan(new UnderlineSpan(), 4, 6, flags);
从上面这个例子,我们可以总结出 Span 的一般用法,需要三个参数:
- XXXSpan,修饰类型;
- 范围,即被修饰子串的起始位置;
- 标志位;
不同类型的 Span,只需要变化第一个参数。
根据范围的大小,可以将 Span 的类型分为两种:字符和段落。
字符
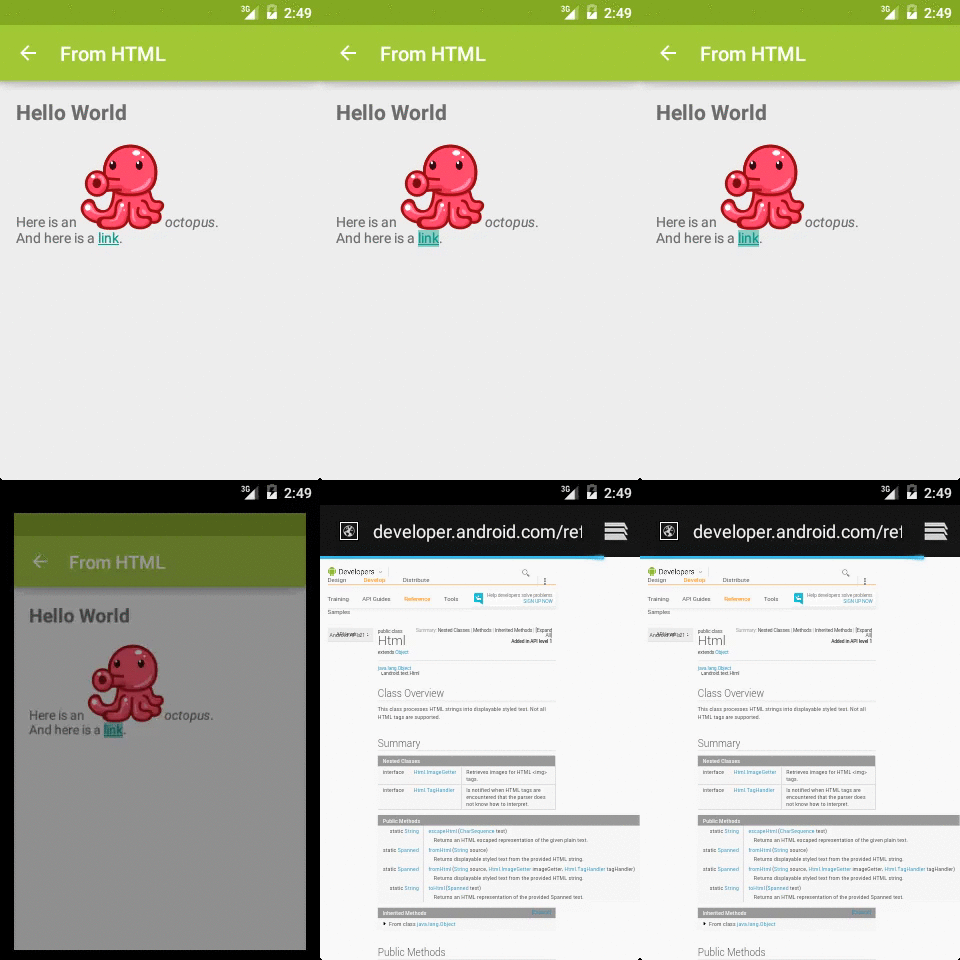
链接(ClickableSpan)
效果:
代码:
ClickableSpan
String text = textView.getText().toString();

String goToSettings = getString(R.string.go_to_settings);
int start = text.indexOf(goToSettings);
int end = start + goToSettings.length();

SpannableString spannableString = new SpannableString(text);
spannableString.setSpan(new GoToSettingsSpan(), start, end, 0);
textView.setText(spannableString);

textView.setMovementMethod(new LinkMovementMethod());

private static class GoToSettingsSpan extends ClickableSpan {
  public void onClick(View view) {
    view.getContext().startActivity(
      new Intent(android.provider.Settings.ACTION_SETTINGS));
  }
}
利用这一原理,我们可以实现朋友圈评论的链接效果:

关于该效果的使用,以及其中点击事件分发的问题,请移步我的这篇博客 《TextView ClickableSpan 事件分发的两个坑》。
在这里记录下 Span 中各种标志的含义:
- SPAN_INCLUSIVE_INCLUSIVE
- SPAN_INCLUSIVE_EXCLUSIVE
- SPAN_EXCLUSIVE_INCLUSIVE
- SPAN_EXCLUSIVE_EXCLUSIVE
这里的 inclusive 和 exclusive 并非指的是 start 和 end 对应的字符,而是指,在 start 之前或 end 之后字符增加时,新增的字符是否应用 span 样式。以下代码摘自 stackoverflow :
String myString = "01234";
int start = 1;
int end = 3;
int spanFlag = Spannable.SPAN_INCLUSIVE_INCLUSIVE; // this is what is changing

SpannableString spannableString = new SpannableString(myString);
ForegroundColorSpan foregroundSpan = new ForegroundColorSpan(Color.RED);
spannableString.setSpan(foregroundSpan, start, end, spanFlag);
textView.setText(spannableString);
各种标志及使用后的结果:
SPAN_INCLUSIVE_INCLUSIVE
SPAN_INCLUSIVE_EXCLUSIVE
SPAN_EXCLUSIVE_INCLUSIVE
SPAN_EXCLUSIVE_EXCLUSIVE
但是,如果我们对 span 做了更改:
String myString = "01234";
int start = 1;
int end = 3;
int spanFlag = Spannable.SPAN_INCLUSIVE_INCLUSIVE; // this is what is changing

// set the span
SpannableStringBuilder spannableString = new SpannableStringBuilder(myString);
ForegroundColorSpan foregroundSpan = new ForegroundColorSpan(Color.RED);
spannableString.setSpan(foregroundSpan, start, end, spanFlag);

// insert the text after the span has already been set
// (inserting at start index second so that end index doesn't get messed up)
spannableString.insert(end, "x");
spannableString.insert(start, "x");

textView.setText(spannableString);
结果如下:
SPAN_INCLUSIVE_INCLUSIVE
SPAN_INCLUSIVE_EXCLUSIVE
SPAN_EXCLUSIVE_INCLUSIVE
SPAN_EXCLUSIVE_EXCLUSIVE
如果通过 SpannableStringBuilder 来 append 操作子串,也会达到 insert 的效果,即在 inclusive 时扩大 span 样式范围。
至于 SPAN_COMPOSING 等标志,详见 https://stackoverflow.com/questions/16392417/explain-the-definitions-of-these-flags-span-composing-span-user-etc-from-th
自定义 TagHandler
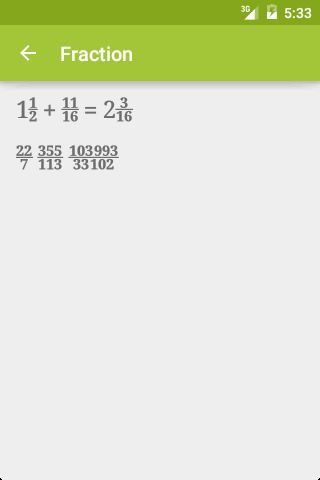
《TextView ClickableSpan 事件分发的两个坑》 告诉我们,安卓系统支持的 Html 标签类型有限,如果要支持其他标签,我们需要使用 TagHandler 来自己实现。综合使用 TagHandler 和 MetricAffectingSpan 可以实现分数效果:
下划线(UnderlineSpan)
//underline a character
span = new UnderlineSpan();
删除线(StrikethroughSpan)
// strikethrough a character
span = new StrikethroughSpan();
字符下沉(SubscriptSpan)
//subscript a character
span = new SubscriptSpan();
字符上浮(SuperscriptSpan)
//superscript a character
span = new SuperscriptSpan();
字符背景色(BackgroundColorSpan)
/*
public BackgroundColorSpan (int color)
-color: background color
*/

//set a green background
span = new BackgroundColorSpan(Color.GREEN);
文本颜色(ForegroundColorSpan)
/*
public ForegroundColorSpan (int color)
-color: foreground color
*/

//set a red foreground
span = new ForegroundColorSpan(Color.RED);
插入图片(ImageSpan)
//replace a character by pic1_small image
span = new ImageSpan(this, R.drawable.pic1_small);
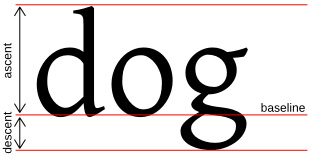
注意,我们可以综合使用 ImageSpan(Context context, Bitmap b) 和 createScaledBitmap(Bitmap src, int dstWidth, int dstHeight, boolean filter) 来控制图片的大小,使其与文本大小一致。我们可以将其 dstHeight 设置为文本的高度,文本高度计算方法:
int ascent = (int) (-textView.getPaint().ascent());
简单样式(StyleSpan)
改变子串的加粗、斜体、正常(bold,italic,normal)等样式。
效果:

代码:
/*
public StyleSpan (int style)
-style: int describing the style (android.graphics.Typeface)
*/

//set a bold+italic style
span = new StyleSpan(Typeface.BOLD | Typeface.ITALIC);
自定义字体(TypefaceSpan)
/*
public TypefaceSpan (String family)
-family: a font family
*/

//set the serif family
span = new TypefaceSpan("serif");
字体样式(TextAppearanceSpan)
/*
public  TextAppearanceSpan(Context context, int appearance, int colorList)
-context: a valid context
-appearance: text appearance resource (ex: android.R.style.TextAppearance_Small)
-colorList: a text color resource (ex: android.R.styleable.Theme_textColorPrimary)

public TextAppearanceSpan(String family, int style, int size, ColorStateList color, ColorStateList linkColor)
-family: a font family
-style: int describing the style (android.graphics.Typeface)
-size: text size
-color: a text color
-linkColor: a link text color
*/

//set the serif family
span = new TextAppearanceSpan(this/*a context*/, R.style.SpecialTextAppearance);
以及自定义 Style:
<style name="SpecialTextAppearance" parent="@android:style/TextAppearance">
- @color/color1
- @color/color2
- @color/color3
- @color/color4
- 28sp
- italic
绝对尺寸(AbsoluteSizeSpan)
这里的尺寸,可以是像素或者 dip,具体通过构造方法里面的布尔值设置。
效果:

代码:
/*
public AbsoluteSizeSpan(int size, boolean dip)
-size: a size
-dip: false, size is in px; true, size is in dip (optionnal, default false)
*/

//set text size to 24dp
span = new AbsoluteSizeSpan(24, true);
相对尺寸(RelativeSizeSpan)
/*
public RelativeSizeSpan(float proportion)
-proportion: a proportion of the actual text size
*/

//set text size 2 times bigger
span = new RelativeSizeSpan(2.0f);
字体横向缩放(ScaleXSpan)
/*
public ScaleXSpan(float proportion)
-proportion: a proportion of actual text scale x
*/

//scale x 3 times bigger
span = new ScaleXSpan(3.0f);
字体蒙板(MaskFilterSpan)
注意:模糊效果(BlurMaskFilter)不支持硬件加速。
模糊效果:

EmbossMaskFilter 效果(蓝色前景色+加粗样式):

代码:
/*
public MaskFilterSpan(MaskFilter filter)
-filter: a filter to apply
*/

//Blur a character
span = new MaskFilterSpan(new BlurMaskFilter(density*2, BlurMaskFilter.Blur.NORMAL));
//Emboss a character
span = new MaskFilterSpan(new EmbossMaskFilter(new float[] { 1, 1, 1 }, 0.4f, 6, 3.5f));
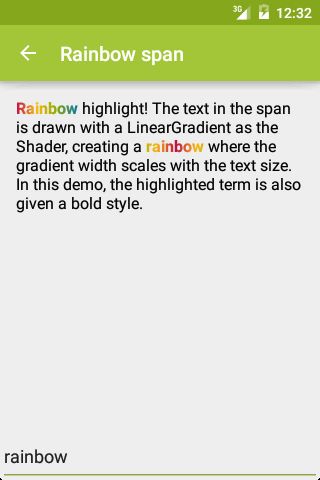
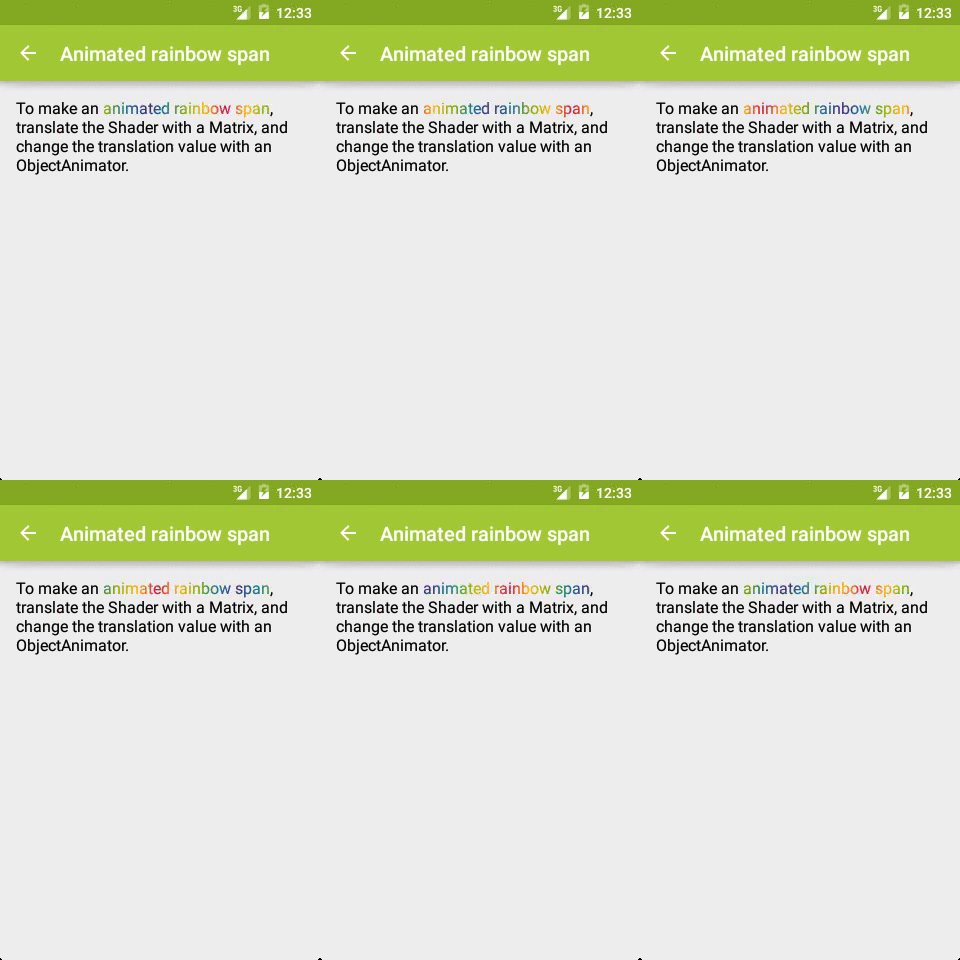
彩虹样式(RainbowSpan)
带横线的 EditText
EditText 是继承 TextView 的。我们继承 EditText,重写 onDraw() 方法,自己去画每行文字下面的横线。
效果:
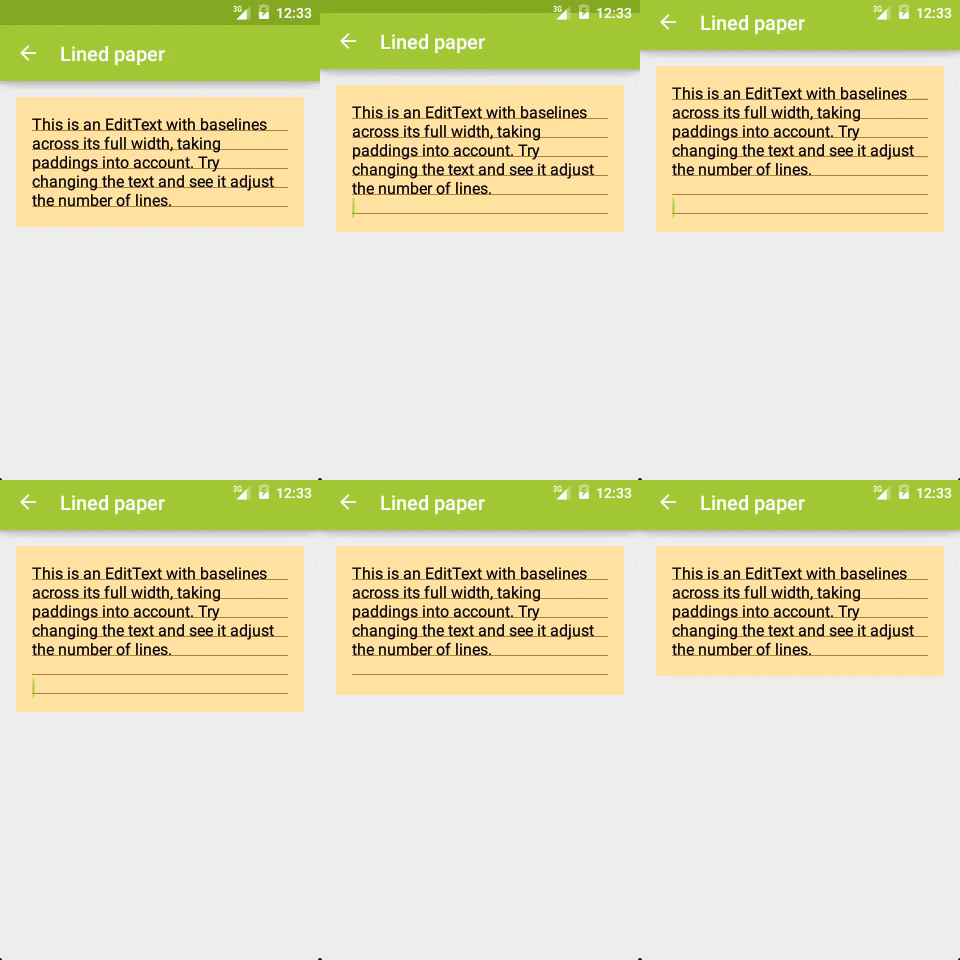
代码见 LinedEditText。
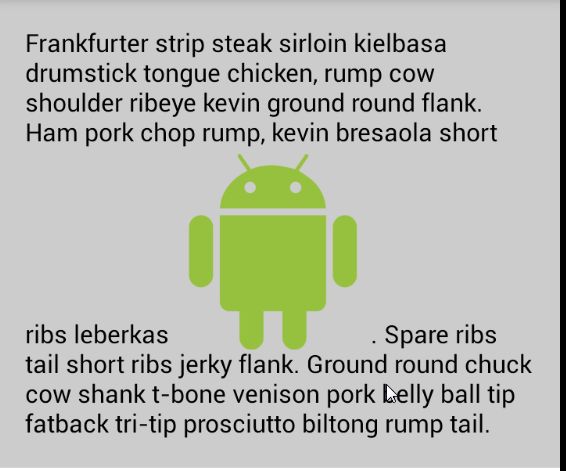
自定义 Span
上面这些 Span 功能已经被固定了,有没有一种 Span 可以让我们自由发挥、自由绘制文本呢?有的,这就是 ReplacementSpan。
比如我们可以继承 ReplacementSpan 去画一个矩形框,效果如下:
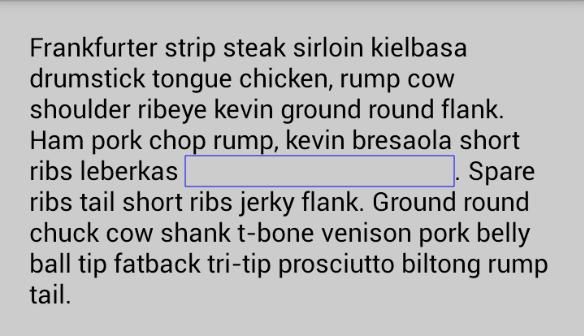
代码如下:
@Override
public int getSize(Paint paint, CharSequence text, int start, int end, Paint.FontMetricsInt fm) {
    // return text with relative to the Paint
    mWidth = (int) paint.measureText(text, start, end);
    return mWidth;
}

@Override
public void draw(Canvas canvas, CharSequence text, int start, int end, float x, int top, int y, int bottom, Paint paint) {
    // draw the frame with custom Paint
    canvas.drawRect(x, top, x + mWidth, bottom, mPaint);
}
自定义 Emoji
效果图:

注意,在上图中,共有4种 emoji 表情,分别是:
- 系统自带,如第2行末尾的心和天晴图案,具体效果因系统版本而已;
- 字库所带,如第3行的滑雪图案,需要通过继承 MetricAffectingSpan 的方式引入第三方字库;
- 静态图片,如第5行的乌贼图案,是通过 ImageSpan 导入的图片资源;
- 动态绘制,末尾2行的限速牌图案,是通过继承 Drawable、重写 draw() 方法的方式实现的,圆圈、底色、数字都是绘制出来的。
段落
简单项目符号(BulletSapn)
/*
public BulletSpan (int gapWidth, int color)
-gapWidth: gap in px between bullet and text
-color: bullet color (optionnal, default is transparent)
*/

//create a black BulletSpan with a gap of 15px
span = new android.text.style.BulletSpan(15, Color.BLACK);
项目符号(LeadingMarginSpan)
上面一节中的 BulletSpan 的项目符号是系统默认的小圆点。
我们可以使用 LeadingMarginSpan 实现个性化的项目符号,而不仅仅限于小圆点。
效果:

关键代码:
String[] bullets = new String[]{"1.", "2.", "3.", "4."};
        String[] itemContents = new String[]{"那一天,闭目在经殿香雾中,蓦然听见,你诵经中的真言;",
                "那一月,我摇动所有的经筒,不为超度,只为触摸你的指尖;",
                "那一年,磕长头匍匐在山路,不为觐见,只为贴着你的温暖;",
                "那一世,转山转水转佛塔呀,不为修来生,只为途中与你相见。"};

        CharSequence allText = "";
        for (int i = 0; i < bullets.length; i++) {

            final String aBullet = bullets[i];
            String t = itemContents[i].trim();

            // 注意此处的换行, 如果没有换行符, 则系统当做只有一个项目处理
            SpannableString spannableString = new SpannableString(t + "\n");

            spannableString.setSpan(new LeadingMarginSpan() {
                @Override
                public int getLeadingMargin(boolean first) {

                    // 项目符号和正文的缩进距离, 单位 px
                    // 我们可以根据 first 来改变第1行和其余行的缩进距离
                    return 100;
                }

                @Override
                public void drawLeadingMargin(Canvas c, Paint p, int x, int dir, int top, int baseline, int bottom, CharSequence text, int start, int end, boolean first, Layout layout) {

                    // 只对第1行文本添加项添加符号
                    if (first) {
                        Paint.Style orgStyle = p.getStyle();
                        p.setStyle(Paint.Style.FILL);

                        c.drawText(aBullet, 0, bottom - p.descent(), p);
                        p.setStyle(orgStyle);
                    }

                }
            }, 0, t.length(), 0);

            allText = TextUtils.concat(allText, spannableString);
        }

        title.setTextSize(20);
        title.setText(allText);
引用(QuoteSapn)
/*
public QuoteSpan (int color)
-color: quote vertical line color (optionnal, default is Color.BLUE)
*/

//create a red quote
span = new android.text.style.QuoteSpan(Color.RED);
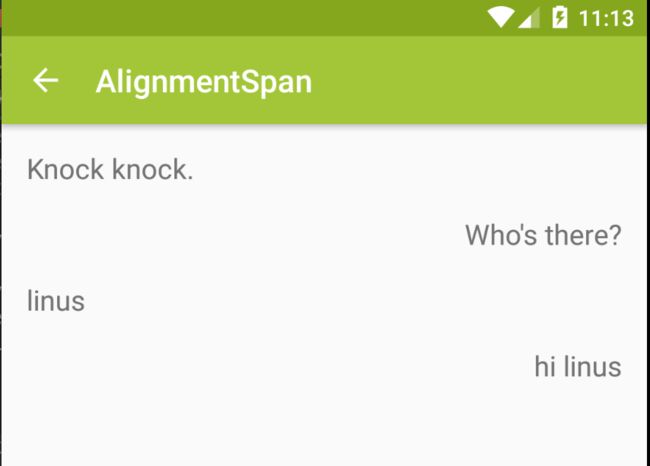
对齐方式(AlignmentSpan.Standard)
共有三种对齐方式:
- 正常,Layout.Alignment.ALIGN_NORMAL;
- 居中对齐,Layout.Alignment.ALIGN_CENTER;
- 反向对齐,Layout.Alignment.ALIGN_OPPOSITE;
/*
public Standard(Layout.Alignment align)
-align: alignment to set
*/

//align center a paragraph
span = new AlignmentSpan.Standard(Layout.Alignment.ALIGN_CENTER);
上图中对话,4个字符串是在一个 TextView 中,左边2个字符串的对齐方式是 Layout.Alignment.ALIGN_NORMAL,右边的2个是Layout.Alignment.ALIGN_OPPOSITE。
注意,Layout.Alignment.ALIGN_OPPOSITE 的对齐方式只有在换行的情况下才会起作用,如果 “Knock knock” 和 “Who’s there?” 在同一行,即使 “Who’s is there?” 是 Layout.Alignment.ALIGN_OPPOSITE,也不会产生反向对齐的效果,实际效果如下:
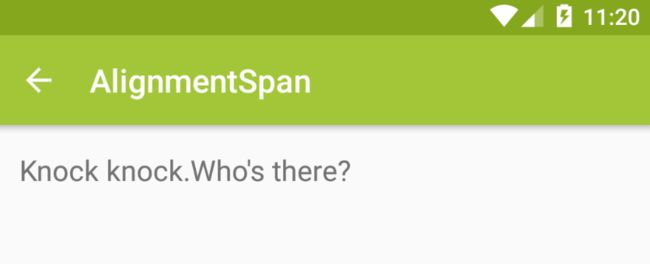
反向对齐关键代码如下:
 @Override
    protected void onCreate(Bundle savedInstanceState) {
        super.onCreate(savedInstanceState);
        setContentView(R.layout.activity_alignment_span);

        // some code

        appendText("Knock knock", Layout.Alignment.ALIGN_NORMAL);
        appendText("Who's there?", Layout.Alignment.ALIGN_OPPOSITE);
    }

    private void appendText(CharSequence text, Layout.Alignment align) {
        if (text == null || text.toString().trim().length() == 0) {
            return;
        }

        AlignmentSpan span = new AlignmentSpan.Standard(align);
        SpannableString spannableString = new SpannableString(text);
        spannableString.setSpan(span, 0, text.length(), 0);

        if (textView.length() > 0) {

            // 该行很重要,如果没有换行,那么反对齐效果失效
            textView.append("\n\n");
        }
        textView.append(spannableString);
    }
参考文章
- Advanced Android Textview
- Spans, a Powerful Concept.
- Android 文本样式——上
- Android 文本样式——下
