framework模块的创建与pod版本管理
为了方便使用,我在GitHub上创建了模版工程,执行脚本一步即可创建私有的framework。仓库地址
这篇文章主要讲述如何创建自己的framework,并提交到pod管理供他人使用。
1、新建framework项目xxModule
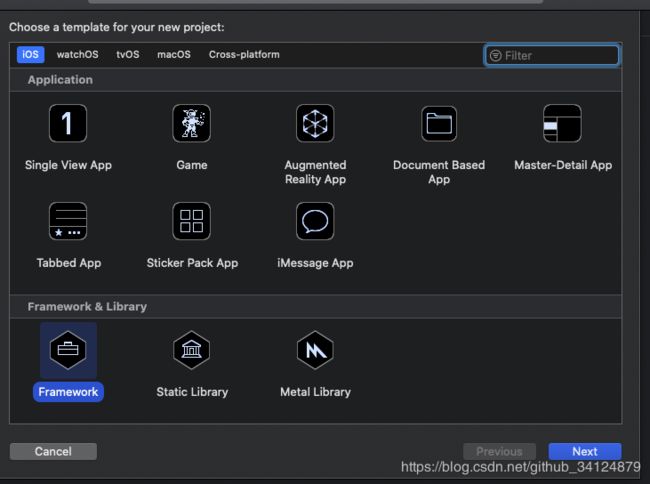
新建工程,选择Framework,然后命名为xxModule
设置xxModule的build settings
Build Activity Architecture Only = YES
Installation Directiotory 删除路径
iOS Deployment Target = iOS 9.0
Skip Install = YES
Strip Debug Symbols During Copy = YES //Debug = NO
Enable Bitcode = NO
Mach-O Type = Static Library
2、新建framework的Demo与Aggregate
在TARGETS列表下点击加号,添加Single View App,命名为xxModuleDemo。选择xxModuleDemo->General,将xxModule.framework添加至Frameworks,Liberaries,and Embedded Content。并设置Demo
Enable Bitcode = NO
在TARGETS列表下点击加号,添加Aggregate,命名为xxModuleAggregate。选择xxModuleAggregate->Build Phases中加入shell脚本:
# Type a script or drag a script file from your workspace to insert its path.
if [ "${ACTION}" = "build" ]

then

INSTALL_DIR=${SRCROOT}/Products/${PROJECT_NAME}.framework

DEVICE_DIR=${BUILD_ROOT}/${CONFIGURATION}-iphoneos/${PROJECT_NAME}.framework

SIMULATOR_DIR=${BUILD_ROOT}/${CONFIGURATION}-iphonesimulator/${PROJECT_NAME}.framework

if [ -d "${INSTALL_DIR}" ]

then

rm -rf "${INSTALL_DIR}"

fi

mkdir -p "${INSTALL_DIR}"

cp -R "${DEVICE_DIR}/" "${INSTALL_DIR}/"

#ditto "${DEVICE_DIR}/Headers" "${INSTALL_DIR}/Headers"

lipo -create "${DEVICE_DIR}/${PROJECT_NAME}" "${SIMULATOR_DIR}/${PROJECT_NAME}" -output "${INSTALL_DIR}/${PROJECT_NAME}"

#open "${DEVICE_DIR}"

open "${SRCROOT}/Products"

fi
脚本的作用是合并真机与模拟器的framework
3、添加Bundle
在TARGETS列表下点击加号,添加bundle,命名为xxModuleBundle。

设置xxModuleBundle的build settings
Base SDK = iOS
Supported Platforms = iOS
Installation Directiotory 删除路径
iOS Deployment Target = iOS 9.0
Skip Install = NO
COMBINE HIDPI IMAGES = NO//不然图片是TIFF格式
Enable Bitcode = NO
在xxModuleBundle下新建Assets.xcassets与Localizable.strings。
在PROJECT的Localizations下添加Chinese,Simplified本地化。
编译xxModuleBundle,将xxModuleBundle加入xxModule,Add to targets选择Demo。
为了让xxModule的framework可以引用xxModuleBundle的资源文件,需要给UIImage添加分类文件UIImage+xx,与NSString添加分类文件NSString+xx
@implementation UIImage (xxModule)
+ (UIImage *)xxImageNamed:(NSString *)name{

    NSString *bundlePath = [[NSBundle bundleForClass:NSClassFromString(@"UIImage+xxModule")] pathForResource:@"xxModuleBundle" ofType:@"bundle"];
    NSBundle *currentBundle = [NSBundle bundleWithPath:bundlePath];

    return [UIImage imageNamed:name inBundle:currentBundle compatibleWithTraitCollection:UIScreen.mainScreen.traitCollection];
}
@end

@implementation NSString (xxModule)
+ (NSString *)xxLocalizedString:(NSString *)string{

    NSString *bundlePath = [[NSBundle bundleForClass:NSClassFromString(@"NSString+xxModule")] pathForResource:@"xxModuleBundle" ofType:@"bundle"];
    NSBundle *currentBundle = [NSBundle bundleWithPath:bundlePath];
   return [currentBundle localizedStringForKey:string value:nil table:nil];
}
@end
这样就可以将资源文件加入framework了。
然后编译xxModule,生成真机与模拟器的framework,编译xxModuleAggregate生成framework合并文件。
4、加入pod管理
参考Podfile文件用法详解
在根目录文件下使用pod init添加Podfile文件,再执行pod install后,打开xxModule.xcworkspace。
修改Podfile文件,添加远程私有库与官方仓库:这里你需要建一个git私有库。参考链接:CocoaPods私有仓库搭建
# 远程私有库
source 'xx/xxModuleSpecs.git'
# 官方仓库
source 'https://github.com/CocoaPods/Specs.git'
定义一种abstract_target包含多个target(举例),target改为你自己项目对应的几个target
# 注意:这是个抽象的target也就是说在工程中并没有这个target引入ShowsKit
abstract_target 'commonPods' do
    pod 'ShowsKit'
    # xxModule target会引入ShowWebAuth库以及继承自commonPods的ShowsKit库
    target 'xxModule' do
        pod 'ShowWebAuth'
    end
    # xxModuleDemo target会引入ShowTVAuth库以及继承自commonPods的ShowsKit库
    target 'xxModuleDemo' do
        pod 'ShowTVAuth'
    end
end
工程目录下执行pod spec create xxModule,添加.podspec文件,并修改
spec.name
spec.version
spec.homepage
spec.source
spec.vendored_frameworks = 'Products/xxModule.framework'
spec.resource = xxModuleBundle.bundle
spec.dependency 'xx'
spec.ios.deployment_target = '9.0'
spec.license
spec.description
//source_files
将工程代码上传git并打上tag,tag版本号需要与xxModule.podspec文件中的spec.version相同。然后执行
pod spec lint --allow-warnings //如果引入了另外的私有库,会报错找不到该私有库,可以忽略此验证直接提交远程库
验证通过后,将framework提交到Spec Repo仓库
pod repo push xxModuleSpecs xxModule.podspec --allow-warnings --verbose
5、其他工程引用
pod search xxModule//搜索
pod 'xxModule'//引用