Vue语法& Element UI安装&VScode 之快速创建vue模板
vue
- 一.vue简单实用
- 1.vue在项目中安装
- 2.安装vue提示
- 3.浏览器安装vue插件
- 4.vue简单语法
- 4.1.声明式渲染功能
- 4.2.双向绑定
- 4.3.指令
- 4.3.1.v-on 绑定事件
- 4.3.2 v-text 不转义
- 4.3.3 v-html 转义
- 4.3.4 v-bind 给html绑定属性
- 4.3.5 v-model 双向绑定
- 4.3.6 v-for
- 4.3.6.1
- 4.3.6.2
- 4.3.6.3
- 4.4 v-if和v-else-if和v-else
- 4.5计算属性和侦听器
- 4.6过滤器(全局)
- 4.7组件(全局和局部)
- 二.项目的创建及插件安装
- 1.使用Vue脚手架进行模块化开发
- 1.1 打开 cmd 创建 Vue 项目,并添加 Vue 依赖的框架
- 1.2 cd进入到创建的 Vue 项目目录,添加依赖框架
- 如果在执行时报错:
- 2.运行项目
- 4.VScode 之快速创建vue模板
一.vue简单实用
1.vue在项目中安装
vscode中 用npm安装
//首先初始化项目
npm init -y

//npm 安装 vue
npm install vue
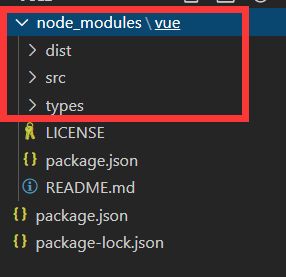
项目中导入 vue.js
<script src="./node_modules/vue/dist/vue.js"></script>
2.安装vue提示

3.浏览器安装vue插件
vue插件
在chrome中新开一个TAB,输入:chrome://extensions/ 回车


4.vue简单语法
api
4.1.声明式渲染功能
vue只要管控了元素,用{{}}就能得到所需要的值
<div id="app">
        //数据绑定{{}} 获取那么值显示
        <h1>{{name}}</h1>
    </div>

    <script src="./node_modules/vue/dist/vue.js"></script>

    <script>
    //声明式渲染功能
        var vm=new Vue({
            //el: 管控
            el:"#app",
            //data里放对象
            data:{
                name:"张三"
            },
        });
    </script>
页面可修改显示的值

4.2.双向绑定
v-model代表输入框与vue里num绑定,模型变化,引起视图变化
<div id="app">
  <input type="text" v-model="num">
        //数据绑定{{}} 获取那么值显示
        <h1>{{name}}</h1>
    </div>

    <script src="./node_modules/vue/dist/vue.js"></script>

    <script>
    //声明式渲染功能
        var vm=new Vue({
            //el: 管控
            el:"#app",
            //data里放对象
            data:{
                name:"张三"
            },
        });
    </script>

4.3.指令
4.3.1.v-on 绑定事件
v-on可以写成@
<div id="app">
  <input type="text" v-model="num">

  <!--v-on:click 简写为@click -->
   <button v-on:click="num ++">点赞</button>
   <button v-on:click="quxiao">取消点赞</button>

        //数据绑定{{}} 获取那么值显示
        <h1>{{name}}</h1>
    </div>

    <script src="./node_modules/vue/dist/vue.js"></script>

    <script>
    //声明式渲染功能
        var vm=new Vue({
            //el: 管控
            el:"#app", //绑定元素
            //data里放对象
            data:{ //封装数据
                name:"张三"
            },
            methods: { //封装方法
                quxiao(){
                    this.num--;
                }
            },
        });
    </script>

v-on:click.prevent="dianji"或者 @click.prevent="dianji"
修饰符:
.stop - 调用 event.stopPropagation()。阻止事件冒泡到父类
.prevent - 调用 event.preventDefault()。阻止默认事件发生
.capture - 添加事件侦听器时使用 capture 模式。 使用事件捕获模式
.self - 只当事件是从侦听器绑定的元素本身触发时才触发回调。
.{keyCode | keyAlias} - 只当事件是从特定键触发时才触发回调。
.native - 监听组件根元素的原生事件。
.once - 只触发一次回调。
.left - (2.2.0) 只当点击鼠标左键时触发。
.right - (2.2.0) 只当点击鼠标右键时触发。
.middle - (2.2.0) 只当点击鼠标中键时触发。
.passive - (2.3.0) 以 { passive: true } 模式添加侦听器
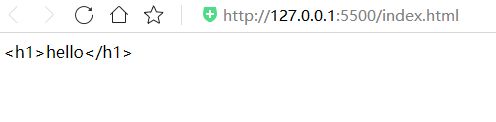
4.3.2 v-text 不转义
<div id="app">
<span v-text="msg"></span>
</div>
<script src="./node_modules/vue/dist/vue.js"></script>
<script>
new Vue({
el:"#app",
data:{
msg:"hello
"
},
})
</script>
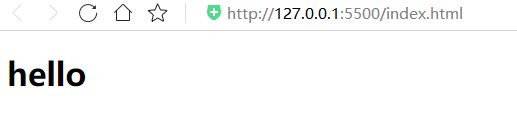
4.3.3 v-html 转义
<div id="app">
<span v-html="msg"></span>
</div>
<script src="./node_modules/vue/dist/vue.js"></script>
<script>
new Vue({
el:"#app",
data:{
msg:"hello
"
},
})
</script>
4.3.4 v-bind 给html绑定属性
v-bind 可以写成 :
class和style绑定,要更改为对象,class属性为true则显示
 <div id="app">
      <a v-bind:href="link">点击</a>

 		<!--class style-->
      <span v-bind:class="{active:iserror}"
       v-bind:style="{color: color1,'font-size': size}">ok</span>
    </div>

    <script src="./node_modules/vue/dist/vue.js"></script>

    <script>
      var vm=new Vue({
          el:"#app",
       	  data:{
            link:"http://www.baidu.com",
            iserror:true,
            color1:'red',
            size:'80px'

          },
      })
      })


    </script>


4.3.5 v-model 双向绑定
<div id="app">
        <input type="checkbox" v-model="language" value="java">java
        <br>
        <input type="checkbox" v-model="language" value="js">js
        <br>
        <input type="checkbox" v-model="language" value="python"> python
        <br>
        选中了 {{language.join(",")}}
    </div>

    <script src="./node_modules/vue/dist/vue.js"></script>

    <script>
        var vm = new Vue({
            el: "#app",
            data: {
                language:[]
            },
        })


    </script>

4.3.6 v-for
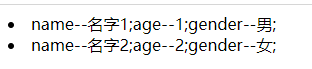
4.3.6.1
<div id="app">
        <li v-for="(user,index) in users">
            <span v-for="(v,k) in user">{{k}}--{{v}};</span>
        </li>
    </div>

    <script src="./node_modules/vue/dist/vue.js"></script>

    <script>
        var vm = new Vue({
            el: "#app",
            data: {
                users:[{name:"名字1",age:1,gender:"男"},
                    {name:"名字2",age:2,gender:"女"}
                ]
            },
        })


    </script>
4.3.6.2
<div id="app">
        <li v-for="(user,index) in users">
            <span v-for="(v,k,index) in user">{{k}}--{{v}}--{{index}};</span>

        </li>
    </div>

    <script src="./node_modules/vue/dist/vue.js"></script>

    <script>
        var vm = new Vue({
            el: "#app",
            data: {
                users:[{name:"名字1",age:1,gender:"男"},
                    {name:"名字2",age:2,gender:"女"}
                ]
            },
        })
    </script>

4.3.6.3
key:来区分不同数据,提高vue渲染效率,必须是唯一值
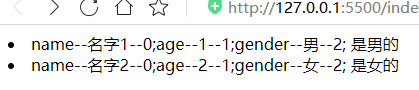
4.4 v-if和v-else-if和v-else
<div id="app">
        <li v-for="(user,index) in users">
            <span v-for="(v,k,index) in user">{{k}}--{{v}}--{{index}};</span>
            <span v-if="user.gender=='男'">是男的</span>
            <span v-else-if="user.gender=='女'">是女的</span>
        </li>
    </div>

    <script src="./node_modules/vue/dist/vue.js"></script>

    <script>
        var vm = new Vue({
            el: "#app",
            data: {
                users:[{name:"名字1",age:1,gender:"男"},
                    {name:"名字2",age:2,gender:"女"}
                ]
            },
        })
    </script>
4.5计算属性和侦听器
<div id="app">
        <li>西游记  价格:{{xyjprice}} 数量:<input type="number" v-model="xyjnum"></li>
        <li> 水浒传  价格:{{shzprice}} 数量:<input type="number" v-model="shznum"></li>
        <li> 总价格 :{{total}}</li>
        {{msg}}
    </div>

    <script src="./node_modules/vue/dist/vue.js"></script>

    <script>
       let vm= new Vue({
            el:"#app",
            data:{
                xyjprice:99,
                shzprice:88,
                xyjnum:1,
                shznum:1,
                msg:""
            },
            //计算属性
            computed: {
                total(){
                    return  this.xyjprice*this.xyjnum+this.shzprice*this.shznum;
                }

            },
            //侦听器
            watch: {
                xyjnum(newnum,oldnum){
                    if(newnum>=3){
                        this.msg="超出限值";
                        this.xyjnum=3;
                    }
                   else if(newnum<=0){
                        this.msg="不能小于0";
                        this.xyjnum=0;
                   }
                    else{
                        this.msg="";
                    }
                }
            },
        })

    </script>

4.6过滤器(全局)
<div id="app">
       <li v-for="user in users":key="user.name">

            {{user.name}}-{{user.age}}- {{user.gender | genderFilter}}--
            {{user.gender | gFilter}}

       </li>
    </div>

    <script src="./node_modules/vue/dist/vue.js"></script>
    <script>
        //全局过滤器
        Vue.filter("gFilter",function(val){
            if(val==1){
                return "男(全局)";
            }
            else{
                return "女(全局)";
            }
        })

        var vm = new Vue({
            el: "#app",
            data: {
                users:[{name:"名字1",age:1,gender:1},
                    {name:"名字2",age:2,gender:2}
                ]
            },
            //局部过滤器
            filters:{
                genderFilter(val){
                    if(val==1){
                        return "男";
                    }
                    else{
                        return "女";
                    }
                }
            }
        })
    </script>

4.7组件(全局和局部)
组件是可复用的 Vue 实例,在注册组件时一定要通过 new Vue 创建的 Vue 根实例中,把这个组件作为自定义元素来使用
<div id="app">
<click></click>
<click></click>
<click></click>
<one-component></one-component>
</div>
<script src="./node_modules/vue/dist/vue.js"></script>
<script>
//全局
Vue.component("click",{
template : ``,
data() {
return {
count : 1
}
},
});
//局部
const oneComponent={
template : ``,
data() {
return {
count : 1
}
},
}
let vm= new Vue({
el:"#app",
data:{
},
components:{
"oneComponent":oneComponent
},
})
</script>

二.项目的创建及插件安装
1.使用Vue脚手架进行模块化开发
1.1 打开 cmd 创建 Vue 项目,并添加 Vue 依赖的框架
#cmd  E:\VSCodeWorkSpace\vue-demo   //cd进入文件
vue create vue-demo   //创建项目文件
1.2 cd进入到创建的 Vue 项目目录,添加依赖框架
cd vue-spring-login-summed (进入到项目根目录)
vue add element (添加 element,一个 element 风格的 UI 框架)
npm install axios (安装 axios,用于网络请求)
npm install vuex --save(安装 Vuex,用于管理状态)
npm install vue-router (安装 路由,用于实现两个 Vue 页面的跳转)


如果在执行时报错:
Vue-cli3 更新 vue create is a Vue CLI 3 only command and you are using Vue CLI 2.9.6.
2.9.6 初始化项目是用 vue init webpack my-project 3.0以上 初始化项目是用 vue create my-project
解决方法:
1.用2.9的命令初始化项目 vue init webpack my-project
2.卸载2.9升级到3.0
npm uninstall -g vue-cli //卸载

npm i -g @vue/cli@^3.12.1  //安装指定版本

npm i -g @vue/cli  //安装最新版本
/安装指定版本**/
3.0以下 npm install -g vue-cli@版本号
3.0以上 npm install -g @vue/cli@版本号
2.运行项目
在 VSCode 菜单栏依次选择:终端 —— 运行任务…

这里使用的是 serve 模式,即开发模式运行的项目

http://localhost:8080/

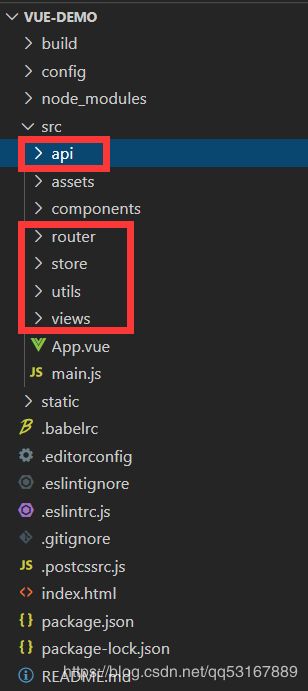
现在需要创建相应功能的目录结构,进行分层开发,需要在 src 目录下创建下面几个目录
api (网络请求接口包)
router (路由配置包)
store (Vuex 状态管理包)
utils (工具包)
views (vue 视图包,存放所有 vue 代码,可根据功能模块进行相应分包)
4.VScode 之快速创建vue模板
- 插件库中搜索Vetur安装,识别vue文件
- 新建代码片段
- 文件–>首选项–>用户代码片段–>点击新建代码片段–取名vue.json 确定
- 在json文件中添加自己的模板字段
// Place your 全局 snippets here. Each snippet is defined under a snippet name and has a scope, prefix, body and
// description. Add comma separated ids of the languages where the snippet is applicable in the scope field. If scope
// is left empty or omitted, the snippet gets applied to all languages. The prefix is what is
// used to trigger the snippet and the body will be expanded and inserted. Possible variables are:
// $1, $2 for tab stops, $0 for the final cursor position, and ${1:label}, ${2:another} for placeholders.
// Placeholders with the same ids are connected.
// Example:
// "Print to console": {
// "scope": "javascript,typescript",
// "prefix": "log",
// "body": [
// "console.log('$1');",
// "$2"
// ],
// "description": "Log output to console"
// }
{
"Print to console": {
"prefix": "vue",
"body": [
"",
"",
"$5",
"",
"",
"",
""
],
"description": "Log output to console"
}
}
Springboot Vue Login(从零开始实现Springboot+Vue登录)