Centos7.5搭建lnmp(详细+实战)
目录:
1)LNMP简介
2)安装nginx1.4
3)安装php7.2
4)安装mariadb10.2
5)总结
一、LNMP简介
L:linux,是目前最流行的免费操作系统,版本有很多,rehat,debian,ubuntu,centos等等,我用的是centos7.5。
N:nginx,是一个高性能的HTTP和反向代理服务器,也是一个IMAP/POP3/SMTP代理服务器。nginx市场份额越来越大,这里也可以选择Apache,老大哥,宝刀未老。
M:Mysql是一个小型关系型数据库管理系统,我觉得已经不小了,对于绝大多数的情况,够用了,这里我用的mariadb10.2,mariadb和mysql都是出自同个作者,这里不讲它们的故事。
P:世界上最好的编程语言,一种在服务器端执行的嵌入HTML文档的脚本语言。
linux+nginx+mysql/mariadb+php,这四个开源项目组在一起,成为一个免费、高效、扩展性强的网站服务系统,这是一个网站服务器架构,学会它就能打通任督二脉,无忌,跟着为师走。
二、安装nginx
- 防火墙设置,允许http,https通信。
firewall-cmd --zone=public --add-service=http  --permanent    //允许http通信
firewall-cmd --zone=public --add-service=https  --permanent  //允许https通信
firewall-cmd --zone=public --add-port=80/tcp --permanent 打开80端口
firewall-cmd --zone=public --add-port=443/tcp --permanent 打开443端口
firewall-cmd --zone=public --add-port=8080/tcp --permanent 打开8080端口
firewall-cmd --reload     //重新加载配置
- 下载基本的库文件
yum install pcre pcre-devel
yum install zlib zlib-devel
yum install openssl openssl-devel
- 配置nginx官方源,下载和安装
rpm -Uvh http://nginx.org/packages/centos/7/noarch/RPMS/nginx-release-centos-7-0.el7.ngx.noarch.rpm
//安装nginx
yum install nginx
- 了解基本配置文件
主配置文件:/etc/nginx/nginx.conf
默认配置文件:/etc/nginx/conf.d/default.conf
我们编辑一下default.conf这个文件。
注意,这里server_name 我写的是我这台电脑的局域网地址及访问端口,你可以设置其它或者默认不变
 5. 局域网访问测试一下
systemctl start nginx
 到这里nginx安装使用成功,如果你这里无法访问,绝大多数情况下是SELINUX和防火墙的问题。注意,如果你是云服务器的话是需要在服务商后台那里添加安全组策略的。
安装php7.2
- 配置php7.2yum源
rpm -Uvh https://dl.fedoraproject.org/pub/epel/epel-release-latest-7.noarch.rpm
rpm -Uvh https://mirror.webtatic.com/yum/el7/webtatic-release.rpm
- 安装php7.2及一些扩展工具
yum install php72w php72w-cli php72w-common php72w-devel php72w-embedded php72w-fpm php72w-gd php72w-mbstring php72w-mysqlnd php72w-opcache php72w-pdo php72w-xml
- 启动php-fpm
systemctl start php-fpm  //启动
systemctl enable php-fpm  //设置开机启动
注意,nginx是通过php-fpm处理php文件的。
4. 让nginx支持php
vim /etc/nginx/conf.d/default.conf
location ~ \.php$ {
        root          /usr/share/nginx/html;
        fastcgi_pass   127.0.0.1:9000;
        fastcgi_index  index.php;
        fastcgi_param  SCRIPT_FILENAME $document_root$fastcgi_script_name;
        include        fastcgi_params;
    }
systemctl restart nginx  //重启服务
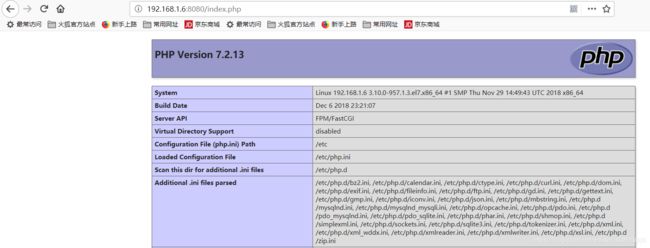
vim /usr/share/nginx/html/index.php //编辑文件
代码如下:
四、安装数据库mariadb10.2
- 卸载系统自带的数据库
首先,centos7.5里面自带的mariadb5.5版本的,所以第一步,我先卸载掉很老老老老老老的版本。
rpm -qa|grep mariadb
yum remove mariadb-*文件
它会删除一些依赖文件,不用担心。
2. 配置mariadb10.2yum源
vim /etc/yum.repos.d/MariaDB.repo
# MariaDB 10.2 CentOS repository list - created 2019-01-08 08:30 UTC
# http://downloads.mariadb.org/mariadb/repositories/
[mariadb]
name = MariaDB
baseurl = http://yum.mariadb.org/10.2/centos7-amd64
gpgkey=https://yum.mariadb.org/RPM-GPG-KEY-MariaDB
gpgcheck=1
以上配置的源是mariadb官方源,下载速度,一个星期的时间是完全可以下载下来的。
如果你想一根烟的时间就能完成下载,替换为国内源:
[mariadb]
name = MariaDB
baseurl = https://mirrors.ustc.edu.cn/mariadb/yum/10.2/centos7-amd64
gpgkey=https://mirrors.ustc.edu.cn/mariadb/yum/RPM-GPG-KEY-MariaDB
gpgcheck=1
保存退出。
yum clean&&yum update  //更新一下yum源
yum install MariaDB-client MariaDB-server //安装

systemctl start mariadb
systemctl enable mariadb //设置开机启动
OK,mariadb安装完成。
3. 初始化mariadb
首先使用mysql_secure_installation命令进行配置。
根据自己的要求配置,可以按照我的图片走。
Set root password? [Y/n] <– 是否设置root用户密码,输入y并回车或直接回车
New password: <– 设置root用户的密码
Re-enter new password: <– 再输入一次你设置的密码
其他配置
Remove anonymous users? [Y/n] <– 是否删除匿名用户,回车
Disallow root login remotely? [Y/n] <–是否禁止root远程登录,回车,
Remove test database and access to it? [Y/n] <– 是否删除test数据库,回车
Reload privilege tables now? [Y/n] <– 是否重新加载权限表,回车
登录
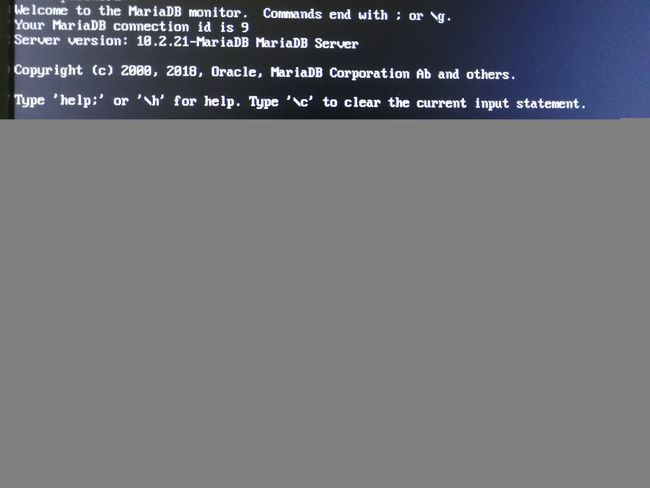
mysql -uroot -p //本地登录
 4. 简单配置mariadb
先配置服务端,配置文件:/etc/my.cnf.d/server.cnf
vim /etc/my.cnf.d/server.cnf
在[mysqld]标签下添加以下内容
init_connect='SET collation_connection = utf8_unicode_ci'
init_connect='SET NAMES utf8'
character-set-server=utf8
collation-server=utf8_unicode_ci
skip-character-set-client-handshake
保存退出
再配置客户端,配置文件:/etc/my.cnf.d/mysql-clients.cnf
vim /etc/my.cnf.d/mysql-clients.cnf
在[mysql]中添加
default-character-set=utf8
保存退出
重启mariadb服务
systemctl restart mariadb
之后登录mariadb,输入下面代码,查看一下我们的设置有没有成功。
show variables like "%character%";show variables like "%collation%";
 6. 测试mariadb
现在nginx,php,mariadb都有了,我们来做个简单的测试,写个简单的代码,访问数据库。
vim /usr/share/nginx/html/index.php
代码:
我们在浏览器访问看看。
 有些朋友写的不是localhost,而是127.0.0.1,可能会出现Permission denied权限问题,如下图。
 这是因为selinux拦截了,我们设置以下就可以。
setsebool httpd_can_network_connect_db = on
用localhost比127.0.0.1在安全及性能上都要好,感兴趣的朋友可以阅读相关文档。
五、 总结
到这里,LNMP就搭建成功了,我第一次配置的时候遇到很多权限问题,其实也是好事。从问出现,到分析问题,再到解决问题,你会收获很多知识,那些问题让你的脑袋不断的思考,最后,你打通了任督二脉。

