docker-compose部署nginx+uwsgi+django项目
网上有很多关于此类型项目的部署教程,但是绝大多数的教程都是一个docker里面完成的或者是两个docker但是里面的配置文件写得云里雾里
这里,记录我写的一个小的demo以防之后忘记
首先展示一下我的目录结构
│  docker-compose.yml
│
├─django
│  │  db.sqlite3
│  │  Dockerfile
│  │  docker_test.ini
│  │  manage.py
│  │  master.pid
│  │  requirements.txt
│  │
│  ├─docker_demo
│  │  │  settings.py
│  │  │  urls.py
│  │  │  wsgi.py
│  │  └─ __init__.py
│  │
│  └─static
└─nginx
    │  Dockerfile
    │  nginx-app.conf
    │
    └─data
            access.log
            error.log
从目录结构可以看到,我们把nginx和django分成两个文件夹,并且各自准备了一个Dockerfile来进行构建,其中django文件夹中包含我们的django项目目录。
进入django文件夹,我们先运行django-admin startproject docker_demo创建django项目。
创建requirements.txt文件
django/requirements.txt
pymysql
Django==2.1
接下来在django文件夹进行django项目docker容器的构建
django/Dockerfile文件:
FROM centos

MAINTAINER jc

RUN mv /etc/yum.repos.d/CentOS-Base.repo /etc/yum.repos.d/CentOS-Base.repo.backup
RUN curl -o /etc/yum.repos.d/CentOS-Base.repo https://raw.githubusercontent.com/hackyoMa/docker-centos/8/CentOS-Base.repo
RUN yum makecache
RUN yum -y install python36
RUN yum -y install gcc
RUN yum -y install python36-devel
RUN pip3 install --upgrade pip -i https://pypi.tuna.tsinghua.edu.cn/simple
# 以上是构建python环境步骤,使用python镜像可省略
RUN mkdir /code

WORKDIR /code

COPY requirements.txt /code

RUN pip install uwsgi -i https://pypi.tuna.tsinghua.edu.cn/simple --default-timeout=200 \
    && pip install -r requirements.txt -i https://pypi.tuna.tsinghua.edu.cn/simple --default-timeout=200 \
    && rm requirements.txt

EXPOSE 8000
由于docker官方的python容器比较大,所以这里我选择了自己制作一个python容器并且构建django项目,觉得麻烦的可以在FROM那里改为python。
其次创建uwsgi配置文件docker_test.ini
django/docker_test.ini
[uwsgi]
#http = 0.0.0.0:8000    #http协议,当不使用nginx的时候,使用这个来转发
chdir = /code	#项目路径
#home = /root/code/Venv    #设置虚拟环境路径,需要可加上
module = docker_demo.wsgi:application
master = True
processes = 4
max-requests = 5000
harakiri = 60
chmod-socket = 666	#设置权限
socket = :8000	#端口号
uid = root
gid = root
pidfile = /code/master.pid
#daemonize = /code/docker_test.log  #设置日志文件,这里不要加,docker容器需要进程在前台运行,加上日志会导致uwsgi转至后台
vacuum = True
到此,我们的django容器可以告一段落,开始进行nginx容器的配置
进入nginx文件夹,创建Dockerfile
nginx/Dockerfile
FROM nginx

MAINTAINER jc

EXPOSE 80 8000
由于是直接引用nginx镜像,所以这个文件可以创建,可以不用创建,区别只在于docker-compose的配置有所不同,这里先创建。
创建nginx-app.conf文件,进行nginx的配置
nginx/nginx-app.conf
upstream django{
         server web:8000;
}
server {
    listen       80 default_server;
    listen       [::]:80 default_server;
    server_name  localhost;

    #charset koi8-r;
    #access_log  /var/log/nginx/host.access.log  main;

    location / {
        include /etc/nginx/uwsgi_params;
        uwsgi_connect_timeout 30;
        uwsgi_pass django;
        root   /usr/share/nginx/html;
        index  index.html index.htm;
    }

    location /static/ {
        alias /code/static/;
    }

    #error_page  404              /404.html;

    # redirect server error pages to the static page /50x.html
    #
    error_page   500 502 503 504  /50x.html;
    location = /50x.html {
        root   /usr/share/nginx/html;
    }

    # proxy the PHP scripts to Apache listening on 127.0.0.1:80
    #
    #location ~ \.php$ {
    #    proxy_pass   http://127.0.0.1;
    #}

    # pass the PHP scripts to FastCGI server listening on 127.0.0.1:9000
    #
    #location ~ \.php$ {
    #    root           html;
    #    fastcgi_pass   127.0.0.1:9000;
    #    fastcgi_index  index.php;
    #    fastcgi_param  SCRIPT_FILENAME  /scripts$fastcgi_script_name;
    #    include        fastcgi_params;
    #}

    # deny access to .htaccess files, if Apache's document root
    # concurs with nginx's one
    #
    #location ~ /\.ht {
    #    deny  all;
    #}
}
需要注意的是,这里的uwsgi_pass后面是django,django指的是配置文件开头的upstream django的设置,也就是server web:8000,而web这个指代的是我们的django容器在docker-compose里面的名称
我们来看看docker-compose.yml的配置
docker-compose.yml
version: '3'

services:
  web:
    build: django
    restart: always
    privileged: true
	#端口映射
    ports:
      - "8000:8000"
    command: uwsgi --ini /code/docker_test.ini
	#挂载目录
    volumes:
      - ./django:/code

  nginx:
    container_name: nginx-container
    restart: always
    depends_on:
      - web
    links:
      - "web:web"
    build: nginx
	#端口映射
    ports:
      - "8888:80"
	#挂载目录
    volumes:
      - ./nginx/data:/var/log/nginx
      - ./nginx/nginx-app.conf:/etc/nginx/conf.d/default.conf
      - ./django/static:/code/static
这里可以看到,我们把django项目定义了web。所以在nginx的配置文件中,那里会是web。
现在我们的所有准备工作都已经做完了,运行docker-compose build进行容器构建
之后运行docker-compose up前台运行我们的两个容器,会看到uwsgi成功启动的画面
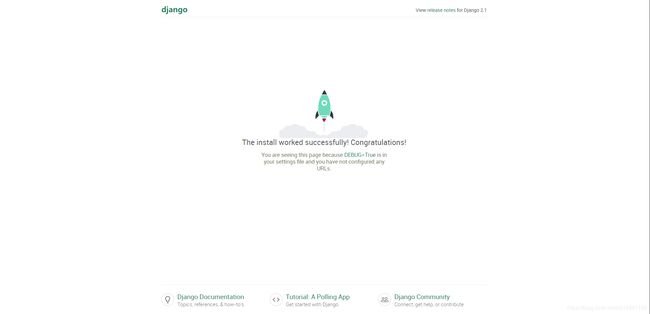
访问loclhost:8888会看到

这时我们已经大功告成了
不想前台运行的童鞋可以关掉容器使用docker-compose up -d来后台运行我们的项目
本项目所有代码已上传github,可以在docker-django-nginx 进行克隆参考
欢迎大家关注我的博客爱吃回锅肉的胖子技术文章我会先发布到我的个人博客中