第二节 mtk算法和driver集成说明
一.安装依赖包
#MTKflash tool依赖下面这个包
Wget -q -O /tmp/libpng12.deb http://mirrors.kernel.org/ubuntu/pool/main/libp/libpng/libpng12-0_1.2.54-1ubuntu1_amd64.deb \

  && sudo dpkg -i /tmp/libpng12.deb \

  && rm /tmp/libpng12.deb
--------------------------------------------------------------------------------------------------------------------
二.添加驱动
1、将sia81xx/目录放到kernel-4.4/sound/soc/mediatek/
修改目录下的makefile,添加obj-y += sia81xx/
2、将mt6799-sia8108.dtsi文件放到kernel-4.4/arch/arm64/boot/dts/mediatek/
修改amt6799_evb_n.dts,添加#include "mt6799-sia8108.dtsi"
3、修改kernel-4.4/sound/soc/mediatek/common_int/mtk-soc-machine.c
添加 ret = soc_aux_init_only_sia81xx(pdev, card);
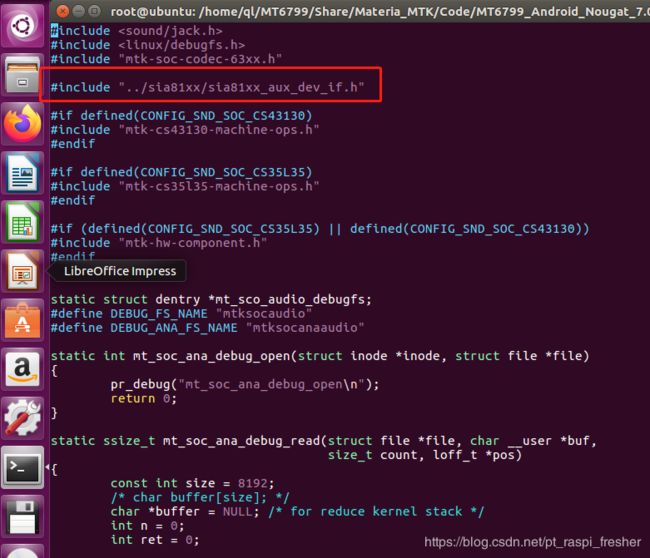
首先,我看到给的文件夹里面有mtk-soc-machine.c文件,直接删除替换了
另外,替换后,我发现这里的头文件路径和函数名有问题都需要修改一下:
4、修改sepolicy相关的东西(https://blog.csdn.net/whshiyun/article/details/82051864)
4.1、修改 system/core/rootdir/ueventd.rc,
添加 /dev/sia81xx_tuning_if 0666 system audio
4.2、修改 system/sepolicy/file_contexts
添加 /dev/sia81xx_tuning_if u:object_r:sia81xx_tuning_if_device:s0
4.3、修改 system/sepolicy/device.te
添加 type sia81xx_tuning_if_device, dev_type;
4.4、修改 system/sepolicy/audioserver.te
添加 allow audioserver sia81xx_tuning_if_device:chr_file rw_file_perms;
5.编译
不用全部重新编译,只用mmm /system/sepolicy,然后会更新/out/target/product/xxxxxxx/root/sepolicy文件,这个时候要重新打包bootimage,所以接着make -j4 bootimage,保险起见的话make snod一下,然后把system.img和boot.img重新烧一下(我这里ramdisk.img也被更新了,保险起见把这个也重新烧一下.
编译指令:
下面指令都是在源码路径下执行的
source build/envsetup.sh
lunch full_amt6799_evb_n-eng
export LC_ALL=C
mmm  system/sepolicy
make -j4 bootimage

make snod
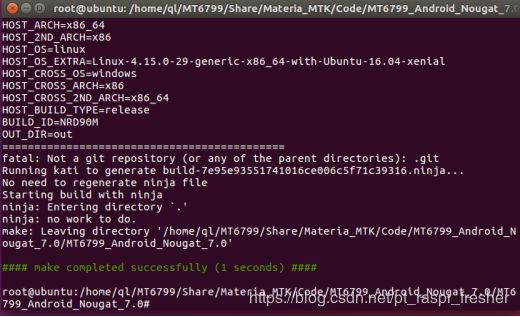
编译成功画面:
###编译报错(一)
make[1]: Leaving directory '/home/ql/MT6799/Share/Materia_MTK/Code/MT6799_Android_Nougat_7.0/MT6799_Android_Nougat_7.0/out/target/product/amt6799_evb_n/obj/KERNEL_OBJ'
Makefile:146: recipe for target 'sub-make' failed
make: *** [sub-make] Error 2
解决办法:
Ubunut16默认的make环境是4.1的,但编译Android源码需要make3.8.1或3.8.2,下面介绍下配置并使用make3.8.1的方法
1 下载make-3.81.tar.bz2
下载地址:http://ftp.gnu.org/gnu/make/

2 解压
tar -xvf make-3.81.tar.gz
3 编译
cd make-3.81/
./configure
make
4 配置
export PATH=/home/ql/MT6799/Share/make-3.81:$PATH
source /etc/profile
root@ubuntu:/home/ql/MT6799/Share# export PATH=/home/ql/MT6799/Share/make-3.81:$PATH
root@ubuntu:/home/ql/MT6799/Share# source /etc/profile
root@ubuntu:/home/ql/MT6799/Share# make --version

GNU Make 3.81
Copyright (C) 2006 Free Software Foundation, Inc.
This is free software; see the source for copying conditions.
There is NO warranty; not even for MERCHANTABILITY or FITNESS FOR A
PARTICULAR PURPOSE.
This program built for x86_64-unknown-linux-gnu
#### make completed successfully ####
###报错(二)
You might want to run `apt-get -f install' to correct these:
The following packages have unmet dependencies:
sun-java6-jre: Depends: sun-java6-bin (= 6-00-2ubuntu2) but it is not going to be installed or
ia32-sun-java6-bin (= 6-00-2ubuntu2) but it is not installable
E: Unmet dependencies. Try 'apt-get -f install' with no packages (or specify a solution).
解决方法:
sudo apt-get install -f
--------------------------------------------------------------------------------------------------------------------
三.添加算法
1、将sia81xx_sixth算法适配代码放到vendor\mediatek\proprietary\external\aurisys\
. build/envsetup.sh
mmm 编译: mmm vendor/mediatek/proprietary/external/aurisys/sia81xx_sixth
并 push .so到手机或者烧system.img
###编译报错(一)
ninja: error: 'out/target/product/generic/obj/SHARED_LIBRARIES/libcutils_intermediates/export_includes', needed by 'out/target/product/generic/obj/SHARED_LIBRARIES/libsixth_intermediates/import_includes', missing and no known rule to make it
build/core/ninja.mk:148: recipe for target 'ninja_wrapper' failed
make: *** [ninja_wrapper] Error 1
解决方法:
最后找到原因的我眼泪掉下来....
居然是因为在编译android的之前没有lunch!!!我的天!!!
编译指令:
source build/envsetup.sh

lunch full_amt6799_evb_n-eng

mmm vendor/mediatek/proprietary/external/aurisys/sia81xx_sixth
[100% 20/20] build out/target/product/amt6799_evb_n/obj/lib/libsixth.so.toc
make: Leaving directory '/home/ql/MT6799/Share/Materia_MTK/Code/MT6799_Android_Nougat_7.0/MT6799_Android_Nougat_7.0'
算法目录:
/out/target/product/amt6799_evb_n/symbols/system/vendor/lib/libsixth.so
/out/target/product/amt6799_evb_n/symbols/system/vendor/lib64/libsixth.so
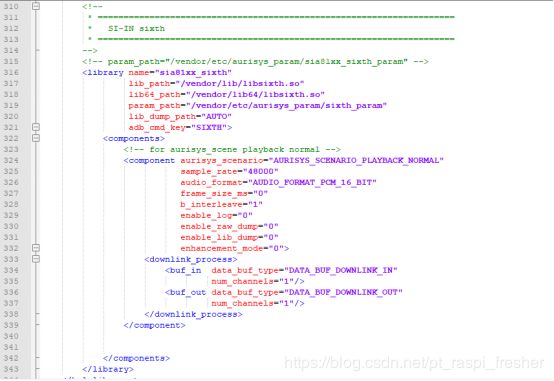
2、修改vendor/mediatek/proprietary/external/aurisys/aurisys_config.xml,添加
##将桌面的aurisys_config.xml文件导入到开发板
adb push C:\Users\DELL\Desktop\aurisys_config.xml /vendor/etc/aurisys_config.xml
3、在device\mediatek\common\devive.mk添加下面内容,复制参数文件到out目录:
PRODUCT_COPY_FILES += vendor/mediatek/proprietary/external/aurisys/sia81xx_sixth/sixth_param.txt:$(TARGET_COPY_OUT_VENDOR)/etc/aurisys_param/sixth_param.txt:mtk
或者 参照aurisys_config.xml里的路径push sixth_param.txt到/vendor/etc/aurisys_param/sixth_param.txt
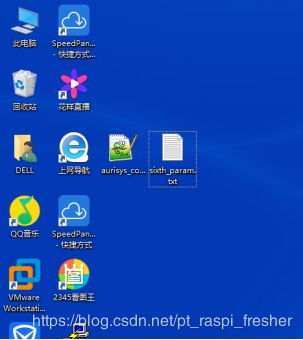
##将桌面的sixth_param.txt文件导入到开发板
adb push sixth_param.txt /vendor/etc/aurisys_param/sixth_param
4.添加tinymix文件
##将桌面的tinymix文件导入到开发板
adb push tinymix /system/bin/
--------------------------------------------------------------------------------------------------------------------
四.将生成的文件烧录
1.将linux里的编译好的文件压缩
tar -zcvf amt6799_evb_n.tar.gz amt6799_evb_n/
2.将压缩文件拷贝到windows
cp amt6799_evb_n.tar.gz /mnt/hgfs/Share/
3.解压后删除没用的文件
PS:已经将没有用的文件夹和部分文件删除
4.将文件通过flash_tool工具烧进开发板
PS:具体操作参照 <


