SSM框架整合与Web开发
文章目录
- 1、综述
- 2、环境搭建
- 2.1 案例需求
- 2.2 数据库搭建
- 2.3 创建Web项目
- 2.4 导入所需jar包
- 2.5 配置Log4j
- 3、配置web.xml
- 4、配置Spring
- 4.1 Spring XML的配置
- 4.2 Spring Java Config的配置
- 5、配置MyBatis
- 5.1 配置MyBatis全局配置文件
- 5.2 配置MyBatis SQL映射文件
- 6、配置Spring MVC
- 7、案例开发
- 7.1 register.jsp前端页面
- 7.2 POJO类
- 7.3 StudentController控制器
- 7.4 StudentService接口
- 7.5 StudentDao接口
- 7.6 welcome.jsp前端页面
- 8、测试运行
1、综述
所谓的SSM框架的整合即对Spring、Spring MVC和MyBatis这三个框架进行整合。由于从Web 3.0开始,使用Java开发Web项目时是可以避免使用和配置web.xml文件的,而是用Java Config的Java代码方式进行配置。
但我在之前的系列博客《Spring使用篇系列博客传送门》中曾讨论过类似的问题,答案是在使用第三方工具时,由于对第三方工具的源码不了解,因此推荐使用XML的配置方式使用,而对自己创建或维护的类,建议使用Java Config的配置方式。
因此在对SSM框架进行整合的过程中,不仅保留了对web.xml的配置,还使用了Java Config配置类,并在web.xml中对Java Config配置类进行了支持。采用这种整合方式的好处就是层次分明,而且更容易使我们理解对SSM的整合。
2、环境搭建
2.1 案例需求
为了使我们更好的理解对SSM的整合,我们在整合框架的过程中开发了一个Demo,该Demo的需求就是通过表单采集用户的姓名和年龄,并将信息添加到数据库的数据表中。
2.2 数据库搭建
创建名为“ssm”的数据库,数据库的字符集设置为UTF-8。在该数据库中创建名为“student”的表,其表的设计具体如下所示:

2.3 创建Web项目
在IDEA中创建名为“SSMConcordanceDemo”的Web Project,并将该项目发布到Tomcat上。该项目的具体项目结构如下所示:

- config包:放置Java Config配置类
- controller包:放置Spring MVC的控制器类
- dao包:放置DAO层接口
- mapper包:放置与DAO层接口相对应的MyBatis SQL映射文件
- pojo包:放置POJO类
- service包:放置Service层接口
- service.impl包:放置对应的Service接口的实现类
- resources包:放置各类配置文件
- lib文件夹:放置素有项目依赖的jar包
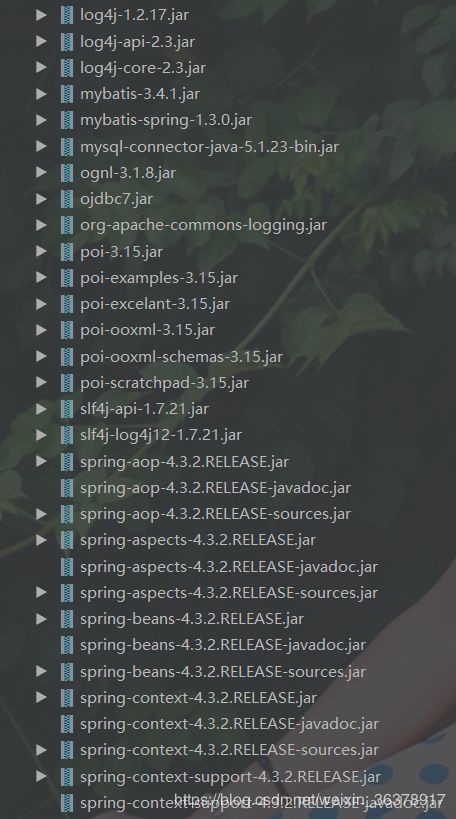
2.4 导入所需jar包
该项目所需的所有jar包全部存放在WEB-INF/lib文件夹中,其所有的jar包与系列博客《Spring使用篇(十)—— Spring与MyBatis整合》中使用的jar包相同,具体如下:


2.5 配置Log4j
在src下创建名为“log4j.properties”属性文件,具体的配置如下:
# Global logging configuration
#\u5728\u5F00\u53D1\u73AF\u5883\u4E0B\u65E5\u5FD7\u7EA7\u522B\u8981\u8BBE\u6210DEBUG\uFF0C\u751F\u4EA7\u73AF\u5883\u8BBE\u4E3AINFO\u6216ERROR
log4j.rootLogger=DEBUG, stdout
# Console output...
log4j.appender.stdout=org.apache.log4j.ConsoleAppender
log4j.appender.stdout.layout=org.apache.log4j.PatternLayout
log4j.appender.stdout.layout.ConversionPattern=%5p [%t] - %m%n
3、配置web.xml
Spring框架和Spring MVC框架均需要在web.xml中进行配置。web.xml的初始内容为空,具体配置如下所示:
<web-app xmlns="http://xmlns.jcp.org/xml/ns/javaee"
         xmlns:xsi="http://www.w3.org/2001/XMLSchema-instance"
         xsi:schemaLocation="http://xmlns.jcp.org/xml/ns/javaee http://xmlns.jcp.org/xml/ns/javaee/web-app_4_0.xsd"
         version="4.0">

web-app>
Spring框架为了能够在应用加载的时候能够获取Spring容器,因此需要在web.xml中注册ServletContext监听器,并且需要在web.xml中指定Spring的Java Config配置类的路径。具体配置如下所示:
<web-app xmlns="http://xmlns.jcp.org/xml/ns/javaee"
         xmlns:xsi="http://www.w3.org/2001/XMLSchema-instance"
         xsi:schemaLocation="http://xmlns.jcp.org/xml/ns/javaee http://xmlns.jcp.org/xml/ns/javaee/web-app_4_0.xsd"
         version="4.0">


    <context-param>
        <param-name>contextClassparam-name>
        <param-value>
            org.springframework.web.context.support.AnnotationConfigWebApplicationContext
        param-value>
    context-param>
    <context-param>
        <param-name>contextConfigLocationparam-name>
        <param-value>com.ccff.ssm.config.ApplicationConfigparam-value>
    context-param>


    <listener>
        <listener-class>org.springframework.web.context.ContextLoaderListenerlistener-class>
    listener>
    <listener>
        <listener-class>org.springframework.web.util.IntrospectorCleanupListenerlistener-class>
    listener>

web-app>
在上面配置context-param中,对于名为“contextConfigLocation”的值“com.ccff.ssm.config.ApplicationConfig”,我们目前还没有创建,我们将在本篇博客的第4小节进行详细说明。
Spring MVC需要在web.xml中注册Spring MVC的中央调度器DispatcherServlet,而Spring同样需要将自己的容器Java Config配置类作为初始化参数配置到DispatcherServlet中。具体配置如下所示:
<web-app xmlns="http://xmlns.jcp.org/xml/ns/javaee"
         xmlns:xsi="http://www.w3.org/2001/XMLSchema-instance"
         xsi:schemaLocation="http://xmlns.jcp.org/xml/ns/javaee http://xmlns.jcp.org/xml/ns/javaee/web-app_4_0.xsd"
         version="4.0">


    <context-param>
        <param-name>contextClassparam-name>
        <param-value>
            org.springframework.web.context.support.AnnotationConfigWebApplicationContext
        param-value>
    context-param>
    <context-param>
        <param-name>contextConfigLocationparam-name>
        <param-value>com.ccff.ssm.config.ApplicationConfigparam-value>
    context-param>


    <listener>
        <listener-class>org.springframework.web.context.ContextLoaderListenerlistener-class>
    listener>
    <listener>
        <listener-class>org.springframework.web.util.IntrospectorCleanupListenerlistener-class>
    listener>


    <servlet>
        <servlet-name>springmvcservlet-name>
        <servlet-class>org.springframework.web.servlet.DispatcherServletservlet-class>
        <init-param>
            <param-name>contextClassparam-name>
            <param-value>
                org.springframework.web.context.support.AnnotationConfigWebApplicationContext
            param-value>
        init-param>
        <init-param>
            <param-name>contextConfigLocationparam-name>
            <param-value>com.ccff.ssm.config.ApplicationConfigparam-value>
        init-param>
        <load-on-startup>1load-on-startup>
    servlet>
    <servlet-mapping>
        <servlet-name>springmvcservlet-name>
        <url-pattern>*.dourl-pattern>
    servlet-mapping>

web-app>
最后,为了避免整个应用出现中文乱码问题,因此需要在web.xml中注册字符编码过滤器。具体配置如下所示:
<web-app xmlns="http://xmlns.jcp.org/xml/ns/javaee"
         xmlns:xsi="http://www.w3.org/2001/XMLSchema-instance"
         xsi:schemaLocation="http://xmlns.jcp.org/xml/ns/javaee http://xmlns.jcp.org/xml/ns/javaee/web-app_4_0.xsd"
         version="4.0">


    <context-param>
        <param-name>contextClassparam-name>
        <param-value>
            org.springframework.web.context.support.AnnotationConfigWebApplicationContext
        param-value>
    context-param>
    <context-param>
        <param-name>contextConfigLocationparam-name>
        <param-value>com.ccff.ssm.config.ApplicationConfigparam-value>
    context-param>


    <listener>
        <listener-class>org.springframework.web.context.ContextLoaderListenerlistener-class>
    listener>
    <listener>
        <listener-class>org.springframework.web.util.IntrospectorCleanupListenerlistener-class>
    listener>


    <servlet>
        <servlet-name>springmvcservlet-name>
        <servlet-class>org.springframework.web.servlet.DispatcherServletservlet-class>
        <init-param>
            <param-name>contextClassparam-name>
            <param-value>
                org.springframework.web.context.support.AnnotationConfigWebApplicationContext
            param-value>
        init-param>
        <init-param>
            <param-name>contextConfigLocationparam-name>
            <param-value>com.ccff.ssm.config.ApplicationConfigparam-value>
        init-param>
        <load-on-startup>1load-on-startup>
    servlet>
    <servlet-mapping>
        <servlet-name>springmvcservlet-name>
        <url-pattern>*.dourl-pattern>
    servlet-mapping>


    <filter>
        <filter-name>CharacterEncodingFilterfilter-name>
        <filter-class>org.springframework.web.filter.CharacterEncodingFilterfilter-class>
        <init-param>
            <param-name>encodingparam-name>
            <param-value>utf-8param-value>
        init-param>
        <init-param>
            <param-name>forceRequestEncodingparam-name>
            <param-value>trueparam-value>
        init-param>
        <init-param>
            <param-name>forceResponseEncodingparam-name>
            <param-value>trueparam-value>
        init-param>
    filter>
    <filter-mapping>
        <filter-name>CharacterEncodingFilterfilter-name>
        <url-pattern>/*url-pattern>
    filter-mapping>

web-app>
以上,就是必须需要在web.xml中进行配置的内容,由于在之前的系列博客中对Spring、Spring MVC和MyBatis框架做了详细的使用说明,因此这里不再赘述这些配置的具体含义,感兴趣可参看如下内容:
- 《Spring使用篇系列博客传送门》.
- 《Spring MVC使用篇系列博客传送门》.
- 《MyBatis使用篇系列博客传送门》.
4、配置Spring
4.1 Spring XML的配置
对于第三方工具的配置,在该整合项目中采用了XML的配置方式。在resources包下创建名为“spring-config.xml”的Spring XML配置文件。
在Spring的配置文件中配置数据源时需要使用连接数据库的四要素,为了减少硬编码带来的不足,这里采用将连接数据库的四要素单独保存在属性文件中,并在Spring配置文件中通过加载属性文件的方式加载使用。因此需要在resources包下创建名为“database-config.properties”的属性文件用于保存连接数据库四要素,具体配置如下所示:
jdbc.database.driver=com.mysql.jdbc.Driver
jdbc.database.url=jdbc:mysql://localhost:3306/chapter12
jdbc.database.username=root
jdbc.database.password=root
初始时,Spring的配置文件仅有约束,内容为空,具体配置如下所示:
<beans xmlns="http://www.springframework.org/schema/beans"
       xmlns:xsi="http://www.w3.org/2001/XMLSchema-instance"
       xmlns:context="http://www.springframework.org/schema/context"
       xmlns:aop="http://www.springframework.org/schema/aop"
       xmlns:tx="http://www.springframework.org/schema/tx"
       xsi:schemaLocation="
        http://www.springframework.org/schema/beans
        http://www.springframework.org/schema/beans/spring-beans.xsd
        http://www.springframework.org/schema/context
        http://www.springframework.org/schema/context/spring-context.xsd
        http://www.springframework.org/schema/tx
        http://www.springframework.org/schema/tx/spring-tx.xsd
        http://www.springframework.org/schema/aop
        http://www.springframework.org/schema/aop/spring-aop.xsd">


beans>
首先,在Spring配置文件中加载属性文件,并配置数据库连接池,具体配置如下所示:
<beans xmlns="http://www.springframework.org/schema/beans"
       xmlns:xsi="http://www.w3.org/2001/XMLSchema-instance"
       xmlns:context="http://www.springframework.org/schema/context"
       xmlns:aop="http://www.springframework.org/schema/aop"
       xmlns:tx="http://www.springframework.org/schema/tx"
       xsi:schemaLocation="
        http://www.springframework.org/schema/beans
        http://www.springframework.org/schema/beans/spring-beans.xsd
        http://www.springframework.org/schema/context
        http://www.springframework.org/schema/context/spring-context.xsd
        http://www.springframework.org/schema/tx
        http://www.springframework.org/schema/tx/spring-tx.xsd
        http://www.springframework.org/schema/aop
        http://www.springframework.org/schema/aop/spring-aop.xsd">


    <context:property-placeholder location="classpath:resources/database-config.properties" ignore-resource-not-found="true" />


    <bean id="dataSource" class="org.apache.commons.dbcp.BasicDataSource">
        <property name="driverClassName" value="${jdbc.database.driver}" />
        <property name="url" value="${jdbc.database.url}" />
        <property name="username" value="${jdbc.database.username}" />
        <property name="password" value="${jdbc.database.password}" />

        <property name="maxActive" value="255" />

        <property name="maxIdle" value="5" />

        <property name="maxWait" value="10000" />
    bean>

beans>
其次,在Spring配置文件中配置Spring的事务管理,具体配置如下所示:
<beans xmlns="http://www.springframework.org/schema/beans"
       xmlns:xsi="http://www.w3.org/2001/XMLSchema-instance"
       xmlns:context="http://www.springframework.org/schema/context"
       xmlns:aop="http://www.springframework.org/schema/aop"
       xmlns:tx="http://www.springframework.org/schema/tx"
       xsi:schemaLocation="
        http://www.springframework.org/schema/beans
        http://www.springframework.org/schema/beans/spring-beans.xsd
        http://www.springframework.org/schema/context
        http://www.springframework.org/schema/context/spring-context.xsd
        http://www.springframework.org/schema/tx
        http://www.springframework.org/schema/tx/spring-tx.xsd
        http://www.springframework.org/schema/aop
        http://www.springframework.org/schema/aop/spring-aop.xsd">


    <context:property-placeholder location="classpath:resources/database-config.properties" ignore-resource-not-found="true" />


    <bean id="dataSource" class="org.apache.commons.dbcp.BasicDataSource">
        <property name="driverClassName" value="${jdbc.database.driver}" />
        <property name="url" value="${jdbc.database.url}" />
        <property name="username" value="${jdbc.database.username}" />
        <property name="password" value="${jdbc.database.password}" />

        <property name="maxActive" value="255" />

        <property name="maxIdle" value="5" />

        <property name="maxWait" value="10000" />
    bean>


    <bean id="transactionManager" class="org.springframework.jdbc.datasource.DataSourceTransactionManager">
        <property name="dataSource" ref="dataSource" />
    bean>

beans>
然后,由于MyBatis框架将SqlSession的管理交由了Spring容器来进行管理,因此需要在Spring的配置文件中配置SqlSessionFactoryBean,具体配置如下所示:
<beans xmlns="http://www.springframework.org/schema/beans"
       xmlns:xsi="http://www.w3.org/2001/XMLSchema-instance"
       xmlns:context="http://www.springframework.org/schema/context"
       xmlns:aop="http://www.springframework.org/schema/aop"
       xmlns:tx="http://www.springframework.org/schema/tx"
       xsi:schemaLocation="
        http://www.springframework.org/schema/beans
        http://www.springframework.org/schema/beans/spring-beans.xsd
        http://www.springframework.org/schema/context
        http://www.springframework.org/schema/context/spring-context.xsd
        http://www.springframework.org/schema/tx
        http://www.springframework.org/schema/tx/spring-tx.xsd
        http://www.springframework.org/schema/aop
        http://www.springframework.org/schema/aop/spring-aop.xsd">


    <context:property-placeholder location="classpath:resources/database-config.properties" ignore-resource-not-found="true" />


    <bean id="dataSource" class="org.apache.commons.dbcp.BasicDataSource">
        <property name="driverClassName" value="${jdbc.database.driver}" />
        <property name="url" value="${jdbc.database.url}" />
        <property name="username" value="${jdbc.database.username}" />
        <property name="password" value="${jdbc.database.password}" />

        <property name="maxActive" value="255" />

        <property name="maxIdle" value="5" />

        <property name="maxWait" value="10000" />
    bean>


    <bean id="transactionManager" class="org.springframework.jdbc.datasource.DataSourceTransactionManager">
        <property name="dataSource" ref="dataSource" />
    bean>


    <bean id="sqlSessionFactory" class="org.mybatis.spring.SqlSessionFactoryBean">
        <property name="dataSource" ref="dataSource" />
        <property name="configLocation" value="classpath:resources/SqlMapConfig.xml" />
    bean>

beans>
最后,为了使得MyBatis框架能够完成接口与映射文件的关联,需要在Spring的配置文件中配置MapperScannerConfigurer,用于扫描MyBatis的SQL映射文件,具体配置如下所示:
<beans xmlns="http://www.springframework.org/schema/beans"
       xmlns:xsi="http://www.w3.org/2001/XMLSchema-instance"
       xmlns:context="http://www.springframework.org/schema/context"
       xmlns:aop="http://www.springframework.org/schema/aop"
       xmlns:tx="http://www.springframework.org/schema/tx"
       xsi:schemaLocation="
        http://www.springframework.org/schema/beans
        http://www.springframework.org/schema/beans/spring-beans.xsd
        http://www.springframework.org/schema/context
        http://www.springframework.org/schema/context/spring-context.xsd
        http://www.springframework.org/schema/tx
        http://www.springframework.org/schema/tx/spring-tx.xsd
        http://www.springframework.org/schema/aop
        http://www.springframework.org/schema/aop/spring-aop.xsd">


    <context:property-placeholder location="classpath:resources/database-config.properties" ignore-resource-not-found="true" />


    <bean id="dataSource" class="org.apache.commons.dbcp.BasicDataSource">
        <property name="driverClassName" value="${jdbc.database.driver}" />
        <property name="url" value="${jdbc.database.url}" />
        <property name="username" value="${jdbc.database.username}" />
        <property name="password" value="${jdbc.database.password}" />

        <property name="maxActive" value="255" />

        <property name="maxIdle" value="5" />

        <property name="maxWait" value="10000" />
    bean>


    <bean id="transactionManager" class="org.springframework.jdbc.datasource.DataSourceTransactionManager">
        <property name="dataSource" ref="dataSource" />
    bean>


    <bean id="sqlSessionFactory" class="org.mybatis.spring.SqlSessionFactoryBean">
        <property name="dataSource" ref="dataSource" />
        <property name="configLocation" value="classpath:resources/SqlMapConfig.xml" />
    bean>


    <bean class="org.mybatis.spring.mapper.MapperScannerConfigurer">
        <property name="basePackage" value="com.ccff.ssm.dao" />
        <property name="sqlSessionFactoryBeanName" value="sqlSessionFactory" />

        <property name="annotationClass" value="org.springframework.stereotype.Repository" />
    bean>

beans>
至此,Spring的XML配置文件已经配置完成。
4.2 Spring Java Config的配置
在配置完Spring的XML配置文件后,需要再配置Spring的Java Config配置类,完成对XML文件的加载以及自定义类的管理。由于在第3小节配置web.xml在加载Java Config配置类参数时对参数名为“contextConfigLocation”的值为“com.ccff.ssm.config.ApplicationConfig”。该类我们之前并没有创建,因此在config包下创建名为“ApplicationConfig”的Java Config配置类,具体配置如下所示:
package com.ccff.ssm.config;

import org.springframework.context.annotation.ComponentScan;
import org.springframework.context.annotation.Configuration;
import org.springframework.context.annotation.ImportResource;
import org.springframework.transaction.annotation.EnableTransactionManagement;

@Configuration
@ComponentScan(basePackages = {"com.ccff.ssm.*"})
@ImportResource({"classpath:resources/spring-config.xml","classpath:resources/spring-mvc.xml"})
@EnableTransactionManagement
public class ApplicationConfig {
}
在该Java Config配置类中,配置了组件扫描的包名,加载了Spring与Spring MVC的配置文件,并开启了使用注解@Transactional进行Spring的事务管理。这里需要注意的是,由于Spring和Spring MVC的配置文件均是以“spring-*.xml”的方式进行命名的,因此在加载XML文件时也选择使用了通配符的方式进行加载。而Spring MVC的spring-mvc.xml的配置文件的配置将在第6小节进行详细介绍。
5、配置MyBatis
5.1 配置MyBatis全局配置文件
在resources包下创建名为SqlMapConfig.xml,该文件为MyBatis全局配置文件,具体配置如下所示:
<configuration>
    <settings>

        <setting name="cacheEnabled" value="true" />

        <setting name="useGeneratedKeys" value="true" />

        <setting name="defaultExecutorType" value="REUSE" />

        <setting name="lazyLoadingEnabled" value="true"/>

        <setting name="defaultStatementTimeout" value="25000"/>
    settings>

    <typeAliases>

        <package name="com.ccff.ssm.pojo" />
    typeAliases>


    <mappers>
        <mapper resource="com/ccff/ssm/mapper/StudentDao.xml" />
    mappers>
configuration>
从上面的配置中可以看出,在MyBatis全局配置文件中,除配置了MyBatis框架的相关设置外,还使用package的形式配置了别名(以com.ccff.ssm.pojo包下的简单类名作为别名)。此外还指定了MyBatis的SQL映射文件为StudentDao.xml文件,该文件的配置将在5.2小节进行详细介绍。
5.2 配置MyBatis SQL映射文件
在mapper包下创建名为“StudentDao.xml”的SQL映射文件,在该映射文件中设置了id名为“insert”的插入方法,操作了student数据表。同时,为该映射文件指定了命名空间为dao包下的名为“StudentDao”的接口文件,而关于StudentDao接口文件的编写将在第7小节详细介绍。具体配置如下所示:
<mapper namespace="com.ccff.ssm.dao.StudentDao">

    <insert id="insert" parameterType="Student">
        insert into student(name, age) values (#{name}, #{age})
        <selectKey resultType="Integer" keyProperty="id" order="AFTER">
            select @@identity
        selectKey>
    insert>

mapper>
6、配置Spring MVC
在resources包下创建名为“spring-mvc.xml”的配置文件用于配置Spring MVC的相关配置,在该配置文件中配置基于注解的处理器适配器与处理器映射器,并配置了视图解析器和对静态资源解析进行了相关配置。具体配置如下所示:
<beans xmlns="http://www.springframework.org/schema/beans"
       xmlns:xsi="http://www.w3.org/2001/XMLSchema-instance" xmlns:mvc="http://www.springframework.org/schema/mvc"
       xmlns:context="http://www.springframework.org/schema/context"
       xmlns:aop="http://www.springframework.org/schema/aop" xmlns:tx="http://www.springframework.org/schema/tx"
       xsi:schemaLocation="http://www.springframework.org/schema/beans
		http://www.springframework.org/schema/beans/spring-beans-3.2.xsd
		http://www.springframework.org/schema/mvc
		http://www.springframework.org/schema/mvc/spring-mvc-3.2.xsd
		http://www.springframework.org/schema/context
		http://www.springframework.org/schema/context/spring-context-3.2.xsd
		http://www.springframework.org/schema/aop
		http://www.springframework.org/schema/aop/spring-aop-3.2.xsd
		http://www.springframework.org/schema/tx
		http://www.springframework.org/schema/tx/spring-tx-3.2.xsd ">


    <mvc:annotation-driven />


    <context:component-scan base-package="com.ccff.ssm.controller"/>


    <bean class="org.springframework.web.servlet.view.InternalResourceViewResolver">

        <property name="suffix" value=".jsp"/>
    bean>


    <mvc:default-servlet-handler />

beans>
7、案例开发
7.1 register.jsp前端页面
在web文件夹下创建名为“register.jsp”的前端页面,在该页面中设置了一个表单,该表单将通过POST方式提交到“/student/register.do”进行处理。具体代码如下所示:
<%@ page language="java" import="java.util.*" pageEncoding="utf-8"%>


<html>
  <head>
    <title>My JSP 'index.jsp' starting pagetitle>
  head>

  <body>
    <form action="${pageContext.request.contextPath }/student/register.do" method="POST">
    	姓名:<input type="text" name="name"/><br>
    	年龄:<input type="text" name="age"/><br>
    	<input type="submit" value="注册"/>
    form>
  body>
html>
7.2 POJO类
在pojo包下创建名为“Student”的POJO类,具体代码如下所示:
package com.ccff.ssm.pojo;

import org.springframework.stereotype.Component;

@Component
public class Student {
    private Integer id;
    private String name;
    private Integer age;

    public Student() {
    }

    public Student(String name, Integer age) {
        this.name = name;
        this.age = age;
    }

    public Integer getId() {
        return id;
    }

    public void setId(Integer id) {
        this.id = id;
    }

    public String getName() {
        return name;
    }

    public void setName(String name) {
        this.name = name;
    }

    public Integer getAge() {
        return age;
    }

    public void setAge(Integer age) {
        this.age = age;
    }

    @Override
    public String toString() {
        return "Student{" +
                "id=" + id +
                ", name='" + name + '\'' +
                ", age=" + age +
                '}';
    }
}
7.3 StudentController控制器
在controller包中创建名为“StudentController”的控制器类,在该控制器类中添加组件注解@Component,添加控制器注解@Controller,并根据register.jsp前端页面表单中的提交路径添加URL映射注解@RequestMapping("/student"),具体代码如下所示:
@Component("studentController")
@Controller
@RequestMapping("/student")
public class StudentController {

    @Autowired
    private StudentService studentService = null;

    @RequestMapping("/register.do")
    public String register(Model model, Student student){
        studentService.insertStudent(student);
        model.addAttribute("student",student);
        return "/welcome";
    }

}
在上面的代码中,创建了register方法,并且通过注解@Autowired自动将StudentService类的对象进行注入。
7.4 StudentService接口
根据7.3小节中的StudentService对象,在service包下创建名为“StudentService”的接口,并在该接口中添加名为“insertStudent”的方法,具体代码如下所示:
package com.ccff.ssm.service;

import com.ccff.ssm.pojo.Student;

public interface StudentService {
    public int insertStudent(Student student);
}
然后,在service.impl包下创建名为“StudentServiceImpl”的接口实现类,具体代码如下所示:
package com.ccff.ssm.service.impl;

import com.ccff.ssm.dao.StudentDao;
import com.ccff.ssm.pojo.Student;
import com.ccff.ssm.service.StudentService;
import org.springframework.beans.factory.annotation.Autowired;
import org.springframework.stereotype.Service;
import org.springframework.transaction.annotation.Transactional;

@Service("studnetService")
public class StudentServiceImpl implements StudentService {

    @Autowired
    private StudentDao studentDao = null;

    @Override
    @Transactional
    public int insertStudent(Student student) {
        return studentDao.insert(student);
    }
}
在上面的代码中,对接口中的insertStudent方法进行了实现,并为该方法添加了切入点的事务注解@Transactional,并通过注解@Autowired将StudentDao自动注入。
7.5 StudentDao接口
在dao包下创建名为“StudentDao”的接口,并在该接口中创建名为“insert”的方法,具体代码如下所示:
package com.ccff.ssm.dao;

import com.ccff.ssm.pojo.Student;
import org.springframework.stereotype.Repository;

@Repository
public interface StudentDao {
    public int insert(Student student);
}
这里需要注意的是:第一,在该接口中的insert方法需要和在之前配置MyBatis SQL映射文件StudentDao.xml中的id为insert的insert标签配置一致。第二,该接口是不需要实现类的,因为通过在MyBatis的全局配置文件中进行的配置可以使得MyBatis框架能够生产代理完成自动映射。
7.6 welcome.jsp前端页面
在web文件夹下创建名为welcome.jsp的前端页面,在该页面中通过student模型回显插入到数据库中的数据,具体代码如下所示:
<%--
  Created by IntelliJ IDEA.
  User: xiaobaixiaoda
  Date: 2019/5/5
  Time: 8:44
  To change this template use File | Settings | File Templates.
--%>
<%@ page contentType="text/html;charset=UTF-8" language="java" %>
<html>
  <head>
    <title>$Title$title>
  head>
  <body>
  <h1>Welcome!h1>
  【用户ID】${student.id} <br>
  【用户名】${student.getName()} <br>
  【用户年龄】${student.getAge()}
  body>
html>
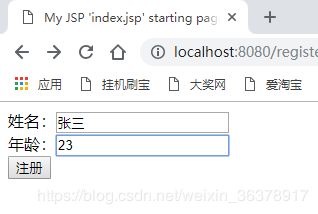
8、测试运行
将整体项目部署到Tomcat上后部署运行,在浏览器内输入如下URL:http://localhost:8080/register.jsp,页面如下所示:

在表单中输入姓名与年龄如下:
当点击注册后,表单将数据提交到/student/register.do进线处理,而在StudentController中通过注解@RequestMapping的配置使得register方法能够拦截到该请求并进行相应的处理。
表单请求提交给StudentController控制器类中的register方法后,调用StudentService,StudentService再调用StudentDao,StudentDao通过MyBatis框架的自动映射找到SQL映射文件StudentDao.xml,完成数据库操作,并最终将student对象通过Model对象返回给welcome.jsp页面进行回显,具体结果如下:

查看数据库中是student数据表(这里需要注意的是,由于主键id是自动递增的,之前有过数据插入的测试,因此id不是1),得到结果如下:

至此,Spring、Spring MVC与MyBatis这三个框架的整合与进行Web开发实例已经全部介绍完成。本篇博客的案例代码已经全部上传在本人的GitHub仓库中: SSMConcordanceDemo.