ARCore快速入门--添加ARCore并检测设备是否安装或支持
在开始写真正的ARCOre API之前,我们需要先在工程中添加对ARCore的支持,并且还要检查一下当前设备是否支持ARCore操作。主要是以下几项修改:
清单文件
在谷歌官方对ARCore的介绍中,提到了有两种类型的ARCore App
AR Required  强制性AR应用
AR Optional  选择性AR应用
所谓强制性AR应用,就是如果设备上没有安装 AR, 那么你的应用是无法运行的。Play Store会确保你的App只能在支持AR的设备上运行,具体可以查看Publish AR Apps in the Play Store 。
要声明一个强制性AR应用,可以在清单文件中添加如下代码:
"{24 or higher}" />

  ...
  "android.hardware.camera.ar" android:required="true" />


    ...
        "com.google.ar.core" android:value="required" />
... 所谓选择性AR应用,就是你的App中包含了一个或多个被激活的AR特性。这种App可以被安装在一个不支持AR的设备上(也就是没有安装ARCore的设备). 要声明一个选择性AR应用,可以在清单文件中添加如下代码:
"{14 or higher}" />
  ...


    ...
        "com.google.ar.core" android:value="optional" />
    ...
添加依赖
使项目支持ARCore支持,在Android Studio中可以很简单的执行以下几步即可:
1 在project的build.gradle文件中添加Google Maven库,如下
allprojects {
repositories {
    google()
        ...
2 在app下的build.gradle中添加如下依赖:
dependencies {
    // ARCore library
    implementation 'com.google.ar:core:1.2.0'
}
3 (可选项) 添加SceneForm库的依赖支持
// Sceneform libraries use language constructs from Java 8.
// Add these compile options if targeting a min API level less than 26.
android {
    compileOptions {
        sourceCompatibility 1.8
        targetCompatibility 1.8
    }
}

dependencies {
    implementation "com.google.ar.sceneform:core:1.0.0"
    implementation "com.google.ar.sceneform.ux:sceneform-ux:1.0.0"
}至于SceneForm是什么,后续会单独用一篇文章来讲解
运行时检测
对于强制性AR应用,Google Play Store可以帮助我们只在Support List的设备上运行。但是对于选择性AR应用 就需要我们自己在代码中手动检测了。
1 检查设备是否支持ARCore
在代码中,可以使用 ArCoreApk.checkAvailability() 来检测当前设备是否支持AR特性。如果返回的是 false 则需要禁止掉AR相关的功能并隐藏相关UI. 具体可以参照如下代码:
void maybeEnableArButton() {
  // Likely called from Activity.onCreate() of an activity with AR buttons.
  ArCoreApk.Availability availability = ArCoreApk.getInstance().checkAvailability(this);
  if (availability.isTransient()) {
    // re-query at 5Hz while we check compatibility.
    new Handler().postDelayed(new Runnable() {
      @Override
      public void run() {
        maybeEnableArButton();
      }
    }, 200);
  }
  if (availability.isSupported()) {
    mArButton.setVisibility(View.VISIBLE);
    mArButton.setEnabled(true);
    // indicator on the button.
  } else { // unsupported or unknown
    mArButton.setVisibility(View.INVISIBLE);
    mArButton.setEnabled(false);
  }
}2 检测ARCore是否已经安装
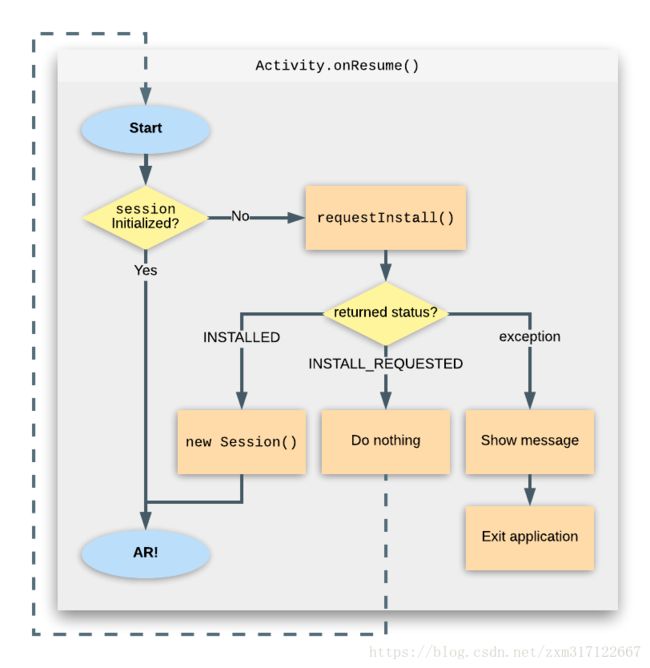
在确认了当前设备在Support List范围之内,接下来就需要确保当前设备上已经安装ARCore了。具体可以使用 ArCoreApk.requestInstall() 来查看ARCore是否已经被安装. 具体可以参考以下代码:
// Set to true ensures requestInstall() triggers installation if necessary.
private boolean mUserRequestedInstall = true;

// in onResume:
try {
  if (mSession == null) {
    switch (ArCoreApk.getInstance().requestInstall(this, mUserRequestedInstall)) {
      case INSTALLED:
        mSession = new Session(this);
        // Success.
        break;
      case INSTALL_REQUESTED:
        // Ensures next invocation of requestInstall() will either return
        // INSTALLED or throw an exception.
        mUserRequestedInstall = false;
        return;
    }
  }
} catch (UnavailableUserDeclinedInstallationException e) {
  // Display an appropriate message to the user and return gracefully.
  return;
} catch (...) {  // current catch statements
  ...
  return;  // mSession is still null
}If returns INSTALL_REQUESTED, the current activity pauses and the user is prompted to install or update ARCore. The activity’s onResume() executes again when the user returns to the activity.
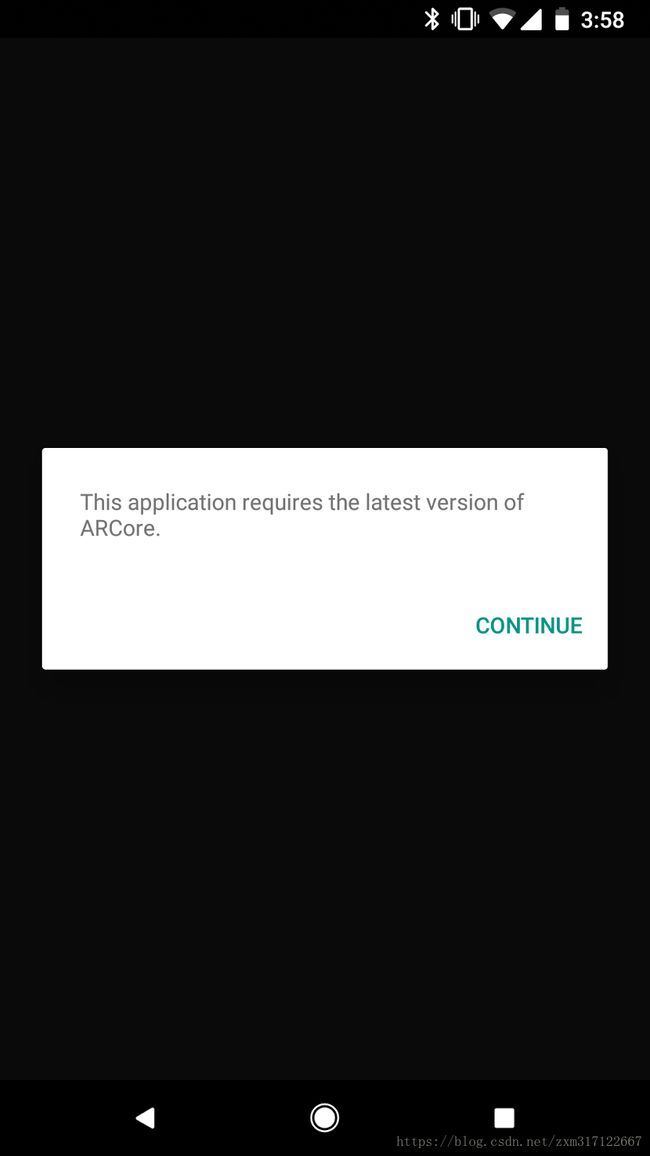
如果 requestInstall() 返回的是 INSTALL_REQUESTED, 那么当前Activity会暂停,并且弹出 ARCore 更新的弹出框

更新完毕重新进入到Activity之后,会继续从 onResume 方法开始执行。接下来就可以书写真正的 ARCore API 的代码了

