微服务是目前系统开发的一种主流技术架构,而Spring Cloud框架是其中的一种解决方案。本文主要从微服务的基本概念,到Spring Cloud框架包括各个基础组件使用进行一个简单介绍。
什么是微服务?
传统的Web应用都是基于单体结构构建的,在单体架构中,所有的UI (用户接口) 、业务、数据库访问逻辑都被打包在一个应用程序中并且部署在一个应用程序服务器上。随着系统业务发展,应用也随之变得越来越复杂,各种业务逻辑杂糅在一起,耦合度太高,不易扩展和维护。
为了解决这些问题,微服务也就应运而生。微服务允许将一个大型的应用分解为具有严格职责定义的便于管理的服务。每个服务具有特定的功能,减少系统耦合度。
另外微服务的诞生与当前互联网产品业务快速发展、频繁变化以及互联网公司的组织架构特点也不无关系。
微服务的理论基础和核心概念其实在很早之前就有人提出来过。其中比较重要的一个就是康威定律。
Melvin Conway 在1968年发表的论文《 How Do Committees Invent》中最著名的一句话原文是:
Organizations which design systems are constrained to produce designs which are copies of the communication structures of these organizations. - Melvin Conway(1967)
系统的架构受制于产生这些设计的组织的沟通成本。即组织结构决定系统设计。
再联想到苹果、谷歌、微软以及国内的BAT的一些产品设计特点,与他们的组织管理方式确实有很大的关系。
微服务架构的优势和缺点
微服务架构优势:
- 服务独立部署,职责专一。每个服务都是一个单独的项目模块,可独立部署,耦合度低。
- 适合敏捷开发。随着业务发展变化和开发团队人员增多,将系统拆分成不同服务,每个开发人员负责专门的服务,有利于产品的快速迭代部署。
- 动态按需扩展。由于每个人服务可不依赖其他服务独立部署,业务扩展时,可直接增加新的服务独立部署。
- 可用复用性高。每个服务提供REST风格的接口服务,服务之间可重用相同的基础接口服务。
微服务架构缺点:
- 分布式部署,增加系统复杂性。每个模块独立部署,通过HTTP进行通信,会产生很多网络问题、容错问题。
- 数据一致性问题,使用多个数据源需要考虑分布式事务处理。
- 测试运维难度提升。随着服务的增加修改,服务之间的调用改变,对服务的测试、监控都都变得更加复杂。
一个小型的、简单的和解耦的服务=可伸缩的、有弹性的和灵活的应用程序。
使用微服务应该结合具体的应用场景,不能为了使用而使用。因为微服务是分布式和细粒度的,它在应用程序之间引入了复杂性,如果是正在构建小型的、部门级的应用程序或具有较小用户群的应用程序,构建分布式系统的代价与构建成功获得的自动化和运维收益相比较高,那就不要考虑使用微服务。同时在使用时应该正确的划分微服务大小,避免每个服务承担太多职责。如何控制每个服务的粒度也是一个很重要的问题。不止需要进行业务逻辑的分离,还需要考虑服务的运行环境、服务之间的通信交互、服务的可伸缩性和弹性等问题。
Spring Cloud介绍
Spring Cloud是基于Spring Boot并集成一系列组件的框架集合。通过将注册中心、负载均衡、熔断器、路网网关、配置中心等微服务需要的基础设施封装配置成starter,提供给开发人员进行快速集成开发部署。下面通过介绍一些常用的组件来对整个Spring Cloud框架的构建有一个简单的了解。
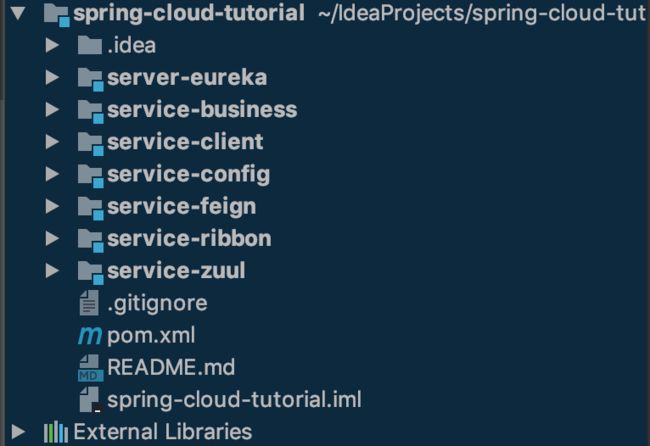
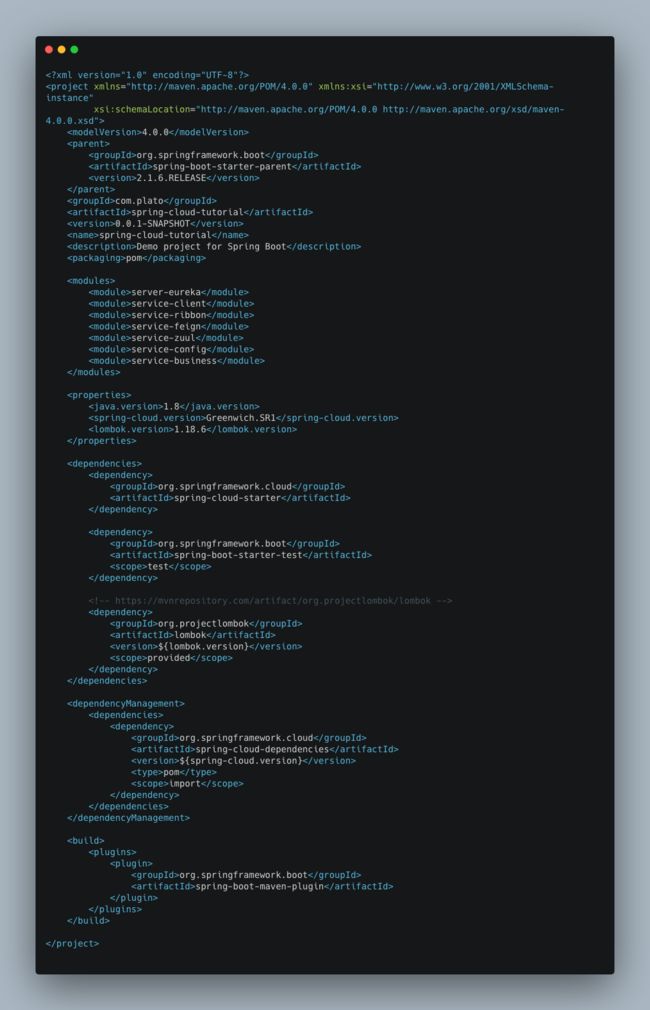
首先创建一个基于Maven的多模块项目spring-cloud-tutorial,项目结构和父pom.xml配置如下:
Eureka——服务注册中心
为管理各个服务,需要通过一个服务注册中心来治理服务提供者和服务消费者之间的调用。打个比方,服务提供者就比如淘宝上面不同的卖家,服务消费者就是不同的买家。这些买家和卖家的关系是复杂的,都需要在淘宝平台上先进行注册登记,才能通过淘宝平台(注册中心)进行通信。
除了Neflix提供的Eureka外,还有Consul、Zookeeper等可作为服务的注册中心。在分布式系统有一个著名的CAP定理,C(Consistency)为数据一致性,A(Availability)为服务可用性,P(Partition tolerance)为网络分区容错性,根据定理,分布式系统只能满足三项中的两项而不可能满足全部三项。Eureka是基于AP原则构建的,Zookeeper是基于CP原则构建的。Dubbo中大部分是使用Zookeeper作为服务注册中心,而Spring Cloud中主要是基于Eureka。
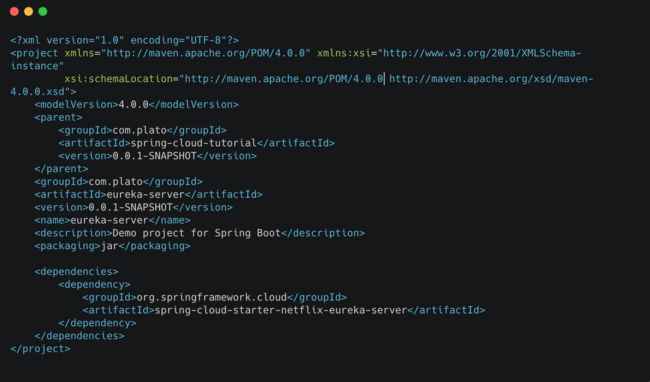
在项目中创建一个server-eureka模块,模块pom.xml配置如下:
主要是依赖一个Netflix提供的eureka-server starter。
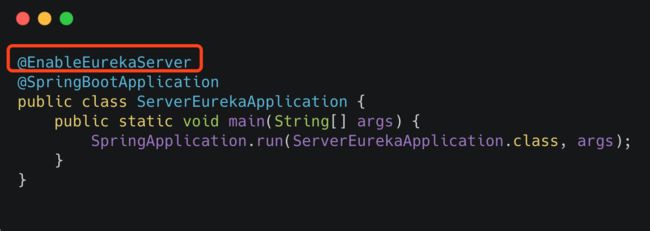
启动类配置如下:
增加一个@EnableEurekaServer注解表示开启Eureka功能。
配置文件如下:
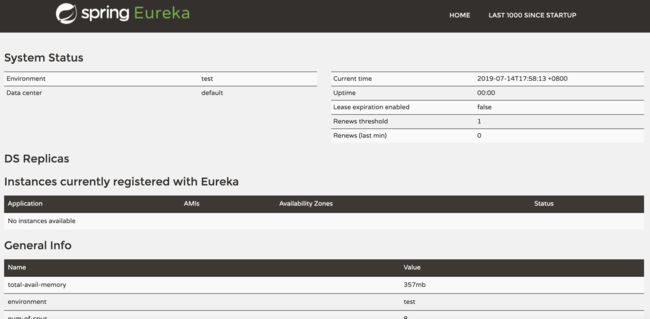
启动服务后,通过http://localhost:8761进行访问,就能够看到Eureka提供的可视化管理控制台:
在这个上面可以查看注册的一些服务实例,由于目前还没有服务注册,所以为空。
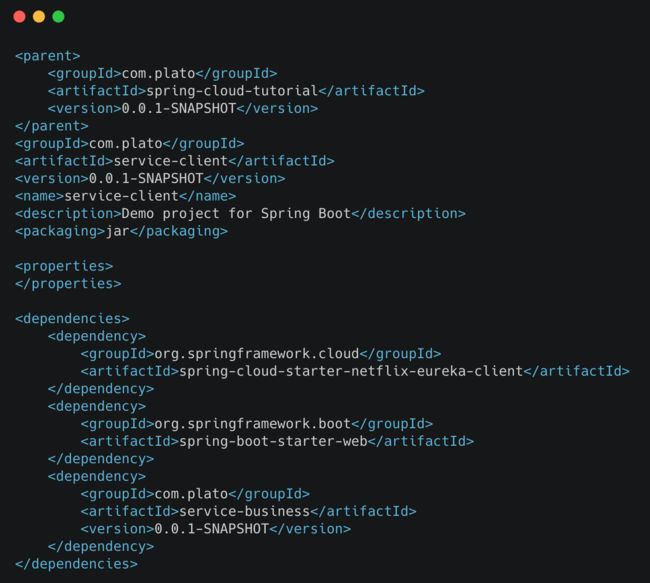
接下来创建一个service-client模块,作为客户端服务。配置如下:
主要加入netFlix-eureaka-client starter依赖。
其中另外一个service-business是一个封装的底层业务模块,会被多个其他模块引用。
service-business模块主要创建了一个Employee员工实体类,其他配置就不再一一列出。
@Data
public class Employee {
    private String empId;
    private String name;
    private String designation;
    private Sex sex;
    private LocalDate birthday;
    private double salary;
}

public enum Sex {
    MALE("0"),
    FEMALE("1");

    private String code;

    Sex(String code) {
        this.code = code;
    }

    public String getCode(){
        return code;
    }
}service-client模块的启动类,加上@EnableEurekaClient注解开启客户端功能。
配置文件中指定注册中心的地址。
在service-client启动后,访问http://localhost:8761就能看到该服务信息。
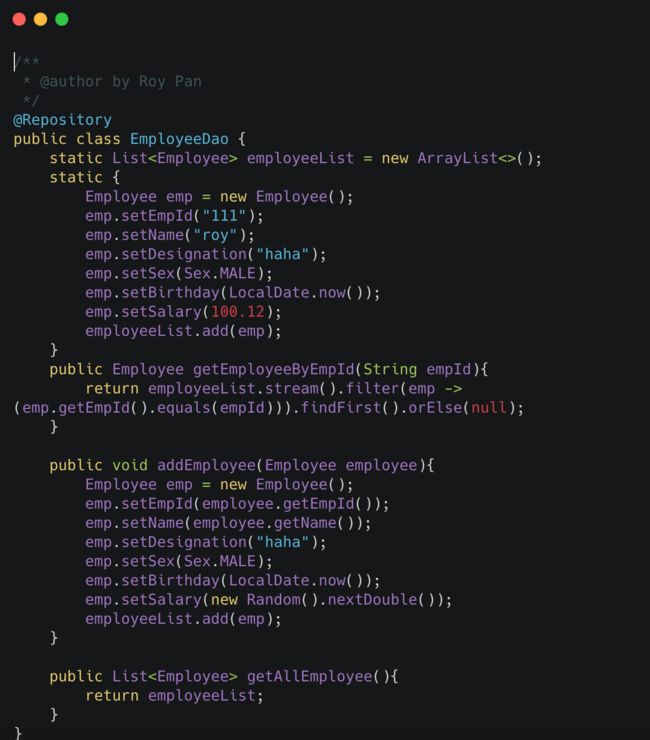
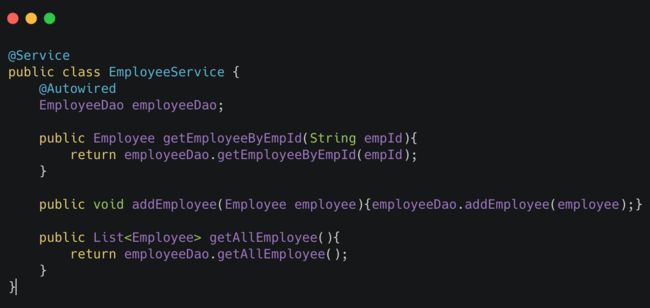
另外在controller、service、dao三层分别新增员工、根据工号查询员工、查询全部员工列表的相关方法。
为简单起见,没有使用数据库存储,直接将数据存在内存当中,其中dao层如下:
service层如下:
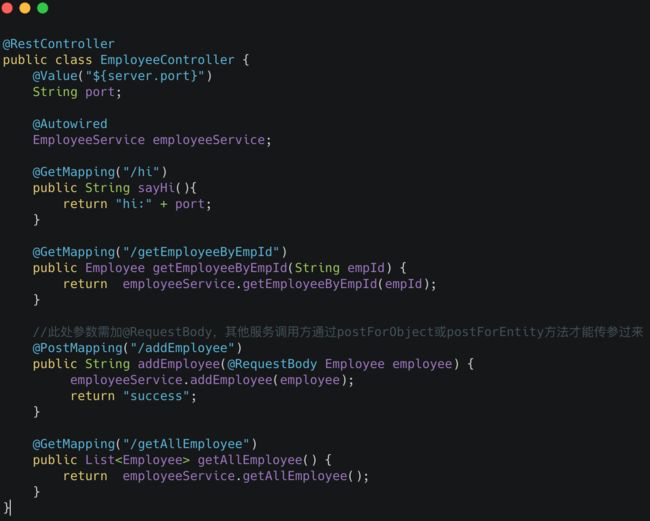
controller层如下:
代码都很逻辑都很简单,就不再进行说明。
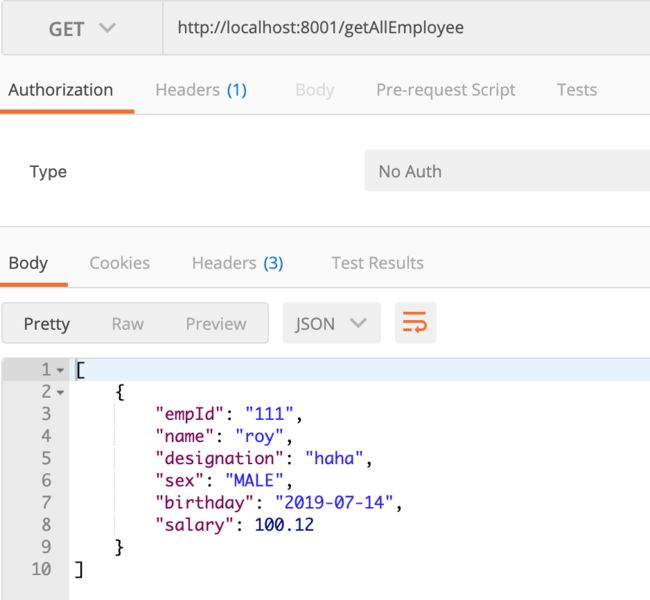
访问http://localhost:8001/getAllEmployee可看到员工信息列表:
Ribbon——客户端负载均衡
Ribbon是Netflix开源的一款用于客户端负载均衡的工具。目前负载均衡主要有两种方法:
- 集中式负载均衡。在服务端和消费者中间使用独立的代理方式进行负载。又分为硬件(例如F5)方式和软件(例如Ngnix)两种。
- 客户端负载均衡。客户端根据自己的请求情况做负载。
接下来我们使用Ribbon来实现一个最简单的负载均衡调用功能。
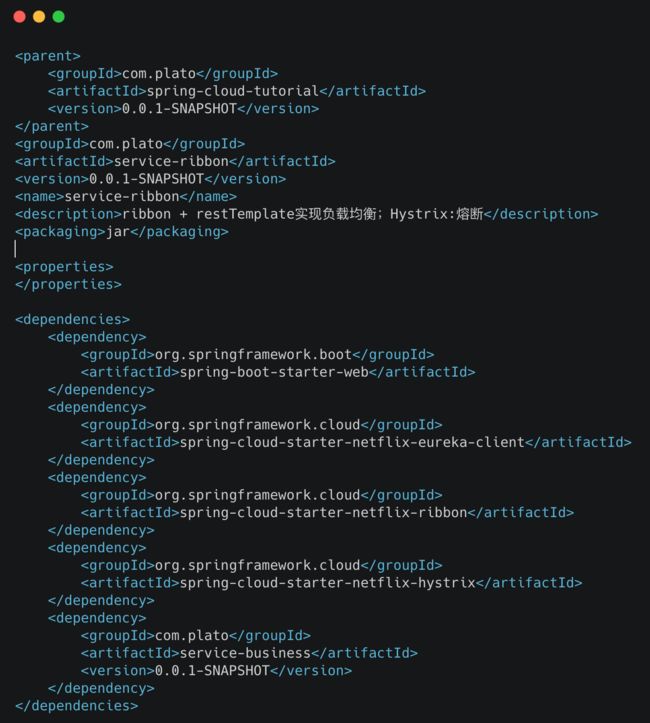
创建一个service-ribbon模块,其中Maven配置如下:
application.properties配置:
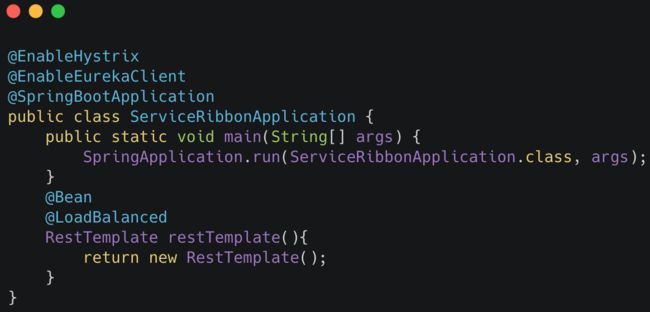
启动类SerivceRibbonApplication加上@EnableEurekaClient注解,并注入RestTemplate进行http请求,添加 @LoadBalanced 注解,表明这个 restTemplate 开启负载均衡功能
新建一个service层调用service-client的接口如下,并新建一个controller调用service。
之前已经启动了一个8001端口的service-client实例,修改application.properties里面的端口为8002,再启动一个新的客户端。在IDEA中修改启动配置项,去掉Signle instance only勾选一个模块即可重复创建实例。
ServiceRibbonApplication也启动后,我们在Eureka的控制台上面就可以看到三个注册服务:
多次访问http://localhost:8100/hi,就会交替输出 hi:8001和 hi:8002,说明实现了负载均衡。
Feign——声明式REST客户端
Spring Cloud 有两种调用服务的方式,一种是 ribbon + restTemplate,另外一种是使用声明式REST客户端 feign进行接口调用。在一般的Java项目中我们通常可以使用HttpClient、HttpUrlConnection、Okhttp、RestTemplate这几种主要方式进行 HTTP 请求。Feign通过编写简单的接口和插入注解,就会完全代理HTTP请求。Feign默认使用JDK自带的HttpURLConnetion进行HTTP请求,也可以替换成HttpClient、OkHttp等其他方式。
新建service-feign模块,Maven配置加入open feign依赖。
    org.springframework.cloud
    spring-cloud-starter-openfeign
ServiceFeignApplication加上@EnableFeignClients开启feign功能。
新建一个IEmployeeService接口。
@FeignClient(value = "service-client")
public interface IEmployeeService {
    @GetMapping("/hi")
    String sayHi();

    @GetMapping("/getEmployeeByEmpId")
    Employee getEmployeeByEmpId(String empId);

    @PostMapping("/addEmployee")
    String addEmployee(Employee employee);

    @GetMapping("/getAllEmployee")
    List getAllEmployee();
}
新建controller调用该接口方法:
@RestController
public class EmployeeController {

    @Autowired
    IEmployeeService employeeService;
    @GetMapping("/hi")
    public String hi(){
        return employeeService.sayHi();
    }
    @GetMapping("/getEmployeeByEmpId")
    public Employee getEmployeeByEmpId(String empId){
        return employeeService.getEmployeeByEmpId(empId);
    }

    @PostMapping("/addEmployee")
    public String addEmployee(Employee employee){
        return employeeService.addEmployee(employee);
    }

    @GetMapping("/getAllEmployee")
    public List getAllEmployee(){
        return employeeService.getAllEmployee();
    }
}
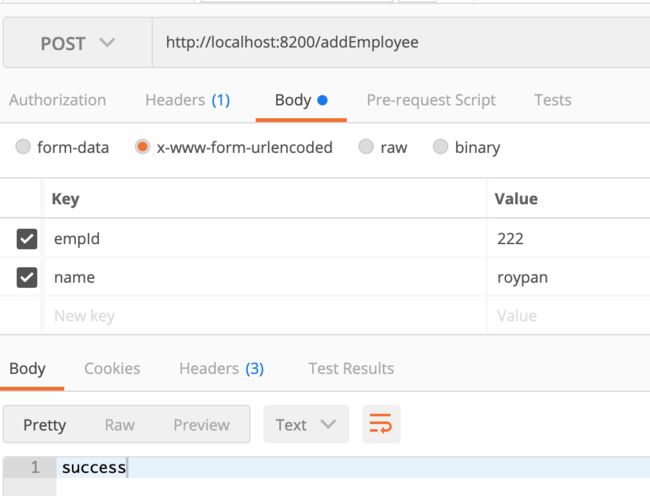
启动 service-feign,端口8200。多次访问http://locahost:8200/hi,交替出现hi:8001和 hi:8002,说明实现了负载均衡。访问http://locahost:8200/addEmployee,添加参数并发送一个post请求.
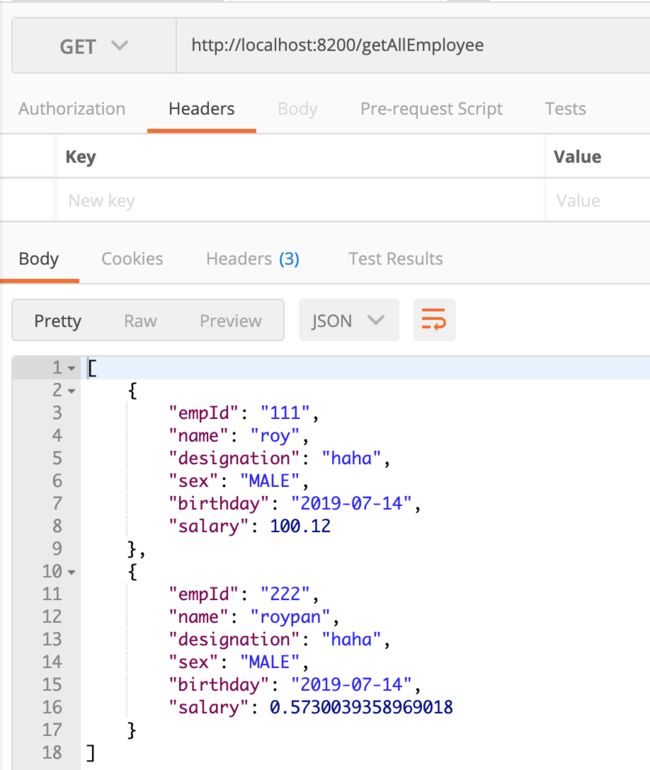
在调用getAllEmployee方法,可看到刚才的请求成功了。
Hystrix——服务容错机制
Ribbon + Hysteria
我们上面已经创建了一个server-eureka、两个service-client、一个service-ribbon、一个service-feign几个服务实例,这些服务之间使用的是链式调用,链式调用中当其中一个服务挂了,其他的服务就会出现问题。Spring Cloud中可以采用Hystrix断路器进行服务容错处理,当一个服务的调用失败次数到达一定阈值,断路器会打开,执行服务调用失败时的处理,避免连锁故障。Hystrix可通过HystrixCommand对调用进行隔离,阻止故障的连锁效应,接口调用失败可迅速恢复正常后在回退并优雅降级。
Hystrix主要是结合在ribbon或者feign中使用。
首先在service-ribbon中加入依赖
    org.springframework.cloud
    spring-cloud-starter-netflix-hystrix
在启动类 ServiceRibbonApplication 加 @EnableHystrix ,启动Hystrix。
修改EmployeeService,在callHi方法上面添加 @HystrixCommand 注解,fallbackMethod 是熔断方法,当服务不可用时会执行该方法。
@Service
public class EmployeeService {
    @Autowired
    RestTemplate restTemplate;

    @HystrixCommand(fallbackMethod = "error")
    public String callHi(){
        return restTemplate.getForObject("http://service-client/hi",String.class);
    }

    public String error(){
        return "sorry,something is wrong!";
    }

    public Employee callGetEmployeeByEmpId(String empId){
        return restTemplate.getForObject("http://service-client/getEmployeeByEmpId?empId=" + empId,Employee.class);
    }

    public String callAddEmployee(Employee employee){
        return restTemplate.postForObject("http://service-client/addEmployee",employee,String.class);
    }

    public String callAddEmployee2(Employee employee){
        return restTemplate.postForEntity("http://service-client/addEmployee",employee,String.class).getBody();
    }

    public List callGetAllEmployee(){
        return restTemplate.getForObject("http://service-client/getAllEmployee",List.class);
    }
}
关闭两个service-client服务,重启service-ribbon服务,访问http://localhost:8100/hi,由于调用不到service-client的hi接口,服务不可用,断路器会迅速执行熔断方法,输出”sorry,something is wrong!“。
Feign + Hystrix
Feign自动包含了Hystrix依赖,不需要修改Maven配置。但需要在配置文件中开启该功能:
feign.hystrix.enabled=true新建一个EmployeeServiceHystrixImpl类,实现IEmployeeService接口。
@Component
public class EmployeeServiceHystrixImpl implements IEmployeeService {

    @Override
    public String sayHi() {
        return "sorry,505";
    }
    @Override
    public Employee getEmployeeByEmpId(String empId) {
        return null;
    }

    @Override
    public String addEmployee(Employee employee) {
        return "sorry,505";
    }

    @Override
    public List getAllEmployee() {
        return null;
    }
}
关闭service-client服务实例,重启service-feign并访问http://localhost:8200/hi, 显示"sorry,505"说明熔断成功。
Zuul——API路由网关
随着业务的发展,服务的增多,可通过API路由聚合内部服务,提供统一对外的API接口给前端进行调用,屏蔽内部实现细节。其中Zuul是一种基于JVM路由和服务端的负载均衡器,其核心是过滤器。使用Zuul可实现动态路由、请求监控、认证鉴权、压力测试、灰度发布等功能。
新建一个service-zuul模块,Maven配置加入zuul依赖
   org.springframework.cloud
   spring-cloud-starter-netflix-zuul
ServiceZuulApplication加入@EnableZuulProxy注解开启Zuul代理
server.port=8300
spring.application.name=service.zuul
eureka.client.service-url.defaultZone=http://localhost:8761/eureka/

zuul.routes.api-a.path=/api-a/**
zuul.routes.api-a.serviceId=service-ribbon
zuul.routes.api-b.path=/api-b/**
zuul.routes.api-b.serviceId=service-feign
配置文件分别使用api-a和api-b路由代理servie-ribbon和service-feign两个服务。
访问http://localhost:8300/api-a/hi和http://localhost:8300/api-b/hi,结果和直接调用一致,说明路由成功。
Zuul还可以实现限流、认证等高级功能,这些功能都基于Zuul过滤器。
下面通过继承ZuulFilter实现一个自定义的过滤器,进行token认证。
@Component
public class MyFilter extends ZuulFilter{
    /**
     * filterType:返回一个字符串代表过滤器的类型,在zuul中定义了四种不同生命周期的过滤器类型,具体如下:
     * pre:路由之前
     * routing:路由之时
     * post: 路由之后
     * error:发送错误调用
     */
    @Override
    public String filterType() {
        return "pre";
    }

    @Override
    public int filterOrder() {
        return 0;
    }

    @Override
    public boolean shouldFilter() {
        return true;
    }

    @Override
    public Object run() throws ZuulException {
        RequestContext ctx = RequestContext.getCurrentContext();
        HttpServletRequest request = ctx.getRequest();
        Object accessToken = request.getParameter("token");
        if (accessToken == null){
            ctx.setSendZuulResponse(false);
            ctx.setResponseStatusCode(401);
            try{
                ctx.getResponse().getWriter().write("plz input token");
            }catch (Exception e){
                System.out.println(e.getMessage());
            }
            return null;
        }

        return null;
    }
}
Zuul过滤器总共有四种类型。
- pre: 在请求被路由之前调用,可用于身份认证。
- route:在路由请求时调用。适用于灰度发布场景。
- post:在请求路由到具体服务之后执行。适用于添加响应头,记录响应日志等场景。
- error:处理请求发生错误时调用。可用统一记录错误日志。
http://localhost:8300/api-a/hi?token=123,url地址只有带上token参数才能访问成功。
Config——分布式配置中心
在微服务架构中,服务数量通常从几十到上百甚至上千。每次修改一个配置都需要多个模块,再依次重启每个服务。将配置集中放到服务端进行管理,统一修改推送到客户端后实时生效,能够提高效率和减少出错几率。
Spring Cloud Config 是一个用来为分布式系统提供配置集中化管理的服务,分为客户端和服务端两个部分。其他比较出名的分布式配置中心就是携程开源的Apollo框架。
新建一个service-config模块,Maven配置加上config依赖
   org.springframework.cloud
   spring-cloud-config-server
启动类添加@EnableConfigServer注解。
在github或者码云等”最大同性交友网站“上面新建一个仓库用于存放配置文件。在master分支放生产环境配置,新增dev、test等分支用于存放不同环境的配置。
创建一个config-client.properties文件,master分支输入datasource=oracle,dev分支输入datasource=mysql,
作为配置的服务端。
客户端配置文件如下:
server.port=8400
spring.application.name=service-config
spring.cloud.config.server.git.uri=https://github.com/git-username/spring-cloud-config.git
# 公开的仓库不需要填写用户名密码
spring.cloud.config.server.git.username=
spring.cloud.config.server.git.password=
访问http://localhost:8400/config-client/master,输出如下,其中source下的就是我们配置文件中的内容。
{
"name": "config-client",
"profiles": [
    "master"
],
"label": null,
"version": "cd79457da44a9bd88e00b31b9ee99ffffd73a052",
"state": null,
"propertySources": [
    {
        "name": "https://github.com/git-username/spring-cloud-config.git/config-client.properties",
        "source": {
            "datasource": "oracle"
        }
    }
]
}
改为http://localhost:8400/config-client/dev, 返回的datasource=mysql说明配置成功。
其他的路由访问规则还有这几种方式:
/{application}/{profile}[/{label}] :http://localhost:8400/config-client/dev
/{application}-{profile}.yml
/{label}/{application}-{profile}.yml
/{application}-{profile}.properties
/{label}/{application}-{profile}.properties : http://localhost:8300/dev/config-client.properties
{application}为配置文件名config-client,如果文件名为config-client-pc,则pc就是{profile} ,{label} 指的是资源库的分支,不填则为默认分支。
以上就是一次Spring Cloud框架各个组件使用的简单实践。另外还有一些sleuth服务跟踪,JWT/OAuth2服务认证、Spring Boot Admin服务监控等后面再慢慢研究。TBC。。。
参考资料
- 约翰.卡内尔《Spring微服务实战》.人民邮电出版社.2018-6
- 尹吉欢.《Sprng Cloud微服务入门、实战与进阶》.机械工业出版社.2019-5
