一、yum的配置文件
cachedir=/var/cache/yum #yum下载的RPM包的缓存目录
keepcache=0 #缓存是否保存,1保存,0不保存。
debuglevel=2 #调试级别(0-10),默认为2(具体调试级别的应用,我也不了解)。
logfile=/var/log/yum.log #yum的日志文件所在的位置
exactarch=1 #在更新的时候,是否允许更新不同版本的RPM包,比如是否在i386上更新i686的RPM包。
obsoletes=1 #这是一个update的参数,具体请参阅yum(8),简单的说就是相当于upgrade,允许更新陈旧的RPM包。
gpgcheck=1 #是否检查GPG(GNU Private Guard),一种密钥方式签名。
plugins=1 #是否允许使用插件,默认是0不允许,但是我们一般会用yum-fastestmirror这个插件。
installonly_limit=3 #允许保留多少个内核包。
exclude=selinux* #屏蔽不想更新的RPM包,可用通配符,多个RPM包之间使用空格分离。
# This is the default, if you make this bigger yum won't see if the metadata
# is newer on the remote and so you'll "gain" the bandwidth of not having to
# download the new metadata and "pay" for it by yum not having correct
# information.
# It is esp. important, to have correct metadata, for distributions like
# Fedora which don't keep old packages around. If you don't like this checking
# interupting your command line usage, it's much better to have something
# manually check the metadata once an hour (yum-updatesd will do this).
# metadata_expire=90m
# PUT YOUR REPOS HERE or IN separate files named file.repo
# in /etc/yum.repos.d
我们以一份系统自带的repo文件做为实例来探讨(#号后面是我加的注释):
[fedora] #方括号里面的是软件源的名称,将被yum取得并识别
name=Fedora $releasever - $basearch #这里也定义了软件 仓库的名称,通常是为了方便阅读配置文件,一般没什么作用,$releasever变量定义了发行版本,通常是8,9,10等数字,$basearch变 量定义了系统的架构,可以是i386、x86_64、ppc等值,这两个变量根据当前系统的版本架构不同而有不同的取值,这可以方便yum升级的时候选择 适合当前系统的软件包,以下同……
failovermethod=priority #failovermethod 有两个值可以选择,priority是默认值,表示从列出的baseurl中顺序选择镜像服务器地址,roundrobin表示在列出的服务器中随机选择
exclude=compiz* *compiz* fusion-icon* #exclude这个选项是后来我自己加上去的,用来禁止这个软件仓库中的某些软件包的安装和更新,可以使用通配符,并以空格分隔,可以视情况需要自行添加
#baseurl=http://download.fedoraproject.org/pub/fedora/linux/releases/$releasever/Everything/$basearch/os/
#上面的一行baseurl第一个字符是'#'表示该行已经被注释,将不会被读取,这一行的意思是指定一个baseurl(源的镜像服务器地址)
#mirrorlist=http://mirrors.fedoraproject.org/mirrorlist?repo=fedora-$releasever&arch=$basearch
#上面的这一行是指定一个镜像服务器的地址列表,通常是开启的,本例中加了注释符号禁用了,我们可以试试,将$releasever和$basearch替换成自己对应的版本和架构,例如10和i386,在浏览器中打开,我们就能看到一长串镜可用的镜像服务器地址列表。
选择自己访问速度较快的镜像服务器地址复制并粘贴到repo文件中,我们就能获得较快的更新速度了,格式如下baseurl所示:
baseurl=
ftp://ftp.sfc.wide.ad.jp/pub/Linux/Fedora/releases/10/Everything/i386/os
http://ftp.chg.ru/pub/Linux/fedora/linux/releases/10/Everything/i386/os
http://ftp.yz.yamagata-u.ac.jp/pub/linux/fedora/linux/releases/10/Everything/i386/os
http://mirror.nus.edu.sg/fedora/releases/10/Everything/i386/os
http://mirror.yandex.ru/fedora/linux/releases/10/Everything/i386/os
http://ftp.twaren.net/Linux/Fedora/linux/releases/10/Everything/i386/os
http://ftp.itu.edu.tr/Mirror/Fedora/linux/releases/10/Everything/i386/os
enabled=1 #这个选项表示这个repo中定义的源是启用的,0为禁用
gpgcheck=1 #这个选项表示这个repo中下载的rpm将进行gpg的校验,已确定rpm包的来源是有效和安全的
gpgkey=file:///etc/pki/rpm-gpg/RPM-GPG-KEY-fedora-$basearch #定义用于校验的gpg密钥
##以下的软件仓库基本上用不到,选项含义同上
[fedora-debuginfo]
name=Fedora $releasever - $basearch - Debug
failovermethod=priority
#baseurl=http://download.fedoraproject.org/pub/fedora/linux/releases/$releasever/Everything/$basearch/debug/
mirrorlist=http://mirrors.fedoraproject.org/mirrorlist?repo=fedora-debug-$releasever&arch=$basearch
enabled=0
gpgcheck=1
gpgkey=file:///etc/pki/rpm-gpg/RPM-GPG-KEY-fedora-$basearch
[fedora-source]
name=Fedora $releasever - Source
failovermethod=priority
#baseurl=http://download.fedoraproject.org/pub/fedora/linux/releases/$releasever/Everything/source/SRPMS/
mirrorlist=http://mirrors.fedoraproject.org/mirrorlist?repo=fedora-source-$releasever&arch=$basearch
enabled=0
gpgcheck=1
gpgkey=file:///etc/pki/rpm-gpg/RPM-GPG-KEY-fedora-$basearch
以上转载自:
http://hi.baidu.com/%CE%AA%B0%AExxx/blog/item/ba40f75157f8ec878c54308d.html
另外,关于yum的选项可以man一下:
List of Commands:
clean 删除缓存数据
deplist 列出包依赖相关
erase 移除一个或多个包从你的系统
groupinfo 显示关于包组的细节
groupinstall 从组里安装软件包到你的系统
grouplist 列出当前的组
groupremove 在一个组中移除包从您的系统
help 显示帮助用法信息
info 显示关于包或一组包的细节信息
install 安装一个或多个软件包在你的系统
list 列出一个包或某组的包
localinstall 安装本地 RPM
makecache 生成原数据缓存
provides Find what package provides the given value
reinstall 重新安装一个包
repolist 显示软件仓库的配置
resolvedep 决定哪个包提供了给定的依赖
search 查找包细节居给定的字符串
shell 运行交互式的yum shell
update 更新一个或多个包在你的系统
upgrade Update packages taking obsoletes into account
Options:
-h, --help show this help message and exit
-t, --tolerant be tolerant of errors
-C 从缓冲中运行,而不是升级缓存
-c [config file] config file location
-R [minutes] 最大化的命令等待时间
-d [debug level] 调试输出级别
--showduplicates 显示复制, 在repo,list/search命令下
-e [error level] 错误输出级别
-q, --quiet 安静的操作
-v, --verbose verbose operation
-y 回答所有的问题为是
--version 显示 YUM版本信息并退出
--installroot=[path] 设置为root安装
--enablerepo=[repo] 激活一个或多个仓库(支持通配符)
--disablerepo=[repo] 禁掉一个或多个仓库(支持通配符)
-x [package], --exclude=[package] 在名称或glob不包含包。
--disableexcludes=[repo] disable exclude from main, for a repo or for everything
--obsoletes enable obsoletes processing during updates
--noplugins 禁掉yum插件
--nogpgcheck 禁掉GPG验证检查
--disableplugin=[plugin] 用名称禁掉插件
--enableplugin=[plugin] enable plugins by name
--skip-broken 忽略包的依赖问题
--color=COLOR control whether color is used
yum配置:
1.Fedora10添加上海交大源:
创建一个sjtu.repo文件并把如下内容复制进去并保存:
name=Fedora 10 - i386
baseurl=http://ftp.sjtu.edu.cn/fedora/linux/releases/10/Fedora/i386/os/
enabled=1
gpgcheck=0
gpgkey=file:///etc/pki/rpm-gpg/RPM-GPG-KEY-Fedora file:///etc/pki/rpm-gpg/RPM-GPG-KEY
[Everything-ftp.sjtu.edu.cn]
name=Everything 10 - i386
baseurl=http://ftp.sjtu.edu.cn/fedora/linux/releases/10/Everything/i386/os/
enabled=1
gpgcheck=0
gpgkey=file:///etc/pki/rpm-gpg/RPM-GPG-KEY-Fedora file:///etc/pki/rpm-gpg/RPM-GPG-KEY
[updates-ftp.sjtu.edu.cn]
name=Fedora updates
baseurl=http://ftp.sjtu.edu.cn/fedora/linux/updates/10/i386/
enabled=1
gpgcheck=0
gpgkey=file:///etc/pki/rpm-gpg/RPM-GPG-KEY-Fedora file:///etc/pki/rpm-gpg/RPM-GPG-KEY
然后把文件: sjtu.repo
放在 /etc/yum.repos.d 的目录中
然后在终端运行:
2.安装axel
最简单的方法是下载rpm包,分别下载axel和yum-axelget到本地,然后执行:
yum –nogpgcheck localinstall yum-axelget-.0-0.2.20080705.fc10.noarch.rpm
这样axel就下载完成了,它可以使在下载时将一个文件或者包,分成10份同时进行下载。
3.安装最快镜像插件
4.安装加速插件
这个插件为Fedora用户提供更快,更小的下载量,它只下载 rpm 安装包中被更新的部分,而不是整个rpm 包。加速插件被计划包含在Fedora11中。要安装,请输入:
然后编辑 /etc/yum.repos.d/fedora-updates.repo 文件
将
保存退出即可。
5.在下载时偶尔会出现它的最快镜像插件选择不对的情况,如果比较着急的话可以在它下载的时候感觉进度条半天没动或者剩余时间还有很长的时候选择中断这个源的下载,ctrl+C,然后yum会自动开始从别的源去下载更新。
以上文章转自:
http://www.fedora.cc/index.php/2009/04/fedora-10-yum-peizhi/
一、安装第三方软件源:
Fedora 8, 9 or 10:
su -c 'rpm -Uvh http://download1.rpmfusion.org/free/fedora/rpmfusion-free-release-stable.noarch.rpm http://download1.rpmfusion.org/nonfree/fedora/rpmfusion-nonfree-release-stable.noarch.rpm'
注:(RPM Fusion 已经正式启动。简单的说,RPM Fusion 是为 Fedora 及 Red Hat Enterprise Linux 用户提供的一个软件包仓库。各位 Fedora/RHEL 朋友要是想要安装的软件在官方的仓库中找不到,不要泄气,兴许通过 RPM Fusion 你就找到了。新启动的 RPM Fusion 合并了原有的 Dribble、Freshrpms、Livna 等软件包仓库,将成为最大的第三方软件包仓库。通过 RPM Fusion 软件包仓库,你将找到 ATI/NVIDIA 显卡驱动、私有的音频/视频编码/解码器、游戏、模拟器、以及其他软件包等。)
二、安装yum-plugin-fastestmirror(自动挑选快的镜像站)
su -c 'yum install yum-fastestmirror' (注:确定/etc/yum.conf中的plugins=1,搞定!)
三、安装yumex(yum的图形前端)
su -c ' yum install yumex'
四、然后对系统进行整体的升级
su -c ' yum update'
五、显卡的驱动
1、安装nVida显卡驱动
su –c ‘yum install kmod-nvidia’ (注:我是使用的这个,我的显卡是8400gs移动版的!)
GeForce 6, 7, 8, 9 & 200 系列显卡
su -c 'yum install kmod-nvidia xorg-x11-drv-nvidia xorg-x11-drv-nvidia-libs'
GeForce FX 显卡
su -c 'yum install kmod-nvidia-173xx xorg-x11-drv-nvidia-173xx xorg-x11-drv-
nvidia-173xx-libs'
GeForce 4 显卡
su -c 'yum install kmod-nvidia-96xx xorg-x11-drv-nvidia-96xx xorg-x11-drv-nvidia-96xx-
libs'
(注:重启之后你就可以在屏幕上看到 nvidia 的标志了)
2、安装 ATi显卡的驱动(我不 ATi用户,所以没有写!)
六、适用设置
1、在相同窗口中打开文件夹
依次打开系统-->首选项-->个人-->文件管理,在行为Tab页中选中“总是在浏览器窗口中打开”这个选项。
2、访问 Windows 分区
Fedora 10 ntfs-3g 被默认安装,你可以对 NTFS 直接有读/写权限。
如果你想用鼠标点两下就可以启用/禁用外部 和/或 内部的设备写入支持吗,你可以安装 ntfs-config配置工具。
su -c 'yum install ntfs-config'
之后你会在 系统-->管理-->NTFS 配置工具中找到它。
3、安装OpenJRE或OpenJDK
安装OpenJRE使用下面命令:
su -c 'yum install java-1.6.0-openjdk'
如果你是一位JAVA开发者安装OpenJDK请使用下面命令:
su -c 'yum install java-1.6.0-openjdk-devel'
当然如果你想安装所有的OpenJDK 6 packages,请使用下面的命令:
su -c 'yum install java-1.6.0-openjdk*'
七、应用程序
1、安装rar压缩支持unrar
su -c 'yum install unrar'
2、安装chm 阅读器
su -c 'yum install gnochm'
3、配置Firefox安装Flash 插件
(注:在两个之间选择一个就OK,如果你是x86-64位的系统,我建议你安装x86-64位的Flash插件)
(1)安装32位版Flash插件
首先你必须安装了 Adobe 软件仓库
su
rpm -ivh http://linuxdownload.adobe.com/linux/i386/adobe-release-i386-1.0-1.noarch.rpm
rpm –import /etc/pki/rpm-gpg/RPM-GPG-KEY-adobe-linux
接下来打开终端并输入:
su -c 'yum install flash-plugin'
完成之后,重启 Firefox 并打开工具-->附加组件-->>插件,你应该可以看到插件列表中的 Shockwave
Flash 插件了。
(2)安装x86-64位的Flash插件
x86-64位的Flash插件(64位的现在还是测试版,但是使用还是相当不错,我在使用,只有土豆不能访问)
Adobe公司终于发布了64位版的Flash Player。尽管这还是一个Alpha版,但是已经很稳定了,要尝试请下载Flash Player插件64位版,解压并且粘贴库文件到Firefox的插件目录就可以了。(/home/OrientSun/.mozilla /plugins)OrientSun为当前用户目标,你只要把他改成你自己的用户名就OK。
下载地址:http://download.macromedia.com/pub/labs/flashplayer10/libflashplayer-10.0.d20.7.linux-x86_64.so.tar.gz
tar -zxf libflashplayer-10.0.d20.7.linux-x86_64.so.tar.gz
su -c 'mv ~/.mozilla/plugins'
如果你之前使用nspluginwrapper和32位版的Flash Player你首先需要删除他们
su -c 'yum remove flash-plugin nspluginwrapper.{i386,x86_64} pulseaudio-libs.i386'
4、安装Skype
最好通过Skype的软件仓库来安装Skype,因为这样最简单方便,打开终端输入:
su -c 'gedit /etc/yum.repos.d/skype.repo'
在这个文件中复制下面几行:
[skype]
name=Skype Repository
baseurl=http://download.skype.com/linux/repos/fedora/updates/i586/
enabled=1
gpgkey=http://www.skype.com/products/skype/linux/rpm-public-key.asc
gpgcheck=0
之后你就可以自由的安装或者升级 Skype 了。
su -c 'yum install skype'
su -c 'yum update skype'
5、Google Earth(谷歌地球)
请访问这个页面http://earth.google.com/download-earth.html 下载 GoogleEarthLinux.bin 文件,之后打开终端进入你保存该文件的目录,默认的下载目录是 ~/下载 。执行命令安装它:
su -c 'sh GoogleEarthLinux.bin'
然后你就可以在 应用程序-->英特网-->Google Earth 找到它,请注意,要让它更好的运行,你必须安装显卡驱动。
6、安装BT下载软件Azureus(毒蛙)
su -c 'yum install azureus'
八、配置多媒体
1、音频播放:
(1)、安装audacious
su -c 'yum install audacious audacious-plugins audacious-plugins-freeworld audacious-plugins-freeworld-*'
如果你想要当双击 mp3 文件的时候添加到播放队列,通过下面操作实现:
su -c 'gedit /usr/share/applications/fedora-audacious.desktop'
修改 Exec=audacious 为 Exec=audacious -e
(2)、安装Rhythmbox
su -c 'yum install gstreamer rhythmbox'
添加 mp3和其他音频支持输入:
su -c 'yum install gstreamer-plugins-good gstreamer-plugins-bad gstreamer-plugins-ugly'
2、DVD和视频播放:
(1)、DVD 播放
为了能播放dvd你应该现安装适当的解码器:
su -c 'yum install libdvdread libdvdnav lsdvd'
(2)、视频文件播放
su -c 'yum install ffmpeg ffmpeg-libs gstreamer-ffmpeg libmatrosca xvidcore'
(3)、Fedora10已经装了totem了,如果你想用它来放dvd的话,输入:
su -c 'yum install totem-xine totem-gstreamer xine-lib-extras-freeworld'
(4)、Mplayer/SMPlayer
我比较喜欢这个播放器.它支持了几乎所有的视频格式,还有字幕,如果你已经安装了前面说的那些解码器了的话:
su -c 'yum install mplayer smplayer'
(5)、VLC
VLC支持了几乎所以的视频格式而不需要安装额外的解码器:
su -c 'yum install vlc'
(6)、kaffeine
Kaffeine是另外的一个是用xine引擎的kde媒体播放器:
su -c 'yum install kaffeine xine xine-lib xine-lib-extras-freeworld'
(注:X86_64位要解决rm播放格式,请到http://www.mplayerhq.hu/MPlayer/releases/codecs /essential-amd64-20071007.tar.bz2下载,解压后COPY到/usr/lib64/codecs;这样以后就可以使用 smplayer或是totem来播放rm)
(7)、Avidemux(多媒体编辑器)
Avidemux是一个非常好的多媒体编辑器.安装输入:
su -c 'yum install avidemux'
(注:它可以在"应用程序->声音和视频->Avidemux 视频编辑器"找到.)
九、wine安装
su -c 'yum install wine'(这样安装成功的版本不是最新的wine-1.1.9,要想是最新版请使用下面的命令升级。)
su -c 'yum --enablerepo=updates-testing upgrade wine'
su -c 'rm -fr ~/.wine'(删除旧的配置文件)
十、桌面特效(让你的Fedora10更漂亮)
Compiz 需要直接渲染技术正常工作才行,检查你是否安装了直接渲染,输入命令:
glxinfo | grep direct
如果你看到 direct rendering: Yes 的信息,表明你可以继续安装 Compiz 包。
通过一个星期的测试,我还是建议大家安装官方包。(大家在官方安装包和非官方安装包中选择一个安装)
1、*官方安装包
su -c 'yum remove compiz'
rm -rf ~/.gconf/apps/compiz
su -c 'yum install compiz-fusion compiz-fusion-gnome compiz-fusion-extras compiz-fusion-extras-gnome compizconfig-backend-gconf compiz-manager gnome-compiz-manager ccsm fusion-icon fusion-icon-gtk emerald emerald-themes'
2、*非官方包
(1). Install the compiz-fusion-release rpm ( you need wget installed i.e yum install wget )
(安装前请先安装第三方的源,使用下面的命令:)
su
wget http://www.linux-ati-drivers.homecall.co.uk/compiz-fusion-release-1-6.noarch.rpm
rpm -Uvh compiz-fusion-release-1-6.noarch.rpm
rm -f compiz-fusion-release-1-6.noarch.rpm
(2). Install compiz-fusion ( you will need to remove the fedora compiz packages first and
delete the old compiz configuration files /home/username/.gconf/apps/compiz )
(注:删除compiz和compiz配置文件命令如下:)
su -c 'yum remove compiz'
rm -rf ~/.gconf/apps/compiz
使用下面的命令开始安装吧!
su
yum install compiz-gnome fusion-icon-gtk compiz-fusion-plugins-unsupported compiz-fusion-plugins-extra compiz-bcop ccsm emerald-themes compizconfig-backend-gconf
3、添加自动起动:
进入系统-->首选项-->个人-->会话,单击添加,输入:
名称: Fusion Icon
命令: fusion-icon
注释: Compiz-Fusion桌面特效应用程序
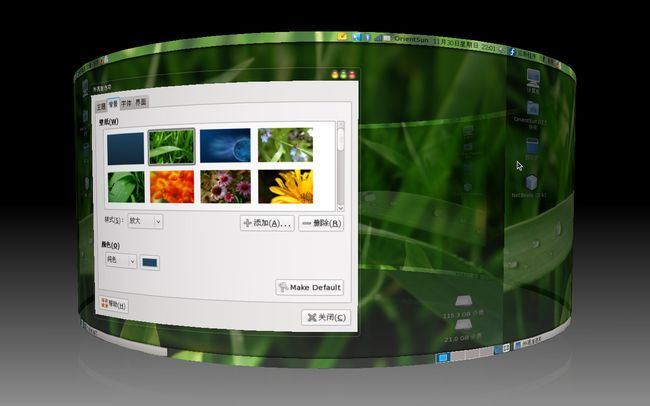
我的桌面:


