如何为你的硬件开发Simulink Toolbox(4)
这次我们从实现一个对模型选项进行设置的block开始,串联起几个Simulink Toolbox的控制文件,并写一个简单的S-Function文件,Simulink本身也提供了类似的block,例如下面这几个。
我们不使用它生成任何的代码,而是利用Simulink的callback机制和m语言,自动化完成模型选项的设置。
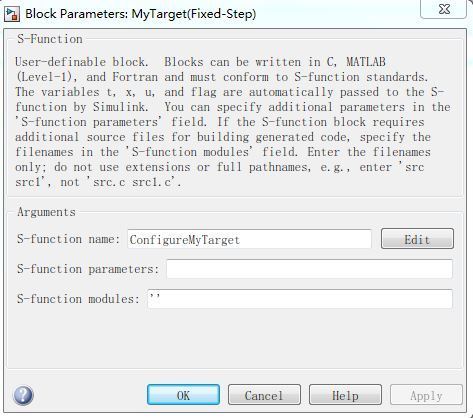
首先我们拖一个Simulink->User Defined Functions->S-Function到我们的libaray,修改成下面的样子。
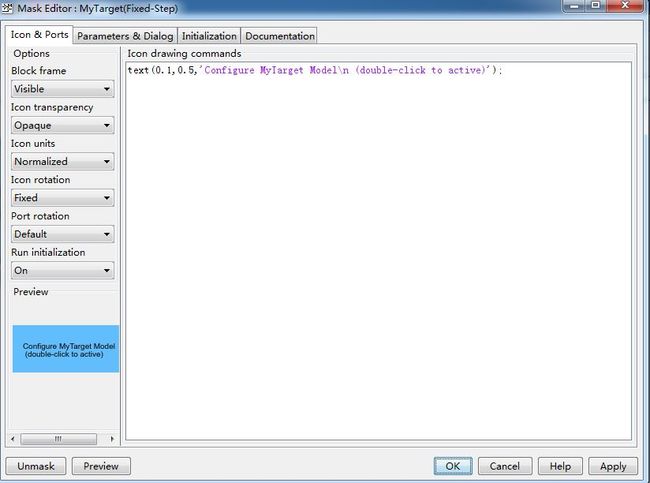
首先Create Mask,然后进行编辑,在Icon&Ports页面输入下面内容:
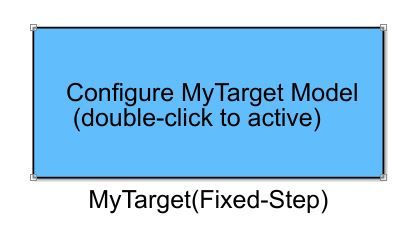
text(0.1,0.5,'Configure MyTarget Model\n (double-click to active)');
text这个函数的功能是在Icon的指定位置显示文字,它的坐标参考系取决于Icon units,这里选择的是Normalized,x和y的取值范围为0到1。
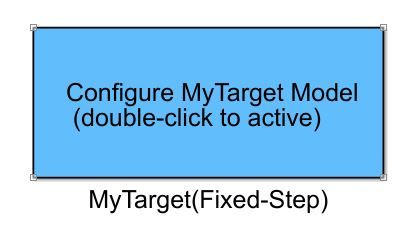
在图标上右键Format->background color中选择背景颜色,选择light blue就是上面图里的效果。
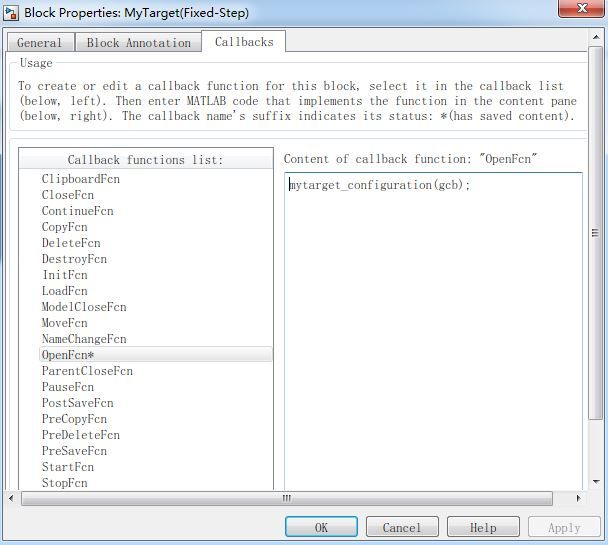
然后右键Properties->Callbacks中,我们选择实现OpenFcn,这个回调函数在双击打开block的时候会被调用。我们可以看到一个block有许多Callback,我们可以通过选择性的实现去自定义一个block的行为。
我们在OpenFcn的编辑框中写mytarget_configuration(gcb),它的意思是将调用mytarget_configuration这个函数,参数gcb是当前block的路径名称。mytarget_configuration实现如下:
function mytarget_configuration(gcb)
    disp('MyTarget Configuration start!');
    subsystem = strread(gcb,'%s','delimiter','/');
    modelname = subsystem(1);
    cs = getActiveConfigSet(string(modelname));
    set_param(cs,'SolverType','Fixed-step');
    set_param(cs,'Solver','FixedStepDiscrete');
    set_param(cs,'ProdHWDeviceType','ARM7');
    set_param(cs,'GenerateReport','on');
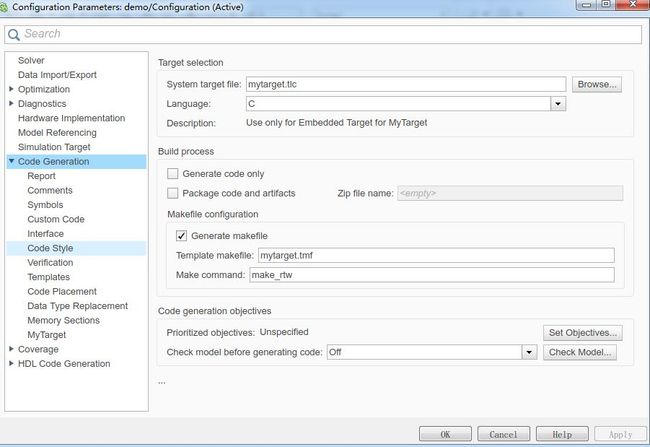
    set_param(cs,'SystemTargetFile','mytarget.tlc');
    set_param(cs,'GenerateASAP2','on');
    set_param(cs,'GenerateMakefile','on');
    set_param(cs,'TemplateMakefile','mytarget.tmf');
    set_param(cs,'ERTHdrFileBannerTemplate','mytarget_code_template.cgt');
    set_param(cs,'ERTDataSrcFileTemplate','mytarget_code_template.cgt');
    set_param(cs,'ERTDataHdrFileTemplate','mytarget_code_template.cgt');
    set_param(cs,'ERTSrcFileBannerTemplate','mytarget_code_template.cgt');
    set_param(cs,'PostCodeGenCommand','mytarget_postgen(buildInfo)');
    set_param(cs,'ERTCustomFileTemplate','mytarget_proc.tlc');
    disp('MyTarget Configuration Complete!');
end
上面这段代码首先通过block的路径,找到模型的名称,然后打开模型的ConfigSet,设置Solver类型为定步长,设置硬件类型和生成报告等,比较主要的是设置模型使用的系统tlc和makefile等几个文件,这几个文件在最开始的两篇文章里有介绍。
-
SystemTargetFile,系统tlc
-
TemplateMakefile,makefile的模板文件
-
xxxTemplate,生成C文件时文件头、函数头的自定义模板
-
PostCodeGenCommand,代码生成的后处理命令
-
ERTCustomFileTemplate,自定义主函数
我们这次先看一下SystemTargetFile,也就是mytarget.tlc的内容,其他几个文件我们后面的文章再讲。
%% SYSTLC: Use only for Embedded Target for MyTarget \ %% TMF: mytarget MAKE: make_rtw EXTMODE: no_ext_comm %% %% Abstract: System target file, Embedded Target for mytarget %% %selectfile NULL_FILE %assign CodeFormat = "Embedded-C" %assign TargetType = "RT" %assign Language = "C" %assign AutoBuildProcedure = !GenerateSampleERTMain %include "codegenentry.tlc" /% BEGIN_RTW_OPTIONS rtwoptions(1).prompt = 'MyTarget'; rtwoptions(1).type = 'Category'; rtwoptions(1).enable = 'on'; rtwoptions(1).default = 2; rtwoptions(1).popupstrings = ''; rtwoptions(1).tlcvariable = ''; rtwoptions(1).tooltip = ''; rtwoptions(1).callback = ''; rtwoptions(1).makevariable = ''; rtwoptions(2).prompt = 'Generated Path:'; rtwoptions(2).type = 'Edit'; rtwoptions(2).enable = 'on'; rtwoptions(2).default = ''; rtwoptions(2).tlcvariable = 'tlc_output'; rtwoptions(2).tooltip = 'The path where generated files will be put into'; rtwoptions(2).callback = ''; rtwoptions(3).prompt = 'Browser...'; rtwoptions(3).type = 'Pushbutton'; rtwoptions(3).enable = 'on'; rtwoptions(3).default = ''; rtwoptions(3).tooltip = 'Locate the path where the generated files will be put into'; rtwoptions(3).callback = 'pathbrowsercallback(hDlg,hSrc,''tlc_output'')'; %----------------------------------------% % Configure code generation settings % %----------------------------------------% rtwgensettings.DerivedFrom = 'ert.tlc'; rtwgensettings.BuildDirSuffix = '_mytarget_rtw'; rtwgensettings.Version = '1'; % Specify callbacks' compliance with DAStudio dialog END_RTW_OPTIONS %/
这个文件里需要注意的是虽然大部分代码看起来都是在注释里,但实际上是有效地,不要随意删除。%%开头的几行是对系统TLC文件的整体说明,下面几行定义了我们的系统是嵌入式C的实时系统。
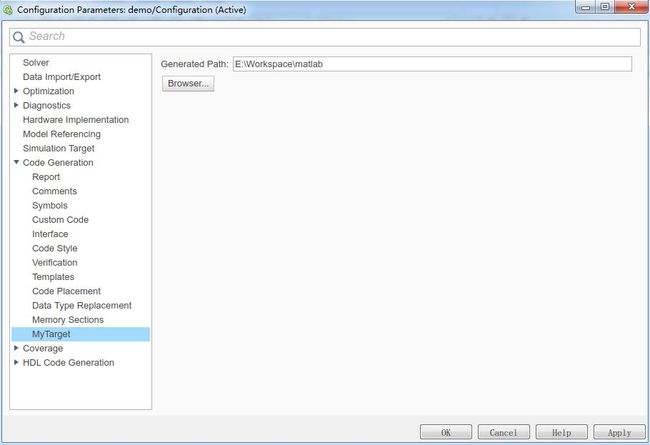
BEGIN_RTW_OPTIONS到END_RTW_OPTIONS之间这段代码,是用来自定义选项的,这里实现的比较简单,是定义了一个编辑框和一个按钮,用来显示和选择代码生产的路径。
最后几行表明我们的TLC文件继承自ert,build之后生成文件夹的后缀是_mytarget_rtw。
到现在为止,我们的block一直是带着输入输出port的箭头的,我们通过编写一个S-Function文件,来指定它没有输入和输出。
首先设置它的S-Function为ConfigureMyTarget。
然后实现ConfigureMyTarget.c这个文件。这个文件里包含了一个S-Function的骨架,但没有实现实质性的内容,只是在mdlInitializeSizes这个函数里将block的输入和输出端口均设置为0。
#define S_FUNCTION_NAME ConfigureMyTarget
#define S_FUNCTION_LEVEL 2
#include "simstruc.h"
static void mdlInitializeSizes(SimStruct *S)
{
ssSetNumContStates (S, 0);
ssSetNumDiscStates (S, 0);
if (!ssSetNumInputPorts(S, 0)) return;
if (!ssSetNumOutputPorts(S, 0)) return;
ssSetNumSFcnParams (S, 0);
ssSetNumSampleTimes (S, 0);
}
static void
mdlOutputs(SimStruct *S, int_T tid)
{
}
static void
mdlInitializeSampleTimes(SimStruct *S){}
static void
mdlTerminate(SimStruct *S) {}
#define MDL_RTW /* Change to #undef to remove function */
#if defined(MDL_RTW)&&(defined(MATLAB_MEX_FILE)||defined(NRT))
static void
mdlRTW (SimStruct *S)
{
}
#endif
#ifdef MATLAB_MEX_FILE
#include "simulink.c"
#else
#include "cg_sfun.h"
#endif
这个文件编写完后,使用mex命令将它编译成mex文件,mex不成功的可以回看上一篇文章,安装MinGW。
mex成功后,生成文件ConfigureMyTarget.mexw64,这个就是matlab可以调用的文件,现在这个block看起来就是下面这样了。
双击之后它会自动化设置模型选项,大家可以根据自己的需求,在Callback里设置自己需要设置的信息。
OK,这次就到这里,下次我们继续。


