Tomcat源码解析——启动过程分析
最近面试一些1~3年的开发人员,问他们tomcat的基础架构发现都是一脸懵逼,这里开贴大概写一下tomcat的整体架构以及启动流程,版本基于7.0.85,后续会不断对文章进行更新。
一、tomcat基础架构
上个图,这张图算是说的比较明白的。

大家可以去翻一下server.xml,精简后会发现如下结构:
这个配置文件是tomcat在启动时的核心配置,后面会用到。下面简单说下各个组件的作用:
1.Server
Server表示整个的Catalina Servlet容器。Tomcat提供了Server接口的一个默认实现,这通常不需要用户自己去实现。在Server容器中,可以包含一个或多个Service组件。
2.Service
Service是存活在Server内部的中间组件,它将一个或多个连接器(Connector)组件绑定到一个单独的引擎(Engine)上。在Server中,可以包含一个或多个Service组件。Service也很少由用户定制,Tomcat提供了Service接口的默认实现,而这种实现既简单又能满足应用。
3.Connector
连接器(Connector)处理与客户端的通信,它负责接收客户请求,以及向客户返回响应结果。在Tomcat中,有多个连接器可以使用。
4.Engine
在Tomcat中,每个Service只能包含一个Servlet引擎(Engine)。引擎表示一个特定的Service的请求处理流水线。作为一个Service可以有多个连接器,引擎从连接器接收和处理所有的请求,将响应返回给适合的连接器,通过连接器传输给用户。用户允许通过实现Engine接口提供自定义的引擎,但通常不需要这么做。
5.Host
Host表示一个虚拟主机,一个引擎可以包含多个Host。用户通常不需要创建自定义的Host,因为Tomcat给出的Host接口的实现(类StandardHost)提供了重要的附加功能。
6.Context
一个Context表示了一个Web应用程序,运行在特定的虚拟主机中。什么是Web应用程序呢?在Sun公司发布的JavaServlet规范中,对Web应用程序做出了如下的定义:“一个Web应用程序是由一组Servlet、HTML页面、类,以及其他的资源组成的运行在Web服务器上的完整的应用程序。它可以在多个供应商提供的实现了Servlet规范的Web容器中运行”。一个Host可以包含多个Context(代表Web应用程序),每一个Context都有一个唯一的路径。用户通常不需要创建自定义的Context,因为Tomcat给出的Context接口的实现(类StandardContext)提供了重要的附加功能。
这部分参考原文https://blog.csdn.net/sundacheng1989/article/details/79064112 ,原文还介绍了一下tomcat的启动脚本,感兴趣的同学可以稍微看一下,需要注意的是首先bootstrap.jar 和 tomcat-juli.jar要添加到classpath下,剩下的就是执行Bootstrap类中的main方法。所以所谓的tomcat容器,其实就是一个普通的java程序。只不过tomcat写了一个await方法,让这个java程序可以一直执行,直到收到shutdow通知,或者进程被kill。
二、类图分析
如何编译tomcat源码,参考文末链接。不复杂,如果你熟悉ant编译的话会更简单。这里先上一张启动过程中要涉及的几个类

1.Lifecycle
tomcat中核心组件都实现了该接口,该接口的作用跟它的名字一样,定义了tomcat容器各组件的生命周期。在源码文件的类注释上详细描述了tomcat容器各个状态以及转换方式:

Lifecycle类中只定义了几个管理生命周期的基本方法:init,start,stop,destroy,getState,getStateName,另外还提供了三个跟生命周期Listener相关的方法,暂时不看。

2.LifecycleMBeanBase
tomcat把自己管理的bean统一命名为MBean,LifecycleMBeanBase通过实现MBeanRegistration的方式来把自己变成一个可被tomcat管理的bean,同时继承LifecycleBase。LifecycleBase是Lifecycle接口的一个比较重要的实现,实现了Lifecycle接口中对生命周期的管理方法。
@Override
    public final synchronized void init() throws LifecycleException {
        if (!state.equals(LifecycleState.NEW)) {
            invalidTransition(Lifecycle.BEFORE_INIT_EVENT);
        }

        try {
            setStateInternal(LifecycleState.INITIALIZING, null, false);
            initInternal();
            setStateInternal(LifecycleState.INITIALIZED, null, false);
        } catch (Throwable t) {
            ExceptionUtils.handleThrowable(t);
            setStateInternal(LifecycleState.FAILED, null, false);
            throw new LifecycleException(
                    sm.getString("lifecycleBase.initFail",toString()), t);
        }
    }
protected abstract void initInternal() throws LifecycleException;init方法的代码不复杂,阅读可知其主要是负责各个组件的状态装换,至于组件初始化的具体细节,通过initInternal方法交由各个组件自己实现。大家可以看一下其他几个方法例如start,destroy等,基本上都是同一个设计思路。
3.Server,Servie,Container
这三个接口均直接实现了Lifecycle接口。其中Server,Service前面已经介绍过了,与配置文件对应。这里简单说下Container。
tomcat核心组件由六部分组成,Server,Service有独立接口,Connector直接是实现类,剩下的三个组件,即Service管理的Engine,Host,Context均实现Container接口,Container接口要对外提供能够接受请求并且返回响应,简单来说,这三个组件构成了tomcat的核心servlet处理引擎,因为tomcat本质上就是一个web容器,其中Server,Service,Connector都是tomcat特有的概念,而Container下面的三个概念,是所有支持servlet模型的web容器所都要实现的功能,主要提供对servlet生命周期的管理功能。
三、启动流程
1、Bootstrap
分析catalina.sh可知tomcat的启动入口是Bootstrap类的main方法:
public static void main(String args[]) {
        //是否已经启动
        if (daemon == null) {
            // Don't set daemon until init() has completed
            Bootstrap bootstrap = new Bootstrap();
            try {
                //初始化catalina
                bootstrap.init();
            } catch (Throwable t) {
                handleThrowable(t);
                t.printStackTrace();
                return;
            }
            daemon = bootstrap;
        } else {
            // When running as a service the call to stop will be on a new
            // thread so make sure the correct class loader is used to prevent
            // a range of class not found exceptions.
            Thread.currentThread().setContextClassLoader(daemon.catalinaLoader);
        }

        try {
            String command = "start";
            if (args.length > 0) {
                command = args[args.length - 1];
            }

            if (command.equals("startd")) {
                args[args.length - 1] = "start";
                daemon.load(args);
                daemon.start();
            } else if (command.equals("stopd")) {
                args[args.length - 1] = "stop";
                daemon.stop();
            } else if (command.equals("start")) {
                daemon.setAwait(true);
                daemon.load(args);
                daemon.start();
            } else if (command.equals("stop")) {
                daemon.stopServer(args);
            } else if (command.equals("configtest")) {
                daemon.load(args);
                if (null==daemon.getServer()) {
                    System.exit(1);
                }
                System.exit(0);
            } else {
                log.warn("Bootstrap: command \"" + command + "\" does not exist.");
            }
        } catch (Throwable t) {
            // Unwrap the Exception for clearer error reporting
            if (t instanceof InvocationTargetException &&
                    t.getCause() != null) {
                t = t.getCause();
            }
            handleThrowable(t);
            t.printStackTrace();
            System.exit(1);
        }

    }
main方法主要负责两件事:1.初始化catalina,2.通过反射调用catalina的方法。简单看下Bootstrap的init方法:
public void init()
        throws Exception
    {

        // Set Catalina path
        setCatalinaHome();
        setCatalinaBase();

        initClassLoaders();

        Thread.currentThread().setContextClassLoader(catalinaLoader);

        SecurityClassLoad.securityClassLoad(catalinaLoader);

        // Load our startup class and call its process() method
        if (log.isDebugEnabled())
            log.debug("Loading startup class");
        Class startupClass =
            catalinaLoader.loadClass
            ("org.apache.catalina.startup.Catalina");
        Object startupInstance = startupClass.newInstance();

        // Set the shared extensions class loader
        if (log.isDebugEnabled())
            log.debug("Setting startup class properties");
        String methodName = "setParentClassLoader";
        Class paramTypes[] = new Class[1];
        paramTypes[0] = Class.forName("java.lang.ClassLoader");
        Object paramValues[] = new Object[1];
        paramValues[0] = sharedLoader;
        Method method =
            startupInstance.getClass().getMethod(methodName, paramTypes);
        method.invoke(startupInstance, paramValues);

        catalinaDaemon = startupInstance;

    }
通过反射获取Catalina类,然后反射注入类加载器,main方法中后续对daemon对象调用的start,stop方法,其实都是通过反射调用Catalina类的相应方法:
public void start()
        throws Exception {
        if( catalinaDaemon==null ) init();

        Method method = catalinaDaemon.getClass().getMethod("start", (Class [] )null);
        method.invoke(catalinaDaemon, (Object [])null);

    }
所以我们接下来的重点要关注Catalina类。
2、Catalina
先看start方法:
public void start() {

        if (getServer() == null) {
            //初始化tomcat
            load();
        }

        if (getServer() == null) {
            log.fatal("Cannot start server. Server instance is not configured.");
            return;
        }

        long t1 = System.nanoTime();

        // Start the new server
        try {
            //启动tomcat,从server开始启动
            getServer().start();
        } catch (LifecycleException e) {
            log.fatal(sm.getString("catalina.serverStartFail"), e);
            try {
                getServer().destroy();
            } catch (LifecycleException e1) {
                log.debug("destroy() failed for failed Server ", e1);
            }
            return;
        }

        long t2 = System.nanoTime();
        if(log.isInfoEnabled()) {
            log.info("Server startup in " + ((t2 - t1) / 1000000) + " ms");
        }

        // Register shutdown hook
        if (useShutdownHook) {
            if (shutdownHook == null) {
                shutdownHook = new CatalinaShutdownHook();
            }
            Runtime.getRuntime().addShutdownHook(shutdownHook);

            // If JULI is being used, disable JULI's shutdown hook since
            // shutdown hooks run in parallel and log messages may be lost
            // if JULI's hook completes before the CatalinaShutdownHook()
            LogManager logManager = LogManager.getLogManager();
            if (logManager instanceof ClassLoaderLogManager) {
                ((ClassLoaderLogManager) logManager).setUseShutdownHook(
                        false);
            }
        }
        //保持主线程不退出,直到容器关闭
        if (await) {
            await();
            stop();
        }
    }
start方法主要做了以下几件事:
1.初始化容器
2.启动容器
3.注册一个钩子方法,用来触发关闭容器
4.让容器进入持续运行状态
初始化通过load方法完成:
public void load() {

        if (loaded) {
            return;
        }
        loaded = true;

        long t1 = System.nanoTime();

        initDirs();

        // Before digester - it may be needed

        initNaming();

        // Create and execute our Digester
        //根据配置文件,初始化容器
        Digester digester = createStartDigester();

        InputSource inputSource = null;
        InputStream inputStream = null;
        File file = null;
        try {
            ...//省略对配置文件的读取
        //server中设置catalina对象
        getServer().setCatalina(this);

        // Stream redirection
        initStreams();

        // Start the new server
        try {
            //初始化server
            getServer().init();
        } catch (LifecycleException e) {
            if (Boolean.getBoolean("org.apache.catalina.startup.EXIT_ON_INIT_FAILURE")) {
                throw new java.lang.Error(e);
            } else {
                log.error("Catalina.start", e);
            }

        }

        long t2 = System.nanoTime();
        if(log.isInfoEnabled()) {
            log.info("Initialization processed in " + ((t2 - t1) / 1000000) + " ms");
        }

    }
这之中重点关注createStartDigester方法,该方法从xml配置文件中读取并初始化一个server:
protected Digester createStartDigester() {
long t1=System.currentTimeMillis();
// Initialize the digester
Digester digester = new Digester();
digester.setValidating(false);
digester.setRulesValidation(true);
HashMap, List> fakeAttributes =
new HashMap, List>();
ArrayList attrs = new ArrayList();
attrs.add("className");
fakeAttributes.put(Object.class, attrs);
digester.setFakeAttributes(fakeAttributes);
digester.setUseContextClassLoader(true);
// Configure the actions we will be using
digester.addObjectCreate("Server",
"org.apache.catalina.core.StandardServer",
"className");
digester.addSetProperties("Server");
digester.addSetNext("Server",
"setServer",
"org.apache.catalina.Server");
digester.addObjectCreate("Server/GlobalNamingResources",
"org.apache.catalina.deploy.NamingResources");
digester.addSetProperties("Server/GlobalNamingResources");
digester.addSetNext("Server/GlobalNamingResources",
"setGlobalNamingResources",
"org.apache.catalina.deploy.NamingResources");
digester.addObjectCreate("Server/Listener",
null, // MUST be specified in the element
"className");
digester.addSetProperties("Server/Listener");
digester.addSetNext("Server/Listener",
"addLifecycleListener",
"org.apache.catalina.LifecycleListener");
digester.addObjectCreate("Server/Service",
"org.apache.catalina.core.StandardService",
"className");
digester.addSetProperties("Server/Service");
digester.addSetNext("Server/Service",
"addService",
"org.apache.catalina.Service");
digester.addObjectCreate("Server/Service/Listener",
null, // MUST be specified in the element
"className");
digester.addSetProperties("Server/Service/Listener");
digester.addSetNext("Server/Service/Listener",
"addLifecycleListener",
"org.apache.catalina.LifecycleListener");
//Executor
digester.addObjectCreate("Server/Service/Executor",
"org.apache.catalina.core.StandardThreadExecutor",
"className");
digester.addSetProperties("Server/Service/Executor");
digester.addSetNext("Server/Service/Executor",
"addExecutor",
"org.apache.catalina.Executor");
digester.addRule("Server/Service/Connector",
new ConnectorCreateRule());
digester.addRule("Server/Service/Connector",
new SetAllPropertiesRule(new String[]{"executor"}));
digester.addSetNext("Server/Service/Connector",
"addConnector",
"org.apache.catalina.connector.Connector");
digester.addObjectCreate("Server/Service/Connector/Listener",
null, // MUST be specified in the element
"className");
digester.addSetProperties("Server/Service/Connector/Listener");
digester.addSetNext("Server/Service/Connector/Listener",
"addLifecycleListener",
"org.apache.catalina.LifecycleListener");
// Add RuleSets for nested elements
digester.addRuleSet(new NamingRuleSet("Server/GlobalNamingResources/"));
digester.addRuleSet(new EngineRuleSet("Server/Service/"));
digester.addRuleSet(new HostRuleSet("Server/Service/Engine/"));
digester.addRuleSet(new ContextRuleSet("Server/Service/Engine/Host/"));
addClusterRuleSet(digester, "Server/Service/Engine/Host/Cluster/");
digester.addRuleSet(new NamingRuleSet("Server/Service/Engine/Host/Context/"));
// When the 'engine' is found, set the parentClassLoader.
digester.addRule("Server/Service/Engine",
new SetParentClassLoaderRule(parentClassLoader));
addClusterRuleSet(digester, "Server/Service/Engine/Cluster/");
long t2=System.currentTimeMillis();
if (log.isDebugEnabled()) {
log.debug("Digester for server.xml created " + ( t2-t1 ));
}
return (digester);
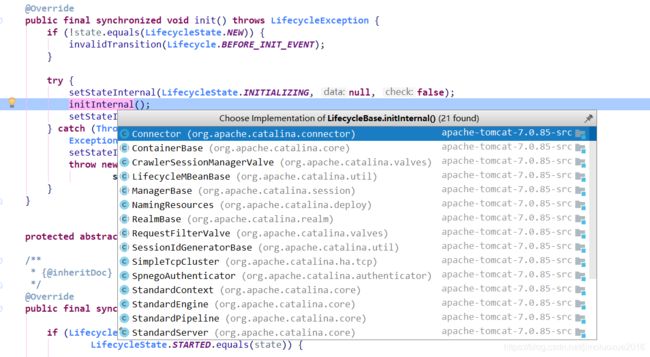
} createStartDigester方法中默认注册了一个StandardServer,但是StandardServer并没有实现init方法,而是由其父类LifecycleBean实现:
@Override
    public final synchronized void init() throws LifecycleException {
        if (!state.equals(LifecycleState.NEW)) {
            invalidTransition(Lifecycle.BEFORE_INIT_EVENT);
        }

        try {
            setStateInternal(LifecycleState.INITIALIZING, null, false);
            initInternal();
            setStateInternal(LifecycleState.INITIALIZED, null, false);
        } catch (Throwable t) {
            ExceptionUtils.handleThrowable(t);
            setStateInternal(LifecycleState.FAILED, null, false);
            throw new LifecycleException(
                    sm.getString("lifecycleBase.initFail",toString()), t);
        }
    }
这个方法之前已经贴过一次,其中核心逻辑交由initInternal方法处理:
接下来就进入到各个组件内部的初始化逻辑,初始化顺序跟server.xml配置文件中的基本一致:
server-->service-->container-->executor-->connector
3.组件初始化
1、server初始化:
protected void initInternal() throws LifecycleException {
        //1.注册bean
        super.initInternal();

        // Register global String cache
        // Note although the cache is global, if there are multiple Servers
        // present in the JVM (may happen when embedding) then the same cache
        // will be registered under multiple names
        //2.注册string缓存
        onameStringCache = register(new StringCache(), "type=StringCache");

        // Register the MBeanFactory
        //3.注册MBean工厂
        MBeanFactory factory = new MBeanFactory();
        factory.setContainer(this);
        onameMBeanFactory = register(factory, "type=MBeanFactory");

        // Register the naming resources
        globalNamingResources.init();

        // Populate the extension validator with JARs from common and shared
        // class loaders
        //4.加载jar包
        if (getCatalina() != null) {
            ClassLoader cl = getCatalina().getParentClassLoader();
            // Walk the class loader hierarchy. Stop at the system class loader.
            // This will add the shared (if present) and common class loaders
            while (cl != null && cl != ClassLoader.getSystemClassLoader()) {
                if (cl instanceof URLClassLoader) {
                    URL[] urls = ((URLClassLoader) cl).getURLs();
                    for (URL url : urls) {
                        if (url.getProtocol().equals("file")) {
                            try {
                                File f = new File (url.toURI());
                                if (f.isFile() &&
                                        f.getName().endsWith(".jar")) {
                                    ExtensionValidator.addSystemResource(f);
                                }
                            } catch (URISyntaxException e) {
                                // Ignore
                            } catch (IOException e) {
                                // Ignore
                            }
                        }
                    }
                }
                cl = cl.getParent();
            }
        }
        // Initialize our defined Services
        //5.初始化service
        for (int i = 0; i < services.length; i++) {
            services[i].init();
        }
    }
2.Service初始化:
protected void initInternal() throws LifecycleException {
        //1.注册bean
        super.initInternal();
        //2.初始化Container组件
        if (container != null) {
            container.init();
        }
        //3.初始化executor
        // Initialize any Executors
        for (Executor executor : findExecutors()) {
            if (executor instanceof LifecycleMBeanBase) {
                ((LifecycleMBeanBase) executor).setDomain(getDomain());
            }
            executor.init();
        }
        //4.初始化Connector
        // Initialize our defined Connectors
        synchronized (connectorsLock) {
            for (Connector connector : connectors) {
                try {
                    connector.init();
                } catch (Exception e) {
                    String message = sm.getString(
                            "standardService.connector.initFailed", connector);
                    log.error(message, e);

                    if (Boolean.getBoolean("org.apache.catalina.startup.EXIT_ON_INIT_FAILURE"))
                        throw new LifecycleException(message);
                }
            }
        }
    }
Service将触发对其余组件的初始化过程,其中Connector的初始化过程中,还要针对每个Connector注册一个MapperListener。
注意这里的Container接口,虽然Engin,Host,Context都是Container的实现类,但在service中而言,这里的Container一般都是Engin。
protected void initInternal() throws LifecycleException {
        // Ensure that a Realm is present before any attempt is made to start
        // one. This will create the default NullRealm if necessary.
        getRealm();
        super.initInternal();
    }
StandardEngin类中的初始化方法非常简单,权限校验后直接调用父类ContainerBase的初始化方法:
protected void initInternal() throws LifecycleException {
        BlockingQueue startStopQueue =
            new LinkedBlockingQueue();
        startStopExecutor = new ThreadPoolExecutor(
                getStartStopThreadsInternal(),
                getStartStopThreadsInternal(), 10, TimeUnit.SECONDS,
                startStopQueue,
                new StartStopThreadFactory(getName() + "-startStop-"));
        startStopExecutor.allowCoreThreadTimeOut(true);
        super.initInternal();
    }
ContainerBase内部初始化了一个线程池,线程池初始化时固定大小为1。
4.组件启动
初始化完成后,回到Catalina的start方法,继续向下执行:
public void start() {

        if (getServer() == null) {
            load();
        }

        if (getServer() == null) {
            log.fatal("Cannot start server. Server instance is not configured.");
            return;
        }

        long t1 = System.nanoTime();

        // Start the new server
        try {
            getServer().start();
        } catch (LifecycleException e) {
            log.fatal(sm.getString("catalina.serverStartFail"), e);
            try {
                getServer().destroy();
            } catch (LifecycleException e1) {
                log.debug("destroy() failed for failed Server ", e1);
            }
            return;
        }

        long t2 = System.nanoTime();
        if(log.isInfoEnabled()) {
            log.info("Server startup in " + ((t2 - t1) / 1000000) + " ms");
        }

        // Register shutdown hook
        if (useShutdownHook) {
            if (shutdownHook == null) {
                shutdownHook = new CatalinaShutdownHook();
            }
            Runtime.getRuntime().addShutdownHook(shutdownHook);

            // If JULI is being used, disable JULI's shutdown hook since
            // shutdown hooks run in parallel and log messages may be lost
            // if JULI's hook completes before the CatalinaShutdownHook()
            LogManager logManager = LogManager.getLogManager();
            if (logManager instanceof ClassLoaderLogManager) {
                ((ClassLoaderLogManager) logManager).setUseShutdownHook(
                        false);
            }
        }

        if (await) {
            await();
            stop();
        }
    }
这里将执行LifecycleBase.start方法:
public final synchronized void start() throws LifecycleException {

        if (LifecycleState.STARTING_PREP.equals(state) || LifecycleState.STARTING.equals(state) ||
                LifecycleState.STARTED.equals(state)) {

            if (log.isDebugEnabled()) {
                Exception e = new LifecycleException();
                log.debug(sm.getString("lifecycleBase.alreadyStarted", toString()), e);
            } else if (log.isInfoEnabled()) {
                log.info(sm.getString("lifecycleBase.alreadyStarted", toString()));
            }

            return;
        }

        if (state.equals(LifecycleState.NEW)) {
            init();
        } else if (state.equals(LifecycleState.FAILED)) {
            stop();
        } else if (!state.equals(LifecycleState.INITIALIZED) &&
                !state.equals(LifecycleState.STOPPED)) {
            invalidTransition(Lifecycle.BEFORE_START_EVENT);
        }

        try {
            setStateInternal(LifecycleState.STARTING_PREP, null, false);
            startInternal();
            if (state.equals(LifecycleState.FAILED)) {
                // This is a 'controlled' failure. The component put itself into the
                // FAILED state so call stop() to complete the clean-up.
                stop();
            } else if (!state.equals(LifecycleState.STARTING)) {
                // Shouldn't be necessary but acts as a check that sub-classes are
                // doing what they are supposed to.
                invalidTransition(Lifecycle.AFTER_START_EVENT);
            } else {
                setStateInternal(LifecycleState.STARTED, null, false);
            }
        } catch (Throwable t) {
            // This is an 'uncontrolled' failure so put the component into the
            // FAILED state and throw an exception.
            ExceptionUtils.handleThrowable(t);
            setStateInternal(LifecycleState.FAILED, null, false);
            throw new LifecycleException(sm.getString("lifecycleBase.startFail", toString()), t);
        }
    }
前面进行了一系列的状态校验,与init方法设计思想一致,具体的启动逻辑封装在各个组件内部的startInternal方法。先看Server:
protected void startInternal() throws LifecycleException {

        fireLifecycleEvent(CONFIGURE_START_EVENT, null);
        setState(LifecycleState.STARTING);

        globalNamingResources.start();

        // Start our defined Services
        synchronized (servicesLock) {
            for (int i = 0; i < services.length; i++) {
                services[i].start();
            }
        }
    }
设置事件,状态,启动命名空间管理器,最后就是遍历各个service启动:
protected void startInternal() throws LifecycleException {

        if(log.isInfoEnabled())
            log.info(sm.getString("standardService.start.name", this.name));
        setState(LifecycleState.STARTING);

        // Start our defined Container first
        if (container != null) {
            synchronized (container) {
                container.start();
            }
        }

        synchronized (executors) {
            for (Executor executor: executors) {
                executor.start();
            }
        }

        // Start our defined Connectors second
        synchronized (connectorsLock) {
            for (Connector connector: connectors) {
                try {
                    // If it has already failed, don't try and start it
                    if (connector.getState() != LifecycleState.FAILED) {
                        connector.start();
                    }
                } catch (Exception e) {
                    log.error(sm.getString(
                            "standardService.connector.startFailed",
                            connector), e);
                }
            }
        }
    }
开始顺序跟初始化顺序类似。Service中的Container仍然是一个StandardEngin实现,我们继续往下跟:
protected synchronized void startInternal() throws LifecycleException {

        // Log our server identification information
        if(log.isInfoEnabled())
            log.info( "Starting Servlet Engine: " + ServerInfo.getServerInfo());

        // Standard container startup
        super.startInternal();
    }
简单的打印日志日后,调用父类ContainerBase的启动方法:
protected synchronized void startInternal() throws LifecycleException {

        // Start our subordinate components, if any
        //相关联的组件启动
        Loader loader = getLoaderInternal();
        if ((loader != null) && (loader instanceof Lifecycle))
            ((Lifecycle) loader).start();
        logger = null;
        getLogger();
        Manager manager = getManagerInternal();
        if ((manager != null) && (manager instanceof Lifecycle))
            ((Lifecycle) manager).start();
        Cluster cluster = getClusterInternal();
        if ((cluster != null) && (cluster instanceof Lifecycle))
            ((Lifecycle) cluster).start();
        Realm realm = getRealmInternal();
        if ((realm != null) && (realm instanceof Lifecycle))
            ((Lifecycle) realm).start();
        DirContext resources = getResourcesInternal();
        if ((resources != null) && (resources instanceof Lifecycle))
            ((Lifecycle) resources).start();

        // Start our child containers, if any
        //这里负责每个Container下的子容器启动逻辑,例如Engin启动Host,Context启动Wrapper
        Container children[] = findChildren();
        List> results = new ArrayList>();
        for (int i = 0; i < children.length; i++) {
            //注意这个内部类StartChild
            results.add(startStopExecutor.submit(new StartChild(children[i])));
        }

        boolean fail = false;
        for (Future result : results) {
            try {
                result.get();
            } catch (Exception e) {
                log.error(sm.getString("containerBase.threadedStartFailed"), e);
                fail = true;
            }

        }
        if (fail) {
            throw new LifecycleException(
                    sm.getString("containerBase.threadedStartFailed"));
        }

        // Start the Valves in our pipeline (including the basic), if any
        if (pipeline instanceof Lifecycle)
            ((Lifecycle) pipeline).start();


        setState(LifecycleState.STARTING);

        // Start our thread
        threadStart();

    }
ContainerBase提供的startInternal方法同样是模板方法,负责容器相关组件以及子容器的启动,这里子容器的启动交给了一个StartChild内部类负责:
private static class StartChild implements Callable {

        private Container child;

        public StartChild(Container child) {
            this.child = child;
        }

        @Override
        public Void call() throws LifecycleException {
            child.start();
            return null;
        }
    }
StartChild简单来说就是一个Callable实现,其中组合了一个Container,在call方法中调用了Container的start方法,实现对子容器的启动。由于这里的Container是Engin实现,根据server.xml中的注册信息,Engin的子容器是Host,所以这里会继续调用Host的startInternal方法:
protected synchronized void startInternal() throws LifecycleException {

        // Set error report valve
        String errorValve = getErrorReportValveClass();
        if ((errorValve != null) && (!errorValve.equals(""))) {
            try {
                boolean found = false;
                Valve[] valves = getPipeline().getValves();
                for (Valve valve : valves) {
                    if (errorValve.equals(valve.getClass().getName())) {
                        found = true;
                        break;
                    }
                }
                if(!found) {
                    Valve valve =
                        (Valve) Class.forName(errorValve).getDeclaredConstructor().newInstance();
                    getPipeline().addValve(valve);
                }
            } catch (Throwable t) {
                ExceptionUtils.handleThrowable(t);
                log.error(sm.getString(
                        "standardHost.invalidErrorReportValveClass",
                        errorValve), t);
            }
        }
        super.startInternal();
    }
Host启动的最后一行,继续调用了父类ContainerBase的startInternal方法,然后进行内部的Pipeline,Value的初始化以及启动过程,这两个组件用来接收处理Request请求并返回Response对象,感兴趣的同学可以跟一下这部分代码,这里先不展开。后续发送消息进行项目加载以及Context初始化
5.项目加载,初始化Context
ContainerBase的startInternal方法注册了一个生命周期状态变化方法setState,Host容器在启动时会首先调用这个方法:
protected synchronized void setState(LifecycleState state)
            throws LifecycleException {
        setStateInternal(state, null, true);
    }
setState调用私有方法setStateInternal,向容器内部的子容器发送通知:
private synchronized void setStateInternal(LifecycleState state,
            Object data, boolean check) throws LifecycleException {

        if (log.isDebugEnabled()) {
            log.debug(sm.getString("lifecycleBase.setState", this, state));
        }
        if (check) {
            // Must have been triggered by one of the abstract methods (assume
            // code in this class is correct)
            // null is never a valid state
            if (state == null) {
                invalidTransition("null");
                // Unreachable code - here to stop eclipse complaining about
                // a possible NPE further down the method
                return;
            }

            // Any method can transition to failed
            // startInternal() permits STARTING_PREP to STARTING
            // stopInternal() permits STOPPING_PREP to STOPPING and FAILED to
            // STOPPING
            if (!(state == LifecycleState.FAILED ||
                    (this.state == LifecycleState.STARTING_PREP &&
                            state == LifecycleState.STARTING) ||
                    (this.state == LifecycleState.STOPPING_PREP &&
                            state == LifecycleState.STOPPING) ||
                    (this.state == LifecycleState.FAILED &&
                            state == LifecycleState.STOPPING))) {
                // No other transition permitted
                invalidTransition(state.name());
            }
        }

        this.state = state;
        String lifecycleEvent = state.getLifecycleEvent();
        if (lifecycleEvent != null) {
            fireLifecycleEvent(lifecycleEvent, data);
        }
    }
调用fireLifecycleEvent方法发送通知,最终调用的是LifecycleSupport中的fireLifecycleEvent:
public void fireLifecycleEvent(String type, Object data) {

        LifecycleEvent event = new LifecycleEvent(lifecycle, type, data);
        LifecycleListener interested[] = listeners;
        for (int i = 0; i < interested.length; i++)
            interested[i].lifecycleEvent(event);

    }
Host在启动过程中,会注册一个HostConfig的监听器,所以直接看HostConfig的lifecycleEvent方法:
public void lifecycleEvent(LifecycleEvent event) {

        // Identify the host we are associated with
        try {
            host = (Host) event.getLifecycle();
            if (host instanceof StandardHost) {
                setCopyXML(((StandardHost) host).isCopyXML());
                setDeployXML(((StandardHost) host).isDeployXML());
                setUnpackWARs(((StandardHost) host).isUnpackWARs());
                setContextClass(((StandardHost) host).getContextClass());
            }
        } catch (ClassCastException e) {
            log.error(sm.getString("hostConfig.cce", event.getLifecycle()), e);
            return;
        }

        // Process the event that has occurred
        if (event.getType().equals(Lifecycle.PERIODIC_EVENT)) {
            check();
        } else if (event.getType().equals(Lifecycle.BEFORE_START_EVENT)) {
            beforeStart();
        } else if (event.getType().equals(Lifecycle.START_EVENT)) {
            start();
        } else if (event.getType().equals(Lifecycle.STOP_EVENT)) {
            stop();
        }
    }
启动时,接收的是START_EVENT,进入start方法:
public void start() {

        if (log.isDebugEnabled())
            log.debug(sm.getString("hostConfig.start"));

        try {
            ObjectName hostON = host.getObjectName();
            oname = new ObjectName
                (hostON.getDomain() + ":type=Deployer,host=" + host.getName());
            Registry.getRegistry(null, null).registerComponent
                (this, oname, this.getClass().getName());
        } catch (Exception e) {
            log.error(sm.getString("hostConfig.jmx.register", oname), e);
        }

        if (!appBase().isDirectory()) {
            log.error(sm.getString(
                    "hostConfig.appBase", host.getName(), appBase().getPath()));
            host.setDeployOnStartup(false);
            host.setAutoDeploy(false);
        }

        if (host.getDeployOnStartup())
            deployApps();

    }
deployApps方法进行项目加载,直接看到deployDirectories:
protected void deployDirectories(File appBase, String[] files) {

        if (files == null)
            return;

        ExecutorService es = host.getStartStopExecutor();
        List> results = new ArrayList>();

        for (int i = 0; i < files.length; i++) {

            if (files[i].equalsIgnoreCase("META-INF"))
                continue;
            if (files[i].equalsIgnoreCase("WEB-INF"))
                continue;
            File dir = new File(appBase, files[i]);
            if (dir.isDirectory()) {
                ContextName cn = new ContextName(files[i], false);

                if (isServiced(cn.getName()) || deploymentExists(cn.getName()))
                    continue;

                results.add(es.submit(new DeployDirectory(this, cn, dir)));
            }
        }

        for (Future result : results) {
            try {
                result.get();
            } catch (Exception e) {
                log.error(sm.getString(
                        "hostConfig.deployDir.threaded.error"), e);
            }
        }
    }
这里的提交了一个DeployDirectory任务:
private static class DeployDirectory implements Runnable {

        private HostConfig config;
        private ContextName cn;
        private File dir;

        public DeployDirectory(HostConfig config, ContextName cn, File dir) {
            this.config = config;
            this.cn = cn;
            this.dir = dir;
        }

        @Override
        public void run() {
            config.deployDirectory(cn, dir);
        }
    }
调用HostConfig的deployDirectory方法,该方法比较长,进行了部分删减。
protected void deployDirectory(ContextName cn, File dir) {


        long startTime = 0;
        // Deploy the application in this directory
        if( log.isInfoEnabled() ) {
            startTime = System.currentTimeMillis();
            log.info(sm.getString("hostConfig.deployDir",
                    dir.getAbsolutePath()));
        }

        Context context = null;
        File xml = new File(dir, Constants.ApplicationContextXml);
        File xmlCopy = new File(configBase(), cn.getBaseName() + ".xml");

        DeployedApplication deployedApp;
        boolean copyThisXml = isCopyXML();
        boolean deployThisXML = isDeployThisXML(dir, cn);

        try {
            if (deployThisXML && xml.exists()) {
                synchronized (digesterLock) {
                    try {
                        //与Catalina中对容器的初始化思路一致,先尝试从xml中转换
                        context = (Context) digester.parse(xml);
                    } catch (Exception e) {
                        log.error(sm.getString(
                                "hostConfig.deployDescriptor.error",
                                xml), e);
                        context = new FailedContext();
                    } finally {
                        digester.reset();
                        if (context == null) {
                            context = new FailedContext();
                        }
                    }
                }
                ...
                //异常处理,忽略
            Class clazz = Class.forName(host.getConfigClass());
            LifecycleListener listener =
                (LifecycleListener) clazz.newInstance();
            context.addLifecycleListener(listener);

            context.setName(cn.getName());
            context.setPath(cn.getPath());
            context.setWebappVersion(cn.getVersion());
            context.setDocBase(cn.getBaseName());
            //建立Host与context的联系
            host.addChild(context);
        } catch (Throwable t) {
            ExceptionUtils.handleThrowable(t);
            log.error(sm.getString("hostConfig.deployDir.error",
                    dir.getAbsolutePath()), t);
        } finally {
            ...
    }
这里调用了Host的addChild方法,简单做了一个类型检查:
public void addChild(Container child) {

        child.addLifecycleListener(new MemoryLeakTrackingListener());

        if (!(child instanceof Context))
            throw new IllegalArgumentException
                (sm.getString("standardHost.notContext"));
        super.addChild(child);

    }
继续跟父类的addChild:
public void addChild(Container child) {
        if (Globals.IS_SECURITY_ENABLED) {
            PrivilegedAction dp =
                new PrivilegedAddChild(child);
            AccessController.doPrivileged(dp);
        } else {
            addChildInternal(child);
        }
    }
private void addChildInternal(Container child) {
if( log.isDebugEnabled() )
log.debug("Add child " + child + " " + this);
synchronized(children) {
if (children.get(child.getName()) != null)
throw new IllegalArgumentException("addChild: Child name '" +
child.getName() +
"' is not unique");
child.setParent(this); // May throw IAE
children.put(child.getName(), child);
}
// Start child
// Don't do this inside sync block - start can be a slow process and
// locking the children object can cause problems elsewhere
try {
if ((getState().isAvailable() ||
LifecycleState.STARTING_PREP.equals(getState())) &&
startChildren) {
child.start();
}
} catch (LifecycleException e) {
log.error("ContainerBase.addChild: start: ", e);
throw new IllegalStateException("ContainerBase.addChild: start: " + e);
} finally {
fireContainerEvent(ADD_CHILD_EVENT, child);
}
}前面做了一个同步的父子关系绑定,后面就是Context的启动方法child.start,之后就调用Context内部的init和start方法,Context继续初始化自己内部的 Wrapper,Wrapper是整个Engin引擎中的最底层Container,它与Servlet直接打交道,不允许再有子容器。
另外需要注意一点,从Server一直到Host的初始化都是在main线程中执行,Host执行ContainerBase的startInternal方法时新开了一个线程用来后续对Context的初始化操作,也就是之前的StartChlid任务。由于后续调用了get方法,此时主线程会进入wait状态,直到Context初始化完成。
6.守护线程
Engin容器启动完成后,startInternal方法在第一次被调用时(Context初始化自己内部的第一个Wrapper)还做了另外一件事,代码一直执行到threadStart方法:
protected void threadStart() {

        if (thread != null)
            return;
        if (backgroundProcessorDelay <= 0)
            return;

        threadDone = false;
        String threadName = "ContainerBackgroundProcessor[" + toString() + "]";
        thread = new Thread(new ContainerBackgroundProcessor(), threadName);
        thread.setDaemon(true);
        thread.start();

    }
这段代码第一次执行是在Host初始化Context的时侯,此时启动了一个后台守护进程ContainerBackgroundProcessor:
protected class ContainerBackgroundProcessor implements Runnable {

        @Override
        public void run() {
            Throwable t = null;
            String unexpectedDeathMessage = sm.getString(
                    "containerBase.backgroundProcess.unexpectedThreadDeath",
                    Thread.currentThread().getName());
            try {
                while (!threadDone) {
                    try {
                        Thread.sleep(backgroundProcessorDelay * 1000L);
                    } catch (InterruptedException e) {
                        // Ignore
                    }
                    if (!threadDone) {
                        Container parent = (Container) getMappingObject();
                        ClassLoader cl =
                            Thread.currentThread().getContextClassLoader();
                        if (parent.getLoader() != null) {
                            cl = parent.getLoader().getClassLoader();
                        }
                        processChildren(parent, cl);
                    }
                }
            } catch (RuntimeException e) {
                t = e;
                throw e;
            } catch (Error e) {
                t = e;
                throw e;
            } finally {
                if (!threadDone) {
                    log.error(unexpectedDeathMessage, t);
                }
            }
        }
重点关注processChildren方法,该方法递归调用了Engin所有子容器的后台方法,用来监听启动后运行时tomcat的事件改变,包括tomcat的运行状态,项目的重新加载等等,这里先不展开,大家可以跟进到每个Container容器内的backgroundProcess方法查看,这里简单贴一下processChildren方法代码:
protected void processChildren(Container container, ClassLoader cl) {
            try {
                if (container.getLoader() != null) {
                    Thread.currentThread().setContextClassLoader
                        (container.getLoader().getClassLoader());
                }
                container.backgroundProcess();
            } catch (Throwable t) {
                ExceptionUtils.handleThrowable(t);
                log.error("Exception invoking periodic operation: ", t);
            } finally {
                Thread.currentThread().setContextClassLoader(cl);
            }
            Container[] children = container.findChildren();
            for (int i = 0; i < children.length; i++) {
                if (children[i].getBackgroundProcessorDelay() <= 0) {
                    processChildren(children[i], cl);
                }
            }
        }
四、总结
其实整个tomcat关于启动部分的源代码还算简单,但是对理解tomcat整体工作流程以及各个组件的功能有很大帮助,重点理解tomcat几个核心组件的初始化顺序,同时也可以加深对模板模式的理解应用。后面将会继续整理关于Engine,Host,Context的启动流程以及tomcat从接到请求到响应的整体流程。
参考文档:
https://blog.csdn.net/w1992wishes/article/details/79317817
https://blog.csdn.net/yuxiangaaaaa/article/details/72867037
https://blog.csdn.net/sundacheng1989/article/details/79064112
https://blog.csdn.net/lxpblsc/article/details/49757345
https://blog.csdn.net/qq_18736155/article/details/81335509