SpringSecurityOauth2实现前后端分离的token服务,app登录
图解认证服务器和资源服务器
用户通过认证服务器获取到token之后,在通过token访问服务器的资源(接口)
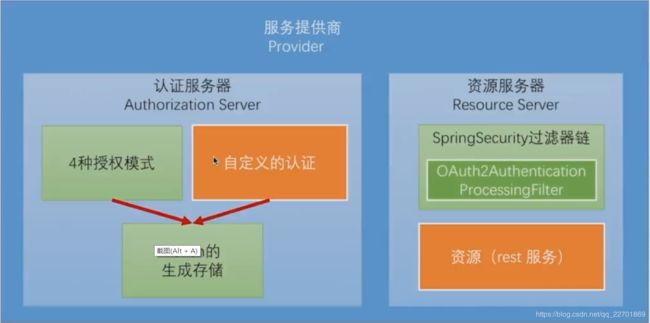
认证服务器
授权码模式
第一步:在@configuration配置类中
@Configuration
//加上这个注解就实现了一个认证服务器
@EnableAuthorizationServer
public class AuthorizationServerConfig {

}
启动服务的时候,日志会打印出两个地址,第一个请求是获取授权码code,第二个请求是获取token

如果没有配置clientId和secret,在项目启动的时候,会有自动生成一个
security.oauth2.client.clientId = 36845fbb-a4eb-474a-97a1-5409aa5130f4
security.oauth2.client.secret = c9663295-e3e1-40b2-9376-d2124e234025
在配置文件可以配置
security.oauth2.client.clientId = imooc
security.oauth2.client.clientSecret = imoocsecret/oauth/authorize:让用户跳过来点击授权的地址
/oauth/token:获取token的地址
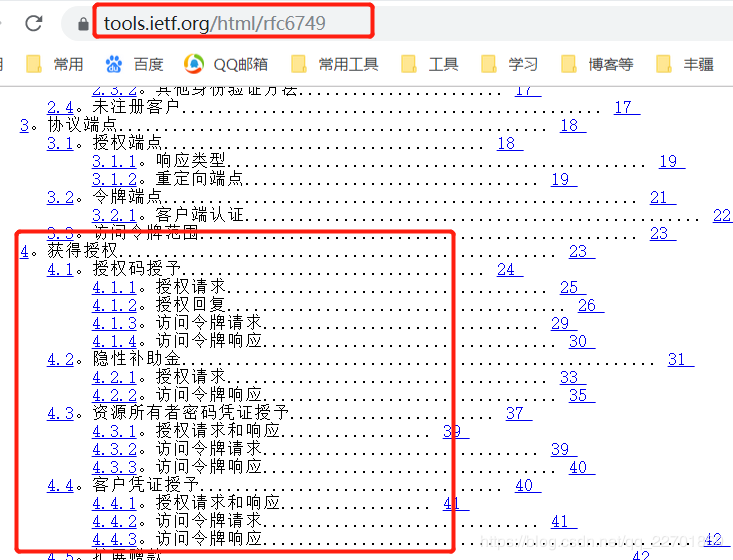
具体请求可以查看oauth2官方文档
https://tools.ietf.org/html/rfc6749
现在启动SpringSecurity项目之后,测试访问示例
http://localhost:8060/oauth/authorize?response_type=code&client_id=imooc&redirect_uri=https://example.com&scope=all
访问之后要填入用户名和密码

用来校验的service,这里设置的用户名是任意的,密码钥匙123456(正式使用的时候,这里是数据库存储的用户名和密码)
用户名:任意
密码:123456
@Component
public class DemoUserDetailsService implements UserDetailsService, SocialUserDetailsService {

	private Logger logger = LoggerFactory.getLogger(getClass());

	@Autowired
	private PasswordEncoder passwordEncoder;

	/*
	 * (non-Javadoc)
	 *
	 * @see org.springframework.security.core.userdetails.UserDetailsService#
	 * loadUserByUsername(java.lang.String)
	 */
	@Override
	public UserDetails loadUserByUsername(String username) throws UsernameNotFoundException {
		logger.info("表单登录用户名:" + username);
		return buildUser(username);
	}

	@Override
	public SocialUserDetails loadUserByUserId(String userId) throws UsernameNotFoundException {
		logger.info("设计登录用户Id:" + userId);
		return buildUser(userId);
	}

//用来校验登录使用
	private SocialUserDetails buildUser(String userId) {
		// 根据用户名查找用户信息
		//根据查找到的用户信息判断用户是否被冻结
		String password = passwordEncoder.encode("123456");
		logger.info("数据库密码是:"+password);
//这里加上ROLE_USER
		return new SocialUser(userId, password,
				true, true, true, true,
				AuthorityUtils.commaSeparatedStringToAuthorityList("admin,ROLE_USER"));
	}

}
点击登录之后,需要点击是否同意给授权码

点击approve,返回到redirect_uri=https://example.com这个页面,返回的页面后面带上了授权码这个参数
https://example.com/?code=5GEoKq,带上了授权码code=5GEoKq
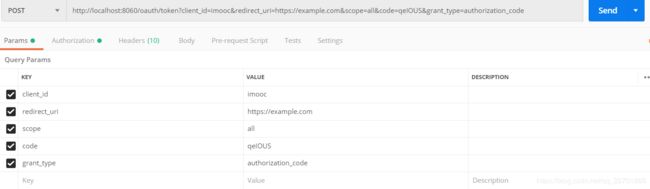
接下来通过授权码获取token,使用postman来模拟,获取tonken
参数
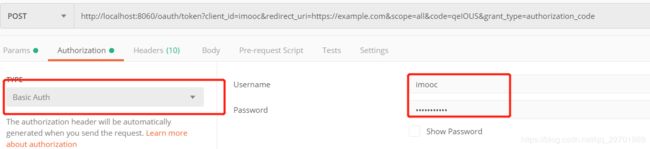
authorization
content-type
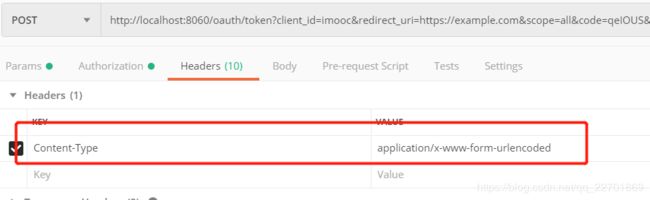
请求成功之后的返回值,access_token就是获取到的token,可以通过token访问接口
{
"access_token": "34e8bb9e-f261-49ff-b5b6-ad16f7f7fe4b",
"token_type": "bearer",
"refresh_token": "9723adcf-7bfe-4a8d-9ab1-d512017ee715",
"expires_in": 43199,
"scope": "all"
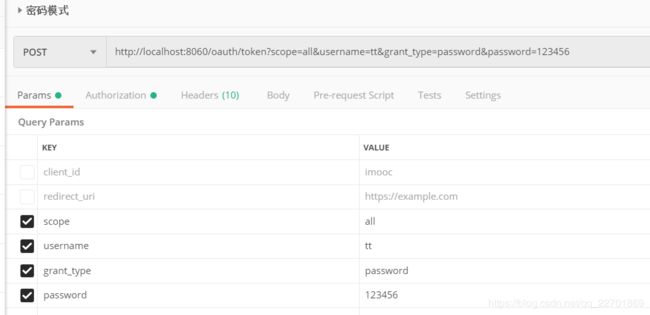
}上面的是通过授权码模式获取token,下面是密码模式获取token,只需要发送一次请求
密码模式发送请求
请求参数
authorization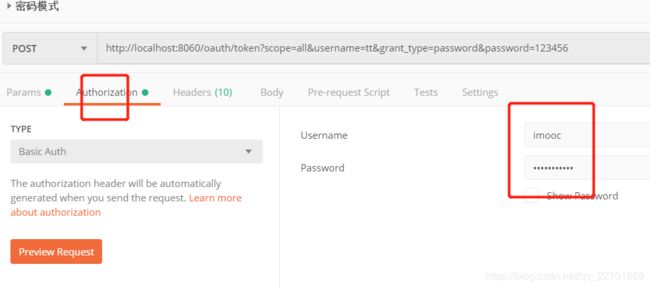
返回结果和授权码模式相同
{
    "access_token": "66b66254-3876-4bf0-8d68-c600f2c92a5d",
    "token_type": "bearer",
    "refresh_token": "b9e7393f-d294-4f61-98b5-c6b1d1d5a8ae",
    "expires_in": 43167,
    "scope": "all"
}备注:只要session不过期,每次获取到的access_token是相同的
资源服务器,获取到token之后,通过token访问资源(接口)
@Configuration
//加上这个注解,就能够实现简单的资源服务器了
@EnableResourceServer
public class ImoocResourceServerConfig {

}
有一个简单的接口请求
@GetMapping("/me")
	public Object getCurrentUser(UserDetails user) {
		return new UserDetails();
	}
直接访问http://localhost:8060/user/me,会把错,如下
结果:unauthorized
Full authentication is required to access this resource

unauthorized
这个时候在请求的时候,在header中加上authentication,就是上面获取到的返回结果
{
    "access_token": "34e8bb9e-f261-49ff-b5b6-ad16f7f7fe4b",
    "token_type": "bearer",
    "refresh_token": "9723adcf-7bfe-4a8d-9ab1-d512017ee715",
    "expires_in": 43199,
    "scope": "all"
}
再点击请求,就能得到返回结果
弱点
1、无法验证特别请求,比如短信验证,验证码登录等
2、token是存储在内存中的,服务器重启之后,token就无效了,页面请求就是unauthorized
1