许多UIView的子类,如UIButton或UILabel,它们的形状都是系统固定的。但是,对于一些特殊的情况,我们需要绘制产品狗想要的图形。那么等待我们的只有两个选择:第一,可以使用UIImageView类显示一个静态的图形(建议,但是low);第二,通过代码动态地绘制一个图形(不建议,但是某些情况需要使用)。
绘图并不难,UIKit提供了一些简单的方法,但是,完整的API是由Core Graphics提供,也称之为Quartz 2D。本文的内容也是围绕Quartz 2D的简单使用展开(由浅到深):
Core Graphics简介。
UIImage的简单处理。
drawRect Core Graphics与圆角定制。
drawRect UIBezierPath与圆角定制。
一、Core Graphics简介
Quartz 2D is an advanced, two-dimensional drawing engine available for iOS application development and to all Mac OS X application environments outside of the kernel. Quartz 2D provides low-level, lightweight 2D rendering with unmatched output fidelity regardless of display or printing device. Quartz 2D is resolution- and device-independent; you don’t need to think about the final destination when you use the Quartz 2D application programming interface (API) for drawing.The Quartz 2D API is easy to use and provides access to powerful features such as transparency layers, path-based drawing, offscreen rendering, advanced color management, anti-aliased rendering, and PDF document creation, display, and parsing.The Quartz 2D API is part of the Core Graphics framework, so you may see Quartz referred to as Core Graphics or, simply, CG.
Quartz 2D是一种先进的二维绘画引擎,它可以用来进行iOS应用开发,并且在Mac OS X系统下也适用于内核外的开发。Quartz 2D提供了层次低,重量轻的二维渲染方式,并且在输出或打印设备上有无与伦比的输出保真度。Quartz 2D的分辨率是与设备无关的,因此你不需要在你适用Quartz 2D的API的考虑太多设备的事情。Quartz 2D API易于使用,并且提供了一些强大的功能,如透明层,基于路径的绘制,离屏渲染,先进的色彩管理机制,抗锯齿渲染,和PDF文档的创建、显示、和解析。Quartz 2D API是Core Graphics框架的一部分,所以你可以看到Quartz 2D被称为Core Graphics或CG。
二、UIImage的简单处理
为了更方便的在下面的drawRect中使用图形上下文,本文首先在UIImage的的角度对图像进行处理来演示下什么是图形上下文,大致从UIImage和CGImage两个角度。(DrawImageDemo)
1. 通过UIImage和图形上下文(实现图像的合成)
- (UIImage *)saveToImage
{
    UIImage *image = [UIImage imageNamed:@"nvdi"];
    CGSize size = [image size];
    UIGraphicsBeginImageContext(CGSizeMake(size.width, size.height * 2));
    [image drawAtPoint:CGPointMake(0, 0)];
    [image drawAtPoint:CGPointMake(0, size.height)];
    UIImage *resultImage = UIGraphicsGetImageFromCurrentImageContext();
    UIGraphicEndImageContext();
    return resultImage;
}
讲解:
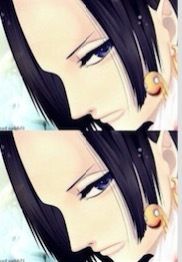
由两张图片的对比,可以发现代码的作用是把一个女帝的图片转成两个女帝的图片。那么,代码是如何作用的呢?由上述代码可见,代码主要运用了两个方面的内容:
-
UIGraphicsBeginImageContext等UIGraphics系列方法
a、UIGraphicsBeginImageContext用于指定新的image的size并开始对上下文的编辑; b、UIGraphicsGetImageFromCurrentImageContext用于获取当前上下文中的image; c、UIGraphicEndImageContext用于结束对上下文的编辑; -
drawAtPoint等UIImage的实例方法
a、drawAtPoint用于在某个点做为起始点放置一张图片;
b、drawInRect用于在一个矩形区域里面放置一张图片;
2. 通过CGImage和图形上下文(实现图像的切割和合成)
原图:(CG层图片最好使用png格式,jpg转换成CGImage后与原图大小不同)
处理后:
代码:
- (UIImage *)cgSaveToImage
{
    UIImage *image = [UIImage imageNamed:@"nvdi.png"];
    CGSize size = [image size];
    CGImageRef imageLeft = CGImageCreateWithImageInRect([image CGImage], CGRectMake(0, 0, size.width/2, size.height));
    CGImageRef imageRight = CGImageCreateWithImageInRect([image CGImage], CGRectMake(size.width/2, 0, size.width/2, size.height));
    UIGraphicsBeginImageContext(CGSizeMake(size.width*1.5, size.height));
    CGContextRef context = UIGraphicsGetCurrentContext();
    CGContextDrawImage(context, CGRectMake(0, 0, size.width/2, size.height), imageLeft);
    CGContextDrawImage(context, CGRectMake(size.width, 0, size.width/2, size.height), imageRight);
    UIImage *resultImage = UIGraphicsGetImageFromCurrentImageContext();
    UIGraphicsEndImageContext();
    return resultImage;
}
问题:
由于Core Graphics上的操作依据的坐标系是mac系统版本的,而非iOS,所以造成CGImageRef出现翻过来的情形。这里我们可以通过进一步的处理解决这个问题(比如,用Core Graphics的CGContextDrawImage方法再画一次)。
代码调整:
static inline CGImageRef flip (CGImageRef im)
{
    CGSize size = CGSizeMake(CGImageGetWidth(im), CGImageGetHeight(im));
    UIGraphicsBeginImageContext(size);
    CGContextDrawImage(UIGraphicsGetCurrentContext(), CGRectMake(0, 0, size.width, size.height), im);
    CGImageRef result = [UIGraphicsGetImageFromCurrentImageContext() CGImage];
    UIGraphicsEndImageContext();
    return result;
}
CGContextDrawImage(context, CGRectMake(0, 0, size.width/2, size.height), flip(imageLeft));
CGContextDrawImage(context, CGRectMake(size.width, 0, size.width/2, size.height), flip(imageRight));调整后图片:
结论:
无论是通过UIImage的实例方法,还是通过Core Graphics的C方法,均可以实现图片的处理。相比较而言,CG方式更为灵活,但是也会有一些需要注意的问题,比如图像的翻转问题和图片的格式问题。
三、drawRect Core Graphics与圆角定制
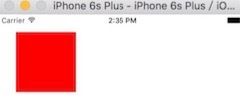
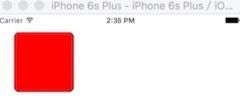
首先,为什么要使用drawRect绘制圆角,因为对于某些场景,比如UIImageView需要有圆角。当然我们运用layer层的两个属性cornerRadius和maskToBounds也可以实现。但是maskToBounds会触发离屏渲染(iOS9以前),因此我们可以使用drawRect+CoreGraphics来绘制圆角(其实这也是离屏渲染,但是是CPU完成图像处理,所以速度快)。当然,使用drawRect也有其缺点,即会触发view的重绘,其损耗甚至可能大于离屏渲染,此问题本文最后会总结。(DrawRectDemo)
未加圆角图:
加圆角图:
代码:
- (void)drawRect:(CGRect)rect
{
    CGFloat width = rect.size.width;
    CGFloat height = rect.size.height;
    // 简便起见,这里把圆角半径设置为长和宽平均值的1/10
    CGFloat radius = (width + height) * 0.05;
    // 获取CGContext,注意UIKit里用的是一个专门的函数
    CGContextRef context = UIGraphicsGetCurrentContext();
    // 移动到初始点
    CGContextMoveToPoint(context, radius, 0);
    // 绘制第1条线和第1个1/4圆弧
    CGContextAddLineToPoint(context, width - radius, 0);
    CGContextAddArc(context, width - radius, radius, radius, -0.5 * M_PI, 0.0, 0);
    // 绘制第2条线和第2个1/4圆弧
    CGContextAddLineToPoint(context, width, height - radius);
    CGContextAddArc(context, width - radius, height - radius, radius, 0.0, 0.5 * M_PI, 0);
    // 绘制第3条线和第3个1/4圆弧
    CGContextAddLineToPoint(context, radius, height);
    CGContextAddArc(context, radius, height - radius, radius, 0.5 * M_PI, M_PI, 0);
    // 绘制第4条线和第4个1/4圆弧
    CGContextAddLineToPoint(context, 0, radius);
    CGContextAddArc(context, radius, radius, radius, M_PI, 1.5 * M_PI, 0);
    // 闭合路径
    CGContextClosePath(context);
    CGContextSetLineWidth(context, 1);
    CGContextSetStrokeColorWithColor(context, [UIColor blackColor].CGColor);
    // 填充半透明粉红色
    CGContextSetRGBFillColor(context, 100.0, 0.0, 0.0, 0.5);
    CGContextDrawPath(context, kCGPathFill|kCGPathFillStroke);
}
拾遗:
代码的解释就不赘述了,见注释。这里说一下setNeedsDisplay与drawRect的关系:
setNeedsDisplay会标记一次重绘,会在下一次loop的时候触发view重绘,触发drawRect。当然可以简单的理解为setNeedsDisplay会触发drawRect。
那么什么时候需要setNeedsDisplay去触发drawRect呢?可以类比tableView,需要使用reloadData等函数刷新界面,这也类似,如果drawRect中的操作与数据源相关,并且数据源发生改变,则需要setNeedsDisplay调用drawRect重新绘制。
四、drawRect UIBezierPath与圆角定制
UIBezierPath类是基于Core Graphics的,准确的说是基于CGPath的。其对CG的进一步封装,使得我们可以在某些场景更方便的使用drawRect,比如绘制圆角。
代码:
- (void)drawRect:(CGRect)rect
{
    CGFloat width = rect.size.width;
    CGFloat height = rect.size.height;
    // 简便起见,这里把圆角半径设置为长和宽平均值的1/10
    CGFloat radius = (width + height) * 0.05;
    UIBezierPath *p = [UIBezierPath bezierPathWithRoundedRect:rect cornerRadius:radius];
    [p stroke];
}
拓展:
上述的代码可以实现类似三中描边的效果,而且非常方便。当然,我们可也已通过UIBezierPath的一些实例方法进行各种其他图形的绘制,比如通过addLineToPoint来绘制一条线。
总结:
1、圆角绘制:
对于一般的view(非UIImageView),仅仅通过cornerRadius设置即可,不需要maskToBounds,因为cornerRadius可以控制view的背景色。(无边框,通过背景色区分)
对于某些需要绘制边框的需求,我们可以通过上述三、四两种方式绘制边框。
对于UIImageView,目前推荐大家尝试使用ZYCornerRadius或者HJCornerRadius(两种方式应该都是采用裁剪图片的方式,类似一中所述),当然也不用过于在乎,因为iOS9以后我们不需要再考虑离屏渲染造成的问题。
2、drawRect应用场景:
对于某些需要绘制边框的需求,我们可以通过上述三、四两种方式绘制边框。
对于某些非矩形,并且使用系统不提供的样式显示的,我们需要drawRect进行自绘。
