【安卓逆向】何为Xposed控件注入
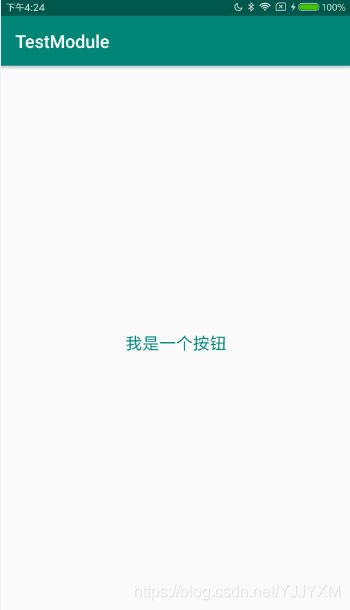
所谓的控件注入就是使用第三方工具对目标app进行view注入。主要作用就是为了在目标app中实现自己想要的功能。那么,先看一下该案例的效果。
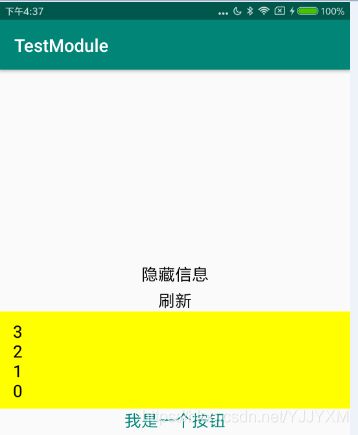
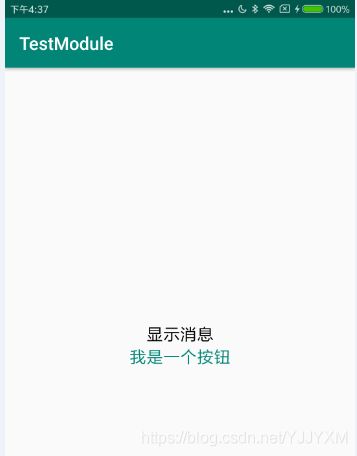
插件注入控件后的效果图:
插件主要增加了显示/隐藏消息的功能和点击刷新在黄色区域增加了字符串数据.


0x01 分析目标app代码
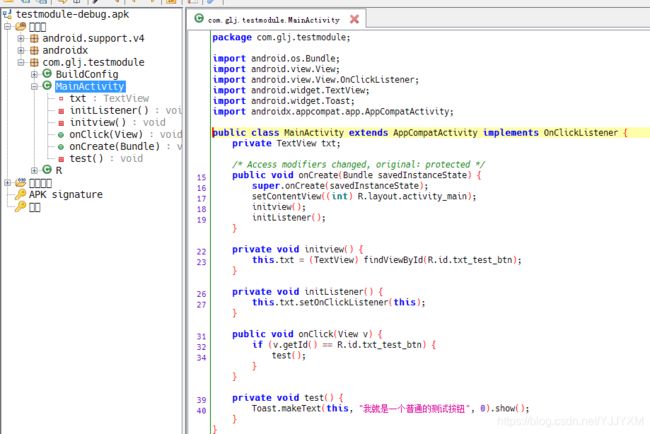
直接将app拖进jadx中进行分析.可以看到代码没多少.只有一个TextView控件,而且只实现了一个点击事件.

那么再观察一下界面的代码,很简洁.也就是将TextView放在LinearLayout中.xml代码扣了出来排版看起来比较好看…
<RelativeLayout xmlns:android="http://schemas.android.com/apk/res/android" android:layout_width="match_parent" android:layout_height="match_parent">

<LinearLayout

   android:gravity="center"

   android:orientation="vertical"

   android:layout_width="match_parent"

   android:layout_height="wrap_content"

   android:layout_centerInParent="true">

    <TextView

       android:textSize="19sp"

       android:textColor="@color/colorPrimary"

       android:id="@+id/txt_test_btn"

       android:layout_width="wrap_content"

       android:layout_height="wrap_content"

       android:text="我是一个按钮"/>
</LinearLayout>

</RelativeLayout>
0x02 Xp插件控件注入部分的代码编写
gradle依赖:
compileOnly 'de.robv.android.xposed:api:82'
compileOnly 'de.robv.android.xposed:api:82:sources'
manifest配置文件:
<?xml version="1.0" encoding="utf-8"?>
<manifest xmlns:android="http://schemas.android.com/apk/res/android"
    package="com.glj.hooktestmodule">

    <application
        android:allowBackup="true"
        android:icon="@mipmap/ic_launcher"
        android:label="@string/app_name"
        android:roundIcon="@mipmap/ic_launcher_round"
        android:supportsRtl="true"
        android:theme="@style/AppTheme">
<!--        <activity android:name=".MainActivity">
            <intent-filter>
                <action android:name="android.intent.action.MAIN" />

                <category android:name="android.intent.category.LAUNCHER" />
            </intent-filter>
        </activity>-->
        <!-- 是否是xposed模块,xposed根据这个来判断是否是模块 -->
        <meta-data
            android:name="xposedmodule"
            android:value="true" />

        <!-- 模块描述,显示在xposed模块列表那里第二行 -->
        <meta-data
            android:name="xposeddescription"
            android:value="test控件注入" />

        <!-- 最低xposed版本号(lib文件名可知) -->
        <meta-data
            android:name="xposedminversion"
            android:value="54" />
    </application>

</manifest>
xposed_init:这玩意自定义
com.glj.hooktestmodule.MainHook
主Hook代码:
public class MainHook implements IXposedHookLoadPackage {

    private String packageName = "com.glj.testmodule";

    private String className = packageName + ".MainActivity";

    private MyLinear myLinear;

    @Override
    public void handleLoadPackage(XC_LoadPackage.LoadPackageParam lpparam) throws Throwable {

        if (lpparam.packageName.equals(packageName)){

            LogUtil.i("testmodule已加载...");

            final Class<?> mMainActivity = XposedHelpers.findClass(className, lpparam.classLoader);

            XposedHelpers.findAndHookMethod(mMainActivity, "onCreate", Bundle.class, new XC_MethodHook() {
                @Override
                protected void afterHookedMethod(MethodHookParam param) throws Throwable {
                    super.afterHookedMethod(param);

                    LogUtil.i("onCreate已加载...");

                    final Activity mActivity = (Activity) param.thisObject;
                    TextView txt = null;
                    try{
                        txt = (TextView) XposedHelpers.getObjectField(mActivity, "txt");
                    } catch (Exception e) {
                        LogUtil.i("txt控件没找到");
                    }


                    if (null == txt) return;

                    LogUtil.i(txt.getText().toString());

                    //获取控件父布局
                    LinearLayout linearLayout = (LinearLayout) txt.getParent();

                    //需注入的View
                    myLinear = new MyLinear();

                    //将布局控件设置到父布局中
                    linearLayout.addView(myLinear.createLinear(mActivity), 0);

                    LogUtil.i("控件注入成功!");
                }
            });

        }
    }
}
MyLinear的代码:
public class MyLinear {

    private TextView tv, txtMsg;
    private ScrollView scrollView;
    private LinearLayout mLinearLayout;

    private int index = 0;

    private boolean isVISIBLE = true;

    public LinearLayout createLinear(Context context){

        //创建LinearLayout布局
        LinearLayout groupLinear = new LinearLayout(context);
        groupLinear.setGravity(Gravity.CENTER);
        groupLinear.setLayoutParams(new LinearLayout.LayoutParams(LinearLayout.LayoutParams.MATCH_PARENT, LinearLayout.LayoutParams.WRAP_CONTENT));
        groupLinear.setOrientation(LinearLayout.VERTICAL);

        //创建TextView控件添加到groupLinear中
        final TextView tvVisibility = new TextView(context);
        tvVisibility.setLayoutParams(new ViewGroup.LayoutParams(ViewGroup.LayoutParams.WRAP_CONTENT, ViewGroup.LayoutParams.WRAP_CONTENT));
        tvVisibility.setTextColor(Color.BLACK);
        tvVisibility.setText("隐藏信息");
        tvVisibility.setTextSize(19);
        tvVisibility.setOnClickListener(new View.OnClickListener() {
            @Override
            public void onClick(View v) {
                if (isVISIBLE) {
                    isVISIBLE = false;
                    tvVisibility.setText("显示消息");
                    setVisibility(View.GONE);
                } else {
                    isVISIBLE = true;
                    tvVisibility.setText("隐藏信息");
                    setVisibility(View.VISIBLE);
                }
            }
        });
        groupLinear.addView(tvVisibility);

        //创建LinearLayout添加到groupLinear中
        mLinearLayout = new LinearLayout(context);
        mLinearLayout.setGravity(Gravity.CENTER);
        mLinearLayout.setPadding(0,10,0,0);
        mLinearLayout.setLayoutParams(new LinearLayout.LayoutParams(LinearLayout.LayoutParams.MATCH_PARENT, LinearLayout.LayoutParams.WRAP_CONTENT));
        mLinearLayout.setOrientation(LinearLayout.VERTICAL);

        //创建TextView添加到mLinearLayout中
        tv = new TextView(context);
        tv.setLayoutParams(new ViewGroup.LayoutParams(ViewGroup.LayoutParams.WRAP_CONTENT, ViewGroup.LayoutParams.WRAP_CONTENT));
        tv.setTextColor(Color.BLACK);
        tv.setText("刷新");
        tv.setTextSize(19);
        tv.setOnClickListener(new View.OnClickListener() {
            @Override
            public void onClick(View v) {
                showMsg(index+"");
                index++;
            }
        });
        mLinearLayout.addView(tv);

        //创建ScrollView添加到mLinearLayout中
        scrollView = new ScrollView(context);
        scrollView.setPadding(0, 20, 0,0);
        scrollView.setBackgroundColor(Color.YELLOW);
        scrollView.setLayoutParams(new ViewGroup.LayoutParams(ViewGroup.LayoutParams.MATCH_PARENT, 300));
        scrollView.setVerticalScrollBarEnabled(false);

        //创建TextView添加到ScrollView中
        txtMsg = new TextView(context);
        txtMsg.setLayoutParams(new ViewGroup.LayoutParams(ViewGroup.LayoutParams.WRAP_CONTENT, ViewGroup.LayoutParams.WRAP_CONTENT));
        txtMsg.setTextColor(Color.BLACK);
        txtMsg.setTextSize(19);
        txtMsg.setPadding(40, 5, 40, 5);
        scrollView.addView(txtMsg);
        mLinearLayout.addView(scrollView);
        groupLinear.addView(mLinearLayout);

        return groupLinear;
    }

    /**
     * 设置文本信息显示
     * @param str
     */
    private void showMsg (String str) {
        String msg = txtMsg.getText().toString();
        msg = str + "\n" + msg;
        LogUtil.i(msg);
        txtMsg.setText(msg);
        scrollView.post(new Runnable() {
            @Override
            public void run() {
                scrollView.fullScroll(View.FOCUS_UP);
            }
        });
    }

    /**
     * 设置mLinearLayout的可视化
     * @param visibility
     */
    private void setVisibility(int visibility){
        mLinearLayout.setVisibility(visibility);
    }

}
本文出自guan原创,转载请注明出处,有疑问请联系作者。
