Linux服务管理
本文介绍了CentOS 5、6、7服务管理相关内容
文章目录
- 一. 概念
- 二. SysV init的服务管理
- 1. 服务分类
- 2. SysV服务管理风格
- 服务脚本
- 依赖关系
- 运行级别
- 3. 相关命令
- service
- chkconfig
- 服务脚本
- 基于xinetd的服务
- 三、SystemD服务管理
- 1. 概述
- 2. 相关文件
- 目录
- Service Unit File
- Unit段
- Service段
- Install段
- 3. systemctl
- Service管理
- 基本管理
- 查看多个服务
- Target管理
- 查看依赖性
- 4. 日志
- 概述
- journalctl
- 四、例
一. 概念
服务(Service)是指执行指定系统功能的程序、例程或进程,以便支持其他程序,尤其是底层(接近硬件)程序1
简单来说,服务就是计算机对上层提供的某种功能或能力,如网络功能、任务计划等,而这些能力需要有相应的程序来完成,我们知道,进程是程序运行的一个实例,通常,这类提供特定服务的进程会随系统启动而运行,如我们一开机就可以使用网络,可以通过SSH登录系统……
与此前所不同的是,这类进程并不占用命令提示符,仅在后台默默运行,常驻在内存中,遂我们将其称为守护进程(Daemon) ,在Unix-Like系统中,提供服务的进程大部分都是Daemon,故很多服务的Server端程序(如sshd、crond、httpd),甚至CentOS 7使用的systemd,其最后的字母“d”就是Daemon之意
在Linux系统启动一文中,介绍了SysV、Upstart、Systemd,而就服务管理的角度而言,SysV与Upstart类似,以下将介绍SysV与Systemd在服务管理方面的相关机制
二. SysV init的服务管理
1. 服务分类
我们知道,服务的具体提供这一般为守护进程,SysV将守护进程分为两种
- 独立守护进程
- 超级守护进程
独立守护进程提供一种或一类服务,相应的进程可独立启动2(Stand Alone)
而超级守护进程(Super Daemon)将由一个进程相应客户端请求,而后将唤醒相应的进程,当服务结束时,所唤醒的进程也将被关闭
想象这样一个场景,有5个人A、B、C、D、E,其中B、C、D、E每人都有一项技能,平时就在房间里休息,而A这个家伙就守在大家门口,外人若需要帮助,则根据大家请求的事情叫醒相应的人去提供帮助即可,事情干完后,依然回去休息
在这个场景中,A就相当于超级守护进程,事实上在Linux中,该角色一般由xinetd或inetd担当,如今inetd已经被xinetd取代
2. SysV服务管理风格
服务脚本
所有的服务脚本放置于/etc/init.d/下,多数是shell脚本,他们接受诸如start、stop、restart、status等参数,如
-
启动:
/etc/init.d/DAEMON start -
关闭:
/etc/init.d/DAEMON stop -
重新启动:
/etc/init.d/DAEMON restart -
状态查看:
/etc/init.d/DAEMON status
依赖关系
我们知道,同软件一样,服务之间有依赖关系,此前在Linux系统启动中已有提及,显而易见,被依赖的服务应该优先启动
在/etc/rc.d/rcX.d/下有K或S开头的链接文件,通过字母后的数字来确定启动或关闭次序,在关闭操作中,被依赖到的服务应该后关闭,而在启动操作中,被依赖到的服务应该优先启动
另外,在/etc/rc.d/rc{2,3,4,5}.d/下,都有一个S99local文件,与其他文件不同的是,该文件指向其父目录的rc.local,即/etc/rc.local
我们亦可将在2、3、4、5级别需要运行的操作或服务指令写入该文件
运行级别
从服务管理的角度来看,运行级别就是服务运行的一套配置,在用户切换运行级别时,sysvinit 开始运行/etc/rc.d/rc脚本。该脚本接受一个RunLevel作为其参数,根据不同的 RunLevel,rc 脚本将打开对应该RunLevel的rcX.d目录(X为runlevel),找到并运行存放在该目录下的所有启动脚本。每个RunLevel都有一个这样的目录,目录名为/etc/rc.d/rcX.d
在这些目录下存放着很多不同的脚本。文件名以S开头的脚本就是启动时应该运行的脚本,S后面跟的数字定义了这些脚本的执行顺序。在/etc/rc.d/rcX.d目录下的脚本其实都是一些软链接文件,真实的脚本文件存放在/etc/init.d目录下
/etc/rc.d/rc脚本中关于服务的启动与停止大致方式为
for srv in /etc/rc.d/rc$runlevel.d/K*; do
	$srv stop
done

###

for srv in /etc/rc.d/rc$runlevel.d/S*; do
	$srv start
done
相关内容在Linux系统启动-SysV init已有介绍
3. 相关命令
service
上文已有说明,服务脚本放置于/etc/init.d/下,他们接受诸如start、stop、restart、status等参数,此外还可以使用service命令执行相同的管理操作
事实上,该命令也是一个脚本(/sbin/service),内容如下
#!/bin/sh

. /etc/init.d/functions

VERSION="$(basename $0) ver. 0.91"
USAGE="Usage: $(basename $0) < option > | --status-all | \
[ service_name [ command | --full-restart ] ]"
SERVICE=
SERVICEDIR="/etc/init.d"
OPTIONS=

if [ $# -eq 0 ]; then
   echo "${USAGE}" >&2
   exit 1
fi

cd /
while [ $# -gt 0 ]; do
  case "${1}" in
    --help | -h | --h* )
       echo "${USAGE}" >&2
       exit 0
       ;;
    --version | -V )
       echo "${VERSION}" >&2
       exit 0
       ;;
    *)
       if [ -z "${SERVICE}" -a $# -eq 1 -a "${1}" = "--status-all" ]; then
          cd ${SERVICEDIR}
          for SERVICE in * ; do
            case "${SERVICE}" in
              functions | halt | killall | single| linuxconf| kudzu)
                  ;;
              *)
                if ! is_ignored_file "${SERVICE}" \
		    && [ -x "${SERVICEDIR}/${SERVICE}" ]; then
                  env -i PATH="$PATH" TERM="$TERM" "${SERVICEDIR}/${SERVICE}" status
                fi
                ;;
            esac
          done
          exit 0
       elif [ $# -eq 2 -a "${2}" = "--full-restart" ]; then
          SERVICE="${1}"
          if [ -x "${SERVICEDIR}/${SERVICE}" ]; then
            env -i PATH="$PATH" TERM="$TERM" "${SERVICEDIR}/${SERVICE}" stop
            env -i PATH="$PATH" TERM="$TERM" "${SERVICEDIR}/${SERVICE}" start
            exit $?
          fi
       elif [ -z "${SERVICE}" ]; then
         SERVICE="${1}"
       else
         OPTIONS="${OPTIONS} ${1}"
       fi
       shift
       ;;
   esac
done

if [ -f "${SERVICEDIR}/${SERVICE}" ]; then
   env -i PATH="$PATH" TERM="$TERM" "${SERVICEDIR}/${SERVICE}" ${OPTIONS}
else
   echo $"${SERVICE}: unrecognized service" >&2
   exit 1
fi
该脚本实际上就是将/etc/init.d/中的脚本封装进行统一调用
此外,在/etc/rc.d/rc脚本中,有以下内容:
...
# First, run the KILL scripts.
for i in /etc/rc$runlevel.d/K* ; do

	# Check if the subsystem is already up.
	subsys=${i#/etc/rc$runlevel.d/K??}
	[ -f /var/lock/subsys/$subsys -o -f /var/lock/subsys/$subsys.init ] || continue
	check_runlevel "$i" || continue

	# Bring the subsystem down.
	[ -n "$UPSTART" ] && initctl emit --quiet stopping JOB=$subsys
	$i stop
	[ -n "$UPSTART" ] && initctl emit --quiet stopped JOB=$subsys
done

# Now run the START scripts.
for i in /etc/rc$runlevel.d/S* ; do

	# Check if the subsystem is already up.
	subsys=${i#/etc/rc$runlevel.d/S??}
	[ -f /var/lock/subsys/$subsys ] && continue
	[ -f /var/lock/subsys/$subsys.init ] && continue
	check_runlevel "$i" || continue

	# If we're in confirmation mode, get user confirmation
	if [ "$do_confirm" = "yes" ]; then
		confirm $subsys
		rc=$?
		if [ "$rc" = "1" ]; then
			continue
		elif [ "$rc" = "2" ]; then
			do_confirm="no"
		fi
	fi

	update_boot_stage "$subsys"
	# Bring the subsystem up.
	[ -n "$UPSTART" ] && initctl emit --quiet starting JOB=$subsys
	if [ "$subsys" = "halt" -o "$subsys" = "reboot" ]; then
		export LC_ALL=C
		exec $i start
	fi
	$i start
	[ -n "$UPSTART" ] && initctl emit --quiet started JOB=$subsys
done
...
可以看到,在rc脚本启动或关闭服务时,是通过查看/var/lock/subsys/SERVICE_NAME来确定服务当前是否运行,在启动服务时,将在该目录下创建相应文件:
[root@localhost ~]# ll /var/lock/subsys/
total 0
-rw-r--r-- 1 root root 0 Mar 27 12:00 abrt-ccpp
-rw-r--r-- 1 root root 0 Mar 27 12:00 abrtd
-rw-r--r-- 1 root root 0 Mar 27 12:00 acpid
-rw-r--r-- 1 root root 0 Mar 27 12:00 atd
-rw-r--r-- 1 root root 0 Mar 27 12:00 auditd
-rw-r--r-- 1 root root 0 Mar 27 12:00 autofs
-rw-r--r-- 1 root root 0 Mar 27 12:00 blk-availability
-rw-r--r-- 1 root root 0 Mar 27 12:00 certmonger
-rw-r--r-- 1 root root 0 Mar 27 12:00 crond
-rw-r--r-- 1 root root 0 Mar 27 12:00 cups
-rw-r--r-- 1 root root 0 Mar 27 12:00 fcoe
-rw-r--r-- 1 root root 0 Mar 27 12:00 haldaemon
-rw-r--r-- 1 root root 0 Mar 27 12:00 ip6tables
-rw-r--r-- 1 root root 0 Mar 27 12:00 lldpad
-rw-r--r-- 1 root root 0 Mar 27 12:00 local
-rw-r--r-- 1 root root 0 Mar 27 12:00 lvm2-monitor
-rw-r--r-- 1 root root 0 Mar 27 12:00 mcelogd
-rw-r--r-- 1 root root 0 Mar 27 12:00 messagebus
-rw-r--r-- 1 root root 0 Mar 27 12:00 named
-rw-r--r-- 1 root root 0 Mar 27 12:00 netfs
-rw-r--r-- 1 root root 0 Mar 27 12:00 network
-rw-r--r-- 1 root root 0 Mar 27 12:00 NetworkManager
-rw-r--r-- 1 root root 0 Mar 27 12:00 postfix
-rw-r--r-- 1 root root 0 Mar 27 12:00 rpcbind
-rw-r--r-- 1 root root 0 Mar 27 12:00 rpc.statd
-rw------- 1 root root 0 Mar 27 12:00 rsyslog
-rw-r--r-- 1 root root 0 Mar 27 12:00 sshd
-rw-r--r-- 1 root root 0 Mar 27 12:00 xinetd
若删除该文件,在切换运行级别时,rc脚本则认为相应的服务没有启动(事实上服务的依然正常运行)
chkconfig
在介绍chkconfig命令之前,我们先提一下如何让服务开机自启的问题
通过上面的介绍可知,我们只需要在/etc/rc.d/rcX.d目录中创建一个以S开头的连接文件,使其指向/etc/init.d中的脚本即可让一个 服务在特定Level下启动,反之创建以K开头的链接即可
而chkconfig工具可帮助用户实现该操作
chkconfig即check configuration之意,用于查看或管控/etc/init.d/每个服务脚本在各级别下的启动或关闭状态,使用方式为
chkconfig --add|--del|--level|--list SERVICE_NAME
	--add
		让服务接受chkconfig的管控,即给脚本创建链接,脚本应放到/etc/rc.d/init.d/中

	--del
		移除创建的链接文件

	--list
		查看服务的启动设定,若省略SERVICE_NAME,则可查看所有服务
如
[root@localhost ~]# chkconfig --list sshd
sshd           	0:off	1:off	2:on	3:on	4:on	5:on	6:off
欲对服务在各级别下的情动情况进行管理,可使用
chkconfig [--level RUNLEVELS] SERVICE_NAME {on|off}
若省略级别指定,则缺省为2、3、4、5级别,如
[root@localhost ~]# chkconfig sshd off
[root@localhost ~]# chkconfig --list sshd
sshd           	0:off	1:off	2:off	3:off	4:off	5:off	6:off
[root@localhost ~]# chkconfig sshd on
[root@localhost ~]# chkconfig --list sshd
sshd           	0:off	1:off	2:on	3:on	4:on	5:on	6:off
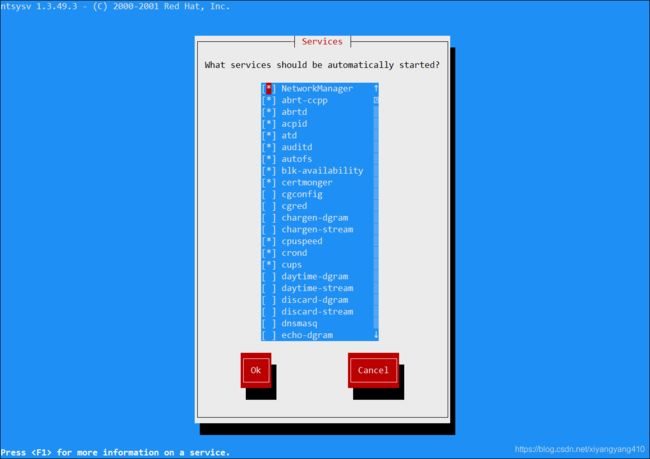
另外,ntsysv命令也可实现类似功能,不过他只能同时修改一个运行级别的配置,现基本已被chkconfig取代,这是一个TUI工具,界面如下
服务脚本
我们知道,服务脚本一般位于/etc/init.d/下,且可接收固定几个参数,而使用chkconfig管理后,其对应在/etc/rc.d/rcX.d中的链接文件的启动次序如何确定?以及默认在哪些级别下启动?
这些信息可在服务脚本中以特定格式指出,chkconfig会读取特定行,来收集这些信息,我们只需在脚本开头处(不必是最开头)
写两行注释:
# chkconfig: DEFAULT_START_LEVEL START_PRIORITY STOP_PRIORITY
# description: DESCRIPTION_INFORMATION
# chkconfig:后跟三组数字字符
- 第一组为默认在哪些级别下启动该服务
- 若指定为
-,则默认在任何级别都不启动
- 若指定为
- 第二组为启动优先级,即创建的以
S开头的链接文件后的数字 - 第三组为停止优先级,即创建的以
K开头的链接文件后的数字
如下为一个简单的样例服务脚本
#!/bin/bash
#
# chkconfig: 2345 77 22
# description: Test Service
#
LOCKFILE=/var/lock/subsys/myservice

status() {
	if [ -e $LOCKFILE ]; then
	echo "Running..."
	else
	echo "Stopped."
	fi
}

usage() {
	echo "`basename $0` {start|stop|restart|status}"
}

case $1 in
	start)
		echo "Starting..."
		touch $LOCKFILE ;;
	stop)
		echo "Stopping..."
		rm -f $LOCKFILE &> /dev/null
	;;
	restart)
		echo "Restarting..." ;;
	status)
		status ;;
	*)
		usage ;;
esac
以上代码仅为了说明基本运作机制,并无实际作用,另外关于服务的启动与停止,可根据/var/lock/subsys/myservice文件是否存在决定是否实际执行
通常,服务脚本会使用/etc/rc.d/init.d/functions中的函数
基于xinetd的服务
使用chkconfig也可直接管理基于超级守护进程的服务,不过与独立守护进程不同,它修改的是xinetd的配置,即/etc/xinetd.d/SERVICE_NAME,以telnet服务为例,安装telnet-server后,使用chkconfig查看:
[root@localhost ~]# chkconfig --list
NetworkManager 	0:off	1:off	2:on	3:on	4:on	5:on	6:off
abrt-ccpp      	0:off	1:off	2:off	3:on	4:off	5:on	6:off
abrtd          	0:off	1:off	2:off	3:on	4:off	5:on	6:off
acpid          	0:off	1:off	2:on	3:on	4:on	5:on	6:off
atd            	0:off	1:off	2:off	3:on	4:on	5:on	6:off
auditd         	0:off	1:off	2:on	3:on	4:on	5:on	6:off
autofs         	0:off	1:off	2:off	3:on	4:on	5:on	6:off
blk-availability	0:off	1:on	2:on	3:on	4:on	5:on	6:off
certmonger     	0:off	1:off	2:off	3:on	4:on	5:on	6:off
cgconfig       	0:off	1:off	2:off	3:off	4:off	5:off	6:off
cgred          	0:off	1:off	2:off	3:off	4:off	5:off	6:off
cpuspeed       	0:off	1:on	2:on	3:on	4:on	5:on	6:off
crond          	0:off	1:off	2:on	3:on	4:on	5:on	6:off
cups           	0:off	1:off	2:on	3:on	4:on	5:on	6:off
dnsmasq        	0:off	1:off	2:off	3:off	4:off	5:off	6:off
fcoe           	0:off	1:off	2:on	3:on	4:on	5:on	6:off
haldaemon      	0:off	1:off	2:off	3:on	4:on	5:on	6:off
htcacheclean   	0:off	1:off	2:off	3:off	4:off	5:off	6:off
httpd          	0:off	1:off	2:off	3:off	4:off	5:off	6:off
ip6tables      	0:off	1:off	2:on	3:on	4:on	5:on	6:off
iptables       	0:off	1:off	2:off	3:off	4:off	5:off	6:off
irqbalance     	0:off	1:off	2:off	3:on	4:on	5:on	6:off
iscsi          	0:off	1:off	2:off	3:on	4:on	5:on	6:off
iscsid         	0:off	1:off	2:off	3:on	4:on	5:on	6:off
kdump          	0:off	1:off	2:off	3:on	4:on	5:on	6:off
lldpad         	0:off	1:off	2:on	3:on	4:on	5:on	6:off
lvm2-monitor   	0:off	1:on	2:on	3:on	4:on	5:on	6:off
mcelogd        	0:off	1:off	2:off	3:on	4:off	5:on	6:off
mdmonitor      	0:off	1:off	2:on	3:on	4:on	5:on	6:off
messagebus     	0:off	1:off	2:on	3:on	4:on	5:on	6:off
multipathd     	0:off	1:off	2:off	3:off	4:off	5:off	6:off
named          	0:off	1:off	2:on	3:on	4:on	5:on	6:off
netconsole     	0:off	1:off	2:off	3:off	4:off	5:off	6:off
netfs          	0:off	1:off	2:off	3:on	4:on	5:on	6:off
network        	0:off	1:off	2:on	3:on	4:on	5:on	6:off
nfs            	0:off	1:off	2:off	3:off	4:off	5:off	6:off
nfslock        	0:off	1:off	2:off	3:on	4:on	5:on	6:off
ntpd           	0:off	1:off	2:off	3:off	4:off	5:off	6:off
ntpdate        	0:off	1:off	2:off	3:off	4:off	5:off	6:off
numad          	0:off	1:off	2:off	3:off	4:off	5:off	6:off
oddjobd        	0:off	1:off	2:off	3:off	4:off	5:off	6:off
portreserve    	0:off	1:off	2:on	3:on	4:on	5:on	6:off
postfix        	0:off	1:off	2:on	3:on	4:on	5:on	6:off
pppoe-server   	0:off	1:off	2:off	3:off	4:off	5:off	6:off
psacct         	0:off	1:off	2:off	3:off	4:off	5:off	6:off
quota_nld      	0:off	1:off	2:off	3:off	4:off	5:off	6:off
rdisc          	0:off	1:off	2:off	3:off	4:off	5:off	6:off
restorecond    	0:off	1:off	2:off	3:off	4:off	5:off	6:off
rngd           	0:off	1:off	2:off	3:off	4:off	5:off	6:off
rpcbind        	0:off	1:off	2:on	3:on	4:on	5:on	6:off
rpcgssd        	0:off	1:off	2:off	3:on	4:on	5:on	6:off
rpcsvcgssd     	0:off	1:off	2:off	3:off	4:off	5:off	6:off
rsyslog        	0:off	1:off	2:on	3:on	4:on	5:on	6:off
saslauthd      	0:off	1:off	2:off	3:off	4:off	5:off	6:off
smartd         	0:off	1:off	2:off	3:off	4:off	5:off	6:off
sshd           	0:off	1:off	2:on	3:on	4:on	5:on	6:off
sssd           	0:off	1:off	2:off	3:off	4:off	5:off	6:off
sysstat        	0:off	1:on	2:on	3:on	4:on	5:on	6:off
udev-post      	0:off	1:on	2:on	3:on	4:on	5:on	6:off
vncserver      	0:off	1:off	2:off	3:off	4:off	5:off	6:off
winbind        	0:off	1:off	2:off	3:off	4:off	5:off	6:off
wpa_supplicant 	0:off	1:off	2:off	3:off	4:off	5:off	6:off
xinetd         	0:off	1:off	2:off	3:on	4:on	5:on	6:off
ypbind         	0:off	1:off	2:off	3:off	4:off	5:off	6:off

xinetd based services:
	chargen-dgram: 	off
	chargen-stream:	off
	daytime-dgram: 	off
	daytime-stream:	off
	discard-dgram: 	off
	discard-stream:	off
	echo-dgram:    	off
	echo-stream:   	off
	rsync:         	off
	tcpmux-server: 	off
	telnet:        	off
	time-dgram:    	off
	time-stream:   	off
可以看到在“xinetd based services”段中,telnet服务为关闭状态,我们使用chkconfig telnet on后,即可将其开启,而此时查看/etc/xinetd.d/telnet:
# default: on
# description: The telnet server serves telnet sessions; it uses \
#       unencrypted username/password pairs for authentication.
service telnet
{
        disable = no
        flags           = REUSE
        socket_type     = stream
        wait            = no
        user            = root
        server          = /usr/sbin/in.telnetd
        log_on_failure  += USERID
}
其中有一个字段disable = no,意为“不禁用”,即启动状态,此时,我们重启xinetd服务使其重读配置:service xinetd restart
telnet监听TCP/23端口,使用ss查看:
[root@localhost ~]# ss -tanp | grep 23
LISTEN     0      64                       :::23                      :::*      users:(("xinetd",3573,5))
可以看到,该端口有xinetd监听(回忆上文的五人例子),而此时在外部使用telnet客户端连接
[root@localhost ~]# w
 15:30:28 up  3:30,  3 users,  load average: 0.01, 0.01, 0.00
USER     TTY      FROM              LOGIN@   IDLE   JCPU   PCPU WHAT
user1    pts/2    192.168.18.128	15:30    6.00s  0.00s  0.00s -bash
root     pts/0    192.168.18.1     	12:00   15.00s  0.09s  0.09s -bash
root     pts/1    192.168.18.1     	12:00    0.00s  0.33s  0.00s w
此时再次使用ss查看:
[root@localhost ~]# ss -tanp | grep 23
LISTEN     0      64                       :::23                      :::*      users:(("xinetd",3573,5))
ESTAB      0      0            192.168.18.131:23            192.168.18.1:4956   users:(("in.telnetd",3633,0),("in.telnetd",3633,1),("in.telnetd",3633,2))
已建立会话的进程为telnet
三、SystemD服务管理
1. 概述
关于SystemD,在Linux系统启动-Systemd中已有部分介绍,此处将介绍Systemd在服务管理方面的一些特点3
-
- 并行启动所有服务,加速开机流程
- 旧的init启动脚本是“一项一项任务依序启动”的模式,因此彼此没有依赖关系的服务也是得要一个一个的等待。systemd就是可以让所有的服务同时启动,因此你会发现到,系统启动的速度变快了!
-
- 一经要求就回应的on-demand启动方式
-
systemd全部就是仅有一只systemd服务搭配
systemctl命令来处理,无须其他额外的指令来支持。不像systemV还要init,chkconfig,service…等等指令。此外, systemd由于常驻内存,因此任何要求(on-demand)都可以立即处理后续的daemon启动的任务。
-
- 服务依赖性的自我检查:
- 由于systemd可以自订服务相依性的检查,因此如果B服务是架构在A服务上面启动的,那当你在没有启动A服务的情况下仅手动启动B服务时, systemd会自动帮你启动A服务喔!这样就可以免去管理员得要一项一项服务去分析的麻烦~(如果读者不是新手,应该会有印象,当你没有启动网路,但却启动NIS/NFS时,那个开机时的timeout甚至可达到10~30分钟…)
-
- 依daemon功能分类:
- systemd旗下管理的服务非常多,systemd先定义所有的服务为一个服务单位(unit),并将该unit归类到不同的服务类型(type)去。旧的init仅分为stand alone与super daemon实在不够看,systemd将服务单位(unit)区分为service, socket, target, path, snapshot, timer等多种不同的类型(type),方便管理员的分类与记忆。
-
- 将多个daemons集合成为一个组:
- 如同systemV的init里头有个runlevel的特色,systemd亦将许多的功能集合成为一个所谓的target项目,这个项目主要在设计操作环境的建置,所以是集合了许多的daemons,亦即是执行某个target就是执行好多个daemon的意思!
-
- 向下兼容旧有的init服务脚本:
- 基本上, systemd是可以兼容init的启动脚本的,因此,旧的init启动脚本也能够通过systemd来管理,只是更高级的systemd功能就没有办法支援就是了。
另外,与SysVinit不同的是,systemd使用systemctl命令来管理服务,遂只能接收固定的参数,而/etc/init.d/下的脚本文件可由开发者自定义参数(也有几个约定俗成的参数,如start、stop等)
若服务不是通过systemd启动,则systemctl无法与之通信,即无法使用该命令管理
2. 相关文件
目录
关于systemd各Unit已在Linux系统启动-Systemd中有介绍,此处再次站在服务管理的角度赘述一下其配置文件
主要由三个目录保存了相关配置:
-
/usr/lib/systemd/system/:每个服务最主要的启动脚本配置,类似于SysVinit的/etc/init.d下的文件 -
/run/systemd/system/:系统执行过程中所产生的服务脚本,这些脚本的优先级比/usr/lib/systemd/system/高 -
/etc/systemd/system/:管理员依据主机系统的需求所建立的执行脚本,该目录类似于SysVinit的/etc/rc.d/rc5.d/Sxx功能,执行优先序比/run/systemd/system/高-
/etc/systemd/system/SERVICE.service.d/custom.conf:用户自定义的服务配置文件,最好以.conf结尾,此时其中的配置可与/usr/lib/systemd/system/中的相应配置结合 -
/etc/systemd/system/*.wangts/:该目录下为软链接文件,意为启动当前unit后,请求启动该目录下的unit -
/etc/systemd/system/*.requires/:当前unit的依赖项,启动前必须启动该目录下的unit
-
Service Unit File
即.service文件,这些文件通常位于以下位置:
-
/etc/systemd/system/*.service -
/usr/lib/systemd/system/*.service -
/run/systemd/system/*.service
以下内容为sshd服务的service文件:
[root@localhost ~]# cat /usr/lib/systemd/system/sshd.service
[Unit]
Description=OpenSSH server daemon
After=network.target sshd-keygen.service
Wants=sshd-keygen.service

[Service]
EnvironmentFile=/etc/sysconfig/sshd
ExecStart=/usr/sbin/sshd -D $OPTIONS
ExecReload=/bin/kill -HUP $MAINPID
KillMode=process
Restart=on-failure
RestartSec=42s

[Install]
WantedBy=multi-user.target
可以看到,这类文件有三部分组成
-
- [Unit]
- 定义与Unit类型无关的通用选项,用于提供当前Unit的描述信息、unit行为以及依赖关系等
-
- [Service]
- 定义与特性类型相关的专用选项,此处为Service类型,其他还有如[Socket],[Timer],[Mount],[Path]等
-
- [Install]
- 将此unit 安装到哪个target 里,即定义由“systemctl enable”以及“systemctl disable”命令在实现服务启用或禁用时用到的一些选项
Unit段
Description:描述信息;意义性描述After:定义的启动次序;表示当前unit应该晚于哪些unit启动,其功能与Before相反Requies:依赖到的其他unit;强依赖,被依赖的unit无法激活时,当前unit将无法激活Wants:依赖到的其他unit;弱依赖,被依赖到的unit无法激活时,当前unit也可以激活Conflicts:定义unit间的冲突关系
Service段
-
Type:用于定义影响ExecStart及相关参数的功能的unit进程启动类型simple:默认,表示ExecStart指定的程序所启动的进程是主进程forking:表示ExecStart指定的程序所启动的进程,所生成对的一个子进程为主进程,启动完成后,父进程将退出oneshot:类似于simple,但启动后续的unit之前,主进程将退出dbus:类似于simple,但后续的unit仅在主进程得到dbus名称之后再启动notify:类似于simple,但后续的unit仅在通过sd_notify函数发送通知以后才启动idle:与simple类似, 不同之处在于该进程将会被延迟到所有活动的任务都完成之后再执行(这样可以避免控制台上的状态信息与shell脚本的输出混杂在一起)
-
EnvironmentFile:环境配置文件;指定的文件将在ExecStart之前被读取,并未其配置诸如变量等自定义功能 -
ExecStart:指明要启动unit要运行的命令或脚本ExecStartPre:运行ExecStart之前运行的命令或脚本ExecStartPost:运行ExecStart之后运行的命令或脚本
-
ExecStop:指明停止unit要运行的命令或脚本 -
Restart:当服务进程正常退出、异常退出、被杀死、超时的时候, 是否重新启动该服务
Install段
-
Alias:当前unit的别名 -
RequiredBy:被哪些unit所依赖,强依赖 -
WantedBy:被哪些unit所依赖,弱依赖
对于新创建的unit文件,或修改了的unit文件,要通知systemd重载此配置文件:
systemctl daemon-reload
3. systemctl
该命令名即System Control之意,SYSTEMCTL(1)中的描述为:
Control the systemd system and service manager
以下按照不同应用场景对该命令基础用法进行说明
Service管理
基本管理
基础的服务启动停止、是否自启的使用格式为
systemctl [COMMAND] [SERVICE]
	COMMAND
		start :立刻启动后面接的SERVICE
		stop :立刻关闭后面接的SERVICE
		restart :立刻关闭后启动后面接的SERVICE,即执行SERVICE再SERVICE
		reload :不关闭后面接的SERVICE的情况下,重新读取配置文件
		enable :后面的SERVICE设定为开机自启
		disable :后面的SERVICE设定为开机不自启
		status :查看SERVICE状态
		is-active :查看SERVICE是否已启动
		is-enabled:查看SERVICE是否开机自启
		mask:注销SERVICE,使其无法启动
		unmask:取消标记位注销状态
如,查看sshd服务的状态:
[root@localhost ~]# systemctl status sshd.service
● sshd.service - OpenSSH server daemon
   Loaded: loaded (/usr/lib/systemd/system/sshd.service; enabled; vendor preset: enabled)
   Active: active (running) since Fri 2019-03-29 13:46:22 CST; 1h 10min ago
 Main PID: 6504 (sshd)
   CGroup: /system.slice/sshd.service
           └─6504 /usr/sbin/sshd -D

Mar 29 13:46:22 localhost systemd[1]: Started OpenSSH server daemon.
Mar 29 13:46:22 localhost sshd[6504]: Server listening on 0.0.0.0 port 22.
Mar 29 13:46:22 localhost sshd[6504]: Server listening on :: port 22.
Mar 29 14:32:49 localhost sshd[8050]: Accepted password for root from 192.168.18.1 port 1153 ssh2
结合以上的介绍,其输出结果相信很好理解:
-
Loaded:表示该服务是否开机自启,有以下几种状态:-
enabled表示开机自启 -
disabled表示开机不自启 -
static表示该服务不可开机自启,即不能设置为enabled,但是可被其他服务启动,如依赖此服务的服务 -
mask表示该服务无法启动
-
-
Active:表示该服务是否在运行,有以下几种状态:active (running):服务正在运行active (exited):仅执行一次就结束的服务,并且目前没有进程在运行,bash脚本多数是这种类型active (waiting):正在运行,但是被阻塞,需要等待另一个事件完成才可继续inactive:服务没有运行
-
Main PID:表示服务主进程PID
事实上,开机是否自启,只需在/etc/systemd/system/下对应的target目录创建一个符号链接,指向/usr/lib/systemd/system/下对应的Service unit文件即可:
[root@localhost ~]# systemctl disable sshd.service
Removed symlink /etc/systemd/system/multi-user.target.wants/sshd.service.
[root@localhost ~]# systemctl enable sshd.service
Created symlink from /etc/systemd/system/multi-user.target.wants/sshd.service to /usr/lib/systemd/system/sshd.service.
[root@localhost ~]# ll /etc/systemd/system/multi-user.target.wants/sshd.service
lrwxrwxrwx. 1 root root 36 Mar 29 15:24 /etc/systemd/system/multi-user.target.wants/sshd.service -> /usr/lib/systemd/system/sshd.service
而注销操作实际上就是将/etc/systemd/system/SERVICE链接到/dev/null而已:
[root@localhost ~]# systemctl mask httpd.service
Created symlink from /etc/systemd/system/httpd.service to /dev/null.
[root@localhost ~]# systemctl unmask httpd.service
Removed symlink /etc/systemd/system/httpd.service.
查看多个服务
systemctl可以查看多个服务,用法如下:
systemctl [COMMAND] [--type=TYPE] [--all]
	COMMAND
		list-units :依据unit 列出目前启动的unit,若加上--all增会列出没启动的
		list-unit-files :将/usr/lib/systemd/system/下所有文件列出状态
		--type=TYPE:指定unit type,如service, socket, target……
另外,可仅适用不带任何参数的systemctl命令,与systemctl liist-units相同,如:
[root@localhost ~]# systemctl
  UNIT                                               LOAD   ACTIVE SUB       DESCRIPTION
  sys-devices-virtual-block-dm\x2d0.device           loaded active plugged   /sys/devices/virtual/block/dm-0
  sys-devices-virtual-block-dm\x2d1.device           loaded active plugged   /sys/devices/virtual/block/dm-1
  sys-devices-virtual-block-dm\x2d2.device           loaded active plugged   /sys/devices/virtual/block/dm-2
  sys-devices-virtual-block-dm\x2d3.device           loaded active plugged   /sys/devices/virtual/block/dm-3
  sys-devices-virtual-block-dm\x2d4.device           loaded active plugged   /sys/devices/virtual/block/dm-4
  sys-devices-virtual-block-dm\x2d5.device           loaded active plugged   /sys/devices/virtual/block/dm-5
  sys-devices-virtual-block-dm\x2d6.device           loaded active plugged   /sys/devices/virtual/block/dm-6
  sys-devices-virtual-block-md0.device               loaded active plugged   /sys/devices/virtual/block/md0
  sys-module-configfs.device                         loaded active plugged   /sys/module/configfs

……

LOAD   = Reflects whether the unit definition was properly loaded.
ACTIVE = The high-level unit activation state, i.e. generalization of SUB.
SUB    = The low-level unit activation state, values depend on unit type.

151 loaded units listed. Pass --all to see loaded but inactive units, too.
To show all installed unit files use 'systemctl list-unit-files'.
Target管理
关于Target管理的命令格式与Service类似:
systemctl [COMMAND] [TARGET]
	COMMAND
		get-default :获取默认target
		set-default :设定默认target
		isolate :切换target
系统已有的Target我们可通过上文介绍的方式查看:
[root@localhost ~]# systemctl list-units --type=target --all
  UNIT                   LOAD      ACTIVE   SUB    DESCRIPTION
  basic.target           loaded    active   active Basic System
  bluetooth.target       loaded    inactive dead   Bluetooth
  cryptsetup.target      loaded    active   active Local Encrypted Volumes
  emergency.target       loaded    inactive dead   Emergency Mode
  final.target           loaded    inactive dead   Final Step
  getty-pre.target       loaded    inactive dead   Login Prompts (Pre)
  getty.target           loaded    active   active Login Prompts
  graphical.target       loaded    inactive dead   Graphical Interface
  local-fs-pre.target    loaded    active   active Local File Systems (Pre)
  local-fs.target        loaded    active   active Local File Systems
  multi-user.target      loaded    active   active Multi-User System
  network-online.target  loaded    active   active Network is Online
  network-pre.target     loaded    inactive dead   Network (Pre)
  network.target         loaded    active   active Network
  nss-lookup.target      loaded    inactive dead   Host and Network Name Lookups
  nss-user-lookup.target loaded    inactive dead   User and Group Name Lookups
  paths.target           loaded    active   active Paths
  remote-fs-pre.target   loaded    active   active Remote File Systems (Pre)
  remote-fs.target       loaded    active   active Remote File Systems
  rescue.target          loaded    inactive dead   Rescue Mode
  shutdown.target        loaded    inactive dead   Shutdown
  slices.target          loaded    active   active Slices
  sockets.target         loaded    active   active Sockets
  sound.target           loaded    inactive dead   Sound Card
  swap.target            loaded    active   active Swap
  sysinit.target         loaded    active   active System Initialization
● syslog.target          not-found inactive dead   syslog.target
  time-sync.target       loaded    inactive dead   System Time Synchronized
  timers.target          loaded    active   active Timers
  umount.target          loaded    inactive dead   Unmount All Filesystems

LOAD   = Reflects whether the unit definition was properly loaded.
ACTIVE = The high-level unit activation state, i.e. generalization of SUB.
SUB    = The low-level unit activation state, values depend on unit type.

30 loaded units listed.
To show all installed unit files use 'systemctl list-unit-files'.
另外,一些常用的操作可以有简洁的指令实现
-
systemctl poweroff:关机 -
systemctl reboot:重启 -
systemctl suspend:挂起,即睡眠 -
systemctl hibernate:休眠 -
systemctl rescue:救援模式 -
systemctl emergency:紧急救援模式
此处说明一下suspend与hibernate的区别,即挂起(Windows中称为睡眠)与休眠
-
挂起状态即ACPI中的S3,是指仅为RAM供电,保证其数据不丢失,其他组件停止供电,计算机可快速恢复为G0(即工作)状态
-
休眠状态即ACPI中的S4,是指将RAM的内容保存到非易失性存储(一般为硬盘)后,所有组件停止供电,唤醒时需要先将数据恢复到RAM,故唤醒速度较S3慢
关于ACPI(Advanced Configuration and Power Interface),可参考Wikipedia
查看依赖性
我们可以通过systemctl list-dependencies [UNIT] [--reverse]来查看各Unit之间的依赖性,若不指定UNIT,则为当前的Target Unit:
[root@localhost ~]# systemctl list-dependencies
default.target
● ├─abrt-ccpp.service
● ├─abrt-oops.service
● ├─abrt-vmcore.service
● ├─abrt-xorg.service
● ├─abrtd.service
● ├─atd.service
● ├─auditd.service
● ├─brandbot.path
● ├─chronyd.service
● ├─crond.service
● ├─cups.path
● ├─dbus.service
● ├─httpd.service
● ├─hypervkvpd.service
● ├─hypervvssd.service
● ├─irqbalance.service
● ├─kdump.service
● ├─libstoragemgmt.service
● ├─mariadb.service
● ├─mdmonitor.service
● ├─ModemManager.service
● ├─network.service
● ├─NetworkManager.service
● ├─plymouth-quit-wait.service
● ├─plymouth-quit.service
● ├─postfix.service
● ├─rhel-configure.service
● ├─rngd.service
● ├─rsyslog.service
● ├─smartd.service
● ├─sshd.service
● ├─sysstat.service
● ├─systemd-ask-password-wall.path
● ├─systemd-logind.service
● ├─systemd-readahead-collect.service
● ├─systemd-readahead-replay.service
● ├─systemd-update-utmp-runlevel.service
● ├─systemd-user-sessions.service
● ├─tuned.service
● ├─vmtoolsd.service
● ├─basic.target
● │ ├─alsa-restore.service
● │ ├─alsa-state.service
● │ ├─microcode.service
● │ ├─rhel-dmesg.service
● │ ├─paths.target
● │ ├─slices.target
● │ │ ├─-.slice
● │ │ └─system.slice
● │ ├─sockets.target
● │ │ ├─cups.socket
● │ │ ├─dbus.socket
● │ │ ├─dm-event.socket
● │ │ ├─iscsid.socket
● │ │ ├─iscsiuio.socket
● │ │ ├─rpcbind.socket
● │ │ ├─systemd-initctl.socket
● │ │ ├─systemd-journald.socket
● │ │ ├─systemd-shutdownd.socket
● │ │ ├─systemd-udevd-control.socket
● │ │ └─systemd-udevd-kernel.socket
● │ ├─sysinit.target
● │ │ ├─dev-hugepages.mount
● │ │ ├─dev-mqueue.mount
● │ │ ├─dmraid-activation.service
● │ │ ├─iscsi.service
● │ │ ├─kmod-static-nodes.service
● │ │ ├─lvm2-lvmetad.socket
● │ │ ├─lvm2-lvmpolld.socket
● │ │ ├─lvm2-monitor.service
● │ │ ├─multipathd.service
● │ │ ├─plymouth-read-write.service
● │ │ ├─plymouth-start.service
● │ │ ├─proc-sys-fs-binfmt_misc.automount
● │ │ ├─rhel-autorelabel-mark.service
● │ │ ├─rhel-autorelabel.service
● │ │ ├─rhel-domainname.service
● │ │ ├─rhel-import-state.service
● │ │ ├─rhel-loadmodules.service
● │ │ ├─sys-fs-fuse-connections.mount
● │ │ ├─sys-kernel-config.mount
● │ │ ├─sys-kernel-debug.mount
● │ │ ├─systemd-ask-password-console.path
● │ │ ├─systemd-binfmt.service
● │ │ ├─systemd-firstboot.service
● │ │ ├─systemd-hwdb-update.service
● │ │ ├─systemd-journal-catalog-update.service
● │ │ ├─systemd-journal-flush.service
● │ │ ├─systemd-journald.service
● │ │ ├─systemd-machine-id-commit.service
● │ │ ├─systemd-modules-load.service
● │ │ ├─systemd-random-seed.service
● │ │ ├─systemd-sysctl.service
● │ │ ├─systemd-tmpfiles-setup-dev.service
● │ │ ├─systemd-tmpfiles-setup.service
● │ │ ├─systemd-udev-trigger.service
● │ │ ├─systemd-udevd.service
● │ │ ├─systemd-update-done.service
● │ │ ├─systemd-update-utmp.service
● │ │ ├─systemd-vconsole-setup.service
● │ │ ├─cryptsetup.target
● │ │ ├─local-fs.target
● │ │ │ ├─-.mount
● │ │ │ ├─boot.mount
● │ │ │ ├─home.mount
● │ │ │ ├─rhel-readonly.service
● │ │ │ └─systemd-remount-fs.service
● │ │ └─swap.target
● │ │   └─dev-mapper-centos\x2dswap.swap
● │ └─timers.target
● │   └─systemd-tmpfiles-clean.timer
● ├─getty.target
● │ └─[email protected]
● └─remote-fs.target
对了,每个Unit条目的左侧的●是有颜色的,这里无法显示
最顶层的default.target即默认的Target,此处为multi-user.target,此外,还可以使用--reverse选项进行反向查询,即查看当前Unit被谁所依赖;
[root@localhost ~]# systemctl list-dependencies --reverse
default.target
● └─graphical.target
4. 日志
概述
这里的日志主要用于记录应用程序与操作系统内核的操作与发生的事件,以方便后期的审计与故障排除,RHEL系列发行版的日志使用syslog协议,其服务提供者为rsyslog,为syslog的补充,一下内容来自rsyslog.com:
- RSYSLOG is the rocket-fast system for log processing.
- It offers high-performance, great security features and a modular design. While it started as a regular syslogd, rsyslog has evolved into a kind of swiss army knife of logging, being able to accept inputs from a wide variety of sources, transform them, and output to the results to diverse destinations.
- RSYSLOG can deliver over one million messages per second to local destinations when limited processing is applied. Even with remote destinations and more elaborate processing the performance is usually considered “stunning”.
- RSYSLOG:
- Multi-threading
- TCP, SSL, TLS, RELP
- MySQL, PostgreSQL, Oracle and more
- Filter any part of syslog message
- Fully configurable output format
- Suitable for enterprise-class relay chains
在Systemd出现之前,Linux系统及各应用的日志都是分别管理的,Systemd开始统一管理了所有Unit的启动日志,而时至RHEL 7,日志系统由systemd-journald和rsyslog两服务组成
当systemd启动后,systemd-journald也会立即启动。将日志存RAM中,当rsyslog启动后会读取该RAM并完成筛选分类写入目录/var/log,syslog的信息也可以由systemd-journald转发到rsyslog中进一步处理
默认情况下,systemd的日志保存在/run/log/journal中,系统重启就会清除,通过新建/var/log/journal目录,日志会自动记录到这个目录中,并永久存储
journalctl
systemd日志可由jpurnalctl命令查看,其使用格式为
journalctl [OPTIONS...] [MATCHES...]
	OPTIONS
		-n N			查看最后N行日志
		-f				显示最近的10条记录,输出后不退出,可持续查看最新信息,可使用-n选项修改显示条目数
		-k				查看内核日志

		-b				查看本次启动后的所有日志

			可使用“-b -N”查看前几次系统日志,如:
				-b -1			上次启动的信息
				-b -2			上上次启动的信息
				-b -0			本次启动的信息,相当于-b

		-p LOG_LEVEL	根据日志级别查看
			LOG_LEVEL=[0-7]

		-u=UNIT			根据UNIT查看日志,支持模式匹配

		--since="YYYY-MM-DD hh-mm-ss"
			显示自YYYY-MM-DD hh-mm-ss以来的日志

		--until="YYYY-MM-DD hh-mm-ss"
			显示截止到YYYY-MM-DD hh-mm-ss的日志

		-o=FORMAT		指定输出格式,可用的FORMAT下文将介绍
关于日志级别,此前已有介绍,这里将其列出以供参考:
| 编码 | 优先级 | 严重性 |
|---|---|---|
0 |
emerg |
系统不可用 |
1 |
alert |
必须立即采取措施 |
2 |
crit |
严重状况 |
3 |
err |
非严重错误状况 |
4 |
warning |
警告状况 |
5 |
notice |
正常但重要的事件 |
6 |
info |
信息性事件 |
7 |
debug |
调试级别消息 |
以上的编码为RHEL标准,不同发行版可能不尽相同,建议使用优先级描述
以下为-o选项中可用的格式4
| 格式 | 描述 |
|---|---|
short |
is the default and generates an output that is mostly identical to the formatting of classic syslog files, showing one line per journal entry. |
short-iso |
is very similar, but shows ISO 8601 wallclock timestamps. |
short-precise |
is very similar, but shows timestamps with full microsecond precision. |
short-monotonic |
is very similar, but shows monotonic timestamps instead of wallclock timestamps. |
verbose |
shows the full-structured entry items with all fields. |
export |
serializes the journal into a binary (but mostly text-based) stream suitable for backups and network transfer (see Journal Export Format[1] for more information). |
json |
formats entries as JSON data structures, one per line (see Journal JSON Format[2] for more information). |
json-pretty |
formats entries as JSON data structures, but formats them in multiple lines in order to make them more readable by humans. |
json-sse |
formats entries as JSON data structures, but wraps them in a format suitable for Server-Sent Events[3]. |
cat |
generates a very terse output, only showing the actual message of each journal entry with no metadata, not even a timestamp. |
四、例
- 提供一个systemd的配置文件, 让nginx服务可以开机启动
-
在
/etc/systemd/system/下创建nginx.service文件,内容如下:[Unit] Description=nginx Service After=network.target remote-fs.target nss-lookup.target [Service] Type=forking PIDFile=/usr/local/nginx/logs/nginx.pid ExecStart=/usr/local/nginx/sbin/nginx -c /usr/local/nginx/conf/nginx.conf ExecReload=/usr/local/nginx/sbin/nginx -s reload ExecStop=/usr/local/nginx/sbin/nginx -s stop [Install] WantedBy=multi-user.target关于nginx专用的一些选项,在介绍nginx时说明
文件保存后,通知systemd重读配置文件:
systemctl daemon-reload - 用awk查看tcp连接处于TIMEOUT的连接个数
-
netstat -tna | awk '{count=0;if ($NF=="TIMEOUT") count++}END{print count}' -
netstat -tna用于列出TCP状态的链接,awk中使用count变量作为计数器,根据netstat输出结果可知,状态信息为最后一个字段(分隔符为空白),我们判断若其为TIMEOUT时计数器+1,在最后打印计数器数值 -
关于awk的详细介绍,详见文本处理三剑客之AWK
来自 https://baike.baidu.com/item/系统服务 ↩︎
这里的独立启动仅指进程启动,而服务的提供依然可能有依赖性关系 ↩︎
以下内容参考鳥哥的Linux私房菜-systemd 使用的 unit 分類 ↩︎
参考自journalctl(1) ↩︎