Qt5.12.3+OpenCV4.2.0配置,minGW编译与库文件调用
Qt5.12.3+OpenCV4.2.0
准备工作
- Qt-OpenSource-windows-x86-5.12.3.exe
- https://mirrors.tuna.tsinghua.edu.cn/qt/archive/qt/5.12/5.12.3/qt-opensource-windows-x86-5.12.3.exe
- CMake-3.17.0-win64-x64.msi
- https://cmake.org/files/v3.17/cmake-3.17.0-win64-x64.msi
- OpenCV-4.2.0-Release-SourceCode.zip
- https://github.com/opencv/opencv/archive/4.2.0.zip
安装步骤
Qt
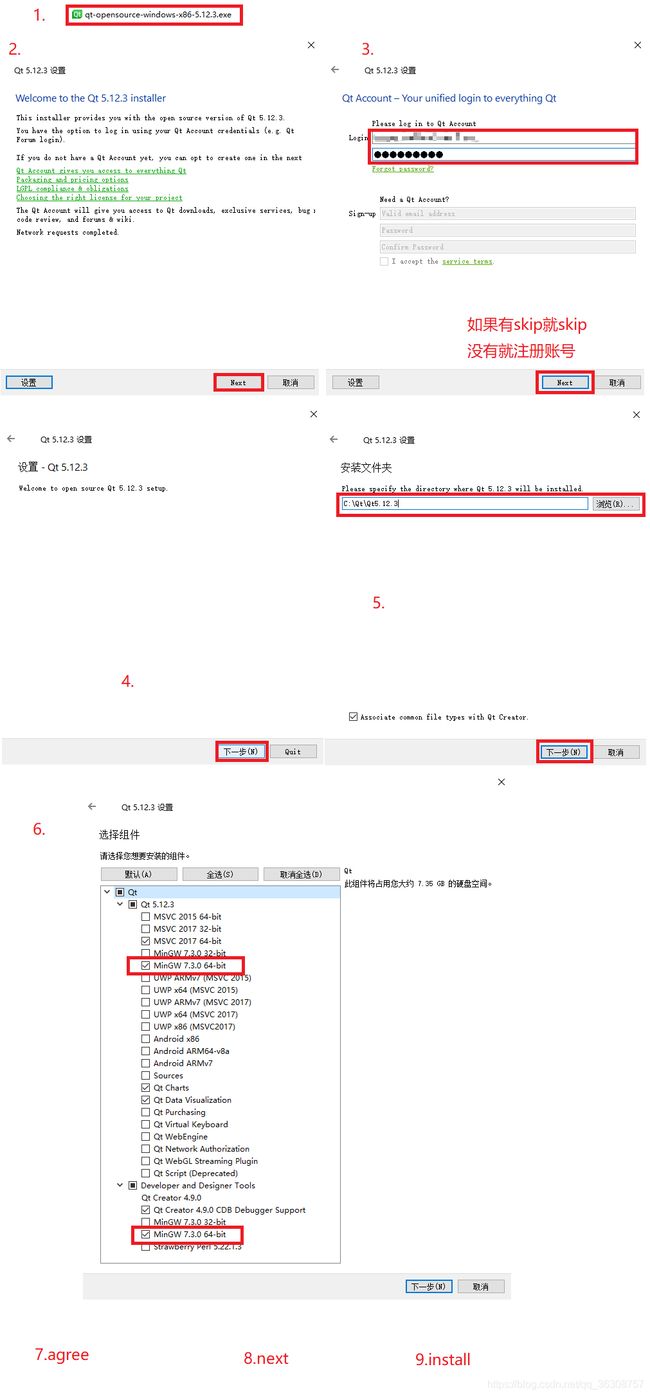
 Welcome to the Qt installer: next
 Qt Account - your unified login to everything Qt: skip
 Setup-Qt: next
 installation folder: $$ProgramFiles/Qt5.12.3
 select components: Qt-Qt5.12.3-MingGW 64 bit
 select components: Qt-Tools-MinGW 64 bit
 License Agreement: agree and next
 start menu shortcuts: next
 ready to install: install
CMake
 Welcome to the CMake Setup Wizzard: next
 End-User License Agreement: [V] Accept and next
 Install options: [V] Add CMake to the system PATH for all users, next
 Destination folder: $$ProgramFiles/CMake, next
 Ready to install CMake, Install
OpenCV
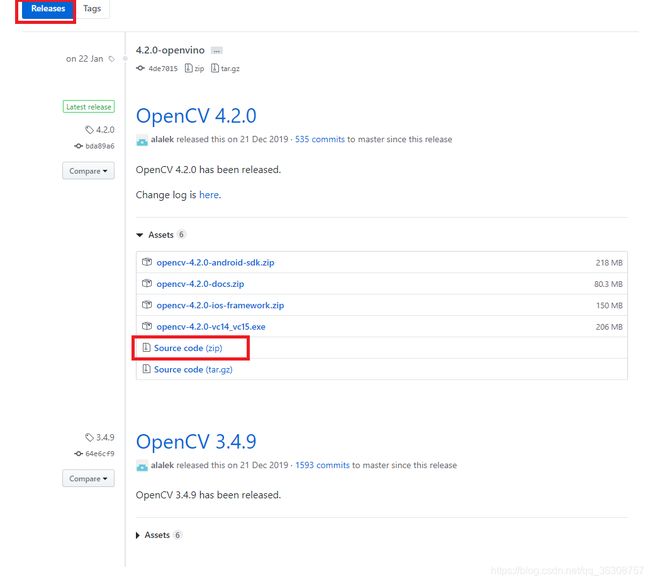
opencv需要选择release版本下载,直接clone可能在make的时候出错,这里下载最新的4.2.0版本,然后解压到没有中文路径的目录下,本教程假设解压到目录 $$opencv-4.2.0\ 下
使用minGW编译opencv
mingw 来自 qt,添加其到系统环境变量
$$ProgramFiles\Qt\5.12.3\mingw73_64\bin在 $$opencv-4.2.0 附近或子目录建立编译 opencv 的 output 文件夹:
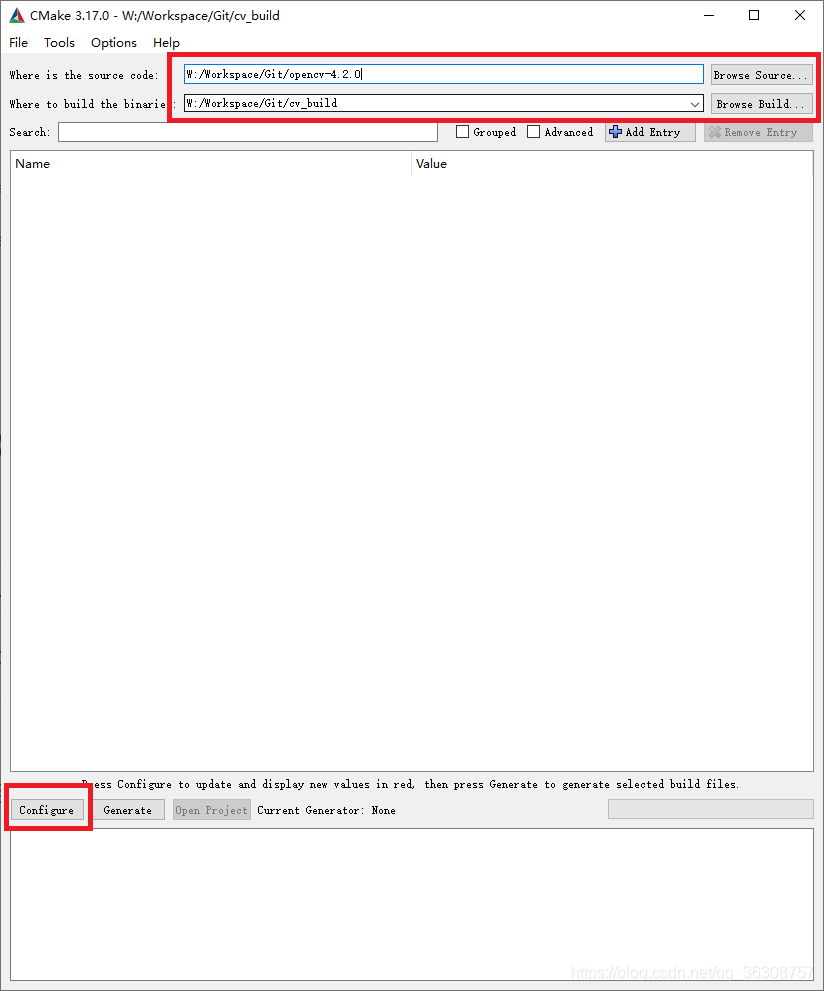
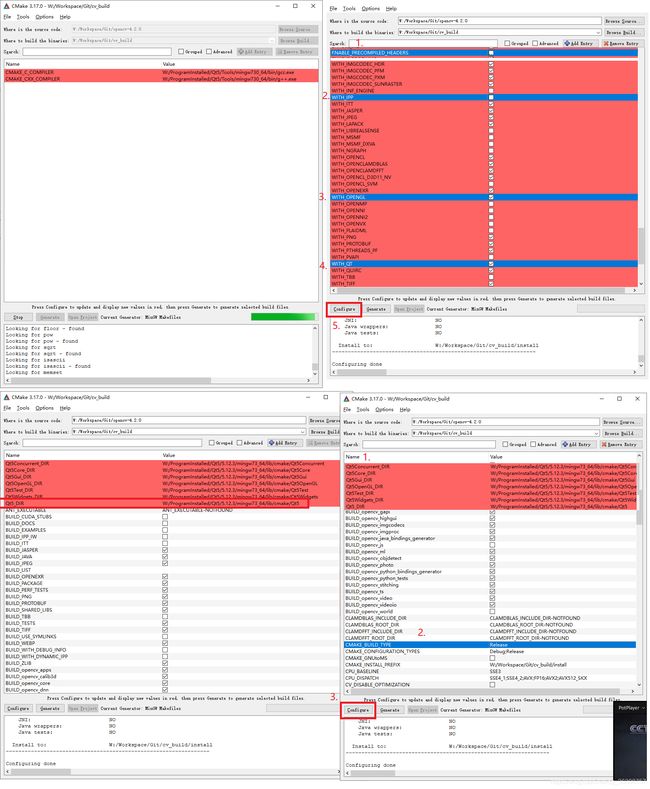
mkdir cv_build打开CMake,选中 opencv 的源码和 output 目录,然后 configure
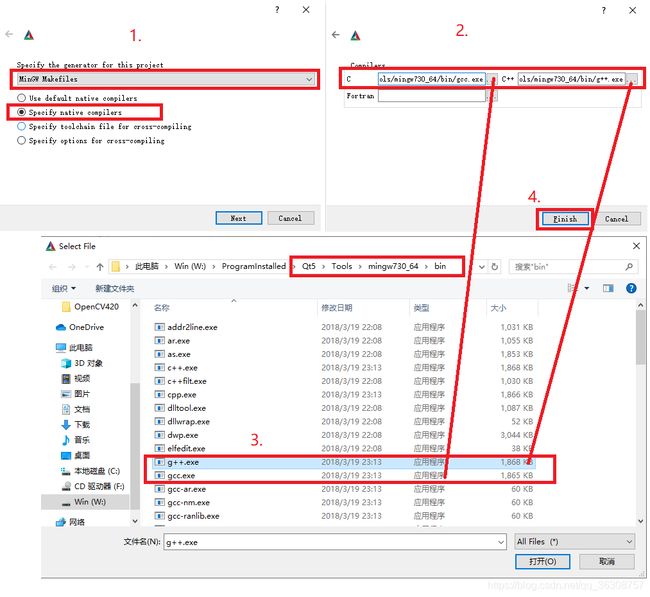
在弹出的对话框中如下配置,调用 qt 的 mingw
configure 期间会下载 dll 文件,由于网络原因会出现下载失败,但不影响
第一次 config 完成后:
- 勾上 WITH_QT
- 勾上 WITH_OPENGL
- 取消 ENABLE_PRECOMPILED_HEADERS
- 取消 WITH_IPP
然后再次 config,这次 config 可能会报错
选择正确的 qt-cmake 文件路径 QT5_DIR --> $$ProgramFiles/Qt5/5.12.3/mingw73_64/lib/cmake/Qt5
其他几个文件路径也在这个目录下,一直 config 和配置参数,直到红色消失,参数配置如下
configure 完成后,执行 generate,然后在 cv_build 目录下运行终端,在终端下执行
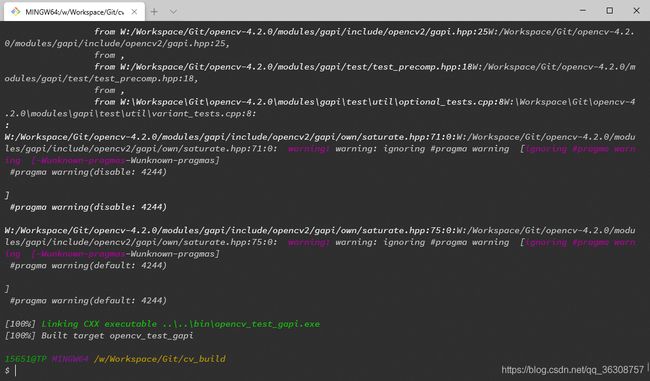
mingw32-make -j 8使用8个cpu核心编译 opencv 源码
其他版本可能出现的问题:
If, in the file opencv/sources/modules/videoio/src/cap_dshow.cpp, you have the following error : 'sprintf_instead_use_StringCbPrintfA_or_StringCchPrintfA' was not declared in this scope ...
try this: put the following line: #define NO_DSHOW_STRSAFE, before the line : #include "DShow.h"
If you have the error: ‘nullptr’ was not declared in this scope..
try this: in cmake check the box ENABLE_CXX11
If, in the file modules\videoio\src\cap_msmf.cpp you have the error: using invalid field '{anonymous}::ComPtr
::p'.. try this: in cmake unchecking WITH_MSMF
If,Building RC object modules/core/CMakeFiles/opencv_core.dir/vs_version.rc.obj v:\MinGW-Builds\mingw64\bin\windres.exe: unknown option -- W
try this: change the source code to release version
编译完成:
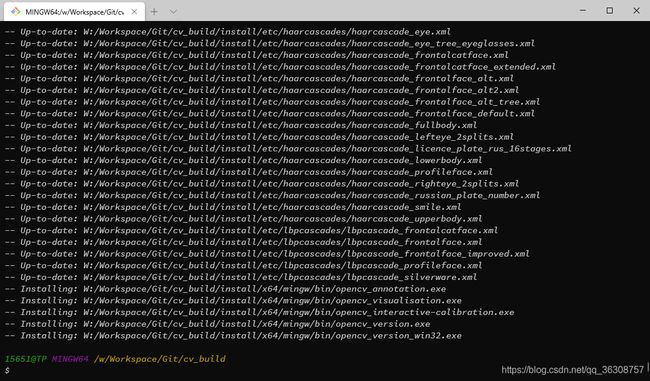
make install:
install done:
install 完成后,在 cv_build 目录下自动生成了一个 install 文件夹,该文件夹内包含了 h文件、lib、dll文件
建立文件夹,用于其他工程调用:
# 新建一个文件夹,用于其他工程调用:
mkdir opencv420
cd opencv420
建立文件目录如下
opencv420/:
+---bin
+---include
|   \---opencv2
|       +---calib3d
|       +---core
|       +---dnn
|       +---features2d
|       +---flann
|       +---gapi
|       +---highgui
|       +---imgcodecs
|       +---imgproc
|       +---ml
|       +---objdetect
|       +---photo
|       +---stitching
|       +---video
|       \---videoio
\---lib
其中:
- include 目录拷贝自 cv_build/install/include
- bin 目录拷贝自 cv_build/install/x64/mingw/bin
- lib 目录拷贝自 cv_build/install/x64/mingw/lib
到现在为止,opencv420 目录包含了 mingw 编译的库文件,接口的头文件,可用于其他 mingw-based 项目调用
Qt调用库文件
拷贝 opencv420 到项目内 pro 文件的同目录,在 opencv420 目录内建立文件 opencv420.pri,内容如下:
DEFINES += OPENCV4_DLL

INCLUDEPATH += $$PWD/include

LIBS += -L$$PWD/bin -llibopencv_calib3d420
LIBS += -L$$PWD/bin -llibopencv_core420
LIBS += -L$$PWD/bin -llibopencv_dnn420
LIBS += -L$$PWD/bin -llibopencv_features2d420
LIBS += -L$$PWD/bin -llibopencv_flann420
LIBS += -L$$PWD/bin -llibopencv_gapi420
LIBS += -L$$PWD/bin -llibopencv_highgui420
LIBS += -L$$PWD/bin -llibopencv_imgcodecs420
LIBS += -L$$PWD/bin -llibopencv_imgproc420
LIBS += -L$$PWD/bin -llibopencv_ml420
LIBS += -L$$PWD/bin -llibopencv_objdetect420
LIBS += -L$$PWD/bin -llibopencv_photo420
LIBS += -L$$PWD/bin -llibopencv_stitching420
LIBS += -L$$PWD/bin -llibopencv_video420
LIBS += -L$$PWD/bin -llibopencv_videoio420- 定义宏,使用 opencv4 动态库
- 添加头文件路径为 pri 文件路径下 include 路径
- 添加库文件,-L 添加库文件的路径为 pri 文件路径下的 bin 路径,-l 添加该路径下的动态库文件
Qt测试OpenCV
修改 pro 文件,增加该行
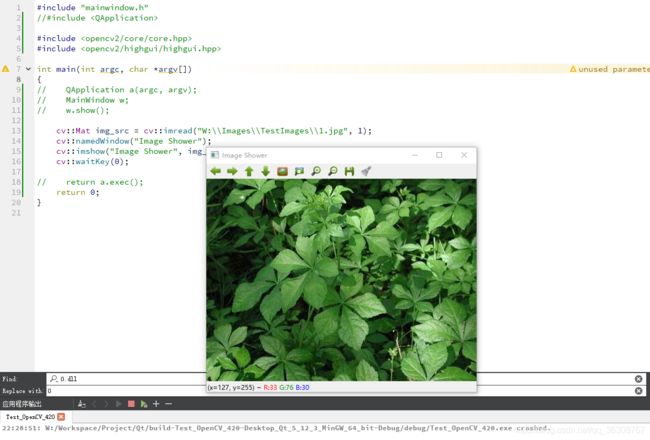
include($$PWD/opencv420/opencv420.pri)修改 main.cpp
#include "mainwindow.h"
//#include

#include
#include

int main(int argc, char *argv[])
{
//    QApplication a(argc, argv);
//    MainWindow w;
//    w.show();

    cv::Mat img_src = cv::imread("W:\\Images\\TestImages\\1.jpg", 1);
    cv::namedWindow("Image Shower");
    cv::imshow("Image Shower", img_src);
    cv::waitKey(0);

//    return a.exec();
    return 0;
}
构建运行:
除了拷贝库文件然后添加LIBS路径的方法外,还可以将dll文件的路径添加到系统环境变量中。
