SSM整合步骤(详细)
文章目录
- 工具
- SSM整合之整合mybatis
- 0.建立数据库
- 1. 建立项目结构,导入依赖包
- 2. 创建配置文件
- 3. 关联数据库
- 4. 编写mybatis配置文件
- 5.编写实体类
- 6. 编写对应的接口
- 7.编写对应的实现类xml文件
- 8. 将写好的mapper文件在mybatis配置文件当中注册
- 9.编写业务层:service层
- SSM整合之整合spring
- 10.创建spring-dao.xml配置文件(整合dao层)
- 11.创建spring-service.xml文件(整合service层)
- 12.在applicationContext.xml文件当中加入:
- SSM整合之整合springMVC
- 13.在项目结构当中增加对web的支持
- 14.配置web.xml文件
- 15 .在applicationContext.xml文件当中加入:
- 16.编写spring-mvc.xml配置文件
- 17.开始写js代码以及controller层
工具
IDEA 2019 3.
mysql 5.7
tomcat 9.0
SSM整合之整合mybatis
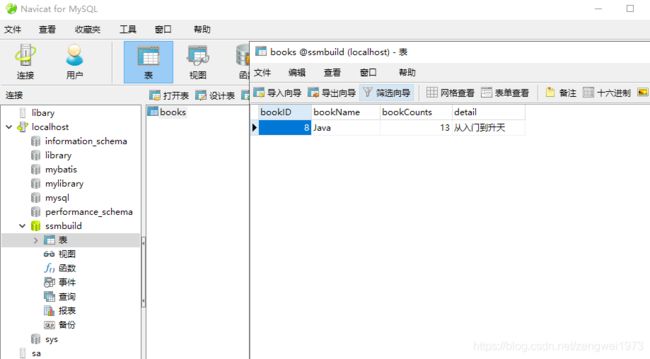
0.建立数据库
1. 建立项目结构,导入依赖包
依赖包
    <dependencies>
        <dependency>
            <groupId>junitgroupId>
            <artifactId>junitartifactId>
            <version>4.11version>
            <scope>testscope>
        dependency>

        <dependency>
            <groupId>mysqlgroupId>
            <artifactId>mysql-connector-javaartifactId>
            <version>5.1.47version>
        dependency>

        <dependency>
            <groupId>com.mchangegroupId>
            <artifactId>c3p0artifactId>
            <version>0.9.5.2version>
        dependency>


        <dependency>
            <groupId>javax.servletgroupId>
            <artifactId>servlet-apiartifactId>
            <version>2.5version>
        dependency>
        <dependency>
            <groupId>javax.servlet.jspgroupId>
            <artifactId>jsp-apiartifactId>
            <version>2.2version>
        dependency>
        <dependency>
            <groupId>javax.servletgroupId>
            <artifactId>jstlartifactId>
            <version>1.2version>
        dependency>


        <dependency>
            <groupId>org.mybatisgroupId>
            <artifactId>mybatisartifactId>
            <version>3.5.2version>
        dependency>
        <dependency>
            <groupId>org.mybatisgroupId>
            <artifactId>mybatis-springartifactId>
            <version>2.0.2version>
        dependency>


        <dependency>
            <groupId>org.springframeworkgroupId>
            <artifactId>spring-webmvcartifactId>
            <version>5.1.9.RELEASEversion>
        dependency>
        <dependency>
            <groupId>org.springframeworkgroupId>
            <artifactId>spring-jdbcartifactId>
            <version>5.1.9.RELEASEversion>
        dependency>

        <dependency>
            <groupId>org.projectlombokgroupId>
            <artifactId>lombokartifactId>
            <version>1.16.10version>
        dependency>
    dependencies>

    <build>

        <resources>
            <resource>
                <directory>src/main/javadirectory>
                <includes>
                    <include>**/*.propertiesinclude>
                    <include>**/*.xmlinclude>
                includes>
                <filtering>falsefiltering>
            resource>
            <resource>
                <directory>src/main/resourcesdirectory>
                <includes>
                    <include>**/*.propertiesinclude>
                    <include>**/*.xmlinclude>
                includes>
                <filtering>falsefiltering>
            resource>
        resources>
    build>
2. 创建配置文件
- mybatis核心配置文件:mybatis-config.xml
- spring 的核心配置文件:applicationContext.xml
//mybatis-config.xml 干净的包


<configuration>

configuration>
//applicationContext.xml

<beans xmlns="http://www.springframework.org/schema/beans"
       xmlns:xsi="http://www.w3.org/2001/XMLSchema-instance"
       xsi:schemaLocation="http://www.springframework.org/schema/beans
        http://www.springframework.org/schema/beans/spring-beans.xsd">


beans>
自此项目的基本架构已经搭建好,准备开始写!!!
3. 关联数据库
创建database.properties
jdbc.driver=com.mysql.jdbc.Driver
#Mysql8.0以上,增加一个时区的配置,url  &serverTimezone=Asia/shanghai

jdbc.url=jdbc:mysql://localhost:3306/ssmbuild?   useSSL=false&useUnicode=true&characterEncoding=utf8
jdbc.username=root
jdbc.password=123456
4. 编写mybatis配置文件
    <typeAliases>
        <package name="com.zengwei.pojo"/>
    typeAliases>
5.编写实体类
//Books
@Data
@AllArgsConstructor
@NoArgsConstructor
public class Books {
    private int bookID;
    private String bookName;
    private int bookCounts;
    private String detail;
}
6. 编写对应的接口
public interface BookMapper {
    //增加一本书
    int addBook(Books books);
    //删除一本书
    int deleteBookById(@Param("bookId") int id);
    //修改一本书
    int updateBook(Books books);
    //查询特定书籍或者所有书籍
    Books queryBookById(@Param("bookId")int id);
    List<Books> queryAllBook();
}
7.编写对应的实现类xml文件
<mapper namespace="com.zengwei.dao.BookMapper">
    //注:针对addBook主键bookID不用特意写,会自动增加!!!
    <insert id="addBook" parameterType="com.zengwei.pojo.Books">
           insert into ssmbuild.books(bookName,bookCounts,detail)
           values (#{bookName}, #{bookCounts}, #{detail})
    insert>
    <delete id="deleteBookById" parameterType="int">
       delete from ssmbuild.books where bookID=#{bookId}
    delete>
    <update id="updateBook" parameterType="com.zengwei.pojo.Books">
          update ssmbuild.books
          set bookName = #{bookName},bookCounts = #{bookCounts},detail = #{detail}
          where bookID = #{bookID}
    update>
<select id="queryBookById" parameterType="int" resultType="com.zengwei.pojo.Books">
        select * from ssmbuild.books
        where bookID = #{bookId}
select>
<select id="queryAllBook" resultType="com.zengwei.pojo.Books">
    select * from ssmbuild.books
select>
mapper>
8. 将写好的mapper文件在mybatis配置文件当中注册
<configuration>

    <typeAliases>
        <package name="com.zengwei.pojo"/>
    typeAliases>
    //注:用class的前提是接口与对应的xml文件名字一样,否则用resource直接定位对应的xml文件
    <mappers>
        <mapper class="com.zengwei.dao.BookMapper"/>
    mappers>
configuration>
9.编写业务层:service层
//编写业务层接口
import java.util.List;

public interface BookService {
    //增加一本书
    int addBook(Books books);
    //删除一本书
    int deleteBookById(int id);
    //修改一本书
    int updateBook(Books books);
    //查询特定书籍或者所有书籍
    Books queryBookById(int id);
    List<Books> queryAllBook();
}
//编写业务层实现类
public class BookServiceImpl implements BookService {
    //业务层调用dao层就对了
    private BookMapper bookMapper;
    //此处用set方法方便spring注入对象!!!
    public void setBookMapper(BookMapper bookMapper) {
        this.bookMapper = bookMapper;
    }
    public int addBook(Books books) {
        return bookMapper.addBook(books);
    }

    public int deleteBookById(int id) {
        return  bookMapper.deleteBookById(id);
    }

    public int updateBook(Books books) {
        return bookMapper.updateBook(books);
    }

    public Books queryBookById(int id) {
        return  bookMapper.queryBookById(id);
    }

    public List<Books> queryAllBook() {
        return  bookMapper.queryAllBook();
    }
}
SSM整合之整合spring
10.创建spring-dao.xml配置文件(整合dao层)
<beans xmlns="http://www.springframework.org/schema/beans"
       xmlns:xsi="http://www.w3.org/2001/XMLSchema-instance"
       xmlns:context="http://www.springframework.org/schema/context"
       xsi:schemaLocation="http://www.springframework.org/schema/beans
        http://www.springframework.org/schema/beans/spring-beans.xsd http://www.springframework.org/schema/context https://www.springframework.org/schema/context/spring-context.xsd">

<context:property-placeholder location="classpath:database.properties"/>

    <bean id="dataSource" class="com.mchange.v2.c3p0.ComboPooledDataSource">
        <property name="driverClass" value="${jdbc.driver}"/>
        <property name="jdbcUrl" value="${jdbc.url}"/>
        <property name="user" value="${jdbc.username}"/>
        <property name="password" value="${jdbc.password}"/>


        <property name="maxPoolSize" value="30"/>
        <property name="minPoolSize" value="10"/>

        <property name="autoCommitOnClose" value="false"/>

        <property name="checkoutTimeout" value="10000"/>

        <property name="acquireRetryAttempts" value="2"/>
    bean>


<bean id="sqlSesionFactory" class="org.mybatis.spring.SqlSessionFactoryBean">

    <property name="dataSource" ref="dataSource"/>

    <property name="configLocation" value="classpath:mybatis-config.xml"/>
bean>


    <bean class="org.mybatis.spring.mapper.MapperScannerConfigurer">

        <property name="sqlSessionFactoryBeanName" value="sqlSessionFactory"/>

        <property name="basePackage" value="com.zengwei.dao"/>
    bean>
beans>
//步骤4主要是代替BookMapper接口的实现类BookMapperImpl.省得每个接口都要写一个实现类!!!
11.创建spring-service.xml文件(整合service层)
<beans xmlns="http://www.springframework.org/schema/beans"
       xmlns:xsi="http://www.w3.org/2001/XMLSchema-instance"
       xmlns:context="http://www.springframework.org/schema/context"
       xsi:schemaLocation="http://www.springframework.org/schema/beans
        http://www.springframework.org/schema/beans/spring-beans.xsd               http://www.springframework.org/schema/context https://www.springframework.org/schema/context/spring-context.xsd">

    <context:component-scan base-package="com.zengwei.service" />


    <bean id="BookServiceImpl" class="com.zengwei.service.BookServiceImpl">
        <property name="bookMapper" ref="bookMapper"/>
    bean>


    <bean id="transactionManager" class="org.springframework.jdbc.datasource.DataSourceTransactionManager">

        <property name="dataSource" ref="dataSource" />
    bean>
beans>
12.在applicationContext.xml文件当中加入:
 <import resource="spring-dao.xml"/>
 <import resource="spring-service.xml"/>
SSM整合之整合springMVC
13.在项目结构当中增加对web的支持
14.配置web.xml文件
<web-app xmlns="http://xmlns.jcp.org/xml/ns/javaee"
         xmlns:xsi="http://www.w3.org/2001/XMLSchema-instance"
         xsi:schemaLocation="http://xmlns.jcp.org/xml/ns/javaee http://xmlns.jcp.org/xml/ns/javaee/web-app_4_0.xsd"
         version="4.0">
 <servlet>
     <servlet-name>springmvcservlet-name>
     <servlet-class>org.springframework.web.servlet.DispatcherServletservlet-class>

     <init-param>
         <param-name>contextConfigLocationparam-name>
         <param-value>classpath:applicationContext.xmlparam-value>
     init-param>
     <load-on-startup>1load-on-startup>
 servlet>
    <servlet-mapping>
        <servlet-name>springmvcservlet-name>
        <url-pattern>/url-pattern>
    servlet-mapping>


    <filter>
        <filter-name>encodingFilterfilter-name>
        <filter-class>
            org.springframework.web.filter.CharacterEncodingFilter
        filter-class>
        <init-param>
            <param-name>encodingparam-name>
            <param-value>utf-8param-value>
        init-param>
    filter>
    <filter-mapping>
        <filter-name>encodingFilterfilter-name>
        <url-pattern>/*url-pattern>
    filter-mapping>


    <session-config>
        <session-timeout>15session-timeout>
    session-config>
web-app>
15 .在applicationContext.xml文件当中加入:
<import resource="spring-mvc.xml"/>
16.编写spring-mvc.xml配置文件
<beans xmlns="http://www.springframework.org/schema/beans"
       xmlns:xsi="http://www.w3.org/2001/XMLSchema-instance" xmlns:mvc="http://www.springframework.org/schema/mvc"
       xmlns:context="http://www.springframework.org/schema/context"
       xsi:schemaLocation="http://www.springframework.org/schema/beans
        http://www.springframework.org/schema/beans/spring-beans.xsd http://www.springframework.org/schema/mvc https://www.springframework.org/schema/mvc/spring-mvc.xsd http://www.springframework.org/schema/context https://www.springframework.org/schema/context/spring-context.xsd">


    <mvc:annotation-driven />

    <mvc:default-servlet-handler/>

    <bean class="org.springframework.web.servlet.view.InternalResourceViewResolver">
        <property name="viewClass" value="org.springframework.web.servlet.view.JstlView" />
        <property name="prefix" value="/WEB-INF/jsp/" />
        <property name="suffix" value=".jsp" />
    bean>


    <context:component-scan base-package="com.zengwei.controller" />
beans>
17.开始写js代码以及controller层
略,见代码!