- UI学习——cell的复用和自定义cell
Magnetic_h
ui学习
目录cell的复用手动(非注册)自动(注册)自定义cellcell的复用在iOS开发中,单元格复用是一种提高表格(UITableView)和集合视图(UICollectionView)滚动性能的技术。当一个UITableViewCell或UICollectionViewCell首次需要显示时,如果没有可复用的单元格,则视图会创建一个新的单元格。一旦这个单元格滚动出屏幕,它就不会被销毁。相反,它被添
- swagger访问路径
igotyback
swagger
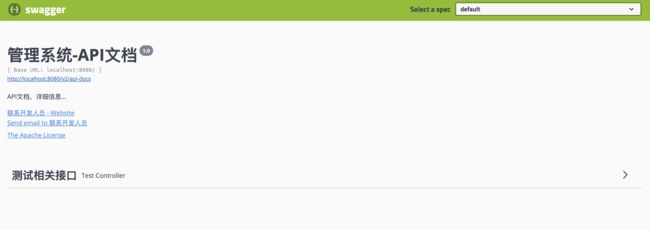
Swagger2.x版本访问地址:http://{ip}:{port}/{context-path}/swagger-ui.html{ip}是你的服务器IP地址。{port}是你的应用服务端口,通常为8080。{context-path}是你的应用上下文路径,如果应用部署在根路径下,则为空。Swagger3.x版本对于Swagger3.x版本(也称为OpenAPI3)访问地址:http://{ip
- Faiss:高效相似性搜索与聚类的利器
网络·魚
大数据faiss
Faiss是一个针对大规模向量集合的相似性搜索库,由FacebookAIResearch开发。它提供了一系列高效的算法和数据结构,用于加速向量之间的相似性搜索,特别是在大规模数据集上。本文将介绍Faiss的原理、核心功能以及如何在实际项目中使用它。Faiss原理:近似最近邻搜索:Faiss的核心功能之一是近似最近邻搜索,它能够高效地在大规模数据集中找到与给定查询向量最相似的向量。这种搜索是近似的,
- SpringBlade dict-biz/list 接口 SQL 注入漏洞
文章永久免费只为良心
oracle数据库
SpringBladedict-biz/list接口SQL注入漏洞POC:构造请求包查看返回包你的网址/api/blade-system/dict-biz/list?updatexml(1,concat(0x7e,md5(1),0x7e),1)=1漏洞概述在SpringBlade框架中,如果dict-biz/list接口的后台处理逻辑没有正确地对用户输入进行过滤或参数化查询(PreparedSta
- 厦门自由行之第一天:
大苏子在广漂
厦门三人行之杂记出发前一天:12️28日下午15:00从广州粗发,来深圳集合!但是中间发生一个小插曲,验票时候发现车票不见了,或许也是一场恶作剧,对于不排队的人,忍不住说了一下,接下来就发现车票不见了,已经是拿在手上!不过还好,可以凭借购票订单查看到信息,所以有惊无险,顺利进站!晚上三个人一起去吃了柠檬鱼,说实话,那会,感觉美吃饱,啊哈哈!晚上回来,两个人又开始彻夜长谈,发现身边优秀的人,一大把,
- 【韩玲】领读小组2月21日打卡文集合
9ce517ee104c
【输出者】健芳【打卡素材】对财富说是Day50【作者】[澳]奥南朵【标题】让努力看得见【字数】7931建立新信念做事情失败的原因都由我们自己无意识的旧有的信念去掌控着。故步自封,没让自己去更新迭代自己的信念。建立新的信念,相信自己的财富会越来越多。2改掉坏习惯以前的懒床、刷手机、煲剧、这些都是封锁自己思想的坏习惯,以为这样就可以让自己过得充实。其实真的不是,而是带给自己一种伤害,阻碍自己努力上进的
- spring如何整合druid连接池?
惜.己
springspringjunit数据库javaidea后端xml
目录spring整合druid连接池1.新建maven项目2.新建mavenModule3.导入相关依赖4.配置log4j2.xml5.配置druid.xml1)xml中如何引入properties2)下面是配置文件6.准备jdbc.propertiesJDBC配置项解释7.配置druid8.测试spring整合druid连接池1.新建maven项目打开IDE(比如IntelliJIDEA,Ecl
- ArrayList 源码解析
程序猿进阶
Java基础ArrayListListjava面试性能优化架构设计idea
ArrayList是Java集合框架中的一个动态数组实现,提供了可变大小的数组功能。它继承自AbstractList并实现了List接口,是顺序容器,即元素存放的数据与放进去的顺序相同,允许放入null元素,底层通过数组实现。除该类未实现同步外,其余跟Vector大致相同。每个ArrayList都有一个容量capacity,表示底层数组的实际大小,容器内存储元素的个数不能多于当前容量。当向容器中添
- SpringCloudAlibaba—Sentinel(限流)
菜鸟爪哇
前言:自己在学习过程的记录,借鉴别人文章,记录自己实现的步骤。借鉴文章:https://blog.csdn.net/u014494148/article/details/105484410Sentinel介绍Sentinel诞生于阿里巴巴,其主要目标是流量控制和服务熔断。Sentinel是通过限制并发线程的数量(即信号隔离)来减少不稳定资源的影响,而不是使用线程池,省去了线程切换的性能开销。当资源
- springboot+vue项目实战一-创建SpringBoot简单项目
苹果酱0567
面试题汇总与解析springboot后端java中间件开发语言
这段时间抽空给女朋友搭建一个个人博客,想着记录一下建站的过程,就当做笔记吧。虽然复制zjblog只要一个小时就可以搞定一个网站,或者用cms系统,三四个小时就可以做出一个前后台都有的网站,而且想做成啥样也都行。但是就是要从新做,自己做的意义不一样,更何况,俺就是专门干这个的,嘿嘿嘿要做一个网站,而且从零开始,首先呢就是技术选型了,经过一番思量决定选择-SpringBoot做后端,前端使用Vue做一
- Spring MVC 全面指南:从入门到精通的详细解析
一杯梅子酱
技术栈学习springmvcjava
引言:SpringMVC,作为Spring框架的一个重要模块,为构建Web应用提供了强大的功能和灵活性。无论是初学者还是有一定经验的开发者,掌握SpringMVC都将显著提升你的Web开发技能。本文旨在为初学者提供一个全面且易于理解的学习路径,通过详细的知识点分析和实际案例,帮助你快速上手SpringMVC,让学习过程既深刻又高效。一、SpringMVC简介1.1什么是SpringMVC?Spri
- Spring Boot中实现跨域请求
BABA8891
springboot后端java
在SpringBoot中实现跨域请求(CORS,Cross-OriginResourceSharing)可以通过多种方式,以下是几种常见的方法:1.使用@CrossOrigin注解在SpringBoot中,你可以在控制器或者具体的请求处理方法上使用@CrossOrigin注解来允许跨域请求。在控制器上应用:importorg.springframework.web.bind.annotation.
- 博客网站制作教程
2401_85194651
javamaven
首先就是技术框架:后端:Java+SpringBoot数据库:MySQL前端:Vue.js数据库连接:JPA(JavaPersistenceAPI)1.项目结构blog-app/├──backend/│├──src/main/java/com/example/blogapp/││├──BlogApplication.java││├──config/│││└──DatabaseConfig.java
- matlab delsat = setdiff(1:69,unique(Eph(30,:))); 语句含义
黄卷青灯77
matlab开发语言setdiff
这行MATLAB代码用于计算在范围1:69中不包含在Eph矩阵第30行的唯一值集合中的所有元素。具体解释如下:delsat=setdiff(1:69,unique(Eph(30,:)));解释Eph(30,:)Eph(30,:)提取矩阵Eph的第30行的所有列元素。这是一个行向量,包含了第30行的所有值。unique(Eph(30,:))unique函数返回Eph(30,:)中的唯一元素。这意味着
- JavaScript `Map` 和 `WeakMap`详细解释
跳房子的前端
JavaScript原生方法javascript前端开发语言
在JavaScript中,Map和WeakMap都是用于存储键值对的数据结构,但它们有一些关键的不同之处。MapMap是一种可以存储任意类型的键值对的集合。它保持了键值对的插入顺序,并且可以通过键快速查找对应的值。Map提供了一些非常有用的方法和属性来操作这些数据对:set(key,value):将一个键值对添加到Map中。如果键已经存在,则更新其对应的值。get(key):获取指定键的值。如果键
- RabbitMQ生产者重复机制与确认机制
java炒饭小能手
java-rabbitmqrabbitmqjava
重复机制生产者发送消息时,出现了网络故障,导致与MQ的连接中断。为了解决这个问题,SpringAMQP提供的消息发送时的重试机制。即:当RabbitTemplate与MQ连接超时后,多次重试。需要修该发送端模块的application.yaml文件,添加下面的内容:spring:rabbitmq:connection-timeout:1s#设置MQ的连接超时时间template:retry:ena
- 高级UI<第二十四篇>:Android中用到的矩阵常识
NoBugException
(1)定义在数学中,矩阵(Matrix)是一个按照长方阵列排列的复数或实数集合。由m×n个数aij排成的m行n列的数表称为m行n列的矩阵,简称m×n矩阵。记作:图片.png这m×n个数称为矩阵A的元素,简称为元,数aij位于矩阵A的第i行第j列,称为矩阵A的(i,j)元,以数aij为(i,j)元的矩阵可记为(aij)或(aij)m×n,m×n矩阵A也记作Amn。元素是实数的矩阵称为实矩阵,元素是复
- LeetCode github集合,附CMU大神整理笔记
Wesley@
LeetCodegithub
GithubLeetCode集合本人所有做过的题目都写在一个java项目中,同步到github中了,算是见证自己的进步。github目前同步的题目是2020-09-17日之后写的题。之前写过的题会陆续跟新到github中。目前大概400个题目Github项目链接:https://github.com/sunliancheng/leetcode_github附上一份优秀的教材整合:这是卡内基梅隆(C
- 【高阶数据结构】并查集
椿融雪
数据结构与算法数据结构并查集
文章目录一、并查集原理二、并查集实现三、并查集应用一、并查集原理在一些应用问题中,需要将n个不同的元素划分成一些不相交的集合。开始时,每个元素自成一个单元素集合,然后按一定的规律将归于同一组元素的集合合并。在此过程中要反复用到查询某一个元素归属于那个集合的运算。适合于描述这类问题的抽象数据类型称为并查集(union-findset)。比如:某公司今年校招全国总共招生10人,西安招4人,成都招3人,
- 【Java】已解决:org.springframework.jdbc.datasource.lookup.DataSourceLookupFailureException
屿小夏
java开发语言
文章目录一、分析问题背景问题背景描述出现问题的场景二、可能出错的原因三、错误代码示例四、正确代码示例五、注意事项已解决:org.springframework.jdbc.datasource.lookup.DataSourceLookupFailureException在使用Spring框架进行开发时,数据源的配置和使用是非常关键的一环。然而,有时候我们可能会遇到org.springframewo
- 济宁高新区“路长制”8月28日工作日志
JNSGAJGXQFJ
【工作日志】一、洸河路“路长制”工作每日战报【早高峰巡逻】凯赛中队与高新区特警早高峰巡逻【平峰治理】凯赛中队与高新区特警平峰巡逻【晚高峰巡逻】凯赛中队与高新区特警在商检岗集合晚高峰巡逻二、吴泰闸路“路长制”工作每日战报【早高峰巡逻】圣地岗和贵和岗巡逻劝导非机动车走机动车道等重点违法行为,在重点路段疏导交通。【平峰巡逻】吴泰闸中队治理乱停乱放【晚高峰巡逻】圣地岗和贵和岗巡逻劝导非机动车走机动车道等重
- SpringBoot和SpringMVC是什么关系?SpringBoot替代SpringMVC了吗?
瑞金彭于晏
springboot后端javaMVCspring数据库
SpringBoot和SpringMVC都是SpringFramework生态系统中的一部分,但它们各自扮演着不同的角色和提供不同的功能集。理解它们之间的关系,首先需要了解SpringFramework本身。SpringFrameworkSpringFramework是一个全面的、开源的应用程序开发框架,它提供了广泛的功能来支持企业应用开发的几乎所有方面。SpringFramework的核心特性之
- spring mvc @RequestBody String类型参数
zoyation
spring-mvcspringmvc
通过如下配置:text/html;charset=UTF-8application/json;charset=UTF-8在springmvc的Controller层使用@RequestBody接收Content-Type为application/json的数据时,默认支持Map方式和对象方式参数@RequestMapping(value="/{code}/saveUser",method=Requ
- Java -jar 如何在后台运行项目
vincent_hahaha
撸了今年阿里、头条和美团的面试,我有一个重要发现.......>>>说到运行jar包通常我们都会以下面的方式运行:java-jarspringboot-0.0.1-SNAPSHOT.jar这样运行的话会有一个问题,就是我们一关闭当前窗口就会停止运行项目,要想解决这个问题,就需要在后台运行。nohupjava-jarbabyshark-0.0.1-SNAPSHOT.jar >log.file 2>&
- spring security中几大组件的作用和执行顺序
阿信在这里
javaspring
springsecurity中几大组件的作用和执行顺序在SpringSecurity中,AuthenticationProvider、GroupPermissionEvaluator、PermissionEvaluator、AbstractAuthenticationProcessingFilter、DefaultMethodSecurityExpressionHandler和ManageSecu
- 探索Zebra4J:构建高效企业级Web应用的微服务框架
叶准鑫Natalie
探索Zebra4J:构建高效企业级Web应用的微服务框架ZebraZebra4J/Zebra4Js基于SpringBoot的JavaWeb/Nodejs框架项目地址:https://gitcode.com/gh_mirrors/zebra/Zebra项目介绍在当今快速发展的技术环境中,构建高效、可扩展的企业级Web应用是每个开发团队的追求。Zebra4J作为一款基于SpringBoot的全新微服务
- Hadoop架构
henan程序媛
hadoop大数据分布式
一、案列分析1.1案例概述现在已经进入了大数据(BigData)时代,数以万计用户的互联网服务时时刻刻都在产生大量的交互,要处理的数据量实在是太大了,以传统的数据库技术等其他手段根本无法应对数据处理的实时性、有效性的需求。HDFS顺应时代出现,在解决大数据存储和计算方面有很多的优势。1.2案列前置知识点1.什么是大数据大数据是指无法在一定时间范围内用常规软件工具进行捕捉、管理和处理的大量数据集合,
- [转载] NoSQL简介
weixin_30325793
大数据数据库运维
摘自“百度百科”。NoSQL,泛指非关系型的数据库。随着互联网web2.0网站的兴起,传统的关系数据库在应付web2.0网站,特别是超大规模和高并发的SNS类型的web2.0纯动态网站已经显得力不从心,暴露了很多难以克服的问题,而非关系型的数据库则由于其本身的特点得到了非常迅速的发展。NoSQL数据库的产生就是为了解决大规模数据集合多重数据种类带来的挑战,尤其是大数据应用难题。虽然NoSQL流行语
- 基于JavaWeb开发的Java+SpringMvc+vue+element实现上海汽车博物馆平台
网顺技术团队
成品程序项目javavue.js汽车课程设计springboot
基于JavaWeb开发的Java+SpringMvc+vue+element实现上海汽车博物馆平台作者主页网顺技术团队欢迎点赞收藏⭐留言文末获取源码联系方式查看下方微信号获取联系方式承接各种定制系统精彩系列推荐精彩专栏推荐订阅不然下次找不到哟Java毕设项目精品实战案例《1000套》感兴趣的可以先收藏起来,还有大家在毕设选题,项目以及论文编写等相关问题都可以给我留言咨询,希望帮助更多的人文章目录基
- 分布式锁和spring事务管理
暴躁的鱼
锁及事务分布式springjava
最近开发一个小程序遇到一个需求需要实现分布式事务管理业务需求用户在使用小程序的过程中可以查看景点,对景点地区或者城市标记是否想去,那么需要统计一个地点被标记的人数,以及记录某个用户对某个地点是否标记为想去,用两个表存储数据,一个地点表记录改地点被标记的次数,一个用户意向表记录某个用户对某个地点是否标记为想去。由于可能有多个用户同时标记一个地点,每个用户在前端点击想去按钮之后,后台接收到请求,从数据
- 书其实只有三类
西蜀石兰
类
一个人一辈子其实只读三种书,知识类、技能类、修心类。
知识类的书可以让我们活得更明白。类似十万个为什么这种书籍,我一直不太乐意去读,因为单纯的知识是没法做事的,就像知道地球转速是多少一样(我肯定不知道),这种所谓的知识,除非用到,普通人掌握了完全是一种负担,维基百科能找到的东西,为什么去记忆?
知识类的书,每个方面都涉及些,让自己显得不那么没文化,仅此而已。社会认为的学识渊博,肯定不是站在
- 《TCP/IP 详解,卷1:协议》学习笔记、吐槽及其他
bylijinnan
tcp
《TCP/IP 详解,卷1:协议》是经典,但不适合初学者。它更像是一本字典,适合学过网络的人温习和查阅一些记不清的概念。
这本书,我看的版本是机械工业出版社、范建华等译的。这本书在我看来,翻译得一般,甚至有明显的错误。如果英文熟练,看原版更好:
http://pcvr.nl/tcpip/
下面是我的一些笔记,包括我看书时有疑问的地方,也有对该书的吐槽,有不对的地方请指正:
1.
- Linux—— 静态IP跟动态IP设置
eksliang
linuxIP
一.在终端输入
vi /etc/sysconfig/network-scripts/ifcfg-eth0
静态ip模板如下:
DEVICE="eth0" #网卡名称
BOOTPROTO="static" #静态IP(必须)
HWADDR="00:0C:29:B5:65:CA" #网卡mac地址
IPV6INIT=&q
- Informatica update strategy transformation
18289753290
更新策略组件: 标记你的数据进入target里面做什么操作,一般会和lookup配合使用,有时候用0,1,1代表 forward rejected rows被选中,rejected row是输出在错误文件里,不想看到reject输出,将错误输出到文件,因为有时候数据库原因导致某些column不能update,reject就会output到错误文件里面供查看,在workflow的
- 使用Scrapy时出现虽然队列里有很多Request但是却不下载,造成假死状态
酷的飞上天空
request
现象就是:
程序运行一段时间,可能是几十分钟或者几个小时,然后后台日志里面就不出现下载页面的信息,一直显示上一分钟抓取了0个网页的信息。
刚开始已经猜到是某些下载线程没有正常执行回调方法引起程序一直以为线程还未下载完成,但是水平有限研究源码未果。
经过不停的google终于发现一个有价值的信息,是给twisted提出的一个bugfix
连接地址如下http://twistedmatrix.
- 利用预测分析技术来进行辅助医疗
蓝儿唯美
医疗
2014年,克利夫兰诊所(Cleveland Clinic)想要更有效地控制其手术中心做膝关节置换手术的费用。整个系统每年大约进行2600例此类手术,所以,即使降低很少一部分成本,都可以为诊 所和病人节约大量的资金。为了找到适合的解决方案,供应商将视野投向了预测分析技术和工具,但其分析团队还必须花时间向医生解释基于数据的治疗方案意味着 什么。
克利夫兰诊所负责企业信息管理和分析的医疗
- java 线程(一):基础篇
DavidIsOK
java多线程线程
&nbs
- Tomcat服务器框架之Servlet开发分析
aijuans
servlet
最近使用Tomcat做web服务器,使用Servlet技术做开发时,对Tomcat的框架的简易分析:
疑问: 为什么我们在继承HttpServlet类之后,覆盖doGet(HttpServletRequest req, HttpServetResponse rep)方法后,该方法会自动被Tomcat服务器调用,doGet方法的参数有谁传递过来?怎样传递?
分析之我见: doGet方法的
- 揭秘玖富的粉丝营销之谜 与小米粉丝社区类似
aoyouzi
揭秘玖富的粉丝营销之谜
玖富旗下悟空理财凭借着一个微信公众号上线当天成交量即破百万,第七天成交量单日破了1000万;第23天时,累计成交量超1个亿……至今成立不到10个月,粉丝已经超过500万,月交易额突破10亿,而玖富平台目前的总用户数也已经超过了1800万,位居P2P平台第一位。很多互联网金融创业者慕名前来学习效仿,但是却鲜有成功者,玖富的粉丝营销对外至今仍然是个谜。
近日,一直坚持微信粉丝营销
- Java web的会话跟踪技术
百合不是茶
url会话Cookie会话Seession会话Java Web隐藏域会话
会话跟踪主要是用在用户页面点击不同的页面时,需要用到的技术点
会话:多次请求与响应的过程
1,url地址传递参数,实现页面跟踪技术
格式:传一个参数的
url?名=值
传两个参数的
url?名=值 &名=值
关键代码
- web.xml之Servlet配置
bijian1013
javaweb.xmlServlet配置
定义:
<servlet>
<servlet-name>myservlet</servlet-name>
<servlet-class>com.myapp.controller.MyFirstServlet</servlet-class>
<init-param>
<param-name>
- 利用svnsync实现SVN同步备份
sunjing
SVN同步E000022svnsync镜像
1. 在备份SVN服务器上建立版本库
svnadmin create test
2. 创建pre-revprop-change文件
cd test/hooks/
cp pre-revprop-change.tmpl pre-revprop-change
3. 修改pre-revprop-
- 【分布式数据一致性三】MongoDB读写一致性
bit1129
mongodb
本系列文章结合MongoDB,探讨分布式数据库的数据一致性,这个系列文章包括:
数据一致性概述与CAP
最终一致性(Eventually Consistency)
网络分裂(Network Partition)问题
多数据中心(Multi Data Center)
多个写者(Multi Writer)最终一致性
一致性图表(Consistency Chart)
数据
- Anychart图表组件-Flash图转IMG普通图的方法
白糖_
Flash
问题背景:项目使用的是Anychart图表组件,渲染出来的图是Flash的,往往一个页面有时候会有多个flash图,而需求是让我们做一个打印预览和打印功能,让多个Flash图在一个页面上打印出来。
那么我们打印预览的思路是获取页面的body元素,然后在打印预览界面通过$("body").append(html)的形式显示预览效果,结果让人大跌眼镜:Flash是
- Window 80端口被占用 WHY?
bozch
端口占用window
平时在启动一些可能使用80端口软件的时候,会提示80端口已经被其他软件占用,那一般又会有那些软件占用这些端口呢?
下面坐下总结:
1、web服务器是最经常见的占用80端口的,例如:tomcat , apache , IIS , Php等等;
2
- 编程之美-数组的最大值和最小值-分治法(两种形式)
bylijinnan
编程之美
import java.util.Arrays;
public class MinMaxInArray {
/**
* 编程之美 数组的最大值和最小值 分治法
* 两种形式
*/
public static void main(String[] args) {
int[] t={11,23,34,4,6,7,8,1,2,23};
int[]
- Perl正则表达式
chenbowen00
正则表达式perl
首先我们应该知道 Perl 程序中,正则表达式有三种存在形式,他们分别是:
匹配:m/<regexp>;/ (还可以简写为 /<regexp>;/ ,略去 m)
替换:s/<pattern>;/<replacement>;/
转化:tr/<pattern>;/<replacemnt>;
- [宇宙与天文]行星议会是否具有本行星大气层以外的权力呢?
comsci
举个例子: 地球,地球上由200多个国家选举出一个代表地球联合体的议会,那么现在地球联合体遇到一个问题,地球这颗星球上面的矿产资源快要采掘完了....那么地球议会全体投票,一致通过一项带有法律性质的议案,既批准地球上的国家用各种技术手段在地球以外开采矿产资源和其它资源........
&
- Oracle Profile 使用详解
daizj
oracleprofile资源限制
Oracle Profile 使用详解 转
一、目的:
Oracle系统中的profile可以用来对用户所能使用的数据库资源进行限制,使用Create Profile命令创建一个Profile,用它来实现对数据库资源的限制使用,如果把该profile分配给用户,则该用户所能使用的数据库资源都在该profile的限制之内。
二、条件:
创建profile必须要有CREATE PROFIL
- How HipChat Stores And Indexes Billions Of Messages Using ElasticSearch & Redis
dengkane
elasticsearchLucene
This article is from an interview with Zuhaib Siddique, a production engineer at HipChat, makers of group chat and IM for teams.
HipChat started in an unusual space, one you might not
- 循环小示例,菲波拉契序列,循环解一元二次方程以及switch示例程序
dcj3sjt126com
c算法
# include <stdio.h>
int main(void)
{
int n;
int i;
int f1, f2, f3;
f1 = 1;
f2 = 1;
printf("请输入您需要求的想的序列:");
scanf("%d", &n);
for (i=3; i<n; i
- macbook的lamp环境
dcj3sjt126com
lamp
sudo vim /etc/apache2/httpd.conf
/Library/WebServer/Documents
是默认的网站根目录
重启Mac上的Apache服务
这个命令很早以前就查过了,但是每次使用的时候还是要在网上查:
停止服务:sudo /usr/sbin/apachectl stop
开启服务:s
- java ArrayList源码 下
shuizhaosi888
ArrayList源码
版本 jdk-7u71-windows-x64
JavaSE7 ArrayList源码上:http://flyouwith.iteye.com/blog/2166890
/**
* 从这个列表中移除所有c中包含元素
*/
public boolean removeAll(Collection<?> c) {
- Spring Security(08)——intercept-url配置
234390216
Spring Securityintercept-url访问权限访问协议请求方法
intercept-url配置
目录
1.1 指定拦截的url
1.2 指定访问权限
1.3 指定访问协议
1.4 指定请求方法
1.1 &n
- Linux环境下的oracle安装
jayung
oracle
linux系统下的oracle安装
本文档是Linux(redhat6.x、centos6.x、redhat7.x) 64位操作系统安装Oracle 11g(Oracle Database 11g Enterprise Edition Release 11.2.0.4.0 - 64bit Production),本文基于各种网络资料精心整理而成,共享给有需要的朋友。如有问题可联系:QQ:52-7
- hotspot虚拟机
leichenlei
javaHotSpotjvm虚拟机文档
JVM参数
http://docs.oracle.com/javase/6/docs/technotes/guides/vm/index.html
JVM工具
http://docs.oracle.com/javase/6/docs/technotes/tools/index.html
JVM垃圾回收
http://www.oracle.com
- 读《Node.js项目实践:构建可扩展的Web应用》 ——引编程慢慢变成系统化的“砌砖活”
noaighost
Webnode.js
读《Node.js项目实践:构建可扩展的Web应用》
——引编程慢慢变成系统化的“砌砖活”
眼里的Node.JS
初初接触node是一年前的事,那时候年少不更事。还在纠结什么语言可以编写出牛逼的程序,想必每个码农都会经历这个月经性的问题:微信用什么语言写的?facebook为什么推荐系统这么智能,用什么语言写的?dota2的外挂这么牛逼,用什么语言写的?……用什么语言写这句话,困扰人也是阻碍
- 快速开发Android应用
rensanning
android
Android应用开发过程中,经常会遇到很多常见的类似问题,解决这些问题需要花时间,其实很多问题已经有了成熟的解决方案,比如很多第三方的开源lib,参考
Android Libraries 和
Android UI/UX Libraries。
编码越少,Bug越少,效率自然会高。
但可能由于 根本没听说过、听说过但没用过、特殊原因不能用、自己已经有了解决方案等等原因,这些成熟的解决
- 理解Java中的弱引用
tomcat_oracle
java工作面试
不久之前,我
面试了一些求职Java高级开发工程师的应聘者。我常常会面试他们说,“你能给我介绍一些Java中得弱引用吗?”,如果面试者这样说,“嗯,是不是垃圾回收有关的?”,我就会基本满意了,我并不期待回答是一篇诘究本末的论文描述。 然而事与愿违,我很吃惊的发现,在将近20多个有着平均5年开发经验和高学历背景的应聘者中,居然只有两个人知道弱引用的存在,但是在这两个人之中只有一个人真正了
- 标签输出html标签" target="_blank">关于标签输出html标签
xshdch
jsp
http://back-888888.iteye.com/blog/1181202
关于<c:out value=""/>标签的使用,其中有一个属性是escapeXml默认是true(将html标签当做转移字符,直接显示不在浏览器上面进行解析),当设置escapeXml属性值为false的时候就是不过滤xml,这样就能在浏览器上解析html标签,
&nb

