Netty源码阅读之ByteBuf简析(二)
前面对于Netty中的ByteBuf缓存做了一下简单的介绍,下面将围绕源码,对几方面展开分析。
1.扩容机制
首先来聊下Bytebuf的扩容机制,这个机制也是Netty比较强悍的地方,而我们知道JDK自带的ByteBuffer是无法扩容的,这是其在设计中一个比较反人类的点,导致很多程序员在使用中无法接受;而在Bytebuf创建的时候,我们通常会设置一个初始容量,在我们写数据的时候,如果写指针超过了设置的初始容量,那么Bytebuf将进行扩容,废话不多说,下面我们直接通过源码来一探究竟吧:
public ByteBuf writeBytes(ByteBuf src, int srcIndex, int length) {
    ensureAccessible();
    ensureWritable(length);
    setBytes(writerIndex, src, srcIndex, length);
    writerIndex += length;
    return this;
}
在写数据的时候,首先会校验当前的对象是否已经被释放,具体的做法就是查看一下引用计数的标志位是否为0,如果为0,那么直接抛出异常。
protected final void ensureAccessible() {
    if (checkAccessible && refCnt() == 0) {
        throw new IllegalReferenceCountException(0);
    }
}
随后是校验一下是否可写,具体的逻辑如下:
private void ensureWritable0(int minWritableBytes) {
    if (minWritableBytes <= writableBytes()) {
        return;
    }

    if (minWritableBytes > maxCapacity - writerIndex) {
        throw new IndexOutOfBoundsException(String.format(
                "writerIndex(%d) + minWritableBytes(%d) exceeds maxCapacity(%d): %s",
                writerIndex, minWritableBytes, maxCapacity, this));
    }

    // Normalize the current capacity to the power of 2.
    int newCapacity = alloc().calculateNewCapacity(writerIndex + minWritableBytes, maxCapacity);

    // Adjust to the new capacity.
    capacity(newCapacity);
}
开始主要是做一些边界检查,下面主要看下分配新容量的代码逻辑:
public int calculateNewCapacity(int minNewCapacity, int maxCapacity) {
    if (minNewCapacity < 0) {
        throw new IllegalArgumentException("minNewCapacity: " + minNewCapacity + " (expectd: 0+)");
    }
    if (minNewCapacity > maxCapacity) {
        throw new IllegalArgumentException(String.format(
                "minNewCapacity: %d (expected: not greater than maxCapacity(%d)",
                minNewCapacity, maxCapacity));
    }
    final int threshold = 1048576 * 4; // 4 MiB page

    if (minNewCapacity == threshold) {
        return threshold;
    }

    // If over threshold, do not double but just increase by threshold.
    if (minNewCapacity > threshold) {
        int newCapacity = minNewCapacity / threshold * threshold;
        if (newCapacity > maxCapacity - threshold) {
            newCapacity = maxCapacity;
        } else {
            newCapacity += threshold;
        }
        return newCapacity;
    }

    // Not over threshold. Double up to 4 MiB, starting from 64.
    int newCapacity = 64;
    while (newCapacity < minNewCapacity) {
        newCapacity <<= 1;
    }

    return Math.min(newCapacity, maxCapacity);
}
扩容的时候,如果当前的容量小于4MB,那么新的容量从64字节大小开始,一直翻倍,直到超过期望的容量,如果期望的新容量已经超过4MB,那么由期望的容量计算应该扩大为4MB的多少倍,最后返回应该扩容的容量大小。
上边分析了应该扩容的容量大小,下面再来看下具体的扩容函数(这是一个抽象方法,这里以PooledBytebuf这个类中的实现为例):
public final ByteBuf capacity(int newCapacity) {
    ensureAccessible();

    // If the request capacity does not require reallocation, just update the length of the memory.
    if (chunk.unpooled) {
        if (newCapacity == length) {
            return this;
        }
    } else {
        if (newCapacity > length) {
            if (newCapacity <= maxLength) {
                length = newCapacity;
                return this;
            }
        } else if (newCapacity < length) {
            if (newCapacity > maxLength >>> 1) {
                if (maxLength <= 512) {
                    if (newCapacity > maxLength - 16) {
                        length = newCapacity;
                        setIndex(Math.min(readerIndex(), newCapacity), Math.min(writerIndex(), newCapacity));
                        return this;
                    }
                } else { // > 512 (i.e. >= 1024)
                    length = newCapacity;
                    setIndex(Math.min(readerIndex(), newCapacity), Math.min(writerIndex(), newCapacity));
                    return this;
                }
            }
        } else {
            return this;
        }
    }

    // Reallocation required.
    chunk.arena.reallocate(this, newCapacity, true);
    return this;
}
由上边的代码可以知道,如果当前的缓存为非池化的缓存,那么直接申请内存,待释放的时候再进行释放,具体做法是直接增加当前内存的容量长度,但假如当前的缓存为池化的缓存,那么我们将直接申请一块大内存,重新分配大内存的逻辑如下:
void reallocate(PooledByteBuf buf, int newCapacity, boolean freeOldMemory) {
    if (newCapacity < 0 || newCapacity > buf.maxCapacity()) {
        throw new IllegalArgumentException("newCapacity: " + newCapacity);
    }

    int oldCapacity = buf.length;
    if (oldCapacity == newCapacity) {
        return;
    }

    PoolChunk oldChunk = buf.chunk;
    long oldHandle = buf.handle;
    T oldMemory = buf.memory;
    int oldOffset = buf.offset;
    int oldMaxLength = buf.maxLength;
    int readerIndex = buf.readerIndex();
    int writerIndex = buf.writerIndex();

    allocate(parent.threadCache(), buf, newCapacity);
    if (newCapacity > oldCapacity) {
        memoryCopy(
                oldMemory, oldOffset,
                buf.memory, buf.offset, oldCapacity);
    } else if (newCapacity < oldCapacity) {
        if (readerIndex < newCapacity) {
            if (writerIndex > newCapacity) {
                writerIndex = newCapacity;
            }
            memoryCopy(
                    oldMemory, oldOffset + readerIndex,
                    buf.memory, buf.offset + readerIndex, writerIndex - readerIndex);
        } else {
            readerIndex = writerIndex = newCapacity;
        }
    }

    buf.setIndex(readerIndex, writerIndex);

    if (freeOldMemory) {
        free(oldChunk, oldHandle, oldMaxLength, buf.cache);
    }
}
主要的逻辑是将原来旧内存中的内容写到新的内存中,最后将旧的内存释放掉。
2.ByteBuf中的内存规格简介
首先,我们需要了解在Netty向操作系统申请内存的时候是以“chunk”为单位进行申请的,内存规格主要是分为4个区间,每一个区间,其对应的内存分配方式各异,下面来了解一下内存区间的具体分配:
| tiny | small | normal | huge |
| 0~512B | 512B~8K | 8K~16M | 16M~+∞ |
由表1,16M即上一段提及的"Chunk",而8K又称为“Page”,至于(0,8K)区间段又称为“SubPage”,为了尽可能的利用内存资源,Netty内部采用了上述的规格来进行内存划分。
3.ByteBuf内存分配流程
上边简单科普了一下内存规格相关的知识,下面我们将对照源码来看下内存分配相关的内容
在开始之前我们有必要认识一下PoolThreadCache这个类:

这个类主要分成了cache以及arena两部分,在cache我们可以直接分配内存,而arena主要功能是向操作系统请求内存分配,也是本部分主要讲解的内容,具体PoolThreadCache的结构大致是下面这样的:


根据上图可以画出arena的大致结构:

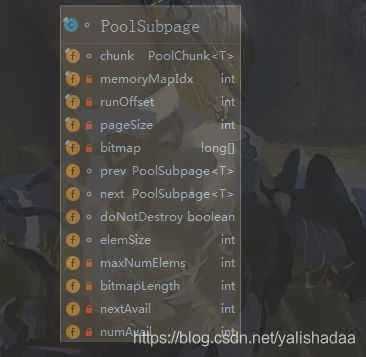
而chunk又由多个更小的subpage组成,这些subpage通过chunk属性来标明具体属于哪一个chunk,相互之间通过双向链表进行连接。
下面对应于具体的源码来探究下具体的内存分配逻辑:
首先是Page级别的内存划分,打开PoolArena的allocate()方法,可以看到:
if (normCapacity <= chunkSize) {
            if (cache.allocateNormal(this, buf, reqCapacity, normCapacity)) {
                // was able to allocate out of the cache so move on
                return;
            }
            allocateNormal(buf, reqCapacity, normCapacity);
        } else {
            // Huge allocations are never served via the cache so just call allocateHuge
            allocateHuge(buf, reqCapacity);
        }
也就是说当小于16M的时候,是通过缓存来进行分配的,每一次分配内存都分配16M的整数倍,具体的代码逻辑如下:
private synchronized void allocateNormal(PooledByteBuf buf, int reqCapacity, int normCapacity) {
        if (q050.allocate(buf, reqCapacity, normCapacity) || q025.allocate(buf, reqCapacity, normCapacity) ||
            q000.allocate(buf, reqCapacity, normCapacity) || qInit.allocate(buf, reqCapacity, normCapacity) ||
            q075.allocate(buf, reqCapacity, normCapacity)) {
            ++allocationsNormal;
            return;
        }

        // Add a new chunk.
        PoolChunk c = newChunk(pageSize, maxOrder, pageShifts, chunkSize);
        long handle = c.allocate(normCapacity);
        ++allocationsNormal;
        assert handle > 0;
        c.initBuf(buf, handle, reqCapacity);
        qInit.add(c);
    }
在分配内存的时候,首先尝试在现有的chunk上进行分配,随后创建一个chunk进行分配,最后初始化PooledByteBuf。
说完page级别的内存划分下面在来探究一下subPage级别的内存划分:
f (isTinyOrSmall(normCapacity)) { // capacity < pageSize
            int tableIdx;
            PoolSubpage[] table;
            boolean tiny = isTiny(normCapacity);
            if (tiny) { // < 512
                if (cache.allocateTiny(this, buf, reqCapacity, normCapacity)) {
                    // was able to allocate out of the cache so move on
                    return;
                }
                tableIdx = tinyIdx(normCapacity);
                table = tinySubpagePools;
            } else {
                if (cache.allocateSmall(this, buf, reqCapacity, normCapacity)) {
                    // was able to allocate out of the cache so move on
                    return;
                }
                tableIdx = smallIdx(normCapacity);
                table = smallSubpagePools;
            }

            final PoolSubpage head = table[tableIdx];

            /**
             * Synchronize on the head. This is needed as {@link PoolChunk#allocateSubpage(int)} and
             * {@link PoolChunk#free(long)} may modify the doubly linked list as well.
             */
            synchronized (head) {
                final PoolSubpage s = head.next;
                if (s != head) {
                    assert s.doNotDestroy && s.elemSize == normCapacity;
                    long handle = s.allocate();
                    assert handle >= 0;
                    s.chunk.initBufWithSubpage(buf, handle, reqCapacity);

                    if (tiny) {
                        allocationsTiny.increment();
                    } else {
                        allocationsSmall.increment();
                    }
                    return;
                }
            }
            allocateNormal(buf, reqCapacity, normCapacity);
            return;
        }
对于不同粒度的内存管理,Netty是通过平衡二叉树结构来进行分配的,具体可以参考(https://segmentfault.com/a/1190000021444859)
4.ByteBuf回收机制
上面一大段,光分析了内存分配了,那么既然有分配内存,相应的也有释放内存,接下来,我们再来通过源代码了解一下Netty中的内存回收机制:
release()方法定义在ReferenceCounted这个接口中,我们找一下这个接口的实现类:AbstractReferenceCountedByteBuf,具体看下release0这个方法:
说到这里,还是必须提下Netty中的引用计数,对的,Netty也是采用了引用计数这种当时来判断当前的内存是否为“可以被回收”,
具体到代码中,是通过refCnt 这个变量来确定引用数的,当refCnt == decrement的时候,我们就可以进行内存的回收了
private boolean release0(int decrement) {
        for (;;) {
            int refCnt = this.refCnt;
            if (refCnt < decrement) {
                throw new IllegalReferenceCountException(refCnt, -decrement);
            }

            if (refCntUpdater.compareAndSet(this, refCnt, refCnt - decrement)) {
                if (refCnt == decrement) {
                    deallocate();
                    return true;
                }
                return false;
            }
        }
    }
查看PooledByteBuf中关于deallocate()的实现:
 @Override
    protected final void deallocate() {
        if (handle >= 0) {
            final long handle = this.handle;
            this.handle = -1;
            memory = null;
            chunk.arena.free(chunk, handle, maxLength, cache);
            recycle();
        }
    }
具体的步骤就是先将连续的内存段加载到缓存中,并标记连续的内存区段为未使用,随后将ByteBuf添加到对象池中(ByteBuf并不会立即销毁):
void free(PoolChunk chunk, long handle, int normCapacity, PoolThreadCache cache) {
        if (chunk.unpooled) {
            int size = chunk.chunkSize();
            destroyChunk(chunk);
            activeBytesHuge.add(-size);
            deallocationsHuge.increment();
        } else {
            SizeClass sizeClass = sizeClass(normCapacity);
            if (cache != null && cache.add(this, chunk, handle, normCapacity, sizeClass)) {
                // cached so not free it.
                return;
            }

            freeChunk(chunk, handle, sizeClass);
        }
    }
至此,对于ByteBuf的分析完毕。
慈母手中线,游子身上衣;今天是母亲节,祝愿所有伟大的母亲节日快乐!
