Android进阶学习(12)-- 图片加载性能优化(1)
图片加载性能优化
- 前言
- 图片内存
- 优化场景
- 大图片显示在小控件
- 超长图片处理
前言
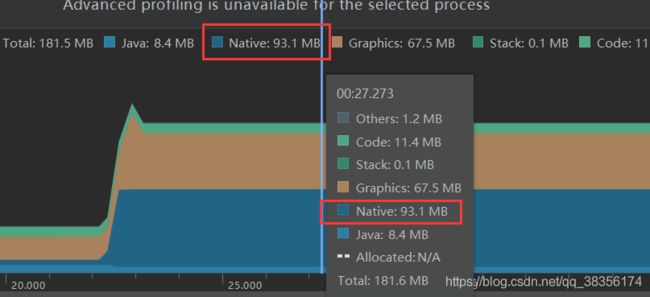
最近自己做了一个app,列表中有大量图片需要加载,毫无任何处理的情况下占用的内存可达250M之上:

所以需要对所有的图片进行优化处理,那么优化主要有以下两个方面:
- 图片加载时优化
- 图片的缓存
图片内存
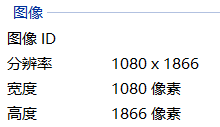
首先需要了解啥图片的内存是如何计算出来的;我们一半所说的图片宽高就是鼠标右键图片查看详细信息那里的像素

图片是由一个个像素点构成的,图片的像素点有以下四种格式:
- ALPHA_8 //每个像素占用1byte内存
- RGB_565 //每个像素占用2byte内存
- ARGB_4444 //每个像素占用2byte内存
- ARGB_8888 //每个像素占用4byte内存
图片占用的内存 = 宽 * 高 * 像素点格式

这里要注意:图片的内存占用大小,只和它的像素点格式有关,和它的文件格式无关,.png、.jpg、.webp等同样的图片不同格式占用内存是相同的。
但是,在Android项目中,同样图片放在不同的文件目录,所占用的内存大小是不同的。在BitmapFactory中的Options有一个属性, inDensity,表示bitmap的像素密度,它是根据不同的文件目录去赋值的
drawable-ldpi  	120
drawable-mdpi  	160
drawable-hdpi  	240
drawable-xhdpi 	320
drawable-xxhdpi 480
优化场景
什么时候需要对图片优化?比如,一个高清大图在app中只需要显示在一个比较小的控件上;又或者比如一些特别长的图,那么就需要分段加载,用户滑动到哪里就加载那一部分;前面两种都是加载单个图片的场景,当有图片列表时就需要缓存,同样的图片不要重复创建bitmap对象或是重复从网络获取。针对以上场景逐个分析。
大图片显示在小控件
//XML
可以看到,当界面只加载这一张图片,内存也会飙升

 从log中可以看出,这个图片占用了50M的内存(log中的byte单位),这种情况下,图片的宽高远大于View的宽高,我们就可以对他进行缩放;
新建 ImgUtils,写入以下代码:
public class ImgUtils {

    /**
     * 对图片缩放、降低质量
     * @param context
     * @param resId
     * @param showWidth
     * @param showHeight
     * @return
     */
    public static Bitmap resizeBitmap(Context context, int resId, int showWidth, int showHeight) {
        BitmapFactory.Options mOptions = new BitmapFactory.Options();
        mOptions.inMutable = true;
        mOptions.inJustDecodeBounds = true;
        BitmapFactory.decodeResource(context.getResources(), resId, mOptions);
        int width = mOptions.outWidth;
        int height = mOptions.outHeight;
        mOptions.inSampleSize = calcuteInSampleSize(width, height, showWidth, showHeight);
        mOptions.inJustDecodeBounds = false;
        return BitmapFactory.decodeResource(context.getResources(), resId, mOptions);
    }

    /**
     * 计算最大缩放比例
     * @param relWidth 真实宽高
     * @param relHeight 真是宽高
     * @param showWidth 显示在view中的宽高
     * @param showHeight 显示在view中的宽高
     * @return
     */
    public static int calcuteInSampleSize(int relWidth, int relHeight, int showWidth, int showHeight) {
        Log.d("ImgUtils", "relWidth : " + relWidth + " relHeight : " + relHeight + " showWidth : " + showWidth + " showHeight : " + showHeight  );
        int inSampleSize = 1;
        if (relWidth > showWidth && relHeight > showHeight) {
            inSampleSize = 2;
            while ((relWidth /= 2) > showWidth && (relHeight /= 2) > showHeight) {
                inSampleSize *= 2;
            }
        }
        Log.d("ImgUtils", "calcuteInSampleSize : " + inSampleSize);
        return inSampleSize;
    }
}
修改activity中的代码:
Bitmap resizeBitmap = ImgUtils.resizeBitmap(this, R.drawable.big, 300, 200);
Log.e("图片内存_优化一", resizeBitmap.getByteCount() + " byte");
ivCover.setImageBitmap(resizeBitmap);
运行后会发现native大幅度下降

看一下log
![]()
优化了将近二十倍;上面的代码中,最核心的就是给 Bitmap 设置了 inSampleSize 属性;inSampleSize 就是取图片宽高的几分之一,如果一个图片的宽高都是100像素,inSampleSize 等于2 的情况下,bitmap分别取图片宽高的 二分之一,那么也就意味着图片占用的内存是原来的 四分之一;当然,这样缩放是会造成图片失真,所有一定要注意 inSampleSize 的大小;
除了设置 inSampleSize,之前还说了图片的像素格式,RGB_565 占用 2字节,是ARGB_8888 的一半,也可以修改图片的像素格式达到减少内存占用的目的;
在ImgUtils类中的resizeBitmap方法加入以下代码测试:
public class ImgCacheUtils {

    public static Bitmap resizeBitmap(Context context, int resId, int showWidth, int showHeight) {
        BitmapFactory.Options mOptions = new BitmapFactory.Options();
        mOptions.inMutable = true;
        // 修改图片像素格式
        mOptions.inPreferredConfig = Bitmap.Config.RGB_565;
        mOptions.inJustDecodeBounds = true;
        BitmapFactory.decodeResource(context.getResources(), resId, mOptions);
        int width = mOptions.outWidth;
        int height = mOptions.outHeight;
        mOptions.inSampleSize = calcuteInSampleSize(width, height, showWidth, showHeight);
        mOptions.inJustDecodeBounds = false;
        return BitmapFactory.decodeResource(context.getResources(), resId, mOptions);
    }

}
运行后,看一下log

和没加入修改格式代码时相比,内存占用又缩小了一半;同样,这样也会让图片失真,在处理时一定要考虑图片的效果问题;
超长图片处理
遇到特别长的图片,我们就需要让他局部加载,就需要我们自定义View;主要实现的功能:只加载屏幕上可见的部分,用户滑动时改变可见区域,既然滑动,那么也要实现滑动的逻辑。图片压缩处理,依旧采用上面工具类中的方法,对 inSimpleSize 进行修改,和修改图片的像素格式
新建LongImageView:
public class LongImageView extends View implements GestureDetector.OnGestureListener, View.OnTouchListener {

    //View 滑动相关
    private GestureDetector mGestureDetector;
    private Scroller mScroller;
    //可见的矩形区域
    Rect mRect;
    BitmapFactory.Options mOptions;
    BitmapRegionDecoder mBitmapRegionDecoder;
    //图片宽高
    int mImageWidth;
    int mImageHeight;
    //View的宽高
    int mViewHeight;
    int mViewWidth;
    //缩放比例
    float mZoom;
    Bitmap bitmap = null;

    public LongImageView(Context context) {
        this(context, null, 0);
    }

    public LongImageView(Context context, @Nullable AttributeSet attrs) {
        this(context, attrs, 0);
    }

    public LongImageView(Context context, @Nullable AttributeSet attrs, int defStyleAttr) {
        super(context, attrs, defStyleAttr);
        mGestureDetector = new GestureDetector(context, this);
        setOnTouchListener(this);
        mScroller = new Scroller(context);
        mRect = new Rect();
        mOptions = new BitmapFactory.Options();
    }

    public void setImage(InputStream in) {
        mOptions.inJustDecodeBounds = true;
        BitmapFactory.decodeStream(in, null, mOptions);
        //获取图片宽高
        mImageWidth = mOptions.outWidth;
        mImageHeight = mOptions.outHeight;
        //设置图片格式
        mOptions.inMutable = true;
        //mOptions.inPreferredConfig = Bitmap.Config.RGB_565;
        mOptions.inJustDecodeBounds = false;

        try {
            // 第二个参数为 false 表示 输入流关闭时 不受影响
            mBitmapRegionDecoder = BitmapRegionDecoder.newInstance(in, false);
        } catch (IOException e) {
            e.printStackTrace();
        }

        requestLayout();
    }

    @Override
    protected void onDraw(Canvas canvas) {
        super.onDraw(canvas);
        if (mBitmapRegionDecoder == null){
            return;
        }
        mOptions.inBitmap = bitmap;
        bitmap = mBitmapRegionDecoder.decodeRegion(mRect, mOptions);

        Matrix matrix = new Matrix();
        matrix.setScale(mZoom * mOptions.inSampleSize, mZoom * mOptions.inSampleSize);
        Log.e("占用的内存", bitmap.getByteCount() + " byte");
        canvas.drawBitmap(bitmap, matrix, null);
    }

    @Override
    protected void onMeasure(int widthMeasureSpec, int heightMeasureSpec) {
        super.onMeasure(widthMeasureSpec, heightMeasureSpec);

        mViewWidth = getMeasuredWidth();
        mViewHeight = getMeasuredHeight();

        if (mBitmapRegionDecoder == null){
            return;
        }

        //设置矩形区域
        mRect.left = 0;
        mRect.top = 0;
        mRect.right = mImageWidth;
        //根据图片缩放程度 计算出图片显示的高度
        mZoom = (float)mViewWidth / (float)mImageWidth;
        mRect.bottom = (int) (mViewHeight / mZoom);

        mOptions.inMutable = true;
        mOptions.inSampleSize = ImgUtils.calcuteInSampleSize(mImageWidth, mImageHeight, mViewWidth, mViewHeight);
    }

    /**
     * 用户 触摸 屏幕
     * @param e
     * @return
     */
    @Override
    public boolean onDown(MotionEvent e) {
        if (!mScroller.isFinished()){
            mScroller.forceFinished(true);
        }
        return true;
    }

    /**
     * 用户 触摸 屏幕 但是 没有松开 拖动
     * @param e
     */
    @Override
    public void onShowPress(MotionEvent e) {

    }

    /**
     * 用户 触摸 屏幕 松开后
     */
    @Override
    public boolean onSingleTapUp(MotionEvent e) {
        return false;
    }

    /**
     *  用户 滑动 屏幕
     */
    @Override
    public boolean onScroll(MotionEvent e1, MotionEvent e2, float distanceX, float distanceY) {
        mRect.offset(0, (int) distanceY);
        if(mRect.bottom > mImageHeight){
            mRect.bottom = mImageHeight;
            mRect.top = mImageHeight - (int) (mViewHeight / mZoom);
        }
        if (mRect.top < 0) {
            mRect.top = 0;
            mRect.bottom = (int) (mViewHeight / mZoom);
        }
        invalidate();
        return false;
    }

    @Override
    public void onLongPress(MotionEvent e) {

    }

    /**
     *  用户 触摸 屏幕 快速滑动后松开
     */
    @Override
    public boolean onFling(MotionEvent e1, MotionEvent e2, float velocityX, float velocityY) {
        mScroller.fling(0, mRect.top, 0, (int) - velocityY, 0, 0,
                0, mImageHeight - (int) (mViewHeight / mZoom));
        return false;
    }

    @Override
    public boolean onTouch(View v, MotionEvent event) {
        return mGestureDetector.onTouchEvent(event);
    }

    @Override
    public void computeScroll() {
        if (mScroller.isFinished()) {
            return;
        }
        //返回 true 表示 在滑动
        if (mScroller.computeScrollOffset()) {
            mRect.top = mScroller.getCurrY();
            mRect.bottom = mRect.top + (int) (mViewHeight / mZoom);
            invalidate();
        }
    }
}
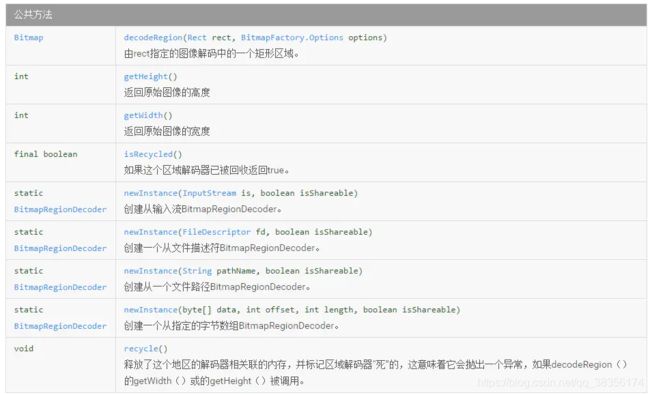
在这个自定义view中,我们借助了GestureDetector 手势检测 和 Scoller,处理用户触摸,滑动等事件;图像局部显示利用的是BitmapRegionDecoder,看以下他的api:

当用户滑动时,不断通过 computeScroll 方法去计算显示的位置,并且重绘界面,这里要注意 滑到顶部 和 滑到底部 时的判断、逻辑处理。
