JumpServer开源堡垒机安装过程详解
安装过程参考Jumpserver官方文档:http://docs.jumpserver.org/zh/docs/step_by_step.html
一 .系统相关
VMware虚拟机:2G内存,双核处理器,20G硬盘,桥接模式,系统使用centos7.2,最小化安装
IP地址:172.16.0.38/24
1.设置SElinux和防火墙,字符编码
firewall-cmd --zone=public --add-port=80/tcp --permanent
firewall-cmd --zone=public --add-port=2222/tcp --permanent
firewall-cmd --reload
setenforce 0
sed -i "s/enforcing/disabled/g" /etc/selinux/config
localedef -c -f UTF-8 -i zh_CN zh_CN.UTF-8
export LC_ALL=zh_CN.UTF-8
echo 'LANG="zh_CN.UTF-8"' > /etc/locale.conf
二.准备环境
1.安装依赖包和python3.6和python3.6,编译需要的相关软件
yum install autoconf automake libtool -y
yum -y install wget gcc epel-release git
yum -y install python36 python36-devel
2.建立python虚拟环境并载入python虚拟环境变量
2.1 手动载入
cd /opt/
python3.6 -m venv py3
source /opt/py3/bin/activate
2.2 自动载入
cd /opt/
git clone https://github.com/kennethreitz/autoenv.git
echo 'source /opt/autoenv/activate.sh' >> ~/.bashrc
source ~/.bashrc
三.安装Jumpserver
1.下载或clone源文件
cd /opt/
git clone https://github.com/jumpserver/jumpserver.git
echo "source /opt/py3/bin/activate" > /opt/jumpserver/.env
2.安装依赖RPM包和python库依赖
cd /opt/jumpserver/requirements第一次进入会有提示,为正常现象,
yum -y install $(cat rpm_requirements.txt)
pip install --upgrade pip setuptools
pip install -r requirements.txt
3.安装 Redis, Jumpserver 使用 Redis 做 cache 和 celery broke
yum -y install redis
systemctl enable redis
systemctl start redis
4.安装mysql(centos中为mariadb)并配置
yum -y install mariadb mariadb-devel mariadb-server
systemctl enable mariadb
systemctl start mariadb
mysql -u root
  create database jumpserver default charset 'utf8';
  grant all on jumpserver.* to 'jumpserver'@'127.0.0.1' identified by 'pwd';
5.修改Jumpserver的配置文件
cd /opt/jumpserver/
cp config_example.py config.py
vim config.py                //编写过程中不要tab,使用空格对齐
32  SECRET_KEY = 'keystring'
36  BOOTSTRAP_TOKEN = 'presharetoken'
40  DEBUG = True
46  LOG_LEVEL = 'ERROR'
47  LOG_DIR = os.path.join(BASE_DIR,'logs')
52  SESSION_EXPIRE_AT_BROWSER_CLOSE = True
65  DB_ENGINE = 'mysql'
66  DB_HOST = '127.0.0.1'
67  DB_PORT = 3306
68  DB_USER = 'jumpserver'
69  DB_PASSWORD = 'pwd'              //数据库密码
70  DB_NAME = 'jumpserver'
6.运行Jumpserver
cd /opt/jumpserver/
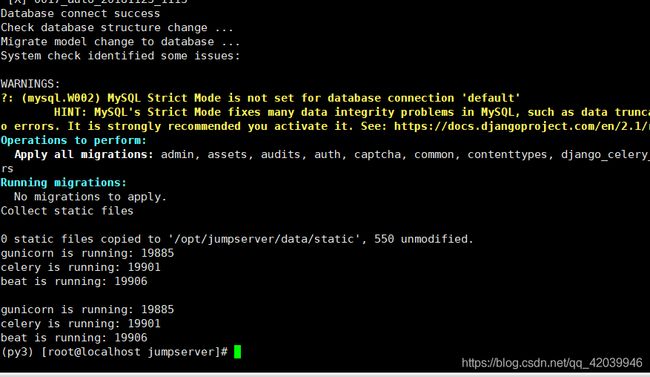
./jms start all            //后面加-d 可以后台运行
四. 安装SSH Server和WebSocket Server(Coco)
1.下载或clone源文件
如果之前运行jumpserver不是后台运行,需要新建一个终端继续
在/opt目录下
source /opt/py3/bin/activate
git clone https://github.com/jumpserver/coco.git && cd coco && git checkout master
echo "source /opt/py3/bin/activate" > /opt/coco/.env
2.安装依赖包
cd /opt/coco/requirements/
yum -y  install $(cat rpm_requirements.txt)
pip install -r requirements.txt -ihttps://pypi.org/simple
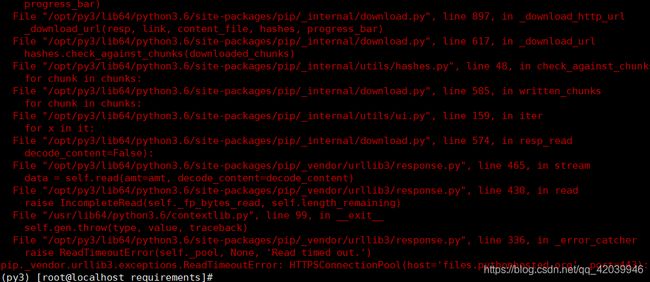
如果回显如下图的话重新pip install就好。。。。暂时没搞懂为什么
3.修改配置文件后运行
cd /opt/coco/
cp conf_example.py conf.py
vim conf.py   //注意对齐不要用tab,使用空格
16  NAME = "COCO"
19  CORE_HOST = 'http://127.0.0.1:8080'
23  BOOTSTRAP_TOPKEN = 'presharetoken'
45  LOG_LEVEL = 'ERROR'
注释掉cocod文件的25行和38行
./cocod start -d
五.安装Web Terminal前端(Luna)
cd /opt
wget https://github.com/jumpserver/luna/releases/download/1.4.6/luna.tar.gz
tar xf luna.tar.gz
chown -R root:root luna
六.安装windows支持组件(如果没有windows资产就不装)
1.安装依赖,编译安装guacamole服务
cd /opt
yum install cairo-devel libjpeg-devel libpng-devel uuid-devel
yum install ffmpeg-devel freerdp-devel pango-devel libssh2-devel libtelnet-devel libvncserver-devel pulseaudio-libs-devel openssl-devel libvorbis-devel libwebp-devel
git clone https://github.com/jumpserver/docker-guacamole.git
cd /opt/docker-guacamole/
tar -xf guacamole-server-0.9.14.tar.gz
cd guacamole-server-0.9.14
autoreconf -fi
./configure --with-init-dir=/etc/init.d
make && make install
cd ..
rm -rf guacamole-server-0.9.14
ldconfig
2.配置tomcat
mkdir -p /config/guacamole /config/guacamole/lib /config/guacamole/extensions
ln -sf /opt/docker-guacamole/guacamole-auth-jumpserver-0.9.14.jar /config/guacamole/extensions/guacamole-auth-jumpserver-0.9.14.jar
ln -sf /opt/docker-guacamole/root/app/guacamole/guacamole.properties /config/guacamole/guacamole.properties
cd /config/
wget http://mirror.bit.edu.cn/apache/tomcat/tomcat-8/v8.5.35/bin/apache-tomcat-8.5.35.tar.gz
tar xf apache-tomcat-8.5.35.tar.gz
rm -rf apache-tomcat-8.5.35.tar.gz
mv apache-tomcat-8.5.35 tomcat8
rm -rf /config/tomcat8/webapps/*
ln -sf /opt/docker-guacamole/guacamole-0.9.14.war /config/tomcat8/webapps/ROOT.war
sed -i 's/Connector port="8080"/Connector port="8081"/g' /config/tomcat8/conf/server.xml
sed -i 's/FINE/WARNING/g' /config/tomcat8/conf/logging.properties
cd /config
wget https://github.com/ibuler/ssh-forward/releases/download/v0.0.5/linux-amd64.tar.gz
tar xf linux-amd64.tar.gz -C /bin/
chmod +x /bin/ssh-forward
3.配置环境变量并启动Guacamole
export JUMPSERVER_SERVER=http://127.0.0.1:8080
echo "export JUMPSERVER_SERVER=http://127.0.0.1:8080" >> ~/.bashrc
export BOOTSTRAP_TOKEN=presharetoken
echo "export BOOTSTRAP_TOKEN=presharetoken" >> ~/.bashrc
export JUMPSERVER_KEY_DIR=/config/guacamole/keys
echo "export JUMPSERVER_KEY_DIR=/config/guacamole/keys" >> ~/.bashrc
export GUACAMOLE_HOME=/config/guacamole
echo "export GUACAMOLE_HOME=/config/guacamole" >> ~/.bashrc
/etc/init.d/guacd start
sh /config/tomcat8/bin/startup.sh
七.配置Nginx整合各组件
1.安装Nginx
vim /etc/yum.repos.d/nginx.repo
写入下面5行内容
[nginx]
name=nginx repo
baseurl=http://nginx.org/packages/centos/7/$basearch/
gpgcheck=0
enabled=1
yum install -y nginx
rm -rf /etc/nginx/conf.d/default.conf
systemctl enable nginx
2.编写配置文件
vim /etc/nginx/conf.d/jumpserver.conf
配置文件参考:
server {
    listen 80;

    client_max_body_size 100m;

    location /luna/ {
        try_files $uri / /index.html;
        alias /opt/luna/;
    }

    location /media/ {
        add_header Content-Encoding gzip;
        root /opt/jumpserver/data/;
    }

    location /static/ {
        root /opt/jumpserver/data/;
    }

    location /socket.io/ {
        proxy_pass       http://localhost:5000/socket.io/;
        proxy_buffering off;
        proxy_http_version 1.1;
        proxy_set_header Upgrade $http_upgrade;
        proxy_set_header Connection "upgrade";
        proxy_set_header X-Real-IP $remote_addr;
        proxy_set_header Host $host;
        proxy_set_header X-Forwarded-For $proxy_add_x_forwarded_for;
        access_log off;
    }

    location /coco/ {
        proxy_pass       http://localhost:5000/coco/;
        proxy_set_header X-Real-IP $remote_addr;
        proxy_set_header Host $host;
        proxy_set_header X-Forwarded-For $proxy_add_x_forwarded_for;
        access_log off;
    }

    location /guacamole/ {
        proxy_pass       http://localhost:8081/;
        proxy_buffering off;
        proxy_http_version 1.1;
        proxy_set_header Upgrade $http_upgrade;
        proxy_set_header Connection $http_connection;
        proxy_set_header X-Real-IP $remote_addr;
        proxy_set_header Host $host;
        proxy_set_header X-Forwarded-For $proxy_add_x_forwarded_for;
        access_log off;
    }

    location / {
        proxy_pass http://localhost:8080;
        proxy_set_header X-Real-IP $remote_addr;
        proxy_set_header Host $host;
        proxy_set_header X-Forwarded-For $proxy_add_x_forwarded_for;
    }
}
3.用“nginx -t”检查配置文件,如下图回显没错误则ok
4.开启nginx服务
systemctl start nginx
systemctl enable nginx
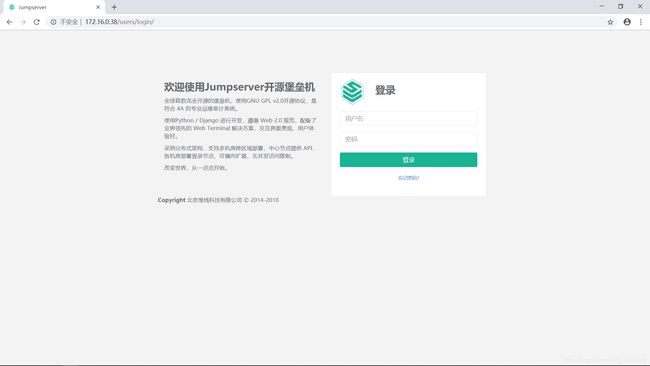
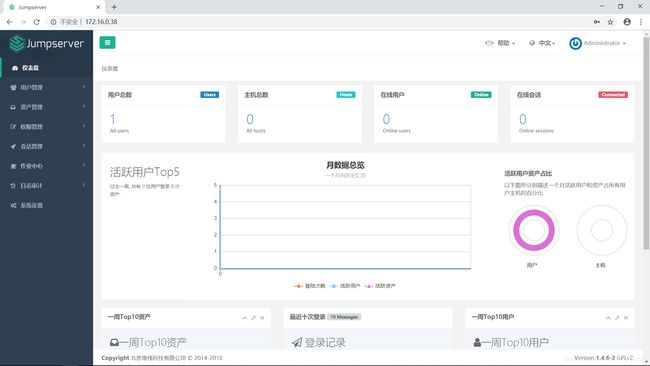
八 . 安装完成,可以通过浏览器使用,效果如下图
默认的用户名和密码均为admin


