Nginx的安装与平滑升级(详)
一、安装Nginx
1.下载Nginx安装包
[root@localhost ~]# wget http://nginx.org/download/nginx-1.14.2.tar.gz

[root@localhost ~]# wget http://nginx.org/download/nginx-1.16.1.tar.gz
这里下载两个版本的Nginx安装包是为了一会儿的升级使用。
Nginx下载
2.源码安装Nginx及相关组件
[root@localhost ~]# yum -y install gcc pcre-devel openssl-devel

[root@localhost ~]# useradd -s /sbin/nologin nginx   //创建禁止登陆解释器的用户(为了安全)

[root@localhost ~]# id nginx
uid=1001(nginx) gid=1001(nginx) 组=1001(nginx)

[root@localhost ~]# tar -xf nginx-1.14.2.tar.gz

[root@localhost ~]# cd nginx-1.14.2

[root@localhost nginx-1.14.2]# ./configure --prefix=/usr/local/nginx --user=nginx --group=nginx --with-http_ssl_module

         --prefix=/usr/local/nginx                   //指定安装路径
         --user=nginx                               //指定用户
         --group=nginx                              //指定组
         --with-http_ssl_module                    //安装ssl模块,开启其中的SSL加密功能(需要什么模块就安装什么模块)
  ......
  ......
  nginx modules path: "/usr/local/nginx/modules"
  nginx configuration prefix: "/usr/local/nginx/conf"
  nginx configuration file: "/usr/local/nginx/conf/nginx.conf"
  nginx pid file: "/usr/local/nginx/logs/nginx.pid"
  nginx error log file: "/usr/local/nginx/logs/error.log"
  nginx http access log file: "/usr/local/nginx/logs/access.log"
  nginx http client request body temporary files: "client_body_temp"
  nginx http proxy temporary files: "proxy_temp"
  nginx http fastcgi temporary files: "fastcgi_temp"
  nginx http uwsgi temporary files: "uwsgi_temp"
  nginx http scgi temporary files: "scgi_temp"

[root@localhost nginx-1.14.2]# make && make install    //编译并且安装
......
	'/usr/local/nginx/conf/scgi_params.default'
test -f '/usr/local/nginx/conf/nginx.conf' \
	|| cp conf/nginx.conf '/usr/local/nginx/conf/nginx.conf'
cp conf/nginx.conf '/usr/local/nginx/conf/nginx.conf.default'
test -d '/usr/local/nginx/logs' \
	|| mkdir -p '/usr/local/nginx/logs'
test -d '/usr/local/nginx/logs' \
	|| mkdir -p '/usr/local/nginx/logs'
test -d '/usr/local/nginx/html' \
	|| cp -R html '/usr/local/nginx'
test -d '/usr/local/nginx/logs' \
	|| mkdir -p '/usr/local/nginx/logs'
make[1]: 离开目录“/root/nginx-1.14.2”
3.启动Nginx
[root@localhost nginx-1.14.2]# /usr/local/nginx/sbin/nginx

[root@localhost nginx-1.14.2]# netstat -antulp | grep :80
tcp        0      0 0.0.0.0:80              0.0.0.0:*               LISTEN      6079/nginx: master

或者[root@localhost nginx-1.14.2]# netstat -antulp | grep nginx
tcp        0      0 0.0.0.0:80              0.0.0.0:*               LISTEN      6079/nginx: master

[root@localhost nginx-1.14.2]# /usr/local/nginx/sbin/nginx -V   //查看Nginx软件信息
nginx version: nginx/1.14.2
built by gcc 4.8.5 20150623 (Red Hat 4.8.5-39) (GCC)
built with OpenSSL 1.0.2k-fips  26 Jan 2017
TLS SNI support enabled
configure arguments: --prefix=/usr/local/nginx --user=nginx --group=nginx --with-http_ssl_module
/usr/local/nginx/sbin/nginx            //启动服务

/usr/local/nginx/sbin/nginx -s stop    //停止服务

/usr/local/nginx/sbin/nginx -t         //验证配置文件是否有错误

/usr/local/nginx/sbin/nginx -s reload  //重新加载配置文件(平滑重启,使用前最好先-t检查一下配置文件正确性)

/usr/local/nginx/sbin/nginx -V         //查看Nginx软件信息
二、平滑升级Nginx
1.查看Nginx版本
[root@localhost nginx-1.14.2]# /usr/local/nginx/sbin/nginx -V
nginx version: nginx/1.14.2
built by gcc 4.8.5 20150623 (Red Hat 4.8.5-39) (GCC)
built with OpenSSL 1.0.2k-fips  26 Jan 2017
TLS SNI support enabled
configure arguments: --prefix=/usr/local/nginx --user=nginx --group=nginx --with-http_ssl_module
2.编译新版本Nginx软件
[root@localhost ~]# tar -xf nginx-1.16.1.tar.gz

[root@localhost ~]# cd nginx-1.16.1

[root@localhost nginx-1.16.1]# ./configure --prefix=/usr/local/nginx --user=nginx --group=nginx --with-http_ssl_module
......
[root@localhost nginx-1.16.1]# make
注意:这里千万不要make install
3.备份老版Nginx程序,并使用新版本替换
[root@localhost nginx-1.16.1]# mv /usr/local/nginx/sbin/nginx /usr/local/nginx/sbin/nginxold

[root@localhost nginx-1.16.1]# cp objs/nginx /usr/local/nginx/sbin/

[root@localhost nginx-1.16.1]# /usr/local/nginx/sbin/nginx -t
nginx: the configuration file /usr/local/nginx/conf/nginx.conf syntax is ok
nginx: configuration file /usr/local/nginx/conf/nginx.conf test is successful
4.发送USR2信号
//向主进程(master)发送USR2信号,Nginx会启动一个新版本的master进程和对应工作进程,和旧版一起处理请求

[root@localhost nginx-1.16.1]# ps -aux | grep nginx
root       6088  0.0  0.1  46080  1928 ?        Ss   14:57   0:00 nginx: master process /usr/local/nginx/sbin/nginx
nginx      6091  0.0  0.1  46516  2012 ?        S    14:57   0:00 nginx: worker process
root       8693  0.0  0.0 112728   964 pts/0    R+   15:28   0:00 grep --color=auto nginx

[root@localhost nginx-1.16.1]# kill -USR2 6088    //发送USR2信号

[root@localhost nginx-1.16.1]# ps -aux | grep nginx
root       6088  0.0  0.1  46080  1928 ?        Ss   14:57   0:00   nginx: master process /usr/local/nginx/sbin/nginx
 nginx      6091  0.0  0.1  46516  2012 ?        S    14:57   0:00 nginx: worker process
root       8694  0.5  0.1  45960  3260 ?        S    15:29   0:00 nginx: master process /usr/local/nginx/sbin/nginx
 nginx      8695  0.0  0.1  46420  1888 ?        S    15:29   0:00 nginx: worker process
 root       8697  0.0  0.0 112728   968 pts/0    S+   15:29   0:00 grep --color=auto nginx
5.发送WINCH信号
//向旧的Nginx主进程(master)发送WINCH信号,它会逐步关闭自己的工作进程(主进程不退出),这时所有请求都会由新版Nginx处理

[root@localhost nginx-1.16.1]# ps -aux | grep nginx
root       6088  0.0  0.1  46080  1928 ?        Ss   14:57   0:00 nginx: master process /usr/local/nginx/sbin/nginx
 nginx      6091  0.0  0.1  46516  2012 ?        S    14:57   0:00 nginx: worker process
root       8694  0.0  0.1  45960  3260 ?        S    15:29   0:00 nginx: master process /usr/local/nginx/sbin/nginx
 nginx      8695  0.0  0.1  46420  1888 ?        S    15:29   0:00 nginx: worker process
 root       8700  0.0  0.0 112728   968 pts/0    R+   15:36   0:00 grep --color=auto nginx

[root@localhost nginx-1.16.1]# kill -WINCH 6088

[root@localhost nginx-1.16.1]# ps -aux | grep nginx
root       6088  0.0  0.1  46080  1928 ?        Ss   14:57   0:00 nginx: master process /usr/local/nginx/sbin/nginx
root       8694  0.0  0.1  45960  3260 ?        S    15:29   0:00 nginx: master process /usr/local/nginx/sbin/nginx
 nginx      8695  0.0  0.1  46420  1888 ?        S    15:29   0:00 nginx: worker process
 root       8702  0.0  0.0 112728   968 pts/0    R+   15:37   0:00 grep --color=auto nginx
注意:如果这个时候需要回退继续使用之前的Nginx版本,可以向旧版本的Nginx主程序发送HUP信号,它会重新启动工作进程, 仍使用旧版配置文件。然后可以将新版Nginx进程杀死(使用QUIT、TERM、或者KILL)
例如:
[root@localhost nginx-1.16.1]# kill -HUP 6088
6.发送QUIT信号
升级完毕,可向旧的Nginx主进程(master)发送(QUIT、TERM、或者KILL)信号,使旧的主进程退出

[root@localhost nginx-1.16.1]# kill -QUIT 6088

[root@localhost nginx-1.16.1]# ps -aux | grep nginx
root       8694  0.0  0.1  45960  3260 ?        S    15:29   0:00 nginx: master process /usr/local/nginx/sbin/nginx
nginx      8695  0.0  0.1  46420  1888 ?        S    15:29   0:00 nginx: worker process
root       8708  0.0  0.0 112728   968 pts/0    R+   15:38   0:00 grep --color=auto nginx
7.验证升级后的Nginx版本并访问
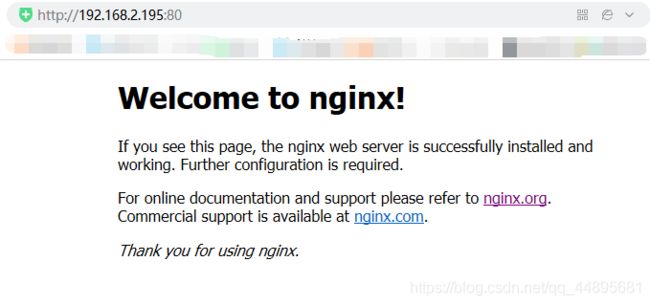
[root@localhost nginx-1.16.1]# /usr/local/nginx/sbin/nginx -V
nginx version: nginx/1.16.1
built by gcc 4.8.5 20150623 (Red Hat 4.8.5-39) (GCC)
built with OpenSSL 1.0.2k-fips  26 Jan 2017
TLS SNI support enabled
configure arguments: --prefix=/usr/local/nginx --user=nginx --group=nginx --with-http_ssl_module
Nginx信号补充:
QUIT          平滑关闭

TERM、INT     快速关闭

HUP           平滑重启,重新加载配置文件

USR1          重新打开日志文件

USR2          平滑升级可执行程序

WINCH         平滑关闭工作进程
↓↓↓↓↓↓
最近刚申请了个微信公众号,上面也会分享一些运维知识,大家点点发财手关注一波,感谢大家。 【原创公众号】:非著名运维 【福利】:公众号回复 “资料” 送运维自学资料大礼包哦!
![]()
如果你觉得这篇文章还不错,就请动动你的发财手为本文留个言,点个在看,或者转发一下吧,因为这将是我持续输出更多优质文章的最强动力!

