Spring Boot学习笔记(四)—— 使用Spring Security
一、前言
Spring Boot同样提供了关于Spring Security的自动配置支持,在org.springframework.boot.autoconfigure.security包中可以看到,在SpringBootWebSecurityConfiguration中,为我们自动配置了:
- 一个内存中的用户
user,密码在程序启动时出现; - 忽略对静态文件的拦截,
private static List DEFAULT_IGNORED = Arrays.asList("/css/**", "/js/**",
"/images/**", "/webjars/**", "/**/favicon.ico"); - 自动配置的
securityFilterChainRegistration的Bean。
Spring Boot为我们做了很多自动配置,当我们需要自己扩展配置时,如定义认证规则,只需定义一个配置类继承WebSecurityConfigurerAdapter即可
@Configuration
public class WebSecurityConfig extends WebSecurityConfigurerAdapter{
二、开始开发
1.添加依赖
        <dependency>

            <groupId>org.springframework.bootgroupId>
            <artifactId>spring-boot-starter-webartifactId>
        dependency>
        <dependency>

            <groupId>org.springframework.bootgroupId>
            <artifactId>spring-boot-starter-securityartifactId>
        dependency>


        <dependency>
            <groupId>org.springframework.bootgroupId>
            <artifactId>spring-boot-starter-thymeleafartifactId>
        dependency>

        <dependency>
            <groupId>org.webjarsgroupId>
            <artifactId>jqueryartifactId>
            <version>2.1.1version>
        dependency>
        <dependency>
            <groupId>org.webjarsgroupId>
            <artifactId>bootstrapartifactId>
            <version>3.3.7version>
        dependency>

        <dependency>
            <groupId>org.webjarsgroupId>
            <artifactId>webjars-locatorartifactId>
dependency>此时运行项目,直接访问http://localhost:8080就会弹出提示框要求

2.编写演示代码、页面
为了更直观地看到跳转流程,我们添加一些页面和演示代码,在web包下新建SecurityController
@Controller
public class SecurityController {

    @RequestMapping("/home")
    public ModelAndView home(String msg) {
        ModelAndView mv = new ModelAndView();
        mv.setViewName("home");
        mv.addObject("msg", msg);
        return mv;
    }
}在templates下新建login.html,home.html,内容如下:
// login.html

<html xmlns:th="http://www.thymeleaf.org">
<head>
<meta http-equiv="Content-Type" content="text/html; charset=utf-8"/>
<meta http-equiv="X-UA-Compatible" content="IE=edge"/>
<meta name="viewport" content="width=device-width, initial-scale=1"/>
<link th:src="@{/webjars/bootstrap/css/bootstrap.min.css}" rel="stylesheet"/>
<title>Login Pagetitle>
head>
<body>
<div class="container" align="center">
    <form th:action="@{/login}" method="post">
        <input type="text" id="username" name="username" placeholder="用户名"/>
        <br/>
        <input type="password" id="password" name="password" placeholder="密码"/>
        <br/>
        <button class="btn btn-primary btn-lg" type="submit">登录button>
    form>
div>
body>
html>

// home.html

<html xmlns:th="http://www.thymeleaf.org">
<head>
<meta http-equiv="Content-Type" content="text/html; charset=utf-8"/>
<meta http-equiv="X-UA-Compatible" content="IE=edge"/>
<meta name="viewport" content="width=device-width, initial-scale=1"/>
<link th:src="@{/webjars/bootstrap/css/bootstrap.min.css}" rel="stylesheet"/>
<title>Home Pagetitle>
head>
<body>
<div class="container" align="center">
    <h2>Hello <span th:text="${msg}">span>h2>
    <form th:action="@{/logout}" method="post" id="logoutForm">form>
    <button type="submit" form="logoutForm">注销button>
div>
body>
html>其中login.html用作登录页面,Spring Security 只是默认post到/login的请求为登录请求,而并未指明具体的登录页面,所以我们需要自己配置登录页面,在config包下创建WebMvcConfig继承WebMvcConfigurerAdapter,创建WebSecurityConfig继承WebSecurityConfigurerAdapter。
/*****WebMVC配置******/
@Configuration
public class WebMvcConfig extends WebMvcConfigurerAdapter{

    @Override
    public void addViewControllers(ViewControllerRegistry registry) {
        // 前面是url路径,后面是视图路径,添加thymeleaf后自动配置prefix为/templates,suffix为.html
        registry.addViewController("/login").setViewName("/login");
        registry.addViewController("/home").setViewName("/home");
    }
}
/*****WebSecurity配置******/
@Configuration
public class WebSecurityConfig extends WebSecurityConfigurerAdapter{

    @Override
    protected void configure(HttpSecurity http) throws Exception {
        http
            .authorizeRequests()    //定义权限配置
                .anyRequest().authenticated()   //任何请求都必须经过认证才能访问
        .and()
            .formLogin()    //定制登录表单
                .loginPage("/login")    //设置登录url
                .defaultSuccessUrl("/home") //设置登录成功默认跳转url
                .permitAll()    //允许任何人访问登录url
        .and()
            .logout().permitAll();  //允许任何人访问登出url
    }
}
现在运行项目,Spring Security会自动生成一个用户放到内存中,用户名为user,密码会在项目启动时显示,直接访问http://localhost:8080/home将跳转到登录页面,输入用户名密码后就能看到home页面了。


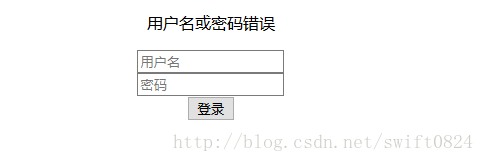
点击注销后Spring Security将注销用户session并跳转到/login?logout,如果登录失败,比如用户名不存在、密码错误等情况,将跳转到/login?error,可以根据后面的参数来添加用户提示信息,如:
<html xmlns:th="http://www.thymeleaf.org">
<head>
<meta http-equiv="Content-Type" content="text/html; charset=utf-8"/>
<meta http-equiv="X-UA-Compatible" content="IE=edge"/>
<meta name="viewport" content="width=device-width, initial-scale=1"/>
<link th:src="@{/webjars/bootstrap/css/bootstrap.min.css}" rel="stylesheet"/>
<title>Login Pagetitle>
head>
<body>
<div class="container" align="center">
    <form th:action="@{/login}" method="post">
        <p th:if="${param.logout}" class="bg-warning">你已注销p>
        <p th:if="${param.error}" class="bg-danger">用户名或密码错误p>
        <input type="text" id="username" name="username" placeholder="用户名"/>
        <br/>
        <input type="password" id="password" name="password" placeholder="密码"/>
        <br/>
        <button class="btn btn-primary btn-lg" type="submit">登录button>
    form>
div>
body>
html>
此时登录失败或注销后便可以显示相应的提示信息。

3.实现从数据库验证用户名密码
刚才实现的例子所用的用户名是存储在内存中的,你也可以在内存中自定义用户名和密码,重写WebSecurityConfig中的configure方法
@Override
    protected void configure(AuthenticationManagerBuilder auth) throws Exception {
        auth
            .inMemoryAuthentication()
                .withUser("admin").password("123456").roles("ADMIN");   //在内存中添加admin账号
    }
重启后即可使用admin登录。现在我们要从数据库中获取用户名密码进行验证,那么就要添加访问数据库的依赖,此处使用Mysql+Mybatis+Druid访问数据库,具体配置可参考上篇文章 http://blog.csdn.net/swift0824/article/details/79173052 ,现在我们先创建两张相关的表:user和role。
DROP TABLE IF EXISTS `tb_role`;
CREATE TABLE `tb_role` (
  `role_id` int(11) NOT NULL AUTO_INCREMENT,
  `role_name` varchar(255) NOT NULL,
  PRIMARY KEY (`role_id`)
) ENGINE=InnoDB DEFAULT CHARSET=utf8;

DROP TABLE IF EXISTS `tb_user`;
CREATE TABLE `tb_user` (
  `user_id` int(11) NOT NULL AUTO_INCREMENT,
  `role_id` int(11) NOT NULL,
  `username` varchar(255) NOT NULL,
  `password` varchar(255) NOT NULL,
  PRIMARY KEY (`user_id`)
) ENGINE=InnoDB AUTO_INCREMENT=8 DEFAULT CHARSET=utf8;
插入测试数据:
insert into tb_role(role_name) values('ROLE_ADMIN'),('ROLE_USER');
insert into tb_user(role_id,username,password) values(1,'admin','123456'),(2,'zhangsan','123456');
对应的实体类:
public class SysRole {
    private Integer roleId;
    private String roleName;
    //getter setter
    }
public class SysUser {
    private Integer userId;
    private Integer roleId;
    private String username;
    private String password;
    //one-to-one
    private SysRole role;
    //getter setter
    }
/***************SysUserMapper.xml***************************/
"1.0" encoding="UTF-8"?>
"-//mybatis.org//DTD Mapper 3.0//EN" "http://mybatis.org/dtd/mybatis-3-mapper.dtd">
"com.hl.spring_boot_demo.dao.SysUserMapper">
  "BaseResultMap" type="com.hl.spring_boot_demo.domain.SysUser">
    "user_id" jdbcType="INTEGER" property="userId" />
    "role_id" jdbcType="INTEGER" property="roleId" />
    "username" jdbcType="VARCHAR" property="username" />
    "password" jdbcType="VARCHAR" property="password" />
    "role"
    javaType="com.hl.spring_boot_demo.domain.SysRole"
    select="com.hl.spring_boot_demo.dao.SysRoleMapper.selectByPrimaryKey"
    column="role_id">


  "Base_Column_List">
    user_id, role_id, username, password

  <select id="selectByUsername" parameterType="java.lang.String" resultMap="BaseResultMap">
    select
        *
    from
        tb_user
    where
        username=#{username,jdbcType=VARCHAR}
select> 接下来需要实现UserDetailsService接口
public class CustomUserDetailsService implements UserDetailsService{
    @Autowired
    SysUserMapper userMapper;
    @Override
    public UserDetails loadUserByUsername(String username) throws UsernameNotFoundException {
        SysUser sysUser= userMapper.selectByUsername(username);
        if(sysUser!=null) {
            List authority = new ArrayList();
            authority.add(new SimpleGrantedAuthority(sysUser.getRole().getRoleName()));
            return new User(sysUser.getUsername(),sysUser.getPassword(),authority);
        }else {
            throw new UsernameNotFoundException("用户 [" + username + "] 不存在!");
        }
    }

}
将service注册为bean并配置到Spring Security中,
@Bean
    public UserDetailsService customUserDetailsService() {
        return new CustomUserDetailsService();
    }
@Override
    protected void configure(AuthenticationManagerBuilder auth) throws Exception {
        auth
            .userDetailsService(customUserDetailsService());
//          .inMemoryAuthentication()
//              .withUser("admin").password("123456").roles("ADMIN");   //在内存中添加admin账号
    }
此时你可以使用admin或者zhangsan登录,说明登录校验是从数据库获取数据的。
4.简单的角色权限管理
在刚才设置的两个用户其角色分别是ROLE_ADMIN,ROLE_USER,Spring Security支持根据角色来分配不同的访问权限。为了方便演示,我们在/template下新建admin.html,修改home.html,在/static下新建index.html,并添加依赖。
        <dependency>
            <groupId>org.thymeleaf.extrasgroupId>
            <artifactId>thymeleaf-extras-springsecurity4artifactId>
        dependency>


<html xmlns:th="http://www.thymeleaf.org"
      xmlns:sec="http://www.thymeleaf.org/thymeleaf-extras-springsecurity4">
<head>
<meta http-equiv="Content-Type" content="text/html; charset=utf-8"/>
<meta http-equiv="X-UA-Compatible" content="IE=edge"/>
<meta name="viewport" content="width=device-width, initial-scale=1"/>
<link th:src="@{/webjars/bootstrap/css/bootstrap.min.css}" rel="stylesheet"/>
<title>Admin Pagetitle>
head>
<body>
<div class="container" align="center">
    <h2>Hello [<span sec:authentication="name">span>] <span th:text="${msg}">span>h2>
    <form th:action="@{/logout}" method="post" id="logoutForm">form>
    <button type="submit" form="logoutForm">注销button>
div>
body>
html>


<html xmlns:th="http://www.thymeleaf.org"
      xmlns:sec="http://www.thymeleaf.org/thymeleaf-extras-springsecurity4">
<head>
<meta http-equiv="Content-Type" content="text/html; charset=utf-8"/>
<meta http-equiv="X-UA-Compatible" content="IE=edge"/>
<meta name="viewport" content="width=device-width, initial-scale=1"/>
<link th:src="@{/webjars/bootstrap/css/bootstrap.min.css}" rel="stylesheet"/>
<title>Home Pagetitle>
head>
<body>
<div class="container" align="center">
    <h2>Hello [<span sec:authentication="name">span>] <span th:text="${msg}">span>h2>
    <form th:action="@{/logout}" method="post" id="logoutForm">form>
    <button type="submit" form="logoutForm">注销button>
div>
body>
html>


<html xmlns:th="http://www.thymeleaf.org">
<head>
<meta http-equiv="Content-Type" content="text/html; charset=utf-8"/>
<meta http-equiv="X-UA-Compatible" content="IE=edge"/>
<meta name="viewport" content="width=device-width, initial-scale=1"/>
<title>Index Pagetitle>
head>
<body>
<div class="container" align="center">
    <h2><a href="/home">HOMEa>h2>
    <h2><a href="/admin">ADMINa>h2>
div>
body>
html>配置WebSecurityConfig
@Override
    protected void configure(HttpSecurity http) throws Exception {
        http
            .authorizeRequests()    //定义权限配置
                .antMatchers("/admin").hasRole("ADMIN") //角色为ROLE_ADMIN才能访问,可省略prefix
                .anyRequest().authenticated()   //任何请求都必须经过认证才能访问
        .and()
            .formLogin()    //定制登录表单
                .loginPage("/login")    //设置登录url
                .defaultSuccessUrl("/home") //设置登录成功默认跳转url
                .permitAll()    //允许任何人访问登录url
        .and()
            .logout().permitAll();  //允许任何人访问登出url
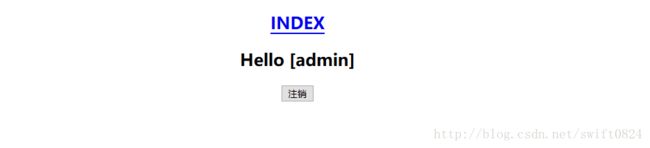
}运行项目,访问http://localhost:8080,分别使用admin和zhangsan登录,可以看到访问/admin路径时,只有admin用户有权限。
5.使用BCryptPasswordEncoder加密用户密码
为了安全考虑,应尽量避免明文存储用户密码,Spring Security提供了BCryptPasswordEncoder加密工具,使用强哈希算法,即使相同的密码每次生成的密码字符串也都不同,使用也非常简单,添加配置即可:
/********* WebSecurityConfig.java *****************/
    @Bean
    public BCryptPasswordEncoder passwordEncoder() {
        return new BCryptPasswordEncoder();
    }
    @Override
    protected void configure(AuthenticationManagerBuilder auth) throws Exception {
        auth
            .userDetailsService(customUserDetailsService())
            .passwordEncoder(passwordEncoder());
//          .inMemoryAuthentication()
//              .withUser("admin").password("123456").roles("ADMIN");   //在内存中添加admin账号
    }
此时重启项目发现已经无法登录了,因为Spring Security会将用户输入的密码加密后与数据库中的对比,下面将写一次测试类将用户密码手动更新一下。
public class UserTest extends BaseJunit4Test{
    @Autowired
    SysUserMapper userMapper;
    @Autowired
    BCryptPasswordEncoder passwordEncoder;
    @Test
    @Transactional
    @Rollback(false)//事务控制,为true时回滚
    public void testUpdateUser() {
        SysUser user = new SysUser();
        //数据库中user的主键id
        user.setUserId(8);
        user.setPassword(passwordEncoder.encode("123456"));
        userMapper.updateByPrimaryKeySelective(user);
    }
    }
/***************************************************/
@RunWith(SpringJUnit4ClassRunner.class)
@SpringBootTest(classes = SpringBootDemoApplication.class)
public class BaseJunit4Test {
}
更新后数据库内容为:

重启项目,再次登录:
登录成功。
三、总结
本文介绍了Spring Security的一些基本用法,灵活运用可满足开发中的大部分需求,有关其更多功能和更详细的介绍可阅读官方文档 https://docs.spring.io/spring-security/site/docs/4.2.5.BUILD-SNAPSHOT/reference/htmlsingle/ 。
本文示例源码:https://github.com/tsfans/spring_boot_demo