微信小程序学习(1)-基础开发
学习微信小程序
微信小程序学习(1)
微信小程序学习(2)
文章目录
- 学习微信小程序
- 注册和初始化
- 小程序配置
- tabbar导航栏
- 模板插样与WXML
- 循环渲染
- 条件渲染
- 模板
- 微信小程序脚本WXS
- module
- require
- src
- demo
- 微信小程序常用组件
- 事件
- 绑定并阻止事件冒泡
- 互斥事件绑定
- 事件的捕获阶段
- API
- 请求数据
- 小程序项目-商城
- 初始化
- 引入vant
- 使用组件
- 下面引入一个Skeleton 骨架屏
- 小程序的屏幕像素
- 设置一个自定义navbar
- 图片轮播
- 图标列表使用Grid宫格
- 滚动view和底部栏
- 列表与下拉刷新
- 新页面分类
- 进入产品页面
- 页面详情
- 商品规格
- 商品评论
- 加购与购物车页面模拟
- 模拟个人中心
注册和初始化
https://mp.weixin.qq.com/
账号用的网易的163邮箱,首字母小写缩写+手机号作为账号(以防忘掉)
开发者工具https://developers.weixin.qq.com/miniprogram/dev/devtools/devtools.html
下载后根据在平台中生成的AppID就可以创建小程序项目了,这里选择js非云开发
utils是工具函数
app.js是我们的应用以及项目编写的入口实例
app.json是我们的路由和窗体样式相关的配置
app.wxss是布局样式文件
project.config.json是项目的配置文件
sitemap.json是微信小程序的索引相关
index和logs是两个页面,每个页面的组成形式大致是固定的
形式和全局类似
wxml是模板引擎,wxss是布局样式,json是窗体配置,js是生命周期方法和数据绑定
小程序配置
新建页面很简单,在pages下面可以新建一个文件夹about然后右击新加page,可以直接生成四个空白page相关的文件
由于还没有做路由跳转所以直接在app.json中修改了路由的优先级把about放到最前面
window下面依次是背景文字样式、导航条的背景颜色、导航条内文字、导航条文字颜色
全局配置指南https://developers.weixin.qq.com/miniprogram/dev/reference/configuration/app.html
也可以在page中的.json中自定义配置
tabbar导航栏
https://developers.weixin.qq.com/miniprogram/dev/reference/configuration/app.html
logo用的是随便找的之前练习用的小米的,然后如果是活跃状态就会显示小米图标,非活跃就是home图标,此处只是为了练习效果
模板插样与WXML
https://developers.weixin.qq.com/miniprogram/dev/reference/wxml/
https://developers.weixin.qq.com/miniprogram/dev/component/
| 小程序标签 | 说明 |
|---|---|
| 视图容器 | |
| view | 视图容器,类比div |
| scroll-view | 可滚动视图容器 |
| swiper | 可滑动的视频容器 |
| 基础内容 | |
| icon | 图标 |
| text | 文字,类比span |
| progress | 进度条 |
| 表单组件 | |
| button | 按钮 |
| form | 表单 |
| input | 输入框 |
| checkbox | 多项选择器 |
| radio | 单项选择器 |
| picker | 列表选择器 |
| slider | 滑动选择器 |
| switch | 开关选择器 |
| label | 标签 |
| 操作反馈组件 | |
| action-sheet | 上拉菜单 |
| modal | 模态弹框 |
| progress | 进度条 |
| toast | 短通知 |
| 导航 | |
| navigator | 应用内跳转 |
| 多媒体 | |
| audio | 音频 |
| image | 图片 |
| video | 视频 |
| 地图 | |
| map | 地图 |
| 画布 | |
| canvas | 画布 |
想使用模板引擎,就是js中的data能够放到wxml显示
然后是对于image的src的模板引擎插入,会拿双引号括起来
<image src="{{imgUrl}}" >image>
设置了一个3s后切换源的事件,可以搞定
data: {
    msg: 'wxml,hello',
    imgUrl: '/images/mi-home.png',
  },

  /**
   * 生命周期函数--监听页面加载
   */
  onLoad: function (options) {
    setTimeout(() => {
      this.setData({
        imgUrl: '/images/mi-logo.png',
      })
    }, 3000)
  },
甚至可以直接用js语句操作
也就是{{}}内部是可以直接引用js代码和data数据的,并且可以直接在双引号中和字符串拼接
循环的方式
循环渲染
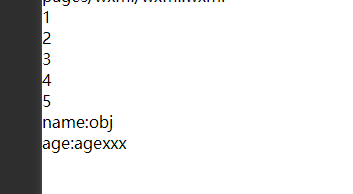
<view wx:for="{{array}}" wx:key="index">
	{{item}}
view>

<view wx:for="{{obj}}" wx:key="index" wx:for-item="obj_item" wx:for-index="obj_name">
	{{obj_name}}:{{obj_item}}
view>
条件渲染
<view wx:for="{{obj}}" wx:key="index" wx:for-item="obj_item" wx:for-index="obj_index">

	<view wx:if="{{obj_item.isvalid===1}}">
		{{obj_index}}:{{obj_item.name}}
	view>
  	<view wx:elif="{{obj_item.isvalid===0}}">
		{{obj_index}}:{{obj_item.name}}:废弃
	view>
  <view wx:else>
		{{obj_index}}:{{"xxx"}}:废弃
	view>

view>
    obj:[
      {name:'obj1',age:'1',isvalid:1},
      {name:'obj2',age:'2',isvalid:-1},
      {name:'obj3',age:'3',isvalid:1},
      {name:'obj4',age:'3',isvalid:0},
  ]
模板
<template name="staffName">
  <view>
    FirstName: {{firstName}}, LastName: {{lastName}}
  view>
template>

<template is="staffName" data="{{...staffs.staffA}}">template>
<template is="staffName" data="{{...staffs.staffB}}">template>
<template is="staffName" data="{{...staffs.staffC}}">template>
    staffs: {
      staffA: { firstName: 'Hulk', lastName: 'Hu' },
      staffB: { firstName: 'Shang', lastName: 'You' },
      staffC: { firstName: 'Gideon', lastName: 'Lin' }
    },
微信小程序脚本WXS
https://developers.weixin.qq.com/miniprogram/dev/reference/wxs/
语法暂时不支持es6
WXS 代码可以编写在 wxml 文件中的 `` 标签内,或以 .wxs 为后缀名的文件内。
每一个 .wxs 文件和 `` 标签都是一个单独的模块。
每个模块都有自己独立的作用域。即在一个模块里面定义的变量与函数,默认为私有的,对其他模块不可见。
module
一个模块要想对外暴露其内部的私有变量与函数,只能通过 module.exports 实现。
// /pages/comm.wxs

var foo = "'hello world' from comm.wxs";
var bar = function(d) {
  return d;
}
module.exports = {
  foo: foo,
  bar: bar
};
上述例子在 /pages/comm.wxs 的文件里面编写了 WXS 代码。该 .wxs 文件可以被其他的 .wxs 文件 或 WXML 中的
// /pages/tools.wxs

var foo = "'hello world' from tools.wxs";
var bar = function (d) {
  return d;
}
module.exports = {
  FOO: foo,
  bar: bar,
};
module.exports.msg = "some msg";
<wxs src="./../tools.wxs" module="tools" />
<view> {{tools.msg}} view>
<view> {{tools.bar(tools.FOO)}} view>
require
在.wxs模块中引用其他 wxs 文件模块,可以使用 require 函数。
引用的时候,要注意如下几点:
- 只能引用
.wxs文件模块,且必须使用相对路径。 wxs模块均为单例,wxs模块在第一次被引用时,会自动初始化为单例对象。多个页面,多个地方,多次引用,使用的都是同一个wxs模块对象。- 如果一个
wxs模块在定义之后,一直没有被引用,则该模块不会被解析与运行。
// /pages/logic.wxs

var tools = require("./tools.wxs");

console.log(tools.FOO);
console.log(tools.bar("logic.wxs"));
console.log(tools.msg);
src
src 属性可以用来引用其他的 wxs 文件模块。
引用的时候,要注意如下几点:
- 只能引用
.wxs文件模块,且必须使用相对路径。 wxs模块均为单例,wxs模块在第一次被引用时,会自动初始化为单例对象。多个页面,多个地方,多次引用,使用的都是同一个wxs模块对象。- 如果一个
wxs模块在定义之后,一直没有被引用,则该模块不会被解析与运行。
demo
wxs肯定不支持es6,要小心
wxs只支持wxml的wxs标签和wxs的require的两种引用
<view>
1-价格:{{setobj.setPrice()}}
2-价格:{{setobj2.setPrice()}}
3-价格:{{setobjx}}
view>
<wxs module="setobj2" src="./wxs.wxs"/>
<wxs module="setobj">
var price=10;
var setPrice=function(){
  return price+'¥'
}
module.exports={
  setPrice:setPrice
}
wxs>
//./wxs.wxs
var price=10;
var setPrice=function(){
  return price+'$'
}
module.exports={
  setPrice:setPrice
}
//./wxs2.js
let price=10;
let setPrice=()=>{
  return price+'$'
}
module.exports={
  setPrice
}
//./wxs.js
onLoad: function (options) {
    let wxjs = require("./wx2")
    let setobj = wxjs.setPrice()
    console.log(wxjs, wxjs.setPrice())
    this.setData({
      setobjx: wxjs.setPrice()
    })
  },
然后就是这里面的js是支持module和require的,也可以考虑把数据和方法都用js定义好然后引入到page.js中
这时候如果命名相同,wxs的引入比js的data的优先级要高
微信小程序常用组件
https://developers.weixin.qq.com/miniprogram/dev/component/
组件和标签可以自行查看实例然后自己用逻辑实现,很多都已经封装好了
事件
https://developers.weixin.qq.com/miniprogram/dev/framework/view/wxml/event.html
事件分为冒泡事件和非冒泡事件:
- 冒泡事件:当一个组件上的事件被触发后,该事件会向父节点传递。
- 非冒泡事件:当一个组件上的事件被触发后,该事件不会向父节点传递。
WXML的冒泡事件列表:
| 类型 | 触发条件 | 最低版本 |
|---|---|---|
| touchstart | 手指触摸动作开始 | |
| touchmove | 手指触摸后移动 | |
| touchcancel | 手指触摸动作被打断,如来电提醒,弹窗 | |
| touchend | 手指触摸动作结束 | |
| tap | 手指触摸后马上离开 | |
| longpress | 手指触摸后,超过350ms再离开,如果指定了事件回调函数并触发了这个事件,tap事件将不被触发 | 1.5.0 |
| longtap | 手指触摸后,超过350ms再离开(推荐使用longpress事件代替) | |
| transitionend | 会在 WXSS transition 或 wx.createAnimation 动画结束后触发 | |
| animationstart | 会在一个 WXSS animation 动画开始时触发 | |
| animationiteration | 会在一个 WXSS animation 一次迭代结束时触发 | |
| animationend | 会在一个 WXSS animation 动画完成时触发 | |
| touchforcechange | 在支持 3D Touch 的 iPhone 设备,重按时会触发 |
绑定并阻止事件冒泡
除 bind 外,也可以用 catch 来绑定事件。与 bind 不同, catch 会阻止事件向上冒泡。
例如在下边这个例子中,点击 inner view 会先后调用handleTap3和handleTap2(因为tap事件会冒泡到 middle view,而 middle view 阻止了 tap 事件冒泡,不再向父节点传递),点击 middle view 会触发handleTap2,点击 outer view 会触发handleTap1。
<view id="outer" bindtap="handleTap1">
  outer view
  <view id="middle" catchtap="handleTap2">
    middle view
    <view id="inner" bindtap="handleTap3">
      inner view
    view>
  view>
view>
互斥事件绑定
还可以使用 mut-bind 来绑定事件。一个 mut-bind 触发后,如果事件冒泡到其他节点上,其他节点上的 mut-bind 绑定函数不会被触发,但 bind 绑定函数和 catch 绑定函数依旧会被触发。
换而言之,所有 mut-bind 是“互斥”的,只会有其中一个绑定函数被触发。同时,它完全不影响 bind 和 catch 的绑定效果。
例如在下边这个例子中,点击 inner view 会先后调用 handleTap3 和 handleTap2 ,点击 middle view 会调用 handleTap2 和 handleTap1 。
<view id="outer" mut-bind:tap="handleTap1">
  outer view
  <view id="middle" bindtap="handleTap2">
    middle view
    <view id="inner" mut-bind:tap="handleTap3">
      inner view
    view>
  view>
view>
事件的捕获阶段
自基础库版本 1.5.0 起,触摸类事件支持捕获阶段。捕获阶段位于冒泡阶段之前,且在捕获阶段中,事件到达节点的顺序与冒泡阶段恰好相反。需要在捕获阶段监听事件时,可以采用capture-bind、capture-catch关键字,后者将中断捕获阶段和取消冒泡阶段。
在下面的代码中,点击 inner view 会先后调用handleTap2、handleTap4、handleTap3、handleTap1。
<view id="outer" bind:touchstart="handleTap1" capture-bind:touchstart="handleTap2">
  outer view
  <view id="inner" bind:touchstart="handleTap3" capture-bind:touchstart="handleTap4">
    inner view
  view>
view>
如果将上面代码中的第一个capture-bind改为capture-catch,将只触发handleTap2。
<view id="outer" bind:touchstart="handleTap1" capture-catch:touchstart="handleTap2">
  outer view
  <view id="inner" bind:touchstart="handleTap3" capture-bind:touchstart="handleTap4">
    inner view
  view>
view>
BaseEvent 基础事件对象属性列表:
| 属性 | 类型 | 说明 | 基础库版本 |
|---|---|---|---|
| type | String | 事件类型 | |
| timeStamp | Integer | 事件生成时的时间戳 | |
| target | Object | 触发事件的组件的一些属性值集合 | |
| currentTarget | Object | 当前组件的一些属性值集合 | |
| mark | Object | 事件标记数据 | 2.7.1 |
CustomEvent 自定义事件对象属性列表(继承 BaseEvent):
| 属性 | 类型 | 说明 |
|---|---|---|
| detail | Object | 额外的信息 |
TouchEvent 触摸事件对象属性列表(继承 BaseEvent):
| 属性 | 类型 | 说明 |
|---|---|---|
| touches | Array | 触摸事件,当前停留在屏幕中的触摸点信息的数组 |
| changedTouches | Array | 触摸事件,当前变化的触摸点信息的数组 |
特殊事件: canvas 中的触摸事件不可冒泡,所以没有 currentTarget。
API
https://developers.weixin.qq.com/miniprogram/dev/api/
api挺多的随用随查吧
- 基础
- wx.canIUse
- wx.base64ToArrayBuffer
- wx.arrayBufferToBase64
- 系统
- 更新
- 小程序
- 调试
- 定时器
- 环境变量
- 路由
- wx.switchTab
- wx.reLaunch
- wx.redirectTo
- wx.navigateTo
- wx.navigateBack
- EventChannel
- 界面
- 交互
- 导航栏
- 背景
- Tab Bar
- 字体
- 下拉刷新
- 滚动
- 动画
- 置顶
- 自定义组件
- 菜单
- 窗口
- 键盘
- 网络
- 发起请求
- 下载
- 上传
- WebSocket
- mDNS
- UDP 通信
- 数据缓存
- wx.setStorageSync
- wx.setStorage
- wx.removeStorageSync
- wx.removeStorage
- wx.getStorageSync
- wx.getStorageInfoSync
- wx.getStorageInfo
- wx.getStorage
- wx.clearStorageSync
- wx.clearStorage
- 周期性更新
- 媒体
- 地图
- 图片
- 视频
- 音频
- 背景音频
- 实时音视频
- 录音
- 相机
- 富文本
- 音视频合成
- 实时语音
- 画面录制器
- 视频解码器
- 位置
- wx.stopLocationUpdate
- wx.startLocationUpdateBackground
- wx.startLocationUpdate
- wx.openLocation
- wx.onLocationChange
- wx.offLocationChange
- wx.getLocation
- wx.chooseLocation
- 转发
- wx.updateShareMenu
- wx.showShareMenu
- wx.hideShareMenu
- wx.getShareInfo
- 画布
- wx.createOffscreenCanvas
- wx.createCanvasContext
- wx.canvasToTempFilePath
- wx.canvasPutImageData
- wx.canvasGetImageData
- Canvas
- CanvasContext
- CanvasGradient
- Color
- Image
- ImageData
- OffscreenCanvas
- Path2D
- RenderingContext
- 文件
- wx.saveFileToDisk
- wx.saveFile
- wx.removeSavedFile
- wx.openDocument
- wx.getSavedFileList
- wx.getSavedFileInfo
- wx.getFileSystemManager
- wx.getFileInfo
- FileSystemManager
- Stats
- 开放接口
- 登录
- 小程序跳转
- 帐号信息
- 用户信息
- 数据上报
- 数据分析
- 支付
- 授权
- 设置
- 收货地址
- 卡券
- 发票
- 生物认证
- 微信运动
- 性能
- 订阅消息
- 微信红包
- 设备
- 外围设备
- iBeacon
- NFC
- Wi-Fi
- 低功耗蓝牙
- 联系人
- 蓝牙
- 电量
- 剪贴板
- 网络
- 屏幕
- 电话
- 加速计
- 罗盘
- 设备方向
- 陀螺仪
- 性能
- 扫码
- 振动
- Worker
- wx.createWorker
- Worker
- Worker.onMessage
- Worker.postMessage
- Worker.terminate
- 第三方平台
- wx.getExtConfigSync
- wx.getExtConfig
- WXML
- wx.createSelectorQuery
- wx.createIntersectionObserver
- IntersectionObserver
- MediaQueryObserver
- NodesRef
- SelectorQuery
- 广告
- wx.createInterstitialAd
- InterstitialAd
请求数据
拿fastmock模拟了一个数据接口
https://www.fastmock.site/mock/321eff979384ff4bf180c470f5c3c650/demo/api/:id
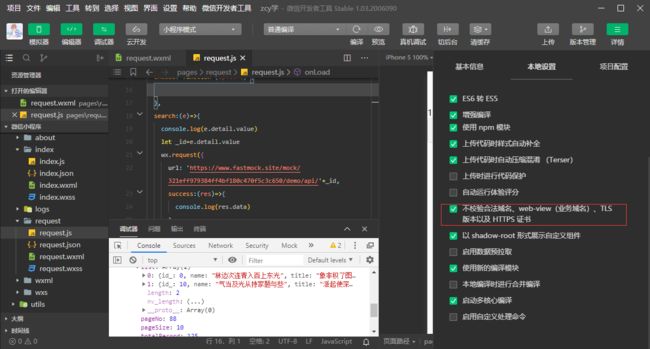
设置关闭域名校验
<form bindsubmit="search">
<input name="_id" placeholder="输入一个id">input>
<button form-type="submit">搜索button>
form>
<view wx:if="{{list}}">
{{id}}
view>
<view wx:for="{{list}}" wx:key="index">
{{item.name}}:{{(item.price)}}
view>
  search(e){
    console.log(e.detail.value)
    let _id=e.detail.value._id
    wx.request({
      url: 'https://www.fastmock.site/mock/321eff979384ff4bf180c470f5c3c650/demo/api/'+_id,
      success:(res)=>{
        console.log('箭头函数拿到全局this',this)
        console.log(res.data)
        let list=res.data.data.list
        list=list.map(item=>{
          let price=+(item.price).toFixed(2)
          item.price=price
          return item
        })
        this.setData({
          list:list,
          id:_id
        })
      }
    })
  },
小程序项目-商城
自定义组件介绍:https://developers.weixin.qq.com/miniprogram/dev/framework/custom-component/
使用第三方ui vant-weapp
https://vant-contrib.gitee.io/vant-weapp/#/quickstart
初始化
先新建一个项目lcmall,目录结构:
引入vant
https://vant-contrib.gitee.io/vant-weapp/#/quickstart
yarn add @vant/weapp --production
然后菜单栏-工具-构建npm
将 app.json 中的 "style": "v2" 去除,小程序的新版基础组件强行加上了许多样式,难以去除,不关闭将造成部分组件样式混乱。
以 Button 组件为例,只需要在app.json或index.json中配置 Button 对应的路径即可。如果你是通过下载源代码的方式使用 @vant/weapp,请将路径修改为项目中 @vant/weapp 所在的目录。
// 通过 npm 安装
// app.json
"usingComponents": {
  "van-button": "@vant/weapp/button/index"
}
// 通过下载源码使用 es6版本
// app.json
"usingComponents": {
  "van-button": "path/to/@vant/weapp/dist/button/index"
}
// 通过下载源码使用 es5版本
// app.json
"usingComponents": {
  "van-button": "path/to/@vant/weapp/lib/button/index"
}
使用组件
引入组件后,可以在 wxml 中直接使用组件
<van-button type="primary">按钮van-button>
下面引入一个Skeleton 骨架屏
第一步删掉app.wxss中的默认布局
第二步引入app.json
{
  "pages":[
    "pages/index/index",
    "pages/logs/logs"
  ],
  "window":{
    "backgroundTextStyle":"light",
    "navigationBarBackgroundColor": "#fff",
    "navigationBarTitleText": "WeChat",
    "navigationBarTextStyle":"black"
  },
  "sitemapLocation": "sitemap.json",
  "usingComponents": {
    "van-skeleton": "@vant/weapp/skeleton/index"
  }
}
第三步把放进去
<view class="container">
<van-skeleton title avatar row="3" />
view>
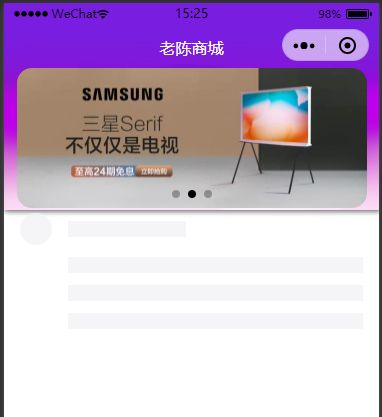
有效果啦
小程序的屏幕像素
建议使用rpx,根据屏幕宽度自适应,规定为一共750rpx
比如iphone6的宽度为375px,则共有750个物理像素,1rpx为1物理像素,1rpx=0.5px
![]()
设置一个自定义navbar
bar的高度从全局设备获取
//app.js
App({
  onLaunch: function () {
    wx.getSystemInfo({
      success: (result) => {
        console.log(result)
        this.globalData.barHeight=result.statusBarHeight
      },
    })
  },
  globalData: {

  }
})
//index.js
//获取应用实例
const app = getApp()

Page({
  data: {
    barHeight:90
  },

  onLoad: function () {
   this.setData({
     barHeight:app.globalData.barHeight*2+90
   })
  },

})
/* index.wxss */
.navbar{
  border-bottom:1rpx solid #ccc;
  box-sizing: border-box;
  display: flex;
  align-items: center;
  justify-content: center;
}
.navbar .title{
  height: 100%;
  width: 750rpx;
  display: flex;
  align-items: flex-end;
  justify-content: center;
  position: relative;
}
.navbar .title .title_bg{
  position: absolute;
  width: 100%;
  top:0rpx;
}
.navbar .title .title_text{
  color: #fff;
  z-index: 2;
  display: inline-block;
  padding-bottom: 20rpx;
}
<view class="navbar" style="height:{{barHeight}}rpx">
<view class='title'>
<image src='/assets/images/bg.jpg' class="title_bg">image>
<text class="title_text">老陈商城text>
view>
view>
<view class="container">
<van-skeleton title avatar row="3" />
view>
图片轮播
官网实例
https://developers.weixin.qq.com/miniprogram/dev/component/swiper.html
      <swiper indicator-dots="{{indicatorDots}}"
        autoplay="{{autoplay}}" interval="{{interval}}" duration="{{duration}}">
        <block wx:for="{{background}}" wx:key="*this">
          <swiper-item>
            <view class="swiper-item {{item}}">view>
          swiper-item>
        block>
      swiper>
带入到案例中使用
<view class="navbar" style="height:{{barHeight}}rpx">
	<view class='title'>
		<image src='/assets/images/bg.jpg' class="title_bg">image>
		<text class="title_text">老陈商城text>
	view>
view>
<view class="container">
	<view class="swiper">
		<swiper indicator-dots="true" autoplay="true" interval="3000" duration="500">
			<block wx:for="{{swipers}}" wx:key="*this">
				<swiper-item class="swiper_item">
					<image src="/assets/images/{{item}}.jpg">image>
				swiper-item>
			block>
		swiper>
	view>
	<van-skeleton title avatar row="3" />
view>
/* index.wxss */
.navbar{
  border-bottom:1rpx solid #ccc;
  box-sizing: border-box;
  display: flex;
  align-items: center;
  justify-content: center;
}
.navbar .title{
  height: 100%;
  width: 750rpx;
  display: flex;
  align-items: flex-end;
  justify-content: center;
  position: relative;
}
.navbar .title .title_bg{
  position: absolute;
  width: 100%;
  top:0rpx;
  height: 415rpx;
  box-shadow: 2rpx 2rpx 10rpx #666;
}
.navbar .title .title_text{
  color: #fff;
  z-index: 2;
  display: inline-block;
  padding-bottom: 20rpx;
}
.container .swiper{
  width: 750rpx;
  height: 280rpx;
  display: flex;
  justify-content: center;
  align-items: center;
  padding-bottom: 10rpx;
}
.swiper swiper{
  width: 700rpx;
  height: 280rpx;
  display: flex;
  justify-content: center;
  align-items: center;
}
.container .swiper .swiper_item image{
  width: 100%;
  height: 280rpx;
  border-radius: 30rpx;
}
//index.js
//获取应用实例
const app = getApp()

Page({
  data: {
    barHeight:90,
    swipers: ['swiper1', 'swiper2', 'swiper3'],
    // indicatorDots: true,//是否显示点
    // vertical: false,//滑动是否纵向
    // autoplay: true,//是否自动播放
    // interval: 3000,//自动切换间隔
    // duration: 500,//自动切换用时
  },

  onLoad: function () {
   this.setData({
     barHeight:app.globalData.barHeight*2+90
   })
  },

})
图标列表使用Grid宫格
<view class="gird">
	<van-grid  border="false" class='iconlist'>
		<van-grid-item
    custom-class="gird-item"
    content-class="gird-item"
    wx:key="index"
    text="{{item}}"
    wx:for="{{ icons }}"
     >
     <image
     slot="icon"
     style="width:120rpx;height:120rpx;"
     src="/assets/images/icon{{index+1}}.png"
     />
     van-grid-item>
	van-grid>
  view>
.container .gird{
  padding: 5rpx;
}
.iconlist .van-grid-item__text{
  padding-top: 20rpx;
}
.gird-item {
  margin-top: 10rpx !important;
  padding-bottom: 10rpx !important;
}
滚动view和底部栏
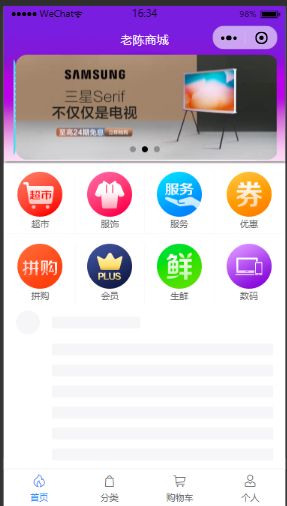
其实就是把除了头部和底部的所有内容放到scrllo-view中然后确定好fixed定位根据top和bottom把定位做好,底部栏采用vant中的Tabbar 组件
<view class="navbar" style="height:{{barHeight}}rpx">
	<view class='title'>
		<image src='/assets/images/bg.jpg' class="title_bg">image>
		<text class="title_text">老陈商城text>
	view>
view>
<scroll-view style="top:{{barHeight}}rpx;" class="container" scroll-y="true">
	<view class="swiper">
		<swiper indicator-dots="true" autoplay="true" interval="3000" duration="500">
			<block wx:for="{{swipers}}" wx:key="*this">
				<swiper-item class="swiper_item">
					<image src="/assets/images/{{item}}.jpg">image>
				swiper-item>
			block>
		swiper>
	view>
	<view class="content">
		<view class="gird">
			<van-grid border="false" class='iconlist'>
				<van-grid-item custom-class="gird-item" content-class="gird-item" wx:key="index" text="{{item}}" wx:for="{{ icons }}">
					<image slot="icon" style="width:120rpx;height:120rpx;" src="/assets/images/icon{{index+1}}.png" />
				van-grid-item>
			van-grid>
		view>
		<van-skeleton title avatar row="320" />
	view>
scroll-view>
<view class="footer">
	<van-tabbar active="{{ active }}" bind:change="onChange">
		<van-tabbar-item icon="fire-o">首页van-tabbar-item>
		<van-tabbar-item icon="bag-o">分类van-tabbar-item>
		<van-tabbar-item icon="shopping-cart-o">购物车van-tabbar-item>
		<van-tabbar-item icon="user-o">个人van-tabbar-item>
	van-tabbar>
view>
/* index.wxss */
.navbar{
  border-bottom:1rpx solid #ccc;
  box-sizing: border-box;
  display: flex;
  align-items: center;
  justify-content: center;
}
.navbar .title{
  height: 100%;
  width: 750rpx;
  display: flex;
  align-items: flex-end;
  justify-content: center;
  position: relative;
}
.navbar .title .title_bg{
  position: absolute;
  width: 100%;
  top:0rpx;
  height: 415rpx;
  box-shadow: 2rpx 2rpx 10rpx #666;
}
.navbar .title .title_text{
  color: #fff;
  z-index: 2;
  display: inline-block;
  padding-bottom: 20rpx;
}
.container{
  width: 750rpx;
  position: fixed;
  left: 0;
  bottom: 100rpx;
  border-bottom: 1rpx solid #ccc;
}
.container .content{
  width: 100%;
  height: auto;
  background-color: #fff;
}
.container .swiper{
  width: 750rpx;
  height: 280rpx;
  display: flex;
  justify-content: center;
  align-items: center;
  padding-bottom: 10rpx;
}
.swiper swiper{
  width: 700rpx;
  height: 280rpx;
  display: flex;
  justify-content: center;
  align-items: center;
}
.container .swiper .swiper_item image{
  width: 100%;
  height: 280rpx;
  border-radius: 30rpx;
}
.container .gird{
  padding: 5rpx;
}
.iconlist .van-grid-item__text{
  padding-top: 20rpx;
}
.gird-item {
  margin-top: 10rpx !important;
  padding-bottom: 10rpx !important;
}
//index.js
//获取应用实例
const app = getApp()

Page({
  data: {
    barHeight:90,
    swipers: ['swiper1', 'swiper2', 'swiper3'],
    // indicatorDots: true,//是否显示点
    // vertical: false,//滑动是否纵向
    // autoplay: true,//是否自动播放
    // interval: 3000,//自动切换间隔
    // duration: 500,//自动切换用时
    icons:['超市','服饰','服务','优惠','拼购','会员','生鲜','数码'],
    active: 0,
  },
  onChange(event) {
    this.setData({ active: event.detail });
    // wx.showToast({
    //   title: `点击标签 ${event.detail + 1}`,
    //   icon: 'none',
    // })
  },
  onLoad: function () {
   this.setData({
     barHeight:app.globalData.barHeight*2+90
   })
  },

})
列表与下拉刷新
布局有点啰嗦
		<view class="list">
			<van-grid border="true" custom-class='tjlist' column-num="2">
				<van-grid-item
        use-slot
        content-class="gird-item"
        wx:key="index"
        wx:for="{{ 4 }}"
        url="/pages/goods/goods"
        >
					<view class="product">
						<image src="/assets/images/p{{index+1}}.png" />
            <view class="title">
            <image src="/assets/images/618tag.png" />
            <text style="display:block">时尚时尚最时尚~618时装2020text>
            view>
					view>
				van-grid-item>
			van-grid>
		view>
.list{
  width:720rpx;
  display: flex;
  justify-content: space-between;
  flex-wrap: wrap;
}
.tjlist .product{
  width: 360rpx;
}
.tjlist .product .title{
  display: flex;
  align-items: center;
  font-size: 30rpx;
  white-space: nowrap;
}
.tjlist .product .title text{
  width: 270rpx;
  text-overflow: ellipsis;
  overflow: hidden;
  margin-left: 10rpx;
}
.tjlist .product image{
  width: 80rpx;
  height: 30rpx;
}
.tjlist .product>image{
  width: 360rpx;
  height: 360rpx;
}
然后是无限添加数据
可以考虑用全局的数据管理控制分页然后拉取服务器数据push到plist中(由于我没有数据只能模拟行为)
使用bindscrolltolower="reachBottom"绑定触底事件为reachBottom
reachBottom() {
    let addplist=[0,1,2,3];
    this.setData({
      plist:[...this.data.plist,...addplist]
    })
    wx.showToast({
      title: `到达底部`,
      icon: 'none',
    })
  }
<scroll-view
style="top:{{barHeight}}rpx;"
class="container"
scroll-y="true"
bindscrolltolower="reachBottom"
>
	<view class="swiper">
		<swiper indicator-dots="true" autoplay="true" interval="3000" duration="500">
			<block wx:for="{{swipers}}" wx:key="*this">
				<swiper-item class="swiper_item">
					<image src="/assets/images/{{item}}.jpg">image>
				swiper-item>
			block>
		swiper>
	view>
	<view class="content">
		<view class="gird">
			<van-grid border="false" class='iconlist'>
				<van-grid-item custom-class="gird-item" content-class="gird-item" wx:key="index" text="{{item}}" wx:for="{{ icons }}">
					<image slot="icon" style="width:120rpx;height:120rpx;" src="/assets/images/icon{{index+1}}.png" />
				van-grid-item>
			van-grid>
		view>
		<view class="tuijian">
			<image src="/assets/images/tuijain.png">image>
		view>
		<view class="list">
			<van-grid border="true" custom-class='tjlist' column-num="2">
				<van-grid-item
        use-slot
        content-class="gird-item"
        wx:key="index"
        wx:for="{{plist}}"
        url="/pages/goods/goods"
        >
					<view class="product">
						<image src="/assets/images/p{{index%4+1}}.png" />
            <view class="title">
            <image src="/assets/images/618tag.png" />
            <text style="display:block">时尚时尚最时尚~618时装2020text>
            view>
					view>
				van-grid-item>
			van-grid>
		view>
新页面分类
首先定义一下四个页面的路由跳转
在app.js中定义了四个页面
  globalData: {
    pages:['index','category','buycar','mine']
  }
这样在每个页面的tabbar的onchange事件加上这个就可以实现navigateTo形式的跳转了
  onChange(event) {
    this.setData({ active: event.detail });
    let pages=app.globalData.pages;
    let page=pages[event.detail]
        wx.navigateTo({
          url: `/pages/${page}/${page}`,
        })
  },
现在的category是个模板
<view class="navbar" style="height:{{barHeight}}rpx">
	<view class='title'>
		<text class="title_text">商品分类text>
	view>
view>
<scroll-view style="top:{{barHeight}}rpx;" class="container" scroll-y="true" bindscrolltolower="reachBottom">

scroll-view>
<view class="footer">
	<van-tabbar active="{{ active }}" bind:change="onChange">
		<van-tabbar-item icon="fire-o">首页van-tabbar-item>
		<van-tabbar-item icon="bag-o">分类van-tabbar-item>
		<van-tabbar-item icon="shopping-cart-o">购物车van-tabbar-item>
		<van-tabbar-item icon="user-o">个人van-tabbar-item>
	van-tabbar>
view>
// pages/category/category.js
//获取应用实例
const app = getApp()
let api = require('../../config/api')
Page({

  /**
   * 页面的初始数据
   */
  data: {
    barHeight: 90,
    swipers: ['swiper1', 'swiper2', 'swiper3'],
    icons: ['超市', '服饰', '服务', '优惠', '拼购', '会员', '生鲜', '数码', '抢购', '返利'],
    active: 0,
    plist: [0,1,2,3],//用于控制products循环
  },
  onChange(event) {
    this.setData({ active: event.detail });
    let pages=app.globalData.pages;
    let page=pages[event.detail]
        wx.navigateTo({
          url: `/pages/${page}/${page}`,
        })
  },
  /**
   * 生命周期函数--监听页面加载
   */
  onLoad: function (options) {
    this.setData({
      barHeight: app.globalData.barHeight * 2 + 90,
      active:app.globalData.pages.indexOf(this.route.split('/').pop())
    })
  },

  /**
   * 生命周期函数--监听页面初次渲染完成
   */
  onReady: function () {

  },

  /**
   * 生命周期函数--监听页面显示
   */
  onShow: function () {

  },

  /**
   * 生命周期函数--监听页面隐藏
   */
  onHide: function () {

  },

  /**
   * 生命周期函数--监听页面卸载
   */
  onUnload: function () {

  },

  /**
   * 页面相关事件处理函数--监听用户下拉动作
   */
  onPullDownRefresh: function () {

  },

  /**
   * 页面上拉触底事件的处理函数
   */
  onReachBottom: function () {

  },

  /**
   * 用户点击右上角分享
   */
  onShareAppMessage: function () {

  }
})
/* pages/category/category.wxss */
.navbar{
  border-bottom:1rpx solid #ccc;
  box-sizing: border-box;
  display: flex;
  align-items: center;
  justify-content: center;
}
.navbar .title{
  height: 100%;
  width: 750rpx;
  display: flex;
  align-items: flex-end;
  justify-content: center;
  position: relative;
}

.navbar .title .title_text{
  color: #333;
  z-index: 2;
  display: inline-block;
  padding-bottom: 20rpx;
}
.container{
  width: 750rpx;
  position: fixed;
  left: 0;
  bottom: 100rpx;
  border-bottom: 1rpx solid #ccc;
}
用这个页面的模板把其他页面也拷贝出来
之后引入Search和TreeSelect
<van-search value="{{ value }}" placeholder="请输入搜索关键词" />
<van-tree-select
  items="{{ items }}"
  main-active-index="{{ mainActiveIndex }}"
  bind:click-nav="onClickNav"
	style="top:{{barHeight}}rpx;bottom: 100rpx;"
>
  <scroll-view class="cateContent" slot="content" scroll-y="true" style="height:100%">
	<van-grid border="true" custom-class='tjlist' column-num="2">
				<van-grid-item
        use-slot
        content-class="gird-item"
        wx:key="index"
        wx:for="{{list}}"
        url="/pages/goods/goods"
        >
					<view class="product">
						<image src="/assets/images/p{{item}}.jpg" />
            <view class="title">
            <image src="/assets/images/618tag.png" />
            <text style="display:block">时尚时尚最时尚~618时装2020text>
            view>
					view>
				van-grid-item>
			van-grid>
	scroll-view>
van-tree-select>
// pages/category/category.js
//获取应用实例
const app = getApp()
let api = require('../../config/api')
Page({

  /**
   * 页面的初始数据
   */
  data: {
    barHeight: 90,
    swipers: ['swiper1', 'swiper2', 'swiper3'],
    icons: ['超市', '服饰', '服务', '优惠', '拼购', '会员', '生鲜', '数码', '抢购', '返利'],
    active: 0,
    plist: [0,1,2,3],//用于控制products循环
    mainActiveIndex: 0,
    activeId: null,
    items:[{text:'手机'},{text:'平板'},{text:'笔记本'}],
    plist:[1,2,3,4,5,6,7,8,9],
    list:[],
  },
  onChange(event) {
    this.setData({ active: event.detail });
    let pages=app.globalData.pages;
    let page=pages[event.detail]
        wx.navigateTo({
          url: `/pages/${page}/${page}`,
        })
  },
   onClickNav({ detail = {} }) {
    console.log(detail)
    this.setData({
      mainActiveIndex: detail.index || 0,
      list:this.data.plist.slice(detail.index*3,detail.index*3+3)
    });
    console.log(this.data)
  },

  /**
   * 生命周期函数--监听页面加载
   */
  onLoad: function (options) {
    this.setData({
      barHeight: app.globalData.barHeight * 2 + 90,
      active:app.globalData.pages.indexOf(this.route.split('/').pop())
    })
    this.setData({
      list:this.data.plist.filter(item=>item%3==this.data.mainActiveIndex)
    });
  },

})
进入产品页面
对于之前的列表渲染
<van-grid border="true" custom-class='tjlist' column-num="2">
				<van-grid-item
        use-slot
        content-class="gird-item"
        wx:key="index"
        wx:for="{{plist}}"
        url="/pages/goods/goods?id={{item}}"
        >
可以把item的内容循环渲染进去形成独特的url,也可以用事件触发的形式去js部分跳转
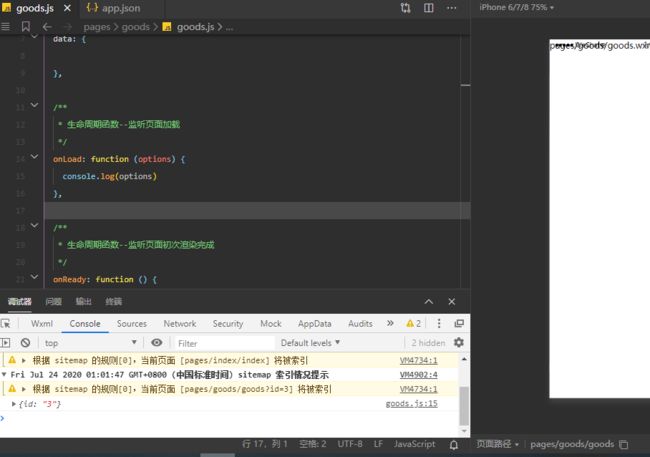
新建goods页面之后onload拿到options可以拿到页面跳转的携带参数值
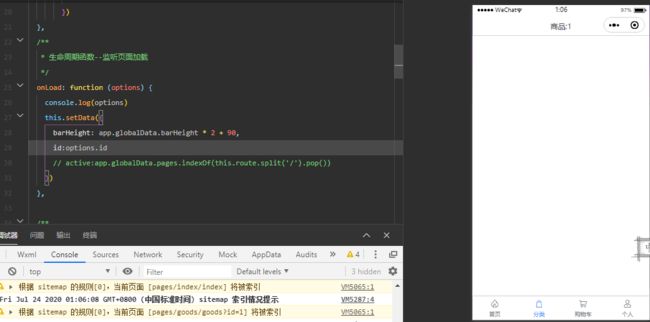
套用模板之后,有id就可以作为请求数据的详情页面了(但是我这里没有数据接口就很惨)
因为详情页没有写在底部tabbar,所以要写一个返回键
<view class="navbar" style="height:{{barHeight}}rpx">
	<view class='title'>
		<text class="title_text">商品:{{id}}text>
	view>
  <image class="back" src="/assets/images/back.png"
  bindtap="onBack"
  >image>
view>
  onBack(){
    wx.navigateBack()//路由返回事件
  }
接下来模拟写一下
页面详情
首先从index中复制swiper过来,图片我没有接口数据还是继续用的首页一样的swiper(实际应该放商品的展示图)
接下来要使用tab标签页
	<view class="main">
		<van-tabs active="{{ activeTab }}" bind:change="onChangeTab">
			<van-tab title="商品详情">内容 1van-tab>
			<van-tab title="商品规格">内容 2van-tab>
			<van-tab title="商品评论">内容 3van-tab>
		van-tabs>
	view>
data: {
    barHeight: 90,
    active: 1,
    id:0,
    swipers: ['swiper1', 'swiper2', 'swiper3'],
    goods:{
      id:0,
      title:'苏宁易购 1号购机立减400元 快来抢购吧!',
      images:['p10.jpg'],
      content:"内容什么的",
      price:4599,
      sku:{机身颜色:[{
        name:'红色',
        type:'机身红色',
        sku_price:5600,
        sku_stock:200,
      },{
        name:'银色',
        type:'机身银色,磨砂',
        sku_price:5888,
        sku_stock:200,
      }]}
    },
    activeTab:0,
  },
onChangeTab(event) {
    wx.showToast({
      title: `切换到标签 ${event.detail.name}`,
      icon: 'none',
    });
  },
用一个富文本标签rich-text
https://developers.weixin.qq.com/miniprogram/dev/component/rich-text.html
<view class="main">
		<van-tabs active="{{ activeTab }}" bind:change="onChangeTab">
			<van-tab title="商品详情">
      <view class="details">
      <rich-text nodes="{{goods.content}}">rich-text>
      view>
      van-tab>
			<van-tab title="商品规格">内容 2van-tab>
			<van-tab title="商品评论">内容 3van-tab>
		van-tabs>
	view>
goods的信息我是直接模拟的,goods.content是富文本的内容
可以正常显示,但是img的获取src会出现问题哦,他有防盗链
所以前面加了一串http://read.html5.qq.com/image?src=forum&imageUrl=+图片地址,可以拿到
// pages/goods/goods.js
//获取应用实例
const app = getApp()
let api = require('../../config/api')
Page({
/**
* 页面的初始数据
*/
data: {
barHeight: 90,
active: 1,
id:0,
swipers: ['swiper1', 'swiper2', 'swiper3'],
goods:{
id:0,
title:'苏宁易购 1号购机立减400元 快来抢购吧!',
images:['p10.jpg'],
content:"内容什么的

 ",
price:4599,
sku:{机身颜色:[{
name:'红色',
type:'机身红色',
sku_price:5600,
sku_stock:200,
},{
name:'银色',
type:'机身银色,磨砂',
sku_price:5888,
sku_stock:200,
}]}
},
activeTab:0,
},
onBack(){
wx.navigateBack()//路由返回事件
}
,
onChangeTab(event) {
wx.showToast({
title: `切换到标签 ${event.detail.name}`,
icon: 'none',
});
},
onChange(event) {
this.setData({ active: event.detail });
let pages=app.globalData.pages;
let page=pages[event.detail]
wx.navigateTo({
url: `/pages/${page}/${page}`,
})
},
/**
* 生命周期函数--监听页面加载
*/
onLoad: function (options) {
console.log(options)
this.setData({
barHeight: app.globalData.barHeight * 2 + 90,
id:options.id
// active:app.globalData.pages.indexOf(this.route.split('/').pop())
})
let content=this.data.goods.content.replace(/
",
price:4599,
sku:{机身颜色:[{
name:'红色',
type:'机身红色',
sku_price:5600,
sku_stock:200,
},{
name:'银色',
type:'机身银色,磨砂',
sku_price:5888,
sku_stock:200,
}]}
},
activeTab:0,
},
onBack(){
wx.navigateBack()//路由返回事件
}
,
onChangeTab(event) {
wx.showToast({
title: `切换到标签 ${event.detail.name}`,
icon: 'none',
});
},
onChange(event) {
this.setData({ active: event.detail });
let pages=app.globalData.pages;
let page=pages[event.detail]
wx.navigateTo({
url: `/pages/${page}/${page}`,
})
},
/**
* 生命周期函数--监听页面加载
*/
onLoad: function (options) {
console.log(options)
this.setData({
barHeight: app.globalData.barHeight * 2 + 90,
id:options.id
// active:app.globalData.pages.indexOf(this.route.split('/').pop())
})
let content=this.data.goods.content.replace(/![]() ,'
,'![]() )
this.setData({
goods:{
...this.data.goods,
content:content
}
})
},
})
)
this.setData({
goods:{
...this.data.goods,
content:content
}
})
},
})
商品规格
使用vant的cell单元格
<view class="main">
		<van-tabs active="{{ activeTab }}" bind:change="onChangeTab">
			<van-tab title="商品详情">
				<view class="details">
					<rich-text nodes="{{goods.content}}">rich-text>
				view>
			van-tab>
			<van-tab title="商品规格">
				<van-cell-group title="商品规格">
					<van-cell
          title="{{item.name}}"
          label="{{item.type}}"
          value="价格:{{item.sku_price}}¥" wx:for="{{goods.sku['机身颜色']}}" wx:key="index"/>

				van-cell-group>
			van-tab>
			<van-tab title="商品评论">内容 3van-tab>
		van-tabs>
	view>
商品评论
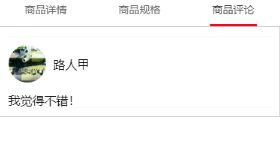
使用vant的panel
<van-tab title="商品评论">
				<view class="comments">
					<van-panel>
						<view slot="header" class="panelheader">
							<image class="himg" src="/assets/images/header.jpg">image>
							<text class="nickname">路人甲text>
						view>
						<view class="comment">我觉得不错!view>
					van-panel>
				view>
			van-tab>
		van-tabs>
加购与购物车页面模拟
vant有个goodsAction
<view class="footer">
<van-goods-action>
  <van-goods-action-icon icon="chat-o" text="客服" />
  <van-goods-action-icon icon="cart-o" text="购物车"  />
  <van-goods-action-button color="#be99ff" text="加入购物车" type="warning" />
van-goods-action>
view>
下面是操作加入购物车,需要用到app.js的全局数据
  globalData: {
    pages:['index','category','buycar','mine'],
    carGoods:[],
  }
之后能够把我模拟的id传递过去并进行循环渲染,不过还是没有细节数据233
  addToCar(){
    app.globalData.carGoods.push({id:this.data.goods.id})
    wx.navigateTo({
      url: '/pages/buycar/buycar',
    })
  },
<view class="navbar" style="height:{{barHeight}}rpx">
	<view class='title'>
		<text class="title_text">购物车text>
	view>
view>
<scroll-view style="top:{{barHeight}}rpx;" class="container" scroll-y="true" bindscrolltolower="reachBottom">
<view wx:for="{{carGoods}}" wx:key="index">
{{item.id}}
view>
scroll-view>
<view class="footer">
	<van-tabbar active="{{ active }}" bind:change="onChange">
		<van-tabbar-item icon="fire-o">首页van-tabbar-item>
		<van-tabbar-item icon="bag-o">分类van-tabbar-item>
		<van-tabbar-item icon="shopping-cart-o">购物车van-tabbar-item>
		<van-tabbar-item icon="user-o">个人van-tabbar-item>
	van-tabbar>
view>
布局采用vant的商品卡片,使用商品卡片中自动带了个button,需要自己引入一下
<view wx:for="{{carGoods}}" wx:key="index">
<van-card
  num="1"
  tag="{{item.id}}"
  price="10.00"
  desc="描述信息"
  title="商品标题"
  thumb="/assets/images/p{{item.id}}.jpg"
>
  <view slot="footer">
    <van-button size="mini">详情van-button>
    <van-button size="mini">删除van-button>
  view>
van-card>
view>
之后去实现详情和删除页面发现会超出页面数量限制,建议用redurecTo(虽然会卡顿但是关于购物车的页面跳转太多了)
onGoDetail(e){
    console.log(e)
    let id=e.target.dataset.id
    wx.navigateTo({
      url: `/pages/goods/goods?id=${id}`,
    })
  },
  onGoDelete(e){
    let carIndex=e.target.dataset.carIndex
    let carGoods=app.globalData.carGoods
    carGoods.splice(carIndex,1)
    app.globalData.carGoods=carGoods
    this.setData({
      carGoods:app.globalData.carGoods,
    })
  },
至于那个购物车的数量调整我没有去做(因为没有数据不太好写一个比较复杂的对象,当然操作是会的这里叙述一下:读carGoods如果没有一样的商品id就push一个数量为1的商品,如果有同id的把这个项拿出来num+=1,逻辑应该写在goods页面的addToCar中,渲染的话就是条件渲染到Cart组件上)
模拟个人中心
使用wxAPI获取用户信息
发现不能直接调用 wx.getUserInfo拿到用户数据
出现错误信息getUserInfo:fail scope unauthorized
发现需要手动授权open-type='getUserInfo’的button可以做到
<view class="profile-info">
<image class="avatar" src="{{userInfo.avatarUrl}}" bindtap="getUserInfo">image>
<view class="info">
<text class="name" bindtap="getUserInfo">{{userInfo.nickName||'点击登录'}}text>
view>
view>
// pages/mine/mine.js
//获取应用实例
const app = getApp()
let api = require('../../config/api')
Page({

  /**
   * 页面的初始数据
   */
  data: {
    barHeight: 90,
    active: 0,
    userInfo:{},
  },
  onChange(event) {
    this.setData({ active: event.detail });
    let pages=app.globalData.pages;
    let page=pages[event.detail]
        wx.redirectTo({
          url: `/pages/${page}/${page}`,
        })
  },
  getUserInfo(){
    console.log(app.globalData.userInfo)
    this.setData({
      userInfo:app.globalData.userInfo,
    })
  },
  /**
   * 生命周期函数--监听页面加载
   */
  onLoad: function (options) {
    this.setData({
      barHeight: app.globalData.barHeight * 2 + 90,
      active:app.globalData.pages.indexOf(this.route.split('/').pop()),
      userInfo:app.globalData.userInfo
    })


  },

  /**
   * 生命周期函数--监听页面初次渲染完成
   */
  onReady: function () {
    console.log(app.globalData.userInfo)
    this.setData({
      userInfo:app.globalData.userInfo,
    })
  },


})
.profile-info{
  width: 750rpx;
  height: 200rpx;
  display: flex;
  justify-content: flex-start;
  align-items: center;
  padding: 0 32rpx;
  background-color: rgb(37, 43, 68);
  box-sizing: border-box;
}
.profile-info .avatar{
  height: 148rpx;
  width: 148rpx;
  border-radius: 50%;
  border: 2rpx solid #eee;
}
.profile-info .name{
  height: 45rpx;
  line-height: 45rpx;
  color: #fff;
  font-size: 40rpx;
  padding: 0 30rpx;
}
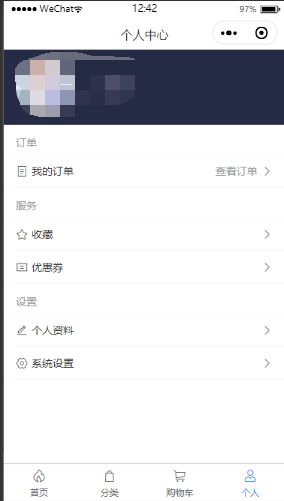
下面加个cell的展示,当然跳转页面都没写,知识模拟了下视觉部分
	<view class="mine_detail">
		<van-cell-group title="订单" >
			<van-cell title="我的订单" value="查看订单" is-link icon="orders-o" />
		van-cell-group>
		<van-cell-group title="服务">
			<van-cell title="收藏" is-link icon="star-o" />
			<van-cell title="优惠券" is-link icon="coupon-o"/>
		van-cell-group>
		<van-cell-group title="设置" >
			<van-cell title="个人资料" is-link icon="edit"/>
			<van-cell title="系统设置" is-link icon="setting-o"/>
		van-cell-group>

	view>
https://www.bilibili.com/video/BV187411c7Bi?p=2学习云开发相关


