CentOS-7搭建Gitlab服务器
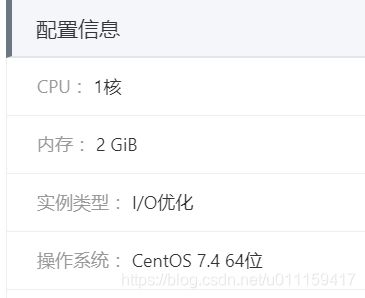
由于疫情情况,我们需要在家办公,公司的git服务器搭建的是内网,现在在家了,所以需要搭建一个外网的git,保证大家在家就能访问,我是在我购买的阿里云的机器上搭建的,机器的配置如下:
登录gitlab官网 https://about.gitlab.com/
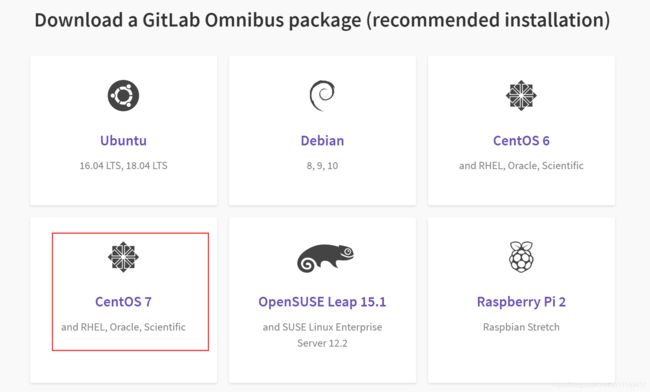
选择Resources中的install GitLab

点击CentOS 7
https://about.gitlab.com/install/#centos-7
可以看到如下内容

CentOS安装必要的依赖
第一步:安装ssh
yum install -y curl policycoreutils-pythonopenssh-server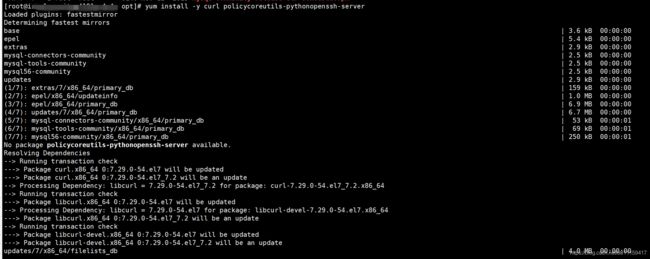
第二步: 将SSH服务设置成开机自启动并启动SSH服务(若安装并启动,则可跳过此步);
sudo systemctl enable sshd
sudo systemctl start sshd

第三步:安装并启动防火墙(若安装并启动,则可跳过此步);
yum install firewalld systemd -y
service firewalld start

第四步:添加http服务到firewalld (--permanent表示永久生效);
firewall-cmd --permanent --add-service=http![]()
第五步:重启防火墙;
firewall-cmd --permanent --add-service=http
第六步:将postfix服务设置成开机自启动并启动postfix;
systemctl enable postfix
systemctl start postfix![]()
运行后,发现启动postfix没有成功,报了一行错误:
Job for postfix.service failed because the control process exited with error code. See "systemctl status postfix.service" and "journalctl -xe" for details.
这是因为防火墙或者配置文件导致,无法启动的邮件服务!!
解决方法如下:
1-关闭防火墙:systemctl stop firewalld
![]()
2-安装sendemail
yum -y install sendmail
3-修改配置文件
vim /etc/postfix/main.cf修改内容如下:
inet_protocols = ipv4
inet_interfaces = all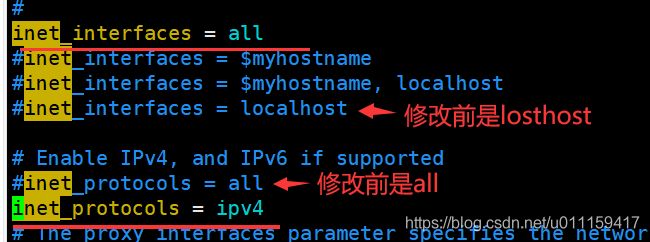
4-重新执行
systemctl enable postfix
systemctl start postfix![]()
第七步:检查系统中是否已经安装wget(若不存在,用yum安装wget);
检查wget版本
wget -V yum -y install wgetyum安装wget
yum -y install wget开始安装gitlab
按照官网的下载速度有点慢,就改变了一种方式:
第一步:wget下载gitlab
gitlab官网下载地址是:https://mirrors.tuna.tsinghua.edu.cn/gitlab-ce/yum/el7/?C=M&O=D
wget https://mirrors.tuna.tsinghua.edu.cn/gitlab-ce/yum/el7/gitlab-ce-12.7.5-ce.0.el7.x86_64.rpm
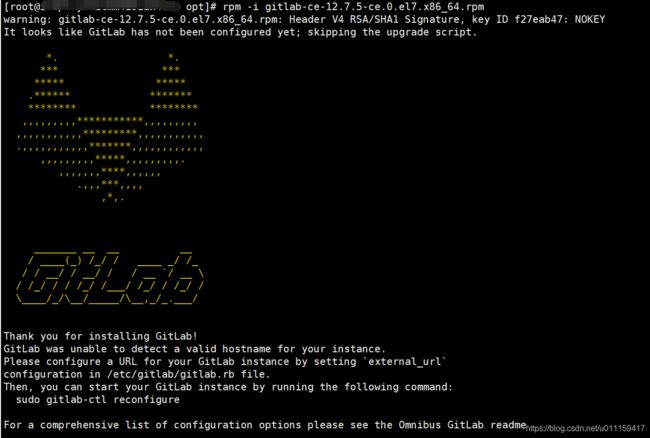
第二步:安装gitlab;
rpm -i gitlab-ce-12.7.5-ce.0.el7.x86_64.rpm
错误信息:
warning: gitlab-ce-12.7.5-ce.0.el7.x86_64.rpm: Header V4 RSA/SHA1 Signature, key ID f27eab47: NOKEY
error: Failed dependencies:
	policycoreutils-python is needed by gitlab-ce-12.7.5-ce.0.el7.x86_64
出现上面错误,需要安装 policycoreutils-python;
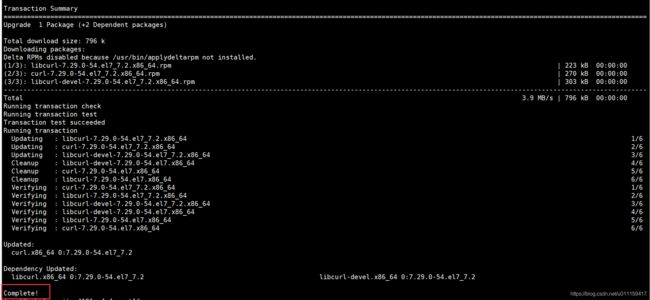
yum -y install policycoreutils-python
再次执行安装命令
第三步:修改gitlab配置文件,指定服务器ip和自定义端口;
vi /etc/gitlab/gitlab.rb

修改external_url
external_url 'http://47.96.100.144:8081'
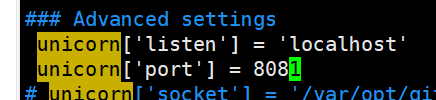
修改端口
修改前:
![]()
修改后:
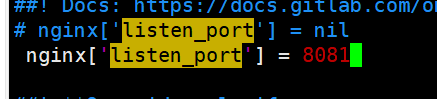
修改unicorn的配置
第四步:重置并启动GitLab;
重置gitlab配置命令:
gitlab-ctl reconfigure我的机器运行改命令花费了7分多钟

重启gitlab服务
gitlab-ctl restart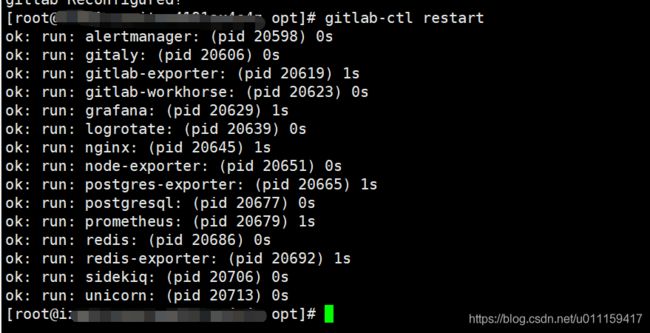
第五步:访问Gitlab
若无法访问,则可以查看端口是否被禁用;
1、查看端口状态:
netstat -lntp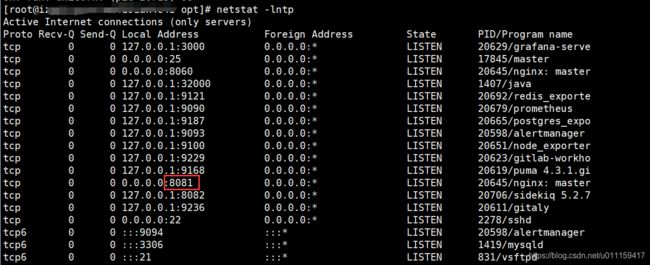
有端口,但是访问不同,重新开放下端口试试
2、防火墙开放端口:
firewall-cmd --zone=public --add-port=8081/tcp --permanent![]()
提示如下:
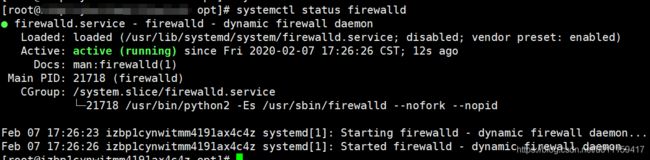
FirewallD is not running有可能防火墙挂了,使用命令查看防火墙状态
systemctl status firewalld发现防火前active是dead
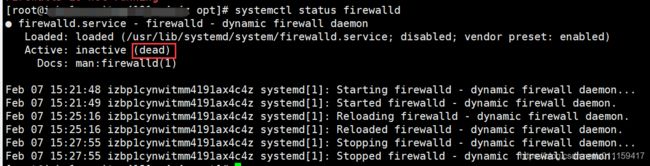
通过systemctl start firewalld开启防火墙,没有任何提示即开启成功。
systemctl start firewalld再次查看防火墙状态发现已经是running状态
再次开放防火墙8081端口
![]()
成功
重新加载防火墙列表
firewall-cmd --reload
再次访问还是不行,忽然想到我是使用的阿里云的云服务器,需要配置安全组才可以
![]()
可以访问了,不过是502
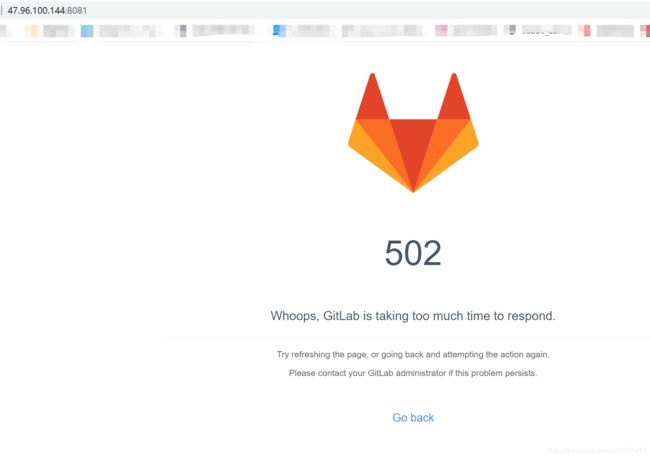
页面错误信息如下:
502
Whoops, GitLab is taking too much time to respond.
可以导致这个问题的原因有很多,
比如:
部分功能没有启动起来
这种情况可以使用gitlab-ctl status命令查看正在运行的进程的id。运行几次,如果有id改变了,则说明这个进程不稳定,需要查看对应的日志。
使用gitlab-ctl tail [process name]命令查看对应的进程是什么情况。如果是端口冲突,则解决端口冲突,如果是权限问题则解决权限问题。
我遇到的情况是:
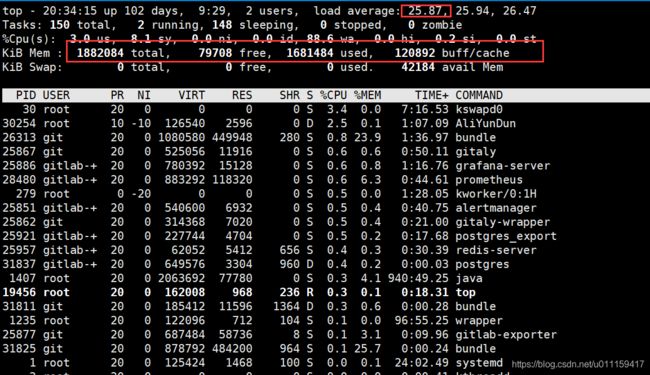
- 内存不足(最小2G)
网上反馈的是最小需要2G内存,弄了个虚拟机试了下,总共3G内存,勉强可以配置使用gitlab启动运行之后相当的消耗内存,尤其是做提交更新等处理的时候,出现这个错误的时候可以使用free -m查看下内存情况:
看下used和free的使用情况,如果free一直在减少,说明gitlab正在启动,消耗内存中,还没有启动完成!这个时候访问是会提示502 Whoops, GitLab is taking too much time to respond.
我的就属于内存不足的情况,大家如果搭建的时候,最好找一台内存大的机器