Consul+Ocelot搭建微服务实践--身份认证(Authentication)
文章目录
- 1、创建服务
- 1.1创建Service1
- 1.2创建Service2
- 2、Ocelot配置服务
- 3、安装IdentityServer4.AccessTokenValidation
- 4、配置服务认证
- 5、进行测试
- 6、总结
- 7、附录
上一篇搭建了IdentityServer认证中心服务,并配置到了Ocelot中去,只是展示了简单的路由配置请求,但是并没有实际继承到服务中去。集成到Ocelot中去应该是让Ocelot集中管理服务的认证,在本篇中我将详细的介绍。(以前都是每个服务自己配置自己的认证,在微服务中一旦服务逐步增多的时候那将是一个很繁琐的事情)
想了解更多相关的IdentityServer知识可以参考@晓晨Master系列文章,以及@solenovex系列文章。
1、创建服务
我这里就创建两个服务进行测试,创建的服务其实在Consul+Ocelot搭建微服务实践–初探路由已经提及到过。
这里使用Ocelot集中身份认证就不解释在服务中如何使用IdentityServer了。
1.1创建Service1
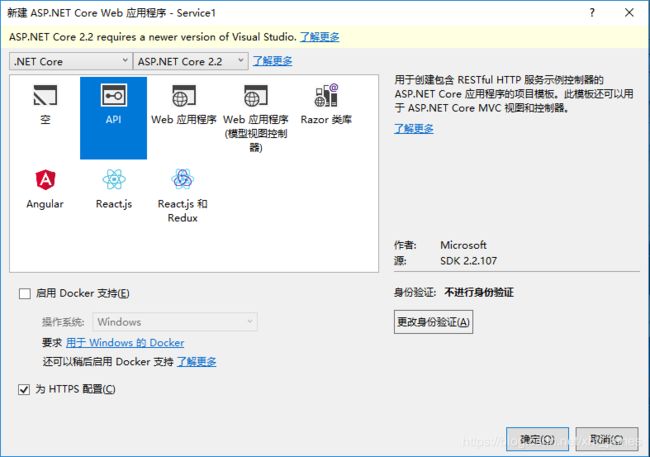
创建好webapi后修改launchSettings.json文件如下:
{
  "profiles": {
    "Study.Microservices.Service1": {
      "commandName": "Project",
      "launchBrowser": false,
      "launchUrl": "api/values",
      "applicationUrl": "https://localhost:5011",
      "environmentVariables": {
        "ASPNETCORE_ENVIRONMENT": "Development"
      }
    }
  }
}
这里解释一下,由于只是测试请求服务那么我们也不需要浏览器运行,所以就将launchBrowser设置为false。也不需要IISExpress 和IIS支持,就把关于IIS的配置也删掉。
1.2创建Service2
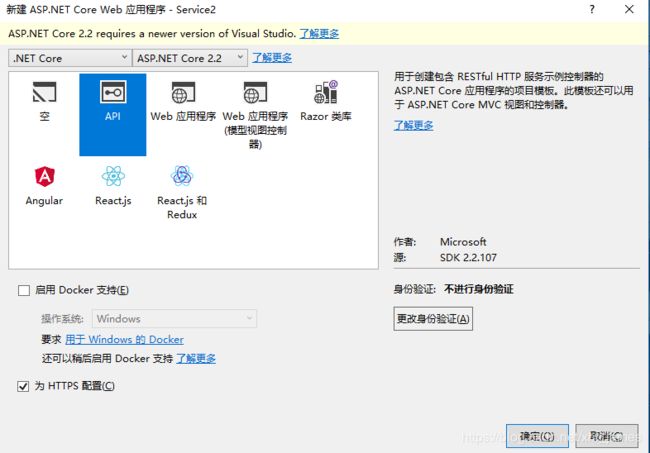
修改launchSettings.json文件如下:
{
  "profiles": {
    "Study.Microservices.Service2": {
      "commandName": "Project",
      "launchBrowser": false,
      "launchUrl": "api/values",
      "applicationUrl": "https://localhost:5021",
      "environmentVariables": {
        "ASPNETCORE_ENVIRONMENT": "Development"
      }
    }
  }
}
2、Ocelot配置服务
将上面两个创建好的服务配置到Ocelot中去。
配置如下:
{
  "ReRoutes": [
    //identityserver4  token
    {
      "DownstreamPathTemplate": "/connect/token",
      "DownstreamScheme": "https",
      "DownstreamHostAndPorts": [
        {
          "Host": "localhost",
          "Port": "5001"
        }
      ],
      "UpstreamPathTemplate": "/auth/token",
      "UpstreamHttpMethod": [ "Post" ]
    },
    // API:Service1
    {
      "AuthenticationOptions": {
        "AuthenticationProviderKey": "service1Identity",
        "AllowedScopes": []
      },
      "DownstreamPathTemplate": "/api/{url}",
      "DownstreamScheme": "https",
      "DownstreamHostAndPorts": [
        {
          "Host": "localhost",
          "Port": "5011"
        }
      ],
      "UpstreamPathTemplate": "/Service1/{url}",
      "UpstreamHttpMethod": [ "Get", "Post" ]
    },
    // API:Service2
    {
      "AuthenticationOptions": {
        "AuthenticationProviderKey": "service2Idnetity",
        "AllowedScopes": []
      },
      "DownstreamPathTemplate": "/api/{url}",
      "DownstreamScheme": "https",
      "DownstreamHostAndPorts": [
        {
          "Host": "localhost",
          "Port": "5021"
        }
      ],
      "UpstreamPathTemplate": "/Service2/{url}",
      "UpstreamHttpMethod": [ "Get", "Post" ]
    }
  ]
}
配置中还多了identityserver相关的配置,本篇中并不会介绍到,不知道的可以查看Consul+Ocelot搭建微服务实践–IdentityServer集成文章
3、安装IdentityServer4.AccessTokenValidation
将IdentityServer4.AccessTokenValidation安装到Ocelot项目中去。
Install-Package IdentityServer4.AccessTokenValidation
或者使用Nuget管理工具直接搜索进行安装。
4、配置服务认证
在ConfigureServices中进行添加配置内容。
配置如下:
#region 配置AccessTokenValidation
void service1TokenOption(IdentityServerAuthenticationOptions options)
{
    options.Authority = Configuration["IdentityService:Uri"];
    options.ApiName = Configuration["IdentityService:ApiNames:service1"];
    options.ApiSecret = Configuration["IdentityService:ApiSecrets:service1"];
    options.RequireHttpsMetadata = Convert.ToBoolean(Configuration["IdentityService:UseHttps:service1"]);
    //设置时间偏移量。默认不进行修改,因为可能存在网络阻塞,导致请求的时候会存在未授权从而影响请求
    //options.JwtValidationClockSkew = TimeSpan.FromSeconds(0);
    options.SupportedTokens = SupportedTokens.Both;
}
void service2TokenOption(IdentityServerAuthenticationOptions options)
{
    options.Authority = Configuration["IdentityService:Uri"];
    options.ApiName = Configuration["IdentityService:ApiNames:service2"];
    options.ApiSecret = Configuration["IdentityService:ApiSecrets:service2"];
    options.RequireHttpsMetadata = Convert.ToBoolean(Configuration["IdentityService:UseHttps:service2"]);
    options.SupportedTokens = SupportedTokens.Both;
}
#endregion
#region 添加IdentityServer验证中间件
services.AddAuthentication("Bearer")
    .AddIdentityServerAuthentication("service1Identity", service1TokenOption)
    .AddIdentityServerAuthentication("service2Idnetity", service2TokenOption);
#endregion
由于实际生产中认证中心会部署在不同的环境上,所以将内容配置在appsettings.json文件中。
{
  "IdentityService": {
    "Uri": "https://localhost:5001",
    "UseHttps": {
      "service1": true,
      "service2": true
    },
    "ApiNames": {
      "service1": "service1",
      "servcie2": "servcie2"
    },
    "ApiSecrets": {
      "service1": "cy",
      "service2": "cy"
    }
  },
  "Logging": {
    "LogLevel": {
      "Default": "Warning"
    }
  },
  "AllowedHosts": "*"
}
上面Ocelot中会发现比前面系列文章多了AuthenticationOptions配置项,ocelot强大的直接将身份认证配置到文件中即可。
我们在ConfigureServices中进行了服务所需的认证配置,然后使用AddIdentityServerAuthentication将其添加到IdentityServer中去,并起名为service1Identity和service2Idnetity。
最后将起名为service1Identity和service2Idnetity的配置添加到AuthenticationOptions的AuthenticationProviderKey中去。
最后不要忘了在Configure方法中使用UseAuthentication中间件
app.UseAuthentication().UseOcelot().Wait();
5、进行测试
在进行测试前,必须贴一个图,不然会一脑子雾水。

通过图可以很清楚的理解整个请求流程,理解了整个请求流程后就可以进行测试了。
将方案设置为多个启动项,鼠标右击解决方案选择属性页,就可以配置如下的内容。

直接通过网关调用下游服务,自然也就访问不了,会显示未授权。
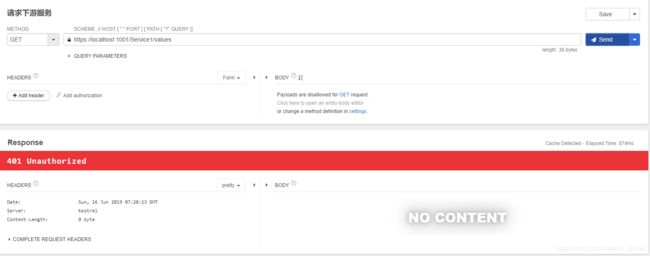
通过上面贴的图可以理解到请求到下游服务的时候先要去IdentityServer4中心去请求token。
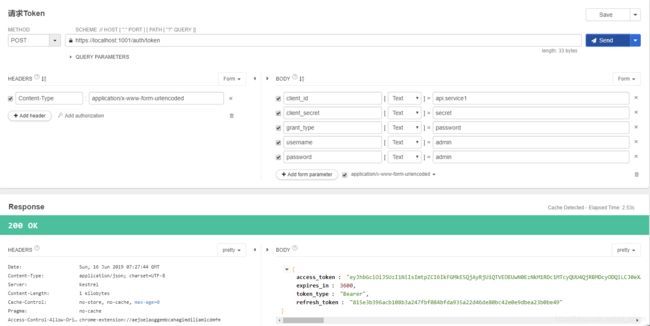
得到IdentityServer4中心返回的token,将起添加到请求服务的Header中去。

到这里整个使用Ocelot集中身份认证就算结束了。
6、总结
在接触新的东西的时候还是非常费劲的,必须自己去查阅相关的资料然后自己进行测试。在测试的途中又没有那么多的时间进行系统化的总结,只有利用周末的时间来进行总结。到了现在重庆的雨终于停了,天气也慢慢放晴了,心中有种迫不及待的想去篮球场,自从工作后才真正体会到了读书是多么的幸福,能够天天打球,还能和室友们打打游戏,但是现在不一样了,现在平时上班周末还要总结自己的东西。我热爱的篮球也只能抽出那么一个下午或者晚上才能去锻炼下,俗话说身体是革命的本钱在忙碌的工作中还是不要忘记锻炼锻炼身体。
最后,希望能够得到园友们的支持!
7、附录
本系列其他文档:
Consul+Ocelot搭建微服务实践–初探路由
Consul+Ocelot搭建微服务实践–负载均衡
Consul+Ocelot搭建微服务实践–IdentityServer集成