安装lnmp(CentOS7、PHP7.1、MySQL5.7、nginx1.14)
####一、安装CentOS Linux 7
######1、不用检测,直接选择install回车

######2、选择中文版

######3、系统配置,如果不需要手动分区,则不用设置分区

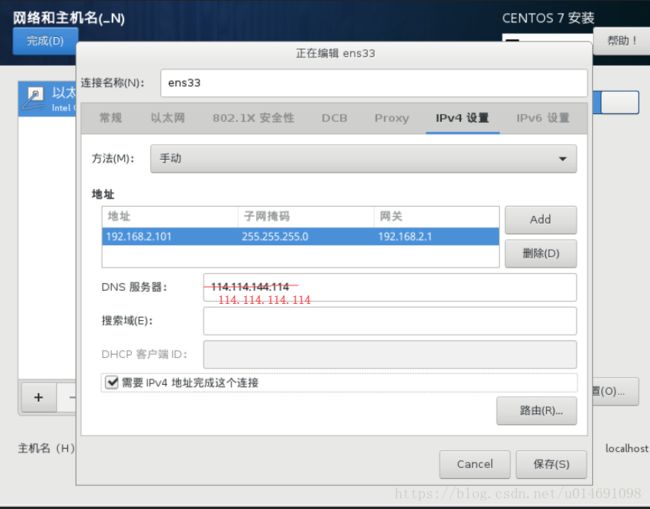
######4、点击网络与主机配置网络,打开网络

######5、点击配置(如果不需要配置静态ip则跳过本步骤)
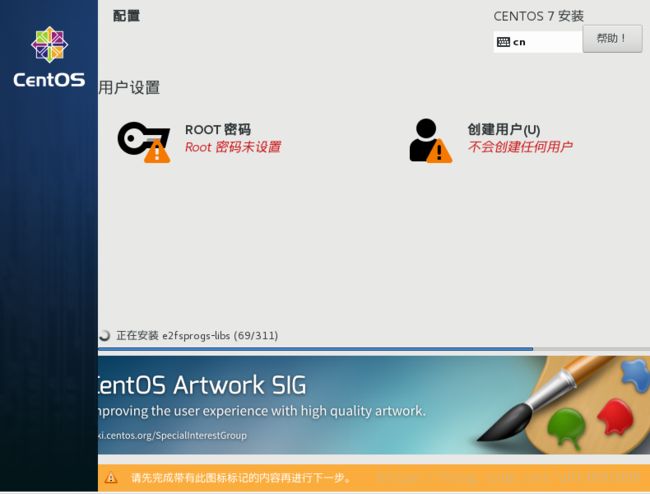
######6、点击开始安装

######7、这个时候可以创建ROOT密码和创建一个普通账户(设置完成后就等待安装完成)
######8、重启

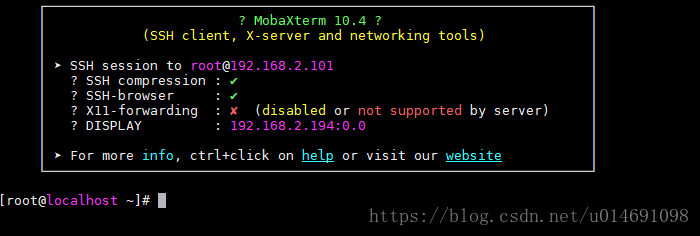
######9、重启后安装好了会显示登录界面

######10、我们不用这个直接登录,我们使用第三方工具登录

######11、安装wget
[root@localhost ~]# yum -y install wget
######12、这里我们切换国内yum源,先备份原来的yum源
[root@localhost ~]# mv /etc/yum.repos.d/CentOS-Base.repo /etc/yum.repos.d/CentOS-Base.repo.bak
######13、获取阿里云源
[root@localhost ~]# wget -O /etc/yum.repos.d/CentOS-Base.repo http://mirrors.aliyun.com/repo/Centos-7.repo
######14、清理yum源
[root@localhost ~]# yum clean all
######15、生成缓存
[root@localhost ~]# yum makecache
######16、习惯了使用vim编辑器,这里顺手安装下
[root@localhost ~]# yum -y install vim epel-release
######17、接下来准备安装mysql、nginx、php,不过在这之前需要先安装一些依赖软件
[root@localhost ~]# yum -y install make gcc gcc-c++ gcc-g77 flex bison file libtool libtool-libs autoconf kernel-devel libjpeg libjpeg-devel libpng libpng-devel libpng10 libpng10-devel gd gd-devel freetype freetype-devel libxml2 libxml2-devel zlib zlib-devel glib2 glib2-devel bzip2 bzip2-devel libevent libevent-devel ncurses ncurses-devel curl curl-devel e2fsprogs e2fsprogs-devel krb5 krb5-devel libzip libidn libidn-devel openssl openssl-devel gettext gettext-devel ncurses-devel gmp-devel pspell-devel unzip libcap lsof wget python-devel cmake libxslt-devel libgcrypt-devel readline-devel libgpg-error-devel libmcrypt libmcrypt-devel mcrypt
####二、安装MySQL5.7.18
######1、在安装mysql前先检查有没有安装mariadb(默认是安装的)
[root@localhost ~]# rpm -qa | grep mariadb
######2、卸载mariadb
[root@localhost ~]# rpm -e mariadb-libs --nodeps
######3、由于mysql5.7必须使用boost 1.59.0及以上版本。所以需要先安装boost 1.59.0
[root@localhost ~]# cd /var/local
[root@localhost local]# wget https://jaist.dl.sourceforge.net/project/boost/boost/1.59.0/boost_1_59_0.tar.gz
[root@localhost local]# tar -zxvf boost_1_59_0.tar.gz
[root@localhost local]# cd boost_1_59_0
[root@localhost boost_1_59_0]# ./bootstrap.sh
[root@localhost boost_1_59_0]# ./b2
[root@localhost boost_1_59_0]# ./b2 install
[root@localhost boost_1_59_0]# cd ..
######4、为了安全起见,我们需要创建mysql用户组和mysql用户来运行mysql
[root@localhost local]# groupadd mysql
[root@localhost local]# useradd -s /sbin/nologin -g mysql -M mysql
######5、下载并安装mysql5.7.18
[root@localhost local]# wget http://mirrors.sohu.com/mysql/MySQL-5.7/mysql-5.7.18.tar.gz
[root@localhost local]# tar -zxvf mysql-5.7.18.tar.gz
[root@localhost local]# cd mysql-5.7.18
[root@localhost mysql-5.7.18]# cmake .
[root@localhost mysql-5.7.18]# make && make install
######6、将mysql的bin目录加入环境变量
[root@localhost mysql-5.7.18]# echo "export PATH=$PATH:/usr/local/mysql/bin" >> /etc/profile
[root@localhost mysql-5.7.18]# source /etc/profile
######7、修改/usr/local/mysql/目录所属组和所属主
[root@localhost mysql-5.7.18]# chown -R root:mysql /usr/local/mysql/
######8、初始化mysql数据库,这里会生成一个root用户的密码,要记住这个初始密码,后面要改密码
[root@localhost mysql-5.7.18]# mysqld --initialize --user=mysql --basedir=/usr/local/mysql --datadir=/usr/local/mysql/data
######9、mysql5.7需要手动创建my.cnf配置文件
[root@localhost mysql-5.7.18]# vim /etc/my.cnf
写入
[mysqld]
basedir=/usr/local/mysql
datadir=/usr/local/mysql/data
pid-file=/usr/local/mysql/data/mysqld.pid
socket=/usr/local/mysql/data/mysql.sock
log_error=/usr/local/mysql/data/mysql.err
######10、重新载入系统服务
[root@localhost mysql-5.7.18]# systemctl daemon-reload
######11、复制启动脚本并设置为开机自启
[root@localhost mysql-5.7.18]# cp /usr/local/mysql/support-files/mysql.server /etc/init.d/mysql
[root@localhost mysql-5.7.18]# chkconfig --add mysql
######12、启动mysql
[root@localhost mysql-5.7.18]# service mysql start
######13、添加软链接
[root@localhost mysql-5.7.18]# ln -s /usr/local/mysql/data/mysql.sock /tmp/mysql.sock
######14、给root用户设置密码(这里只是本地测试,建议设置复杂密码)
[root@localhost mysql-5.7.18]# mysqladmin -uroot -p'kp2k9f*U2.?k' password '123456'
######14、登录mysql
[root@localhost mysql-5.7.18]# mysql -u root -p
######15、给root用户分配所有的操作权限,并允许其从其他终端登录和操作MySQL(还需要设置防火墙开放3306端口或者使用SSH方式连接),为了安全起见,最好把“%”换成指定ip
mysql> GRANT ALL PRIVILEGES ON *.* TO 'root'@'%' IDENTIFIED BY '123456' WITH GRANT OPTION;
mysql> exit;
####三、安装nginx1.14
######1、创建www用户组和www用户,用来运行nginx
[root@localhost mysql-5.7.18]# groupadd www
[root@localhost mysql-5.7.18]# useradd -s /sbin/nologin -g www -M www
######2、下载并安装
[root@localhost mysql-5.7.18]# cd ..
[root@localhost local]# wget http://nginx.org/download/nginx-1.14.0.tar.gz
[root@localhost local]# tar -zxvf nginx-1.14.0.tar.gz
[root@localhost local]# cd nginx-1.14.0
[root@localhost nginx-1.14.0]# ./configure --user=www --group=www --with-http_stub_status_module
[root@localhost nginx-1.14.0]# make && make install
######3、将nginx的sbin目录加入环境变量
[root@localhost nginx-1.14.0]# echo "export PATH=$PATH:/usr/local/nginx/sbin" >> /etc/profile
[root@localhost nginx-1.14.0]# source /etc/profile
######4、创建nginx启动服务
[root@localhost nginx-1.14.0]# vim /etc/init.d/nginx
写入以下内容
#! /bin/sh
# chkconfig: 2345 55 25
# Description: Startup script for nginx webserver on Debian. Place in /etc/init.d and
# run 'update-rc.d -f nginx defaults', or use the appropriate command on your
# distro. For CentOS/Redhat run: 'chkconfig --add nginx'

### BEGIN INIT INFO
# Provides:          nginx
# Required-Start:    $all
# Required-Stop:     $all
# Default-Start:     2 3 4 5
# Default-Stop:      0 1 6
# Short-Description: starts the nginx web server
# Description:       starts nginx using start-stop-daemon
### END INIT INFO

# Author:   licess
# website:  https://lnmp.org

PATH=/usr/local/sbin:/usr/local/bin:/sbin:/bin:/usr/sbin:/usr/bin
NAME=nginx
NGINX_BIN=/usr/local/nginx/sbin/$NAME
CONFIGFILE=/usr/local/nginx/conf/$NAME.conf
PIDFILE=/usr/local/nginx/logs/$NAME.pid
if [ -s /bin/ss ]; then
    StatBin=/bin/ss
else
    StatBin=/bin/netstat
fi


case "$1" in
    start)
        echo -n "Starting $NAME... "

        if $StatBin -tnpl | grep -q nginx;then
            echo "$NAME (pid `pidof $NAME`) already running."
            exit 1
        fi

        $NGINX_BIN -c $CONFIGFILE

        if [ "$?" != 0 ] ; then
            echo " failed"
            exit 1
        else
            echo " done"
        fi
        ;;

    stop)
        echo -n "Stoping $NAME... "

        if ! $StatBin -tnpl | grep -q nginx; then
            echo "$NAME is not running."
            exit 1
        fi

        $NGINX_BIN -s stop

        if [ "$?" != 0 ] ; then
            echo " failed. Use force-quit"
            exit 1
        else
            echo " done"
        fi
        ;;

    status)
        if $StatBin -tnpl | grep -q nginx; then
            PID=`pidof nginx`
            echo "$NAME (pid $PID) is running..."
        else
            echo "$NAME is stopped."
            exit 0
        fi
        ;;

    force-quit|kill)
        echo -n "Terminating $NAME... "

        if ! $StatBin -tnpl | grep -q nginx; then
            echo "$NAME is is stopped."
            exit 1
        fi

        kill `pidof $NAME`

        if [ "$?" != 0 ] ; then
            echo " failed"
            exit 1
        else
            echo " done"
        fi
        ;;

    restart)
        $0 stop
        sleep 1
        $0 start
        ;;

    reload)
        echo -n "Reload service $NAME... "

        if $StatBin -tnpl | grep -q nginx; then
            $NGINX_BIN -s reload
            echo " done"
        else
            echo "$NAME is not running, can't reload."
            exit 1
        fi
        ;;

    configtest)
        echo -n "Test $NAME configure files... "

        $NGINX_BIN -t
        ;;

    *)
        echo "Usage: $0 {start|stop|restart|reload|status|configtest|force-quit|kill}"
        exit 1
        ;;

esac
######5、修改启动文件权限
[root@localhost nginx-1.14.0]# chmod 755 /etc/init.d/nginx
######6、加入开机自启
[root@localhost nginx-1.14.0]# chkconfig --add nginx
######7、启动nginx服务
[root@localhost nginx-1.14.0]# service nginx start
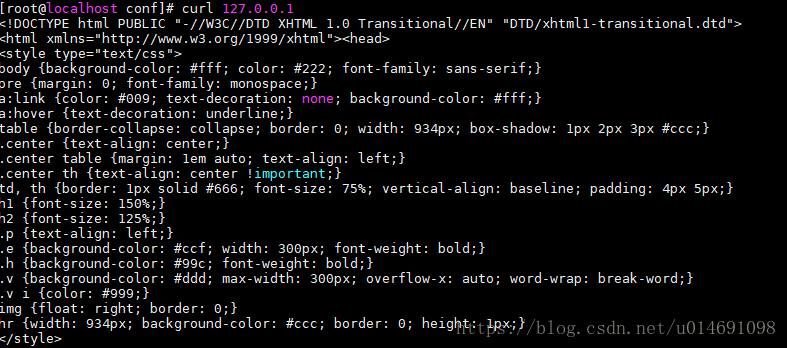
######8、测试是否成功
[root@localhost nginx-1.14.0]# curl 127.0.0.1
看到以下内容则表示成功

####四、安装PHP7.1.18
######1、下载并安装
[root@localhost nginx-1.14.0]# cd ..
[root@localhost local]# wget -O php-7.1.18.tar.gz http://cn2.php.net/get/php-7.1.18.tar.gz/from/this/mirror
[root@localhost local]# tar -zxvf php-7.1.18.tar.gz
[root@localhost local]# cd php-7.1.18
[root@localhost php-7.1.18]# ./configure \
--prefix=/usr/local/php \
--with-config-file-path=/usr/local/php/etc/ \
--enable-fpm \
--with-fpm-user=www  \
--with-fpm-group=www \
--enable-inline-optimization \
--disable-debug \
--disable-rpath \
--enable-shared  \
--enable-soap \
--with-libxml-dir \
--with-xmlrpc \
--with-openssl \
--with-mcrypt \
--with-mhash \
--with-pcre-regex \
--with-sqlite3 \
--with-zlib \
--enable-bcmath \
--with-iconv \
--with-bz2 \
--enable-calendar \
--with-curl \
--with-cdb \
--enable-dom \
--enable-exif \
--enable-fileinfo \
--enable-filter \
--with-pcre-dir \
--enable-ftp \
--with-gd \
--with-openssl-dir \
--with-jpeg-dir \
--with-png-dir \
--with-zlib-dir  \
--with-freetype-dir \
--enable-gd-native-ttf \
--enable-gd-jis-conv \
--with-gettext \
--with-gmp \
--with-mhash \
--enable-json \
--enable-mbstring \
--enable-mbregex \
--enable-mbregex-backtrack \
--with-libmbfl \
--with-onig \
--enable-pdo \
--with-mysqli=mysqlnd \
--with-pdo-mysql=mysqlnd \
--with-zlib-dir \
--with-pdo-sqlite \
--with-readline \
--enable-session \
--enable-shmop \
--enable-simplexml \
--enable-sockets  \
--enable-sysvmsg \
--enable-sysvsem \
--enable-sysvshm \
--enable-wddx \
--with-libxml-dir \
--with-xsl \
--enable-zip \
--enable-mysqlnd-compression-support \
--with-pear \
--enable-opcache
[root@localhost php-7.1.18]# make && make install
######2、将php的bin目录加入系统环境变量
[root@localhost php-7.1.18]# echo "export PATH=$PATH:/usr/local/php/bin" >> /etc/profile
[root@localhost php-7.1.18]# source /etc/profile
######3、测试是否成功php -v

######4、准备配置文件
[root@localhost php-7.1.18]# cp php.ini-production /usr/local/php/etc/php.ini
[root@localhost php-7.1.18]# cp /usr/local/php/etc/php-fpm.conf.default /usr/local/php/etc/php-fpm.conf
[root@localhost php-7.1.18]# cp /usr/local/php/etc/php-fpm.d/www.conf.default /usr/local/php/etc/php-fpm.d/www.conf
######5、修改www.conf文件
[root@localhost php-7.1.18]# vim /usr/local/php/etc/php-fpm.d/www.conf
修改为
[global]
pid = /usr/local/php/var/run/php-fpm.pid
error_log = /usr/local/php/var/log/php-fpm.log
log_level = notice

[www]
listen = /tmp/php-cgi.sock
;listen = 127.0.0.1:9000
listen.backlog = -1
listen.allowed_clients = 127.0.0.1
listen.owner = www
listen.group = www
listen.mode = 0666
user = www
group = www
pm = dynamic
pm.max_children = 20
pm.start_servers = 10
pm.min_spare_servers = 10
pm.max_spare_servers = 20
request_terminate_timeout = 100
request_slowlog_timeout = 0
slowlog = var/log/slow.log
######6、拷贝启动文件
[root@localhost php-7.1.18]# cp sapi/fpm/init.d.php-fpm /etc/init.d/php-fpm
######7、给php-fpm文件添加可执行权限
[root@localhost php-7.1.18]# chmod +x /etc/init.d/php-fpm
######8、加入开机自启
[root@localhost php-7.1.18]# chkconfig --add php-fpm
######9、启动php-fpm
[root@localhost php-7.1.18]# service php-fpm start
php安装完成
####五、创建web目录并修改nginx支持php
######1、我们将web目录创建在/var目录下
[root@localhost php-7.1.18]# cd /var
[root@localhost var]# mkdir -p www/default
[root@localhost var]# chown -R www:www www
######2、创建一个php文件待会测试用
[root@localhost var]# vim /var/www/default/index.php
写入
######3、进入nginx配置目录
[root@localhost var]# cd /usr/local/nginx/conf
######4、添加支持php
[root@localhost conf]# vim enable-php.conf
写入(注意:fastcgi_pass配置项使用php-cgi.sock或127.0.0.1:9000要与php-fpm配置项要一致)
location ~ [^/]\.php(/|$)
{
    try_files $uri =404;
    fastcgi_pass  unix:/tmp/php-cgi.sock;
    fastcgi_index index.php;
    include fastcgi.conf;
}
######5、修改nginx.conf
[root@localhost conf]# vim nginx.conf
修改为
user  www www;
worker_processes  auto;

error_log  logs/error.log crit;

#error_log  logs/error.log  notice;
#error_log  logs/error.log  info;

pid        logs/nginx.pid;
worker_rlimit_nofile 51200;

events {
	use epoll;
    worker_connections  51200;
	multi_accept on;
}


http {
    include       mime.types;
    default_type  application/octet-stream;

	server_names_hash_bucket_size 129;
    client_header_buffer_size 32k;
    large_client_header_buffers 4 32k;
    client_max_body_size 50m;

    sendfile        on;
    tcp_nopush     on;

    #keepalive_timeout  0;
    keepalive_timeout  60;

    #gzip  on;

    tcp_nodelay on;

    fastcgi_connect_timeout 300;
    fastcgi_send_timeout 300;
    fastcgi_read_timeout 300;
    fastcgi_buffer_size 64k;
    fastcgi_buffers 4 64k;
    fastcgi_busy_buffers_size 128k;
    fastcgi_temp_file_write_size 256k;

    gzip on;
    gzip_min_length  1k;
    gzip_buffers     4 16k;
    gzip_http_version 1.1;
    gzip_comp_level 2;
    gzip_types     text/plain application/javascript application/x-javascript text/javascript text/css application/xml application/xml+rss;
    gzip_vary on;
    gzip_proxied   expired no-cache no-store private auth;
    gzip_disable   "MSIE [1-6]\.";

    #limit_conn_zone $binary_remote_addr zone=perip:10m;
    ##If enable limit_conn_zone,add "limit_conn perip 10;" to server section.

    server_tokens off;
    access_log off;

    server {
		listen 80 default_server;
        #listen [::]:80 default_server ipv6only=on;
        server_name _;

		index index.html index.htm index.php;
        root  /var/www/default;

        #error_page  404              /404.html;

		# deny access to .htaccess files, if Apache's document root
        # concurs with nginx's one
        #
        #location ~ /\.ht {
        #    deny  all;
        #}

		include enable-php.conf;

		 location /nginx_status
        {
            stub_status on;
            access_log   off;
        }

        location ~ .*\.(gif|jpg|jpeg|png|bmp|swf)$
        {
            expires      30d;
        }

        location ~ .*\.(js|css)?$
        {
            expires      12h;
        }

        location ~ /.well-known {
            allow all;
        }

        location ~ /\.
        {
            deny all;
        }

        access_log  logs/access.log;
    }

	include vhost/*.conf;

    # another virtual host using mix of IP-, name-, and port-based configuration
    #
    #server {
    #    listen       8000;
    #    listen       somename:8080;
    #    server_name  somename  alias  another.alias;

    #    location / {
    #        root   html;
    #        index  index.html index.htm;
    #    }
    #}


    # HTTPS server
    #
    #server {
    #    listen       443 ssl;
    #    server_name  localhost;

    #    ssl_certificate      cert.pem;
    #    ssl_certificate_key  cert.key;

    #    ssl_session_cache    shared:SSL:1m;
    #    ssl_session_timeout  5m;

    #    ssl_ciphers  HIGH:!aNULL:!MD5;
    #    ssl_prefer_server_ciphers  on;

    #    location / {
    #        root   html;
    #        index  index.html index.htm;
    #    }
    #}

}
######6、创建vhost目录,主要存放虚拟主机配置,这样就无需改动nginx.conf配置文件了
[root@localhost conf]# mkdir vhost
######7、重启nginx
[root@localhost conf]# service nginx restart
######8、开放80端口
[root@localhost conf]# firewall-cmd --zone=public --add-port=80/tcp --permanent
[root@localhost conf]# systemctl restart firewalld.service
######9、通过浏览器访问地址看到如下就代表成功了
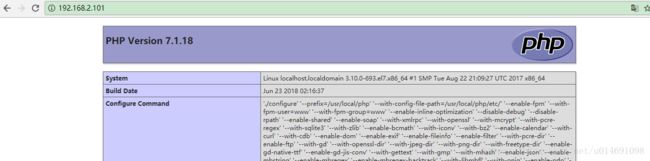
或者通过curl访问127.0.0.1