pyqt5安装及基础使用教程
1.pyqt5工具安装
(1)使用pip工具安装PyQt5工具。执行pip install PyQt5
(2)安装Qt Designer图形界面开发工具。执行pip install PyQt5-tools
安装完成后所在路径
C:\Users\用户\AppData\Local\Programs\Python\Python38\Lib\site-packages
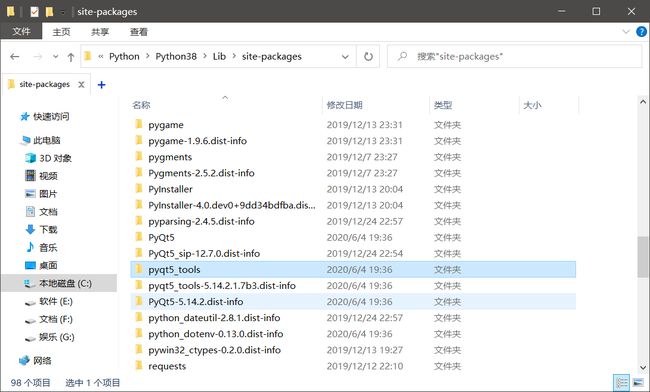
(3)环境变量配置,将PyQt5-tools的安装目录下qt/bin所在目录添加到系统环境变量path,就可以使用cmd启动designer
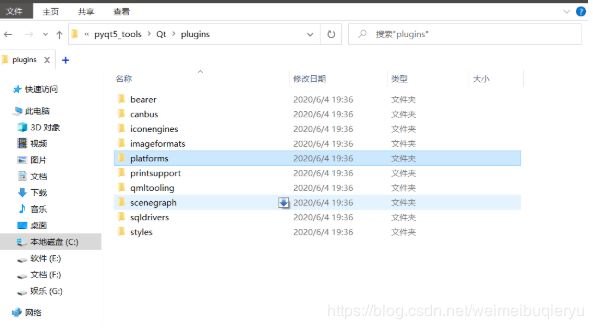
如果出现启动失败,将pyqt5_tools里面qt/plugins/platforms目录粘贴至与qt/bin/desinger.exe文件同级就解决了
(4)IDE配置,我目前用vscode,安装插件PYQT Integration
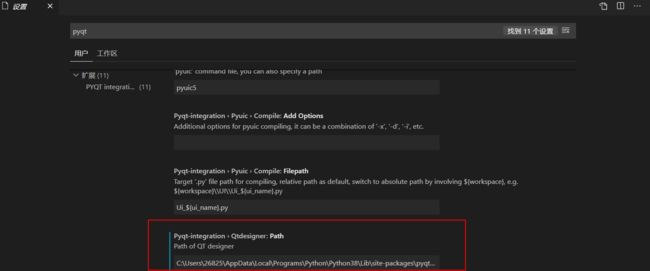
首选项–>设置–>搜索pyqt,最后一项填写designer路径
系统会自动配置pyuic,该工具是用于将Qt Designer工具开发完成的.ui文件转化为.py文件。
(5)pycharm配置
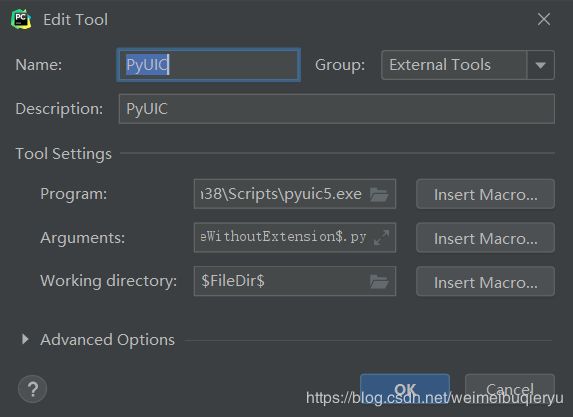
file–>setting–>tools–>external tools添加
①qt designer
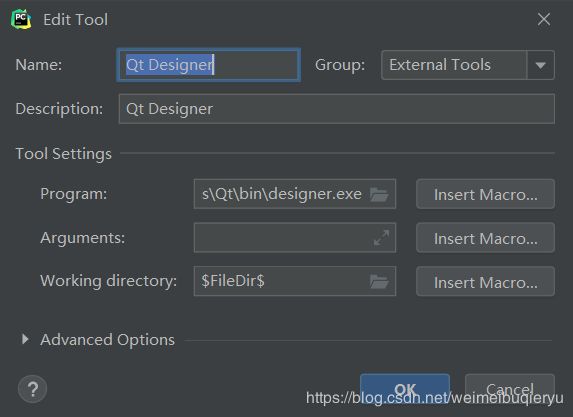
Name:可自己定义
program:Qt Designer的安装路径
parameter:不填
directory: $FileDir$
Name:可自己定义
program:pyuic的安装路径
parameter:$FileName$ -o $FileNameWithoutExtension$.py
directory: $FileDir $
2.简单的login例子
①创建新的ui
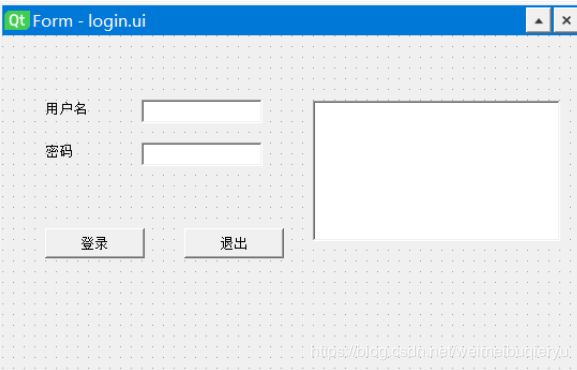
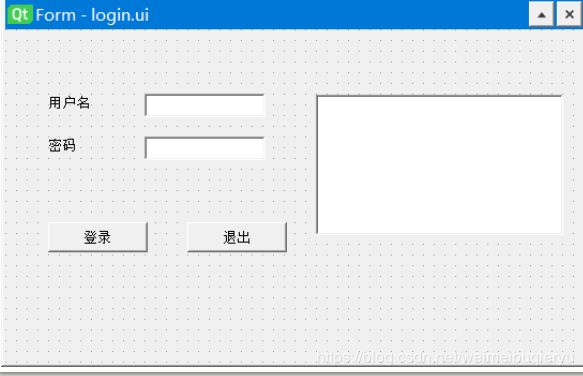
②选择textlabel,pushbutton,textbrowser构成如图所示
③双击可修改对应名称
④同时将右侧对应的from属性修改
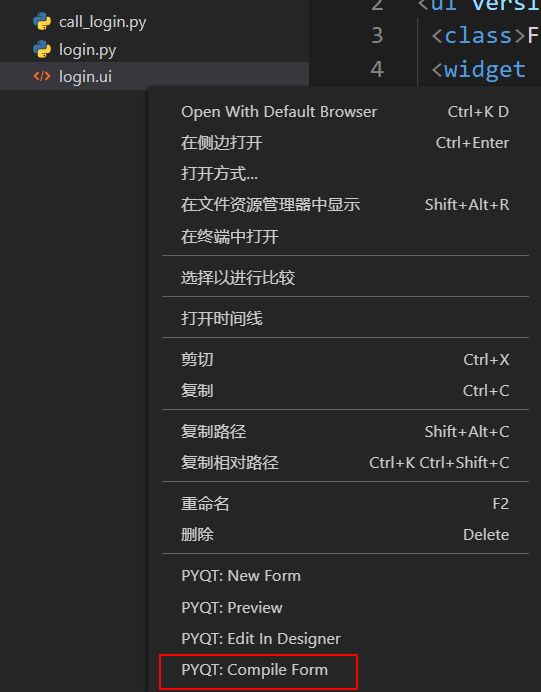
⑤保存成为login.ui文件,右键此文件,选择compile生成对应的py文件
login.py文件代码如下,
# -*- coding: utf-8 -*-

# Form implementation generated from reading ui file 'login.ui'
#
# Created by: PyQt5 UI code generator 5.14.2
#
# WARNING! All changes made in this file will be lost!


from PyQt5 import QtCore, QtGui, QtWidgets


class Ui_Form(object):
    def setupUi(self, Form):
        Form.setObjectName("Form")
        Form.resize(542, 311)
        Form.setMaximumSize(QtCore.QSize(699, 499))
        self.user_lable = QtWidgets.QLabel(Form)
        self.user_lable.setGeometry(QtCore.QRect(40, 60, 55, 16))
        self.user_lable.setObjectName("user_lable")
        self.pwd_lable = QtWidgets.QLabel(Form)
        self.pwd_lable.setGeometry(QtCore.QRect(40, 100, 55, 16))
        self.pwd_lable.setObjectName("pwd_lable")
        self.user_lineEdit = QtWidgets.QLineEdit(Form)
        self.user_lineEdit.setGeometry(QtCore.QRect(130, 60, 113, 22))
        self.user_lineEdit.setObjectName("user_lineEdit")
        self.pwd_lineEdit = QtWidgets.QLineEdit(Form)
        self.pwd_lineEdit.setGeometry(QtCore.QRect(130, 100, 113, 22))
        self.pwd_lineEdit.setObjectName("pwd_lineEdit")
        self.login_Button = QtWidgets.QPushButton(Form)
        self.login_Button.setGeometry(QtCore.QRect(40, 180, 93, 28))
        self.login_Button.setObjectName("login_Button")
        self.cancel_Button = QtWidgets.QPushButton(Form)
        self.cancel_Button.setGeometry(QtCore.QRect(170, 180, 93, 28))
        self.cancel_Button.setObjectName("cancel_Button")
        self.user_textBrowser = QtWidgets.QTextBrowser(Form)
        self.user_textBrowser.setGeometry(QtCore.QRect(290, 61, 231, 131))
        self.user_textBrowser.setObjectName("user_textBrowser")

        self.retranslateUi(Form)
        QtCore.QMetaObject.connectSlotsByName(Form)

    def retranslateUi(self, Form):
        _translate = QtCore.QCoreApplication.translate
        Form.setWindowTitle(_translate("Form", "Form"))
        self.user_lable.setText(_translate("Form", "用户名"))
        self.pwd_lable.setText(_translate("Form", "密码"))
        self.login_Button.setText(_translate("Form", "登录"))
        self.cancel_Button.setText(_translate("Form", "退出"))
⑥逻辑实现代码,同目录下创建call_login.py文件
import sys
#PyQt5中使用的基本控件都在PyQt5.QtWidgets模块中
from PyQt5.QtWidgets import QApplication, QMainWindow
#导入designer工具生成的login模块
from login import Ui_Form

class MyMainForm(QMainWindow, Ui_Form):
    def __init__(self, parent=None):
        super(MyMainForm, self).__init__(parent)
        self.setupUi(self)
        #添加登录按钮信号和槽。注意display函数不加小括号()
        self.login_Button.clicked.connect(self.display)
        #添加退出按钮信号和槽。调用close函数
        self.cancel_Button.clicked.connect(self.close)

    def display(self):
        #利用line Edit控件对象text()函数获取界面输入
        username = self.user_lineEdit.text()
        password = self.pwd_lineEdit.text()
        #利用text Browser控件对象setText()函数设置界面显示
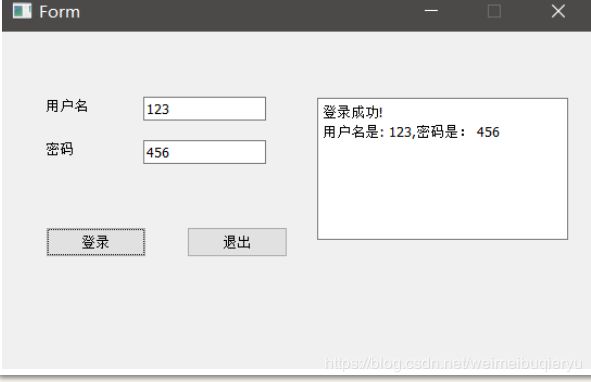
        self.user_textBrowser.setText("登录成功!\n" + "用户名是: "+ username+ ",密码是: "+ password)

if __name__ == "__main__":
    #固定的,PyQt5程序都需要QApplication对象。sys.argv是命令行参数列表,确保程序可以双击运行
    app = QApplication(sys.argv)
    #初始化
    myWin = MyMainForm()
    #将窗口控件显示在屏幕上
    myWin.show()
    #程序运行,sys.exit方法确保程序完整退出。
    sys.exit(app.exec_())
