lnmp centos7 安装 php7.3 nginx1.4 部署 并安装wordpress
lnmp 环境 ,php 和nginx 安装在一个机器上,mysql 是单独的服务器。
安装 php7.3
下载
wget https://downloads.php.net/~cmb/php-7.3.0beta1.tar.gz
tar -zxvf php-7.3.0beta1.tar.gz
useradd -s /sbin/nologin php-fpm
编译
./configure --prefix=/usr/local/php --with-curl --with-freetype-dir
–with-gd --with-gettext --with-iconv-dir --with-kerberos --with-libdir=lib64 --with-libxml-dir --with-mysqli --with-openssl --with-pcre-regex --with-pdo-mysql --with-pdo-sqlite --with-pear --with-png-dir --with-jpeg-dir --with-xmlrpc --with-xsl --with-zlib --with-bz2 --with-mhash --enable-fpm --enable-bcmath --enable-libxml --enable-inline-optimization --enable-mbregex --enable-mbstring --enable-opcache --enable-pcntl --enable-shmop --enable-soap --enable-sockets --enable-sysvsem --enable-sysvshm --enable-xml --enable-zip --enable-fpm --with-fpm-user=php-fpm --with-fpm-group=php-fpm
报错:1,
**configure: error: system libzip must be upgraded to version >=**0.11。

使用Yum最新版只到0.10,不足以达到要求。

一、先删除libzip

yum remove libzip -y

SSH执行以上命令,先删除libzip  和   libzip-devel

二、下载安装并手动编译

wget https://nih.at/libzip/libzip-1.2.0.tar.gz
tar -zxvf libzip-1.2.0.tar.gz
cd libzip-1.2.0
./configure
make && make install

三、(可忽略)另外最新版本请参考官网:https://nih.at/libzip/ 1.5.0的libzip需要cmake

wget https://libzip.org/download/libzip-1.5.0.tar.gz
tar -zxvf libzip-*
cd libzip*
mkdir build && cd build && cmake .. && make && make install
报错2:
error: off_t undefined; check your library configuration

根据报错信息分析 configure: error: off_t undefined; check your library configuration
未定义的类型 off_t。
off_t 类型是在 头文件 unistd.h中定义的,在32位系统 编程成 long int ,64位系统则编译成 long long int ,这里题主的系统应该是 64位的吧,在进行编译的时候 是默认查找64位的动态链接库,但是默认情况下 centos 的动态链接库配置文件/etc/ld.so.conf里并没有加入搜索路径,这个时候需要将 /usr/local/lib64 /usr/lib64 这些针对64位的库文件路径加进去。
采用下面的方法。
添加搜索路径到配置文件
echo '/usr/local/lib64 /usr/local/lib /usr/lib /usr/lib64'>>/etc/ld.so.conf

然后 更新配置
ldconfig -v
再次执行 编译 成功

执行安装:
make && make install
报错:
/usr/local/include/zip.h:59:21: fatal error: zipconf.h: No such file or directory
解决:
cp /usr/local/lib/libzip/include/zipconf.h /usr/local/include/zipconf.h
安装成功:

复制配置文件:
cp php.ini-production /usr/local/php/lib/php.ini

cp /usr/local/php/etc/php-fpm.conf.default /usr/local/php/etc/php-fpm.conf

ln -s /usr/local/php/sbin/php-fpm /usr/local/bin
修改配置:
cd /usr/local/php/etc/php-fpm.d
vim www.conf

[www]          //池子名 (pool) 设置
;listen = /tmp/php-fcgi.sock  // 监听的地址,可以监听socket ,也可以监听端口
listen = 127.0.0.1:8089  // 或者这样写,php-fpm 通常在本地使用,php和nginx 通常在一台机器,所以可写127.0.0.1,别的机器 连接,需用本机ip
listen.mode = 666      //sock 文件的权限
listen.owner = nobody
listen.group = nobody
user = php-fpm
group = php-fpm
pm = dynamic
pm.max_children = 50
pm.start_servers = 20
pm.min_spare_servers = 5
pm.max_spare_servers = 35
pm.max_requests = 500
rlimit_files = 1024
加入 systemtl 服务:
cd  /usr/local/src/php-7.3.0beta1/sapi/fpm

cp php-fpm.service /usr/lib/systemd/system/
启动:
[root@linshi fpm]# systemctl start php-fpm

[root@linshi fpm]# systemctl status php-fpm -l
● php-fpm.service - The PHP FastCGI Process Manager
   Loaded: loaded (/usr/lib/systemd/system/php-fpm.service; enabled; vendor preset: disabled)
   Active: active (running) since Thu 2018-08-09 12:42:35 CST; 2s ago
Main PID: 7441 (php-fpm)
   Memory: 47.6M
   CGroup: /system.slice/php-fpm.service
           ├─7441 php-fpm: master process (/usr/local/php/etc/php-fpm.conf)
           ├─7442 php-fpm: pool www
           ├─7443 php-fpm: pool www
           ├─7444 php-fpm: pool www
           ├─7445 php-fpm: pool www
           ├─7446 php-fpm: pool www
           ├─7447 php-fpm: pool www
           ├─7448 php-fpm: pool www
           ├─7450 php-fpm: pool www
           ├─7451 php-fpm: pool www
           ├─7452 php-fpm: pool www
           ├─7453 php-fpm: pool www
           ├─7454 php-fpm: pool www
           ├─7456 php-fpm: pool www
           ├─7457 php-fpm: pool www
           ├─7458 php-fpm: pool www
           ├─7459 php-fpm: pool www
           ├─7460 php-fpm: pool www
           ├─7461 php-fpm: pool www
           ├─7462 php-fpm: pool www
           └─7464 php-fpm: pool www

Aug 09 12:42:35 linshi systemd[1]: Started The PHP FastCGI Process Manager.
Aug 09 12:42:35 linshi systemd[1]: Starting The PHP FastCGI Process Manager...
安装 nginx 1.4
下载:
cd /usr/local/src/

wget http://nginx.org/download/nginx-1.14.0.tar.gz

同时下载 清理缓存插件
wget http://labs.frickle.com/files/ngx_cache_purge-2.3.tar.gz
tar -zxvf ngx_cache_purge-2.3.tar.gz

tar -zxvf nginx-1.14.0.tar.gz
编译安装
cd nginx-1.14.0

./configure --user=nginx --group=nginx --prefix=/usr/local/nginx --with-http_v2_module --with-http_ssl_module --with-http_sub_module --with-http_flv_module --with-http_stub_status_module --with-http_gzip_static_module --with-pcre --add-module=/usr/local/src/ngx_cache_purge-2.3

make &&  make install
做软连接:
ln -s /usr/local/nginx/sbin/nginx /usr/sbin/nginx
加入 systemctl
vi /lib/systemd/system/nginx.service


[Unit]
Description=nginx
After=network.target

[Service]
Type=forking
ExecStart=/usr/local/nginx/sbin/nginx
ExecReload=/usr/local/nginx/sbin/nginx -s reload
ExecStop=/usr/local/nginx/sbin/nginx -s quit
PrivateTmp=true

[Install]
WantedBy=multi-user.target
修改配置文件:
cd /usr/local/nginx/conf
vim nginx.conf
删除 server 部分
最后加入 一句:
include vhost/*.conf;
示例:
#user  nobody;
worker_processes  2;

#error_log  logs/error.log;
error_log  logs/error.log  notice;
error_log  logs/error.log  info;

#pid        logs/nginx.pid;

worker_rlimit_nofile 51200;
events {
    use epoll;
    worker_connections  1024;
}


http {
    include       mime.types;
    default_type  application/octet-stream;

    log_format  main  '$remote_addr - $remote_user [$time_local] "$request" '
                      '$status $body_bytes_sent "$http_referer" '
                      '"$http_user_agent" "$http_x_forwarded_for"';

    #access_log  logs/access.log  main;

    sendfile        on;
    tcp_nopush     on;

    #keepalive_timeout  0;
    keepalive_timeout  65;

    gzip  on;
    gzip_min_length 1k;
    gzip_buffers 4 8k;
    gzip_comp_level 5;
    gzip_http_version 1.1;
    gzip_types text/plain application/x-javascript text/css text/htm application/xml;
    include vhost/*.conf;
}
创建一个虚拟主机:
cd /usr/local/nginx/conf
mkdir vhost
cd vhost

vim php.conf

写入:
server
    {
        listen 8080;
        server_name localhost;
        index index.html index.htm index.php;
        root /usr/local/nginx/html;

    ## 和php 结合
        location ~ \.php$
        {
            include fastcgi_params;
            fastcgi_pass 127.0.0.1:8089;
            fastcgi_index index.php;
            fastcgi_param SCRIPT_FILENAME /usr/local/nginx/html$fastcgi_script_name;
        }
    }
启动:
systemctl start nginx
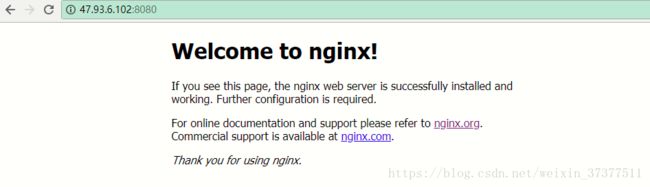
访问测试:
创建 php 文件 测试:
cd /usr/local/nginx/html/

vim 1.php
写入:
检测配置文件是否正确
nginx -t
nginx: the configuration file /usr/local/nginx/conf/nginx.conf syntax is ok
nginx: configuration file /usr/local/nginx/conf/nginx.conf test is successful

重新加载
nginx -s reload
访问测试:

安装 wordpress
下载:
wget  https://cn.wordpress.org/wordpress-4.9.4-zh_CN.tar.gz

tar -zxvf wordpress-4.9.4-zh_CN.tar.gz

mv  wordpress  /usr/local/nginx/html

nginx -s reload
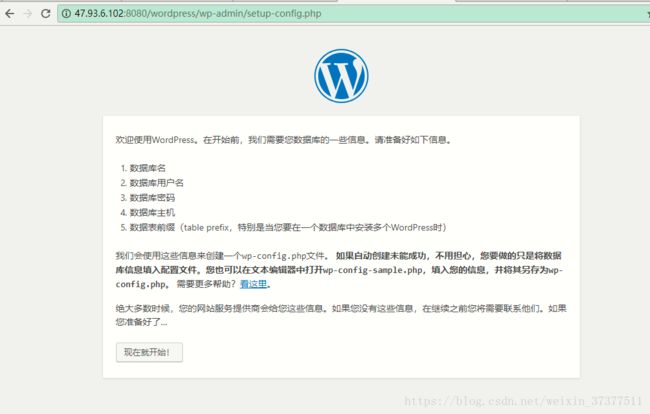
访问安装:
在mysql 服务器上创建wordpress 数据库
> create database wordpress default charset 'utf8';
Query OK, 1 row affected (0.00 sec)

> grant all on wordpress.* to 'wordpress'@'%' identified by 'wordpress123';
Query OK, 0 rows affected (0.06 sec)
填写数据库信息:

下一步:
根据提示在wordpress 目录下创建文件。

下一步:

成功:
