基于PaddleHub实现简易人像抠图
基于PaddleHub实现简易人像抠图
- 1. 背景
- 2. 思路和步骤
- 3. 代码实现
- 4、致谢
1. 背景
PaddleHub是为了解决对深度学习模型的需求而开发的工具。基于飞桨领先的核心框架,精选效果优秀的算法,提供了百亿级大数据训练的预训练模型,方便用户不用花费大量精力从头开始训练一个模型。考虑至此,拟将PaddleHub应用于人像抠图,练习PaddleHub的使用过程。
2. 思路和步骤
- 首先使用PaddleHub导入模型deeplabv3p_xception65_humanseg,该模型能够用于人像抠图。
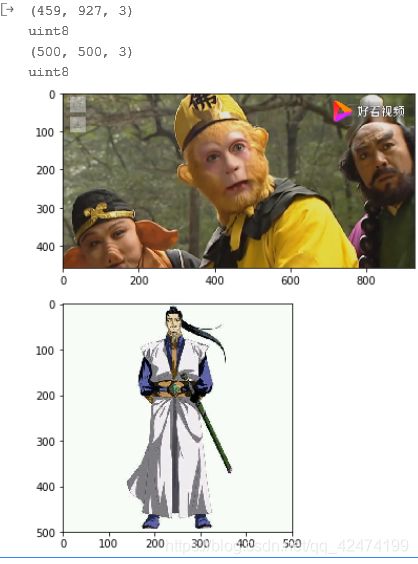
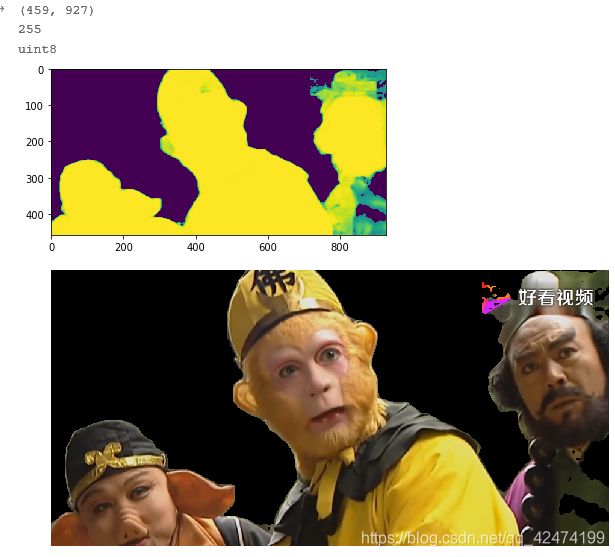
- 然后使用一张图像进行实际检测效果展示,在这也查看了卡通人物的检测效果,发现也是可以的。
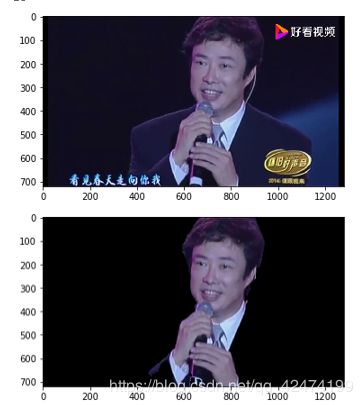
- 最后基于一个视频使用cv2进行读取,对每帧图像使用模型进行抠图检测,将结果写出一个新的视频文件。
3. 代码实现
# 导入库
from PIL import Image
import numpy as np
import matplotlib.pyplot as plt
import matplotlib.image as mpimgimport cv2
%matplotlib inline

# 待检测图像
image_path_list = ["222.png", "111.png"]
img =[cv2.imread(image_path) for image_path in image_path_list]
img[0] = img[0][:,:,[2,1,0]]
print(img[0].shape)print(img[0].dtype)
plt.imshow(img[0])
plt.show()

img[1] = img[1][:,:,[2,1,0]]
print(img[1].shape)
print(img[1].dtype)
plt.imshow(img[1])
plt.show()
# 核心:实现模型调用和人像抠图
import paddlehub as hub
module = hub.Module(name="deeplabv3p_xception65_humanseg")
input_dict = {"image": image_path_list}
# execute predict and print the result
results = module.segmentation(data=input_dict)

for i in range(2):
    print(results[i]["data"].shape)
    prediction = results[i]["data"]
    plt.imshow(prediction)
    plt.show()
    newimg = np.zeros(img[i].shape)
    newimg[:,:,0] = img[i][:,:,0] * (prediction>0)
    newimg[:,:,1] = img[i][:,:,1] * (prediction>0)
    newimg[:,:,2] = img[i][:,:,2] * (prediction>0)
    newimg = newimg.astype(np.uint8)
    print(np.max(newimg))
    print(newimg.dtype)
    # 预测结果展示
    plt.figure(figsize=(10,10))
    plt.imshow(newimg)
    plt.axis('off')
    plt.show()
## 读取视频帧
videoCapture = cv2.VideoCapture("444.flv")
fps = videoCapture.get(cv2.CAP_PROP_FPS)
img_size = (int(videoCapture.get(cv2.CAP_PROP_FRAME_WIDTH)),
            int(videoCapture.get(cv2.CAP_PROP_FRAME_HEIGHT)) )
print(img_size)

videoWrite = cv2.VideoWriter("my.avi", cv2.VideoWriter_fourcc("X", "V", "I", "D"),
                            fps, img_size)
t1 = cv2.getTickCount()  # CPU启动后总计数
success, frame = videoCapture.read()  # 读帧
print(type(frame))
print(frame.shape)
js = 0
while success:
	print(js)
	frame = frame[:,:,[2,1,0]]
	results = module.segmentation(images=[frame])
	prediction = results[0]["data"]
	mask = prediction>0
	newimg = np.zeros(frame.shape)
	for i in range(3):
		newimg[:,:,i] = frame[:,:,i] * mask
       	newimg = newimg.astype(np.uint8)
       	if js==1:
       		plt.imshow(newimg)
       		plt.show()
       	newimg = newimg[:,:,[2,1,0]]
       	videoWrite.write(newimg)
       	success, frame = videoCapture.read()  # 获取下一帧
       	 js+=1

t2 = cv2.getTickCount()
print((t2-t1)/cv2.getTickFrequency())videoWrite.release()
4、致谢
非常感谢百度飞浆提供的平台和资源。


