Windows下的一键安装有:http://bitnami.org/stack/redmine
参考网址:http://www.redmine.org/projects/redmine/wiki/RedmineInstall
Redmine 是用Ruby开发的基于web的项目管理软件,是用ROR框架开发的一套跨平台项目管理系统,据说是源于Basecamp的ror版而来,支持多种数据 库,有不少自己独特的功能,例如提供wiki、新闻台等,还可以集成其他版本管理系统和BUG跟踪系统,例如SVN、CVS、TD等等。这种 Web 形 式的项目管理系统通过“项目(Project)”的形式把成员、任务(问题)、文档、讨论以及各种形式的资源组织在一起,大家参与更新任务、文档等内容来 推动项目的进度,同时系统利用时间线索和各种动态的报表形式来自动给成员汇报项目进度。
我们这里使用RailsInstaller,Ruby和Rails都集成集中。
网址是:http://railsinstaller.org/下载 http://rubyforge.org/frs/download.php/75894/railsinstaller-2.1.0.exe
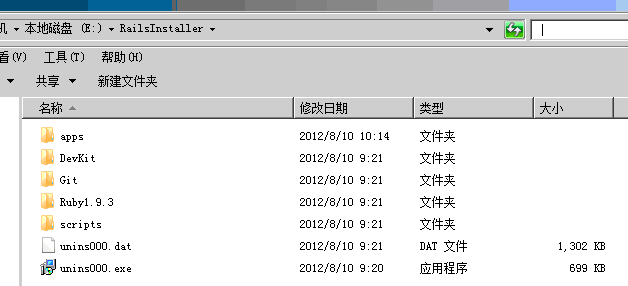
安装在e:/盘根目录下。安装成功后目录如下图所示:
1.下载 redmine(http://www.redmine.org/projects/redmine/wiki/Download)
解压放在 E:\RailsInstaller\apps 目录里(apps是我自己创建的)。
2.安装bundler
在dos下进入redmine根目录。执行以下操作
gem install bundler
bundle install --without development test rmagick postgresql sqlite
需要安装p_w_picpathmagick,选择安装环境变量和C/C++头文件,下载地址:http://www.p_w_picpathmagick.org/script/binary-releases.php#windows
http://www.redmine.org/projects/redmine/wiki/HowTo_install_rmagick_gem_on_Windows
3.创建mysql数据库
create database redmine character set utf8;
grant all privileges on redmine.* to 'redmine'@'localhost' identified by 'my_password';
4. 复制config/database.yml.example到config/database.yml 修改 "production" 配置:
MySQL database using ruby1.9 (adapter must be set to mysql2):
production:adapter: mysql2database: redminehost: localhostusername: redminepassword: 123456
5.创建session密钥
rake generate_secret_token
7.创建数据库结构
在dos下进入redmine所在的文件夹。这里为 E:\RailsInstaller\apps\redmine2.0.3, 执行以下命令
set RAILS_ENV=production
rake db:migrate
rake redmine:load_default_data
参考http://stackoverflow.com/questions/8740868/mysql2-gem-compiled-for-wrong-mysql-client-library可以解决
8.运行WEBrick web server测试安装
ruby script/rails server webrick -e production
至此我们的配置已经完成了。可是大家在使用的过程中会发现,在局域网用ip访问的时候,特别的慢,这是由于Redmine自带的WebrickWeb发布的问题,需要使用Mongrel组件来替换Webrick。请参考:http://blog.haohtml.com/archives/13272
9. 安装成系统服务
我们上面只是开了一个dos窗口来启用了服务,不太方便,这里我们直接将其设置为系统服务。这样的话,以后重启电脑后就方便多了。
Ruby提供一个安装Ruby程序为服务的包:mongrel_service。安装其实很简单,只要命令行下运行gem:
gem install mongrel_service
过程中安装一些必须的其他包。
然后将RedMine使用mongrel_service安装成Windows服务:
mongrel_rails service::install -N RedMine -c E:\RailsInstaller\apps\redmine-2.0.3 -p 3000 -e production
这里,我指定服务名为RedMine,我的RedMine在E:\RailsInstaller\apps\redmine-2.0.3,监听3000端口。
然后修改启动方式为自动启动,并添加MySQL服务为其依赖服务(如果你的MySQL服务器不是本机就不用麻烦了):
sc config RedMine start= auto depend= MySQL
注意,执行sc config系列指令,服务必须是未启动的才行,否则会出错。
将来如果想去掉这个服务,只要执行:
mongrel_rails service::remove -N RedMine
也可以使用:sc delete RedMine 删除服务。
更多参考:http://wangsheng2008love.blog.163.com/blog/static/78201689201251333412940/
相关教程:
centos安装redmine项目管理系统[教程]: http://blog.haohtml.com/archives/13282
http://blog.haohtml.com/archives/13269
