使用Matplotlib绘制3D动画
"""
============
3D animation
============

A simple example of an animated plot... In 3D!
"""
import numpy as np
import matplotlib.pyplot as plt
import mpl_toolkits.mplot3d.axes3d as p3
import matplotlib.animation as animation


def Gen_RandLine(length, dims=2):
    """
    Create a line using a random walk algorithm

    length is the number of points for the line.
    dims is the number of dimensions the line has.
    """
    lineData = np.empty((dims, length))
    lineData[:, 0] = np.random.rand(dims)   # 初始化起点
    for index in range(1, length):
        # scaling the random numbers by 0.1 so
        # movement is small compared to position.
        # subtraction by 0.5 is to change the range to [-0.5, 0.5]
        # to allow a line to move backwards.
        step = ((np.random.rand(dims) - 0.5) * 0.1)  # 步长
        # 下一步的位置
        lineData[:, index] = lineData[:, index - 1] + step

    return lineData   # 返回一个shape为(3,25)的数组,3维坐标25帧


def update_lines(num, dataLines, lines):
    for line, data in zip(lines, dataLines):
        # NOTE: there is no .set_data() for 3 dim data...
        line.set_data(data[0:2, :num])
        line.set_3d_properties(data[2, :num])
    return lines

# Attaching 3D axis to the figure
fig = plt.figure()
ax = p3.Axes3D(fig)

# Fifty lines of random 3-D lines  (长为50的数组,每个元素为shape为3,25的ndarray,最后实际效果就是50条路径)
data = [Gen_RandLine(25, 3) for index in range(50)]

# Creating fifty line objects.
# NOTE: Can't pass empty arrays into 3d version of plot()
lines = [ax.plot(dat[0, 0:1], dat[1, 0:1], dat[2, 0:1])[0] for dat in data] # 每条路径的起始点

# Setting the axes properties
ax.set_xlim3d([0.0, 1.0])
ax.set_xlabel('X')

ax.set_ylim3d([0.0, 1.0])
ax.set_ylabel('Y')

ax.set_zlim3d([0.0, 1.0])
ax.set_zlabel('Z')

ax.set_title('3D Test')

# Creating the Animation object
line_ani = animation.FuncAnimation(fig, update_lines, 25, fargs=(data, lines),
                                   interval=50, blit=False)

plt.show()
#!/usr/bin/env python
# -*- coding:utf-8 -*-


from mpl_toolkits.mplot3d import Axes3D
import matplotlib.pyplot as plt
import numpy as np
#初始化图例
fig = plt.figure()
ax = fig.add_subplot(111, projection='3d')
#设置X,Y的取值
r = [2,2]
p = np.linspace(0, 2*np.pi, 64)
R, P = np.meshgrid(r, p)
X, Y = R * np.cos(P), R * np.sin(P)
r1=[1,0]
#设置Z的范围
ax.set_zlim(0, 10)
try:
    while True:
        #清除原有图像
        plt.cla()
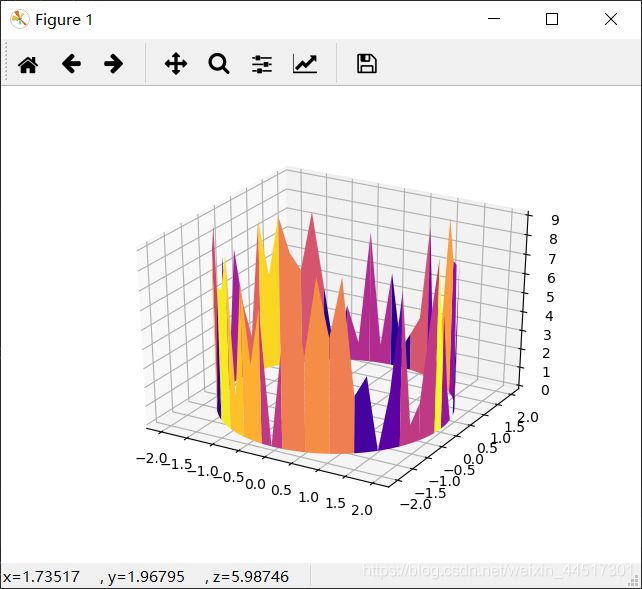
        p1 = np.random.randint(10, size=64)
        R1, P1 = np.meshgrid(r1, p1)
        #设置Z值
        Z = R1*P1
        #画3D图
        ax.plot_surface(X, Y, Z, cmap=plt.cm.plasma)
        #通过暂停和清除来不断更新图像,形成动图
        plt.pause(0.5)
except:
    pass
import matplotlib.pyplot as plt
import matplotlib.animation as animation
import numpy as np

plt.style.use('dark_background')

fig = plt.figure()
ax = plt.axes(xlim=(-50, 50), ylim=(-50, 50))
line, = ax.plot([], [], lw=2)


# initialization function
def init():
    # creating an empty plot/frame
    line.set_data([], [])
    return line,


# lists to store x and y axis points
xdata, ydata = [], []


# simulate ghost effect of oscilloscope
def ghostImage(x, y):
    xdata.append(x)
    ydata.append(y)
    if len(xdata) > 60:
        del xdata[0]
        del ydata[0]
    return xdata, ydata


# animation function
def animate(i):
    # t is a parameter
    t = i / 100.0

    # x, y values to be plotted
    x = 40 * np.sin(2 * 2 * np.pi * (t + 0.3))
    y = 40 * np.cos(3 * 2 * np.pi * t)

    # appending new points to x, y axes points list

    line.set_data(ghostImage(x, y))
    return line,


# setting a title for the plot
plt.title('Creating a Lissajous figure with matplotlib')
# hiding the axis details
plt.axis('off')

# call the animator
anim = animation.FuncAnimation(fig, animate, init_func=init,
                               frames=400, interval=20, blit=True)

# save the animation as gif file
anim.save('figure.gif', writer='imagemagick')

然后使用ImageMagick的convert命令,将多幅静态帧转换成gif,使用以下命令:
convert -delay 10 *.png gif.gif


