pxe+kickstart无人值守安装操作系统
作者:吴业亮
博客:http://blog.csdn.net/wylfengyujiancheng
前言
1、什么是pxe
PXE(preboot execute environment,预启动执行环境)是由Intel公司开发的技术,工作于Client/Server的网络模式,支持工作站通过网络从远端服务器下载映像,并由此支持通过网络启动操作系统,在启动过程中,终端要求服务器分配IP地址,再用TFTP(trivial file transfer protocol)或MTFTP(multicast trivial file transfer protocol)下载一个启动软件包到本机内存中执行,由这个启动软件包完成终端(客户端)基本软件设置,从而引导预先安装在服务器中的终端操作系统。
2.流程图
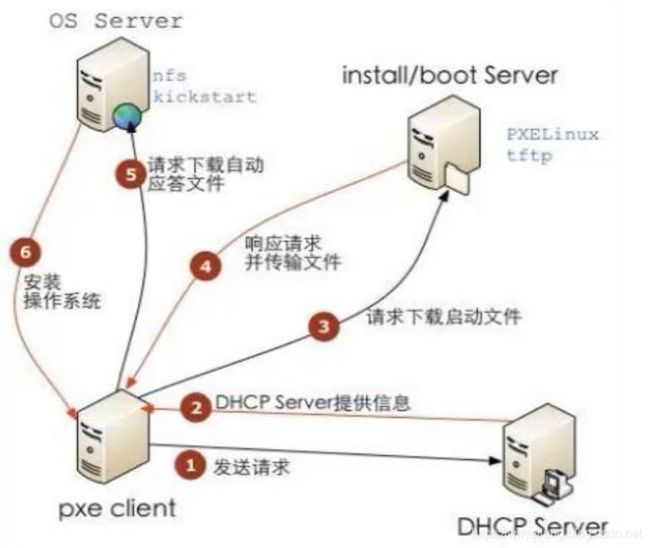
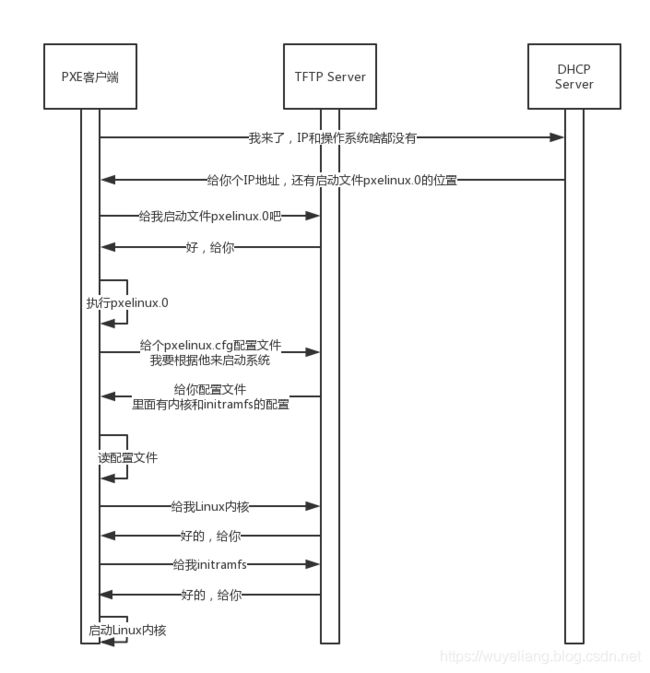
原理介绍:
1)、Client向PXE Server上的DHCP发送IP地址请求消息,DHCP检测Client是否合法(主要是检测Client的网卡MAC地址),如果合法则返回Client的IP地址,同时将启动文件pxelinux.0的位置信息一并传送给Client

2)、Client向PXE Server上的TFTP发送获取pxelinux.0请求消息,TFTP接收到消息之后再向Client发送pxelinux.0大小信息,试探Client是否满意,当TFTP收到Client发回的同意大小信息之后,正式向Client发送pxelinux.0

3)、Client执行接收到的pxelinux.0文件

4)、Client向TFTP Server发送针对本机的配置信息文件(在TFTP服务的pxelinux.cfg目录下,这是系统菜单文件,格式和isolinux.cfg格式一样,功能也是类似),TFTP将配置文件发回Client,继而Client根据配置文件执行后续操作。

5)、Client向TFTP发送Linux内核请求信息,TFTP接收到消息之后将内核文件发送给Client

6)、Client向TFTP发送根文件请求信息,TFTP接收到消息之后返回Linux根文件系统

7)、Client启动Linux内核

8)、Client下载安装源文件,读取自动化安装脚本
| 节点信息 | 备注 |
|---|---|
| server | 192.168.8.2/24 gw:192.168.8.1 |
| client | 被安装机器 |
下列步骤如果为了方便也可以关闭selinux和firewalld
1、关闭selinux
# setenforce 0
# sed -i.bak "s/SELINUX=enforcing/SELINUX=disabled/g" /etc/selinux/config
2、关闭防火墙
# service firewalld stop
# chkconfig firewalld off
一、安装tftp
1、安装tftp包
# yum -y install syslinux xinetd tftp-server
2、创建目录
# mkdir /var/lib/tftpboot/pxelinux.cfg
3、将pxelinux.0拷贝到/var/lib/tftpboot/
# cp /usr/share/syslinux/pxelinux.0 /var/lib/tftpboot/
4、修改配置文件/etc/xinetd.d/tftp
disable = no
5、启动服务并设置开机启动
# systemctl restart xinetd
# systemctl enable xinetd
二、安装dhcp
1、安装dhcp包
# yum -y install dhcp
2、修改配置文件/etc/dhcp/dhcpd.conf
# create new
# specify domain name
option domain-name "wyl.com";
# specify name server's hostname or IP address
option domain-name-servers server.wyl.com;
# default lease time
default-lease-time 600;
# max lease time
max-lease-time 7200;
# this DHCP server to be declared valid
authoritative;
# specify network address and subnet mask
subnet 192.168.8.0 netmask 255.255.255.0 {
    # specify the range of lease IP address
    range dynamic-bootp 192.168.8.100 192.168.8.200;
    # specify broadcast address
    option broadcast-address 192.168.8.255;
    filename        "pxelinux.0";
    next-server     192.168.8.2;
    option domain-name-servers 114.114.114.114;
    # specify default gateway
    option routers 192.168.8.1;
}
3、启动服务并设置开机启动
# systemctl restart dhcpd   tftp
# systemctl enable dhcpd tftp
4、设置防火墙
# firewall-cmd --add-service=dhcp --permanent
success
# firewall-cmd --add-port=69/udp --permanent
success
# firewall-cmd --reload
success
三、安装http
1、安装http包
# yum -y install httpd
2、删除主页文件
# rm -f /etc/httpd/conf.d/welcome.conf
3、启动服务并设置开机启动
# systemctl restart httpd
# systemctl enable httpd
4、配置防火墙
# firewall-cmd --add-service=http --permanent
success
# firewall-cmd --reload
success
四、配置源
1、将CentOS-7-x86_64-DVD-1804.iso通过ftp工具上传到server上
2、挂载镜像
# mount -t iso9660 -o loop CentOS-7-x86_64-DVD-1804.iso /var/www/html
3、拷贝文件
# mkdir  /var/lib/tftpboot/centos7
# cp /var/www/html/images/pxeboot/vmlinuz /var/lib/tftpboot/centos7/
# cp /var/www/html/images/pxeboot/initrd.img /var/lib/tftpboot/centos7/
# cp /usr/share/syslinux/menu.c32 /var/lib/tftpboot/
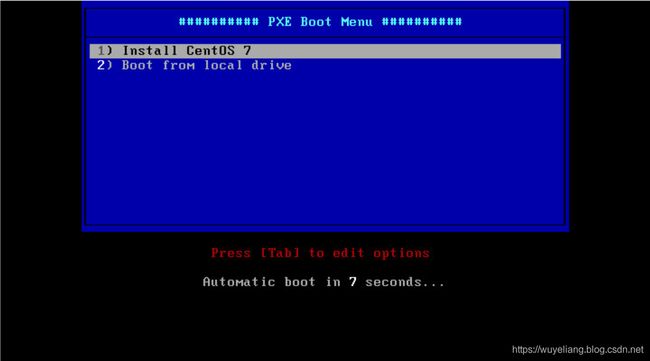
4、创建配置文件/var/lib/tftpboot/pxelinux.cfg/default
# create new
timeout 100
default menu.c32

menu title ########## PXE Boot Menu ##########
label 1
   menu label ^1) Install CentOS 7
   kernel centos7/vmlinuz
   append initrd=centos7/initrd.img method=http://192.168.8.2 devfs=nomount

label 2
   menu label ^2) Boot from local drive
   localboot
注意:修改method地址
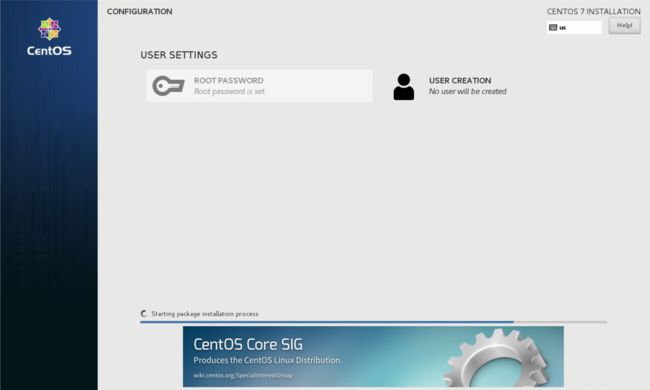
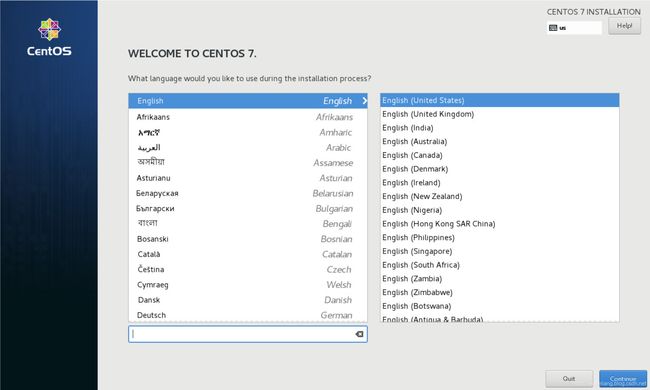
五、测试安装

六、配置自动化安装
1、创建/etc/httpd/conf.d/pxe.conf,内容如下
Alias /pxe /var/www/pxe

    Options +Indexes
    Require all granted
重启httpd
service httpd restart
2、创建目录
mkdir /var/www/pxe
3、生成密码,下面步骤4用到
# openssl rand  -hex 10
420683fbd4385c87a078

# openssl passwd -1 -salt  '420683fbd4385c87a078'  'Changeme_123'
$1$420683fb$vyVjo6DcRKZe/4fck9wIn0
4、创建ks配置文件 /var/www/pxe/centos7-ks.cfg
# create new
install
# automatically proceed for each steps
autostep
# reboot after installing
reboot
# encrypt algorithm
auth --enableshadow --passalgo=sha512
# installation source
url --url=http://192.168.8.2  #修改项
# install disk
ignoredisk --only-use=sda
# keyboard layouts
keyboard --vckeymap=us --xlayouts='us'
# system locale
lang en_US.UTF-8
# network settings
network --bootproto=dhcp --ipv6=auto --activate --hostname=localhost
# root password you generated above
rootpw --iscrypted $1$420683fb$vyVjo6DcRKZe/4fck9wIn0  #修改项
# timezone
timezone Asia/Shanghai --isUtc --nontp

# initialize all partition tables
zerombr
clearpart --all --initlabel


# bootloader's settings
bootloader --location=mbr --boot-drive=sda
# initialize all partition tables
#zerombr
#clearpart --all --initlabel
# partitioning
part /boot --fstype="xfs" --ondisk=sda --size=500
part pv.10 --fstype="lvmpv" --ondisk=sda --size=51200
volgroup VolGroup --pesize=4096 pv.10
logvol / --fstype="xfs" --size=20480 --name=root --vgname=VolGroup
logvol swap --fstype="swap" --size=4096 --name=swap --vgname=VolGroup
%packages
@core
%end
备注:
1)、密码定义,如果密码不加密可以在下面这么写密码:
rootpw 123456
2)、根分区用所有空间写法
part /boot --fstype="xfs" --ondisk=sda --size=1024
volgroup cl --pesize=4096 pv.10
part pv.10 --fstype="lvmpv" --ondisk=sda --grow
logvol / --fstype="xfs" --size=1 --grow --name=root --vgname=cl
5、修改权限
chmod 644 /var/www/pxe/centos7-ks.cfg
6、修改/var/lib/tftpboot/pxelinux.cfg/default
timeout 100
default menu.c32
menu title ########## PXE Boot Menu ##########
label 1
   menu label ^1) Install CentOS 7
   kernel centos7/vmlinuz
   # change: specify Kickstart file
   append initrd=centos7/initrd.img ks=http://192.168.8.2/pxe/centos7-ks.cfg #修改项
label 2
   menu label ^2) Boot from local drive
   localboot
7、安装机器