某验通杀js版,流程各个验证码那对应的js分析,你确定不进来看看(滑动)?
你只管努力,剩下的交给天意。
文章只提供学习,如有侵权请立即联系我。
前言
某验官网:官网
总体来说某验的验证码配合js总共分为三套
- 无感(fullpage.js)无感分析
- 滑动(sense.js)滑动分析
- 点选(click.js)点选and整合
总体来说就分为这三种,当前了点选还分了文字,语序,图标,九空格,空间其略有变化的九宫格其他的一模一样可以使用同一套js解决。
这篇文章只写滑动!!!
go!!!go!!!go!!!

进入我上面提供的官网进来点击如下图:

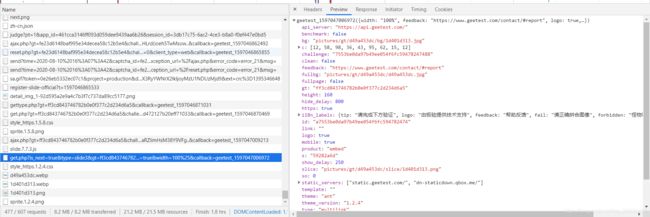
直接获取gt和challenge
url_startCaptcha = f"https://www.geetest.com/demo/gt/register-slide-official?t={int(time.time()*1000)}"
然后获取图片相关信息的链接
data = {
        'is_next':True,
        'type':'slide3',
        'gt':startCaptcha_data['gt'],
        'challenge':startCaptcha_data['challenge'],
        'https':True,
        'protocol':'https://',
        'offline':'false',
        'product':'embed',
        'api_server':'api.geetest.com',
        'isPC':True,
        'width':'100%',
        'callback':'geetest_' + str(int(time.time()*1000))
    }

    url = "https://api.geetest.com/get.php"
response_img_json = json.loads(re.findall('geetest_(\d+)\((.*)\)', response_img_json.text)[0][1])

    # print(response_img_json,'"???????')
    img_1 = response_img_json['fullbg']
    img_2 = response_img_json['bg']
    challenge = response_img_json['challenge']
    gt = response_img_json['gt']

    headers_picture = {
        'Proxy-Connection': 'keep-alive',
        'Pragma': 'no-cache',
        'Cache-Control': 'no-cache',
        'User-Agent': 'Mozilla/5.0 (Windows NT 10.0; Win64; x64) AppleWebKit/537.36 (KHTML, like Gecko) Chrome/83.0.4103.116 Safari/537.36',
        'Accept': 'image/webp,image/apng,image/*,*/*;q=0.8',
        'Referer': 'https://www.geetest.com/show',
        'Accept-Language': 'zh-CN,zh;q=0.9',
    }
    picture_url_1 = 'https://static.geetest.com/' + img_1 + '?'+challenge

    picture_url_2 = 'https://static.geetest.com/' + img_2 + '?'+challenge

    path = []
    response_picture_1 = my_request.request("GET", picture_url_1, headers=headers_picture,verify=False)
    response_picture_2 = my_request.request("GET", picture_url_2, headers=headers_picture,verify=False)
然后获取到的图片是顺序是乱的我们先还原图片原来的模样,然后进行rgb对比获取缺口的位置。

    def core(path,index):
        # js中获取到拼图还原的顺序
        position = [
            [157, 80, 167, 160], [145, 80, 155, 160], [265, 80, 275, 160],
            [277, 80, 287, 160], [181, 80, 191, 160], [169, 80, 179, 160],
            [241, 80, 251, 160], [253, 80, 263, 160], [109, 80, 119, 160],
            [97, 80, 107, 160], [289, 80, 299, 160], [301, 80, 311, 160],
            [85, 80, 95, 160], [73, 80, 83, 160], [25, 80, 35, 160],
            [37, 80, 47, 160], [13, 80, 23, 160], [1, 80, 11, 160],
            [121, 80, 131, 160], [133, 80, 143, 160], [61, 80, 71, 160],
            [49, 80, 59, 160], [217, 80, 227, 160], [229, 80, 239, 160],
            [205, 80, 215, 160], [193, 80, 203, 160], [145, 0, 155, 80],
            [157, 0, 167, 80], [277, 0, 287, 80], [265, 0, 275, 80],
            [169, 0, 179, 80], [181, 0, 191, 80], [253, 0, 263, 80],
            [241, 0, 251, 80], [97, 0, 107, 80], [109, 0, 119, 80],
            [301, 0, 311, 80], [289, 0, 299, 80], [73, 0, 83, 80],
            [85, 0, 95, 80], [37, 0, 47, 80], [25, 0, 35, 80],
            [1, 0, 11, 80], [13, 0, 23, 80], [133, 0, 143, 80],
            [121, 0, 131, 80], [49, 0, 59, 80], [61, 0, 71, 80],
            [229, 0, 239, 80], [217, 0, 227, 80], [193, 0, 203, 80],
            [205, 0, 215, 80]
        ]
        # js中获取到新图片的位置
        mm = [
            [0, 0], [10, 0], [20, 0], [30, 0],
            [40, 0], [50, 0], [60, 0], [70, 0],
            [80, 0], [90, 0], [100, 0], [110, 0],
            [120, 0], [130, 0], [140, 0], [150, 0],
            [160, 0], [170, 0], [180, 0], [190, 0],
            [200, 0], [210, 0], [220, 0], [230, 0],
            [240, 0], [250, 0], [0, 80], [10, 80],
            [20, 80], [30, 80], [40, 80], [50, 80],
            [60, 80], [70, 80], [80, 80], [90, 80],
            [100, 80], [110, 80], [120, 80], [130, 80],
            [140, 80], [150, 80], [160, 80], [170, 80],
            [180, 80], [190, 80], [200, 80], [210, 80],
            [220, 80], [230, 80], [240, 80], [250, 80]
        ]
        path_full = []
        for k,i in enumerate(path):
            img = Image.open(i)
            to_image = Image.new('RGB', (260, 160))
            for index, p in enumerate(position):
                cropped = img.crop(tuple(p))  # (left, upper, right, lower)
                to_image.paste(cropped, (mm[index][0], mm[index][1]))
            to_image.save(f'{k}.jpg')
            path_full.append(to_image)

        def is_similar_color(x_pixel, y_pixel):
            # 颜色对比
            if sum(np.abs(np.array(x_pixel) - np.array(y_pixel))) >= 200:
                return True

        # 计算距离
        def get_offset_distance(cut_image, full_image,index):
            for x in range(cut_image.width):
                for y in range(cut_image.height):
                    cpx = cut_image.getpixel((x, y))
                    fpx = full_image.getpixel((x, y))
                    if is_similar_color(cpx, fpx):
                        img = full_image.crop((x, y, x + 45, y + 40))
                        # 保存一下计算出来位置图片,看看是不是缺口部分
                        img.save("3.jpg")
                        # return [{"x": x+15, "y": random.randint(-3, 3)}]
                        # return [{"x": x-7, "y": random.randint(-3, 3)}]
                        return [{"x": x-6, "y": random.randint(-3, 3)}]

        return get_offset_distance(path_full[0], path_full[1],index)
至此我们已经还原了图片以及获取到到了图片的缺口位置,接下来就是js了。
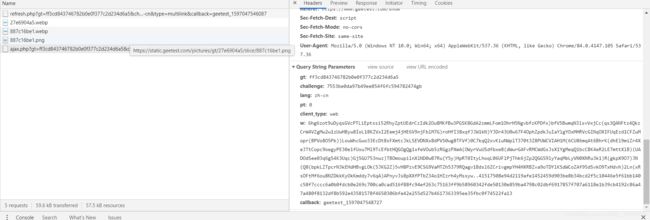
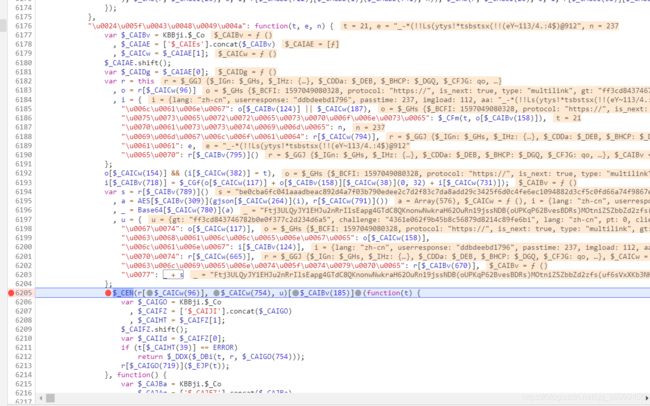
不过执行他的却并不是fullpage.js这js的执行的请求了。

跟无感一样我们先还原js,依然用我们的ast,先看看slide.js的结构。

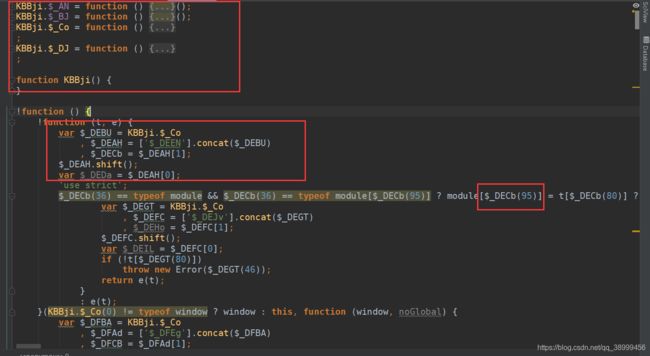
没错跟fullpage.js一样的,那么无感的那套ast就可以还原它,不过需要替换一下字符串模型。

还原之后我们直接搜索challenge,会发下这个跟我们想要的参数一模一样。

那ok,我们去线上debugger一下看看是不是这里。
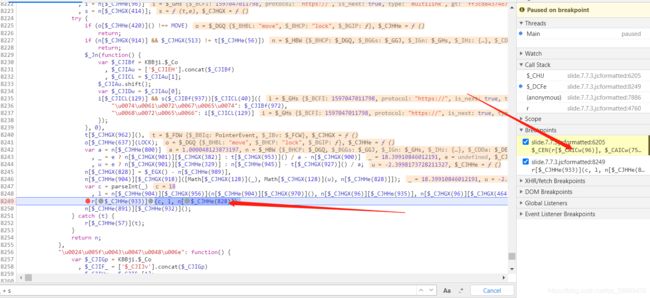
根据还原的代码很容易就找到了,这个点。

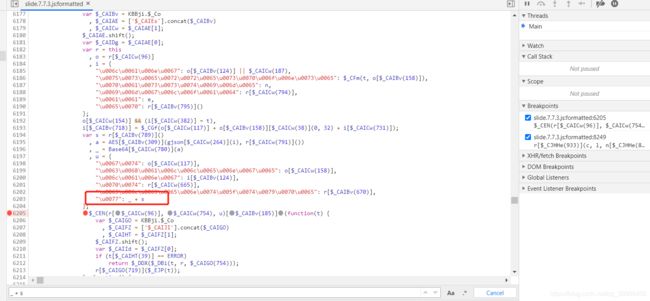
滑动之后发现确实是这里没错!!一下就找到了(美滋滋)。
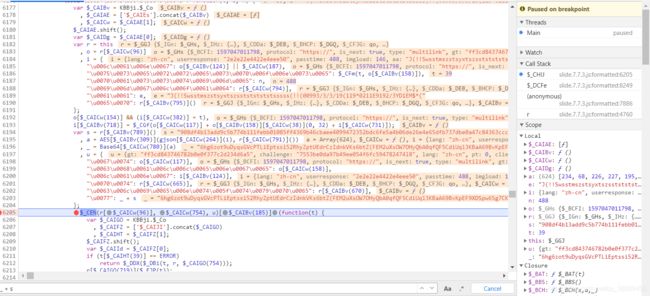

那ok看看都需要什么条件才能生成这个参数呢。
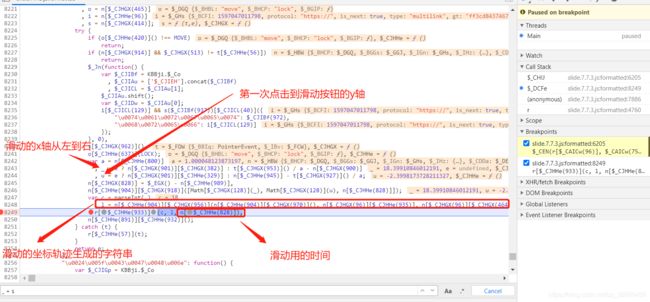
这里调用了这个函数给他穿了三个参数,先瞅瞅这三个参数都是什么。
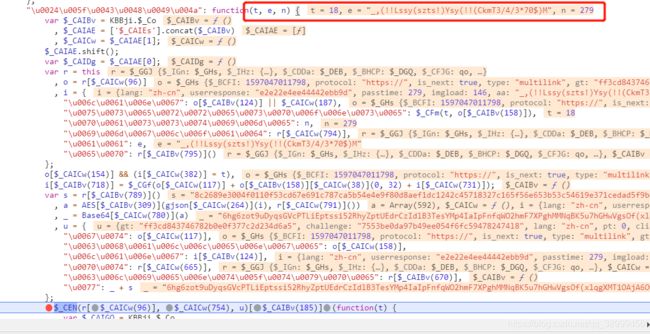
还是一样点击调用栈看看,原来如此。
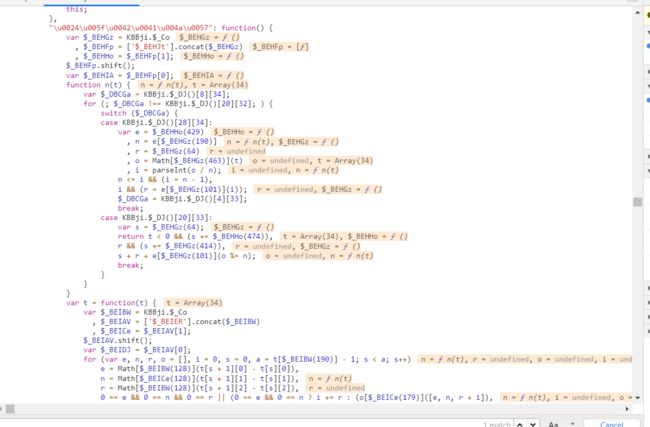
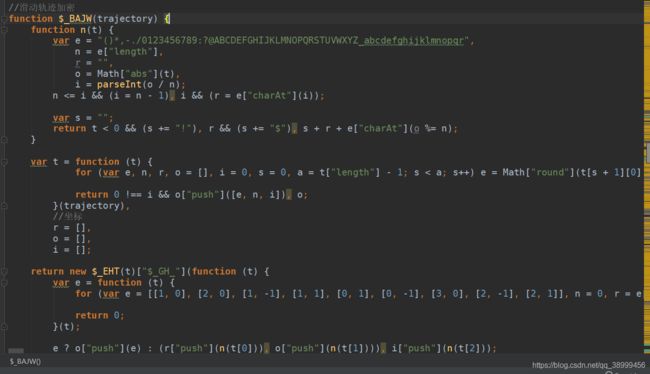
到这里有一个执行函数并且传了我滑动的轨迹。
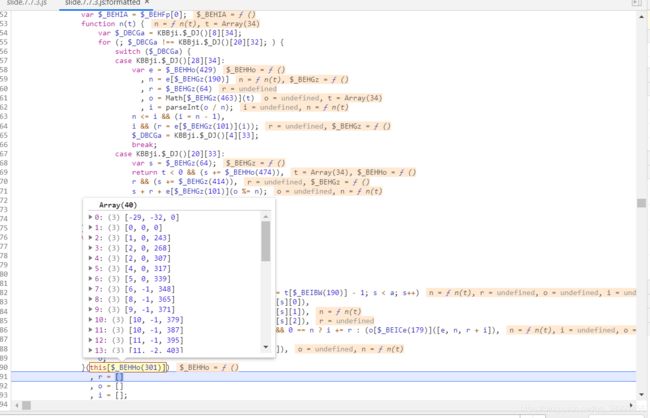
我们需要模拟一下这个操作因为某验验证了这个滑动的轨迹。
想象一下,你滑动时候的操作,先滑动的快,然后慢,有可能滑动的超过了缺口的外置在回到正确的缺口位置,对吗?ps:-.-| 不会gif图大家想象一下这个操作。
所以我这里给了,原本传入的XY坐标添加了超过位置和起点位置。
 xy.unshift({x: xy[0]['x'] + RandomNum(9, 15), y: RandomNum(-5, 5)});
 xy.unshift({x: 0, y: 0});
下面是滑动轨迹,识别率一般般,你可以自己改动。
// 滑动轨迹
function new_generateTrace_slide(position) {
    var new_p_list = [],
        my_t = 0;
    for (const i in position) {
        if (parseInt(i) === position.length - 1) break;
        var p_x_1 = position[i]['x'],
            p_x_2 = position[parseInt(i) + 1]['x'],
            flag = true;
        if (p_x_1 > p_x_2) {
            flag = false;
        }
        while (true) {
            if (flag) {
                if (p_x_1 >= p_x_2) break;
                if (p_x_2 - p_x_1 < 10) {
                    my_t += RandomNum(30, 90);
                    p_x_1 += RandomNum(0, 1);
                    new_p_list.push([p_x_1, RandomNum(-2, 3), my_t])
                } else {
                    my_t += RandomNum(9, 30);
                    p_x_1 += RandomNum(5, 7);
                    new_p_list.push([p_x_1, RandomNum(0, 1), my_t])
                }
            } else {
                if (p_x_1 <= p_x_2) break;
                if (p_x_1 - p_x_2 < 10) {
                    my_t += RandomNum(20, 60);
                    p_x_1 -= RandomNum(0, 1);
                    new_p_list.push([p_x_1, RandomNum(-2, 3), my_t])
                } else {
                    my_t += RandomNum(15, 30);
                    p_x_1 -= RandomNum(2, 4);
                    new_p_list.push([p_x_1, RandomNum(0, 1), my_t])
                }
            }
        }

    }
    ;
    new_p_list.unshift([0, 0, 0]);
    new_p_list.unshift([RandomNum(-35, -45), RandomNum(-35, -45,), 0]);
    return new_p_list;
}
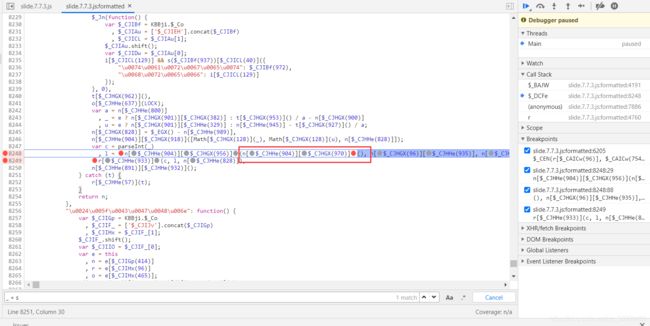
我们根据还原的js来生成这个轨迹加密的字符串
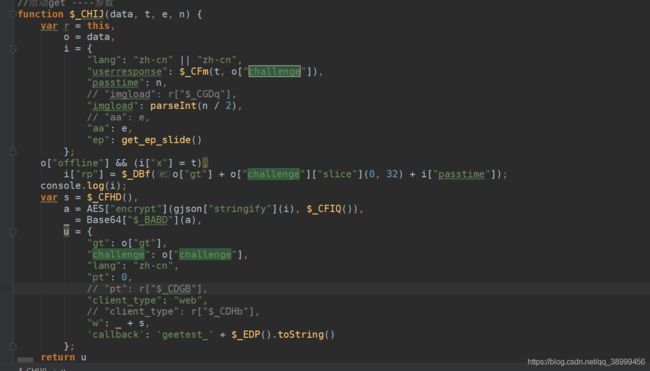
这个data值就是获取你在get请求get.php这个链接的时候给你返回对象。
这里ep的值写死就可以,我自己闲的非要操作一下-、-(如果你想也可以用这样的)
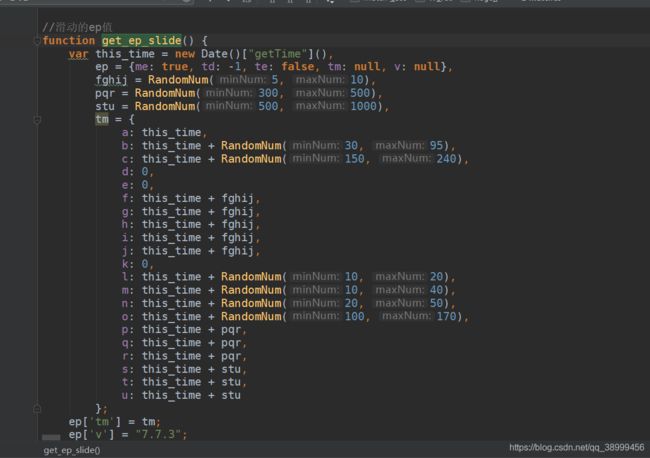
至此滑动的就结束了,其他的需要用的函数就缺什么补什么就好了,不需要其他的操作了!!!

小彩蛋:图片还原的坐标在slide.js里面,你们可以尝试去去找找-。-
如有错误的地方请及时联系我-
