angular基础+登陆+路由守卫的校验
Angular框架:
1.历史:Angular起源于2009年Misko hevery和Adam Abrons两位在业余时间开发.当时Misko Hevery使用GetAngular重写了Google内部的Feedback项目,由原来的代码量17000行3周时间重构到1500行,之后正式立项,创建专职团队来开发和维护.
Angularjs1.0.0于12年月正式推出,亮点在于功能基本齐全,如双向绑定,依赖注入,指令等.
AngularJS1.3x放弃支持IE8浏览器,推出了单次绑定语法
AngularJS1.5x增加类似组件式书写体验:主要视为过度Angular做铺垫.等等,其一直在迭代发展.
AngularJS1.x的困境:
当页面的数据过多会出现性能方面的问题.
落后于当前Web发展理念:如组件开发方式等 .
对手机端支持不够友好
2014年9月下旬Angular2在NG-Europe大会上正式亮相.
2.Angular2新特性:
移除了controller+$dcope设计,改用组件式开发;
性能更好:渲染更快,变化监测效率更高;
优先为移动应用设计:Angular Mobile Toolkit
更加贴合未来的标准如(ES6/7//WebComponent
无缝升级方案:UpgradeAdapter: 推出了adapter适配器,加载在模板上下文当中,可以随时加入到组件中.并且在指令升级上,提供了支持版本识别.能够在angular1,和2之间识别.
3.Angular2核心:组件,元数据,模板,数据绑定,服务,指令,依赖注入,模块. 组件(Components是最核心元素,其他核心为其提供服务.
a.组件:层层嵌套形成组件树.每个组件独立完成各自的功能,可以各自定义自己的输入输出接口(javascript,html,css),可以上下之间交互.
生命周期:Constructor构造器初始化,>>OnChanges第一次触发数据变化,>>OnInit组件初始化,>>OnChanges运行期间触发数据变化,>>OnDestory组件销毁前等
组件示例:
import Component
@Component({ //装饰器
selector: 'hello', //元数据
template: '
{{greeting}}
'})
export class HelloComponent{ //组件类
private greeting: string;
constructor(){
this.greeting= 'Hello, Angular 2!';
}
}
@Component装饰器:赋予一个类更丰富的数据
数据绑定:
{{greeting}}>>插值表达式
属性绑定: [value]
事件绑定:
属性绑定和事件绑定属于单向绑定
双向绑定:
组件渲染: selector: 'a'>>能够匹配标签而template模板中的'
{{greeting}}
'又能展现数据:
Hello,Angular 2!
父子组件之间也可以根据selector的标签来关联:
Parent 组件包含son组件
@Component({
selector: 'son'
template: '...'
})
export class SonComponent{
@Input() data: Ison;
}
@Component({
selector: 'son-list',
template: '
'
})
b.指令:属性指令:改变组件模板的外观或者行为,如样式等
结构指令:改变组件模板的DOM结构,如nglf(内置指令)用来插入或者一处DOM节点
组件继承于指令但是组件自身带有模板的指令
登陆部分:
准备:
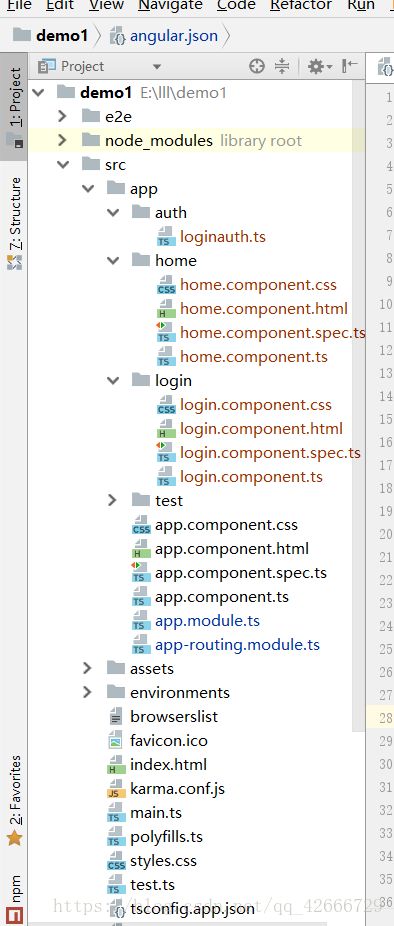
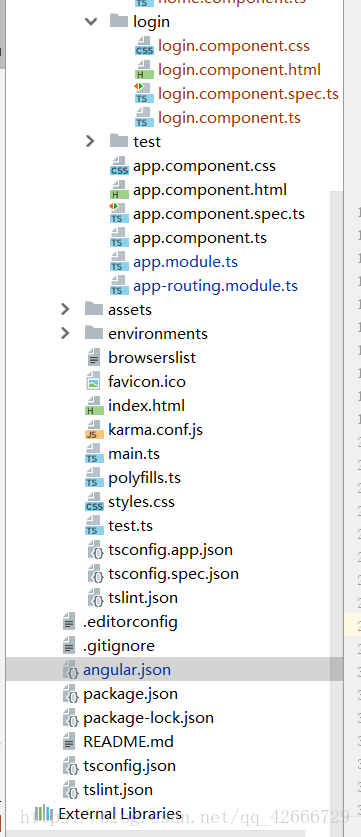
a. 执行命令ng new dome --routing 创建一个带路由的项目.
b.在路由中分别建两个组件login和home :ng g component login 和home
c.在创建一个和home组件平级的文件夹auth,内部创建:new>TypeScripts file 起名叫:loginauth.ts,用来做路由守卫
具体思路:点击按钮登陆(click)="login",,[{ngMoodel}] 双向绑定,,传参到login.component.ts中,将参数转换成json对象:JSON.stringify,,将其放到sessionStorage中.setItem以键值对形式注入.路由跳转到成功页面:this.router.navigateByUrl('/home');
此过程中如果进行页面跳转需要路由守卫来验证,如果sessionStorage中有用户登陆则执行跳转到成功的home.html,反之跳转到login.html中.
具体细节注意:在login.component.ts中创建User类,定义相应的对象,给定构造方法,且初始化User对象.
具体代码:
第一步:登陆的页面:login.component.html:
第二步:登陆的后台:login.component.ts:
import { Component, OnInit } from '@angular/core';
import {Router} from '@angular/router';
export class User {
public uId: string;
public userName: string;
public upwd: string; }
@Component({
selector: 'app-login', t
emplateUrl: './login.component.html',
styleUrls: ['./login.component.css'] })
export class LoginComponent implements OnInit {
user: User;
constructor(public router: Router) {
this.user = {userName: '', upwd: '' , uId: ''}; }
ngOnInit() { } login() {
// 验证(后台请求 console.log('login()---------------');
alert(this.user.userName); const userStr: string = JSON.stringify(this.user);
sessionStorage.setItem( 'user', userStr ); this.router.navigateByUrl('/home'); } }
第三步:设置路由守卫:校验登陆
auth文件:loginauth.ts中:
/// | Promise | boolean {
const userStr = sessionStorage.getItem('user');
const user: User = JSON.parse(userStr);
if (user && user.userName) {
alert(user.userName);
console.log('路由守卫验证通过!');
alert('路由守卫验证通过!');
return true;
} else {
console.log('路由守卫验证失败!');
alert('路由守卫验证失败!');
this.router.navigateByUrl('/login');
return false;
}
}
} 第四步:登陆成功跳转到home.component.html中:
登陆成功!
期间还要设置的有:[(ngModel)] 双向绑定的设置:
import { BrowserModule } from '@angular/platform-browser';
import { NgModule } from '@angular/core';

import { AppRoutingModule } from './app-routing.module';
import { AppComponent } from './app.component';
import { HomeComponent } from './home/home.component';
import { TestComponent } from './test/test.component';
import { LoginComponent } from './login/login.component';
import {FormsModule, ReactiveFormsModule} from '@angular/forms';
import {LoginAuth} from './auth/loginauth';

@NgModule({
  declarations: [
    AppComponent,
    HomeComponent,
    TestComponent,
    LoginComponent
  ],
  imports: [
    BrowserModule,            //此处四条是[(ngModel)] 需要配置的条件
    FormsModule,
    ReactiveFormsModule,
    AppRoutingModule
  ],
  providers: [LoginAuth],   //这个加载的是路由守卫
  bootstrap: [AppComponent]
})
export class AppModule { }
第五步(应该是第一步,此处为大前提,来保证对应的组件之间能够正确跳转)):
import { NgModule } from '@angular/core';
import { Routes, RouterModule } from '@angular/router';
import {LoginComponent} from './login/login.component';
import {HomeComponent} from './home/home.component';
import {LoginAuth} from './auth/loginauth';

const routes: Routes = [
  {path : '', redirectTo: '/home', pathMatch: 'full'},       //如果路径为空,则默认重定向到home中,但是会碰到路由守卫校验
  {path : 'login', component: LoginComponent},               //如果路径中为login,则跳到LoginComponent组件中
  {path : 'home', component: HomeComponent, canActivate: [LoginAuth]}, //如果路径中为home,则跳到HomeComponent组件中,
                                                                       //此处的canActivate加入路由守卫:进入home前校验
];

@NgModule({
  imports: [RouterModule.forRoot(routes)],     //路由+插座的定向
  exports: [RouterModule]
})
export class AppRoutingModule { }

