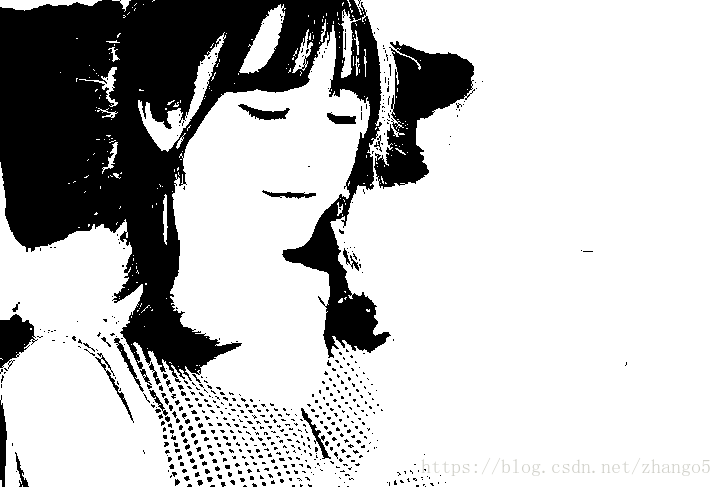
Qt对图像的二值化处理
学习一下图像处理的基础算法,写下来总结一下:
1. 灰度图像
二值化图像的第一步是先将彩色图片转变为灰度图像,灰度图像算法如下:
*以上内容来自百度
2. 图像二值化
二值化是先设定一个阈值,然后将灰度图像中每个像素的颜色值与阈值相比较,小于阈值的设置为0(黑色),大于等于的则设为255(白色);这个阈值可以设定为固定值,也可以是像素平均值,我这里使用otsu算法,查找出合适的阈值。
源码如下:
binarization.h
#ifndef CBINARIZATION_H
#define CBINARIZATION_H

#include
#include

using namespace std;

class CBinarization
{
public:
    CBinarization(QString imgPath);

    QImage* grayScaleImg();
    int Otsu(QImage* img);
    QImage* process(QImage* img);
    int     threshold;

private:
    QImage* _img;

    vector Histogram(QImage* img);
};

#endif // CBINARIZATION_H
binarization.cpp
#include "cbinarization.h"

CBinarization::CBinarization( QString imgPath )
    : threshold(0)
{
    // 加载图片
    _img = new QImage();
    if (NULL != _img)
    {
        _img->load(imgPath);
    }
}

// 生成灰度图像
QImage* CBinarization::grayScaleImg()
{
    if (NULL == _img)
    {
        return NULL;
    }
    int nWidth = _img->width();
    int nHeight = _img->height();

    // 这里留意,我使用了QImage::Format_Grayscale8格式的图片,这种图片每个像素只用了8bit存储灰度颜色值
    QImage* grayImg = new QImage(nWidth, nHeight, QImage::Format_Grayscale8);
    QRgb rgbVal = 0;
    int grayVal = 0;

    for (int x = 0; x < nWidth; ++x)
    {
        for (int y = 0; y < nHeight; ++y)
        {
            rgbVal = _img->pixel(x, y);

            grayVal = qGray(rgbVal);    // 这里调用Qt的函数,使用(R * 11 + G * 16 + B * 5)/32的方法计算

            grayImg->setPixel(x, y, QColor(grayVal, grayVal, grayVal).rgb());
        }
    }

    return grayImg;
}

int CBinarization::Otsu(QImage* img)
{
    if (NULL == img)
    {
        return -1;
    }
    vector histogram = Histogram(img);
    int total = 0;
    for (int i = 0; i != histogram.size(); ++i)
    {
        total += histogram[i];
    }

    double sum = 0.0;
    for (unsigned int i = 1; i < histogram.size(); ++i)
        sum += i * histogram[i];
    double sumB = 0.0;
    double wB = 0.0;
    double wF = 0.0;
    double mB = 0.0;
    double mF = 0.0;
    double max = 0.0;
    double between = 0.0;
    double threshold = 0.0;
    for (int i = 0; i != 256; ++i)
    {
        wB += histogram[i];
        if (wB == 0)
            continue;
        wF = total - wB;
        if (wF == 0)
            break;
        sumB += i * histogram[i];
        mB = sumB / wB;
        mF = (sum - sumB) / wF;
        between = wB * wF * (mB - mF) * (mB - mF);
        if ( between > max )
        {
            threshold = i;
            max = between;
        }
    }
    return threshold;
}

QImage* CBinarization::process(QImage* img)
{
    if (NULL == img)
    {
        return NULL;
    }
    int width = img->width();
    int height = img->height();
    int bytePerLine = img->bytesPerLine();    // 每一行的字节数
    unsigned char *data = img->bits();
    unsigned char *binarydata = new unsigned char[bytePerLine * height];

    unsigned char g = 0;
    for (int i = 0; i < height; ++i)
    {
        for (int j = 0; j < width; ++j)
        {
            g = *(data + i * bytePerLine + j);
            if(int(g) >= threshold)
            {
                binarydata[ i * bytePerLine + j] = 0xFF;
            }
            else
            {
                binarydata[ i * bytePerLine + j] = 0x00;
            }
        }
    }
    QImage *ret = new QImage(binarydata, width, height, bytePerLine, QImage::Format_Grayscale8);
    return ret;
}

std::vector CBinarization::Histogram( QImage* img )
{
    unsigned char* graydata = img->bits();
    vector hist(256);    // 256色
    for (int i = 0; i != img->width(); ++i)
    {
        for (int j = 0; j != img->height(); ++j)
        {
            int index = int(*graydata);
            hist[index] += 1;
            graydata += 1;    // step
        }
    }
    graydata = NULL;
    return hist;
}
main.cpp
    CBinarization* binImg = new CBinarization("D:/girl.png");
    if (NULL == binImg)
    {
        return;    // error
    }

    QImage* grayImage = binImg->grayScaleImg();

    if (NULL == grayImage)
    {
        return;    // error
    }

    grayImage->save("D:/grayimg.png");

    int threshold = binImg->Otsu(grayImage);    // 这就是计算出的阈值
    if (-1 == threshold)
    {
        return;    // error
    }

    binImg->threshold = threshold;

    QImage* binaryImg = binImg->process(grayImage);

    if (NULL == binaryImg)
    {
        return;    // error
    }

    binaryImg->save("D:/binaryimg.png");
这样就生成灰度图和二值化以后的图:
原图(来自百度,如有侵权,必删):
灰度图:
二值化:
能看出来,二值化以后的图虽然奶茶杯子不见了,但是最重要的女孩还是保留的很好的。
注意:
1. 代码中我生成灰度图的时候使用图片格式为 QImage::Format_Grayscale8 ,Qt助手中给出的解释The image is stored using an 8-bit grayscale format可以看出,这种图片中用8-bit存储灰度值,所以每个像素只有1字节;这里我也试过 QImage::Format_RGB888 格式(The image is stored using a 24-bit RGB format (8-8-8)),这时每个像素有3个字节,这里牵扯后面代码中有不同的地方。
2. 在Otsu生成图像直方图时Histogram函数中,因为我用的Grayscale8的格式,所以数据每次只移动1个字节(step注释处,如果是RGB888,则需要移动3个字节);
3. process函数中 img->bytesPerLine() 返回图片每一行的字节数,Grayscale8格式下与宽度相等,RGB888格式下则等于宽度的3倍;RGB888格式时,代码应修改为以下形式:
    unsigned char g = 0;
    for (int i = 0; i < height; ++i)
    {
        for (int j = 0; j < width; ++j)
        {
            g = *(data + i * bytePerLine + j * 3);    // 这里j 乘以 3
            if(int(g) >= threshold)
            {
                binarydata[ i * bytePerLine + j * 3] = 0xFF;    // 每个色值需要对3个字节赋值
                binarydata[ i * bytePerLine + j * 3 + 1] = 0xFF;
                binarydata[ i * bytePerLine + j * 3 + 2] = 0xFF;
            }
            else
            {
                binarydata[ i * bytePerLine + j * 3] = 0x00;
                binarydata[ i * bytePerLine + j * 3 + 1] = 0x00;
                binarydata[ i * bytePerLine + j * 3 + 2] = 0x00;
            }
        }
    }
每次处理3个字节的数据。
4. 两种格式下生成的图片大小也不同:
但效果看上去是一样的。
非常感谢 keybord_dancer 的 使用Qt实现一个图像处理软件0 ,我是参考他的帖子整理出我的代码。


