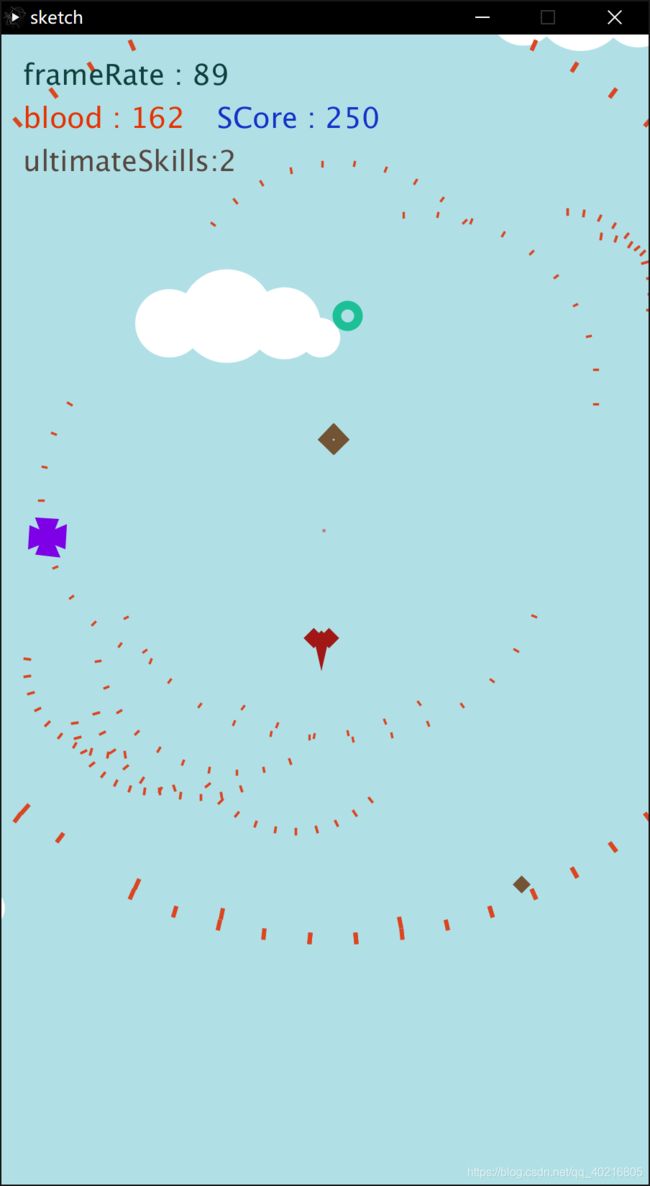
使用processing写一个仿雷电小游戏
Processing编程——仿雷电STG
- 1.前言
- 2.内容展示
- 3.实现过程
- 3.1.背景云彩的随机生成
- 3.2.飞行尾气的实现
- 3.3.击中敌人的粒子效果
- 3.4怪物类
- 3.5.武器系统
- 4.一些问题
- 5.总结
非常幸运这个学期在互动媒体技术这门课上深入的了解了Daniel Shiffman的《代码本色 The Nature of Code》 这本书,在课程最后,老师也是希望我们能利用书中的内容做一个交互应用出来,这就是我们本次博文内容的主题啦。
1.前言
那么怎么才能让这个交互小应用变得足够有趣呢,我思考了很多的表现形式,最终还是回到了我比较熟悉的游戏上来。
当然,可供选择的游戏模式依旧有很多,正好在思考这个问题的几天里,我的网易云推给了我一首FC游戏的bgm,一下子无数回忆涌上心头,就想使用processing仿照着去写一个小时候玩过的《雷电》。
2.内容展示
3.实现过程
首先我们需要实现这个小应用需要什么功能,然后再把这些功能抽象成一个个类,这样实现起来会方便很多。
然后我们可以想到,我们需要的有:子弹类,主角类,云彩类,怪物类,飞机尾气类还有子弹消失的粒子效果类。
这些类别共同构成了我们可以进行交互娱乐的游戏应用,接下来我们就几个关键技术看他们的具体实现。
3.1.背景云彩的随机生成
在这份小游戏中,背景由天蓝色的整体颜色以及白色的云朵组成,在这里我们可以设定云彩的数量上限,然后在每次初始化的时候进行随机生成。
class cloud {
  int num_cloud;
  float[] bgptx;
  float[] bgpty;

  cloud(int num) {
    bgptx = new float[num];
    bgpty = new float[num];
    num_cloud = num;
    for (int i = 0; i<num_cloud; i++) {
      bgptx[i] = random(-width*0.4, boxx+width*0.4);
      bgpty[i] = random(-height*0.4, boxy+height*0.4);
    }
  }

  void update() {
    show();
  }

  void show() {
    for (int i = 0; i<num_cloud; i++) {
      noStroke();
      fill(255);
      ellipse(bgptx[i]+anchordist.x, bgpty[i]+anchordist.y, 130, 130);
      ellipse(bgptx[i]+anchordist.x+80, bgpty[i]+anchordist.y+10, 100, 100);
      ellipse(bgptx[i]+anchordist.x+130, bgpty[i]+anchordist.y+30, 55, 55);
      ellipse(bgptx[i]+anchordist.x-80, bgpty[i]+anchordist.y+10, 95, 95);
    }
  }
}
在这里我们可以看到,cloud在执行构造函数时,每次都会通过random()函数随机地获得一个坐标位置,然后在show()函数中,在这个随机位置上,绘制云彩的图案。
然后我们在背景类中实体化云彩类,最后在主页sketch中调用实体化的背景类——层层调用。
// 背景类的构造函数
background() {
    bds = new bullet_die_particle ();
    cl = new cloud(20);// 每次生成20朵云
  }
// sketch主页上的调用
public background bg;
bg = new background();
void draw() {
    bg.show();
  }
3.2.飞行尾气的实现
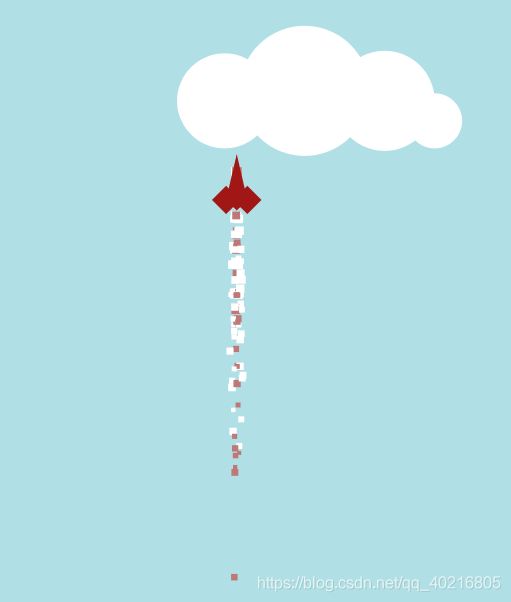
要实现每次按动方向键就能出现飞行尾气,我们首先需要能产生“一条”尾气。
所以我们这里建立两个类,一个onefire,一个powerFire,虽然二者至今没有直接的继承关系,但是由于他们关系密切,我们将他们放在一个标签页中。
这里我们可以想到,对于“一条”尾气来说,他应该有三个参数,位置,速度,以及判断是否处在“加速”状态(方向键按下)。
接下来我们看一下onefire类的构造函数。
onefire(PVector loc0, PVector vel0, boolean powerup) {
    loc = new PVector(loc0.x, loc0.y);
    float anc;
    if (powerup) {
      anc = random(-an08, an08);
      velborn*=1.5;
    } else {
      anc = random(-an16, an16);
    }
    vel = new PVector(vel0.x, vel0.y);
    vel.normalize();
    vel = rotateangle(new PVector(vel.x, vel.y), anc);
    vel.mult(velborn);
    if (powerup) {
      float absanc = abs(anc);
      if (absanc>an32) {
        dieline = normallife+int(random(-10, 10));
        c = c2;
        if (absanc>an16) {
          dieline = shortlife+int(random(-10, 10));
          r*=0.6;
          c = c3;
        }
      } else {
        dieline = lonelife+int(random(-10, 10));
        c = c1;
        r*=1.4;
      }
    } else {
      float absanc = abs(anc);
      if (absanc>an64) {
        dieline = normallife+int(random(-10, 10));
        c = c2;
        if (absanc>an32) {
          dieline = shortlife+int(random(-10, 10));
          c = c3;
        }
      } else {
        dieline = lonelife+int(random(-10, 10));
        c = c1;
      }
    }
  }
这里可以看到,每一条尾气都是由三部分组成,也就是说,三种长短不一的尾气组成了一条尾气。这么介绍下来可能有些绕口,但是应该比较容易理解。
在onefire类中还涉及几种简单的类方法,比如show()绘制尾气,update()在draw()中调用用来更新尾气。
然后我们来看powerFire类
这个类就是将onefire类实体化,同时增加一个add方法,提供给主角类,主角类在加速时,可以调用add方法,在画面上增加尾气。
class powerfire {
  ArrayList<onefire> fire;

  powerfire() {
    fire = new ArrayList<onefire>();
  }

  void update() {
    rectMode(CENTER);
    noStroke();
    for (int i =0; i<fire.size(); i++) {
      onefire ft = fire.get(i);
      if (ft.timer()) {
        fire.remove(i);
      } else {
        ft.update();
        ft.show();
      }
    }
  }

  void addfire(PVector loc, PVector vel, boolean powerup) {
    vel.normalize();
    for (int i = 20; i>0; i--) {
      fire.add(new onefire(new PVector(loc.x, loc.y), new PVector(vel.x, vel.y), powerup));
    }
  }
}
3.3.击中敌人的粒子效果
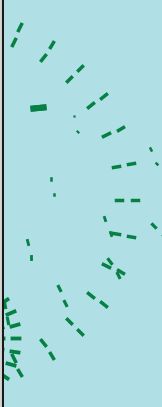
关于这个系统的笼统介绍就是,挡子弹碰到敌人或者墙壁后,可以以散射状绽开。
这里有三个相关类,particleWithoutAcc,bullet_die,bullet_die_particle这三个类。
particleWithoutAcc中主要是一些获得当前子弹的颜色,速度,以及子弹大小的基础方法。
然后在bullet_die中
它继承自particleWithoutAcc类,依靠父类的方法进行初始化,除此之外有一个show()方法,根据子弹大小绘制出子弹碎片。
class bullet_die extends particleWithoutAcc {
  bullet_die(PVector loc, PVector vel, color c) {
    this.loc = new PVector(loc.x, loc.y);
    this.vel = new PVector(vel.x, vel.y);
    setcolor(c);
    setlife(int(framerate*1));
    setrad(4);
  }

  void show() {
    if (!outboder(loc, rad/2)) {
      pushMatrix();
      translate(loc.x+anchordist.x, loc.y+anchordist.y);
      rotate(atan2(-vel.y, -vel.x));
      strokeWeight(rad*map(age, 0, life, 1, 0.5));
      stroke(c);
      line(-8*map(age, 0, life, 1, 0), 0, 0, 0);
      popMatrix();
    }
  }
}
bullet_die_particle中主要是将bullet_die实例化后,根据当前位置和速度用大量的if语句来进行子弹碎片绽开的角度判断。
这些都放在add方法中
void addbdp(PVector loc, PVector vel, color c, boolean isDieboder, boolean R, boolean L, boolean U, boolean D) {
    totaladd++;
    float angleB;
    float angleE;
    if (isDieboder) {
      angleB = 0;
      angleE = TWO_PI;
      if (U) {
        angleB = 0;
        angleE = PI;
      } else {
        if (D) {
          angleB = PI;
          angleE = TWO_PI;
        }
      }
      if (R) {
        angleB = HALF_PI;
        angleE = HALF_PI*3;
        if (U) {
          angleE = PI;
        }
        if (D) {
          angleB = PI;
        }
      } else {
        if (L) {
          angleB = -HALF_PI;
          angleE = HALF_PI;
          if (U) {
            angleB = 0;
          } else {
            if (D) {
              angleE = 0;
            }
          }
        }
      }
    } else {
      float angle = atan2(vel.y, vel.x);
      if (angle>=umbrellaAngle||angle<=-umbrellaAngle) {
        angle+=TWO_PI;
      }
      angleB = angle-umbrellaAngle/2;
      angleE = angle+umbrellaAngle/2;
    }
    for (float i = angleB; i<=angleE; i+=borndist) {
      bdp.add(new bullet_die(new PVector(loc.x, loc.y), new PVector(cos(i)*velnum, sin(i)*velnum), c));
    }
  }
3.4怪物类
在monster的实现上,我实现了一个monster系统来管理几种monster。
所以这里有这么几种方法,monster类及它的三个子类——具体的怪物,还有一个monstersystem类。
在monster中,主要是初始化一些参数,比如位置,速度,加速度等参数。
在monster子类中,主要是利用他们的show()方法,绘制图形,还有check()方法进行碰撞检测。这里展示一下碰撞检测。
 void check() {
    if (PVector.dist(toc, moe.loc)<moe.r/2+rad/2) {
      moe.blood-=5;
    }
    int i = 0;
    while (!isDie&&i<moe.bs.bn.size()) {
      if (PVector.dist(toc, moe.bs.bn.get(i).loc)<=moe.bs.bn.get(i).rad/2+rad/2) {
        moe.bs.bn.get(i).isDie = true;
        isDie = true;
      }
      i++;
    }
  }
其中的moe是主角类的实例。
最后是monstersystem类,其中比较重要的就是add方法,它会在角色周围自动生成怪物。
用怪物1来举例
void addm1(int i) {//could code be better
    if (M1.size()<5) {
      for (int c = 0; c<i; c++) {
        float angle = random(-PI, PI);
        float disting = random(300, 1000);
        float btx = disting*cos(angle)+moe.loc.x;
        float bty = disting*sin(angle)+moe.loc.y;
        btx = range(btx, ms0DistMoe, boxx-ms0DistMoe);
        bty = range(bty, ms0DistMoe, boxy-ms0DistMoe);
        M1.add(new monster_splite(new PVector(btx, bty)));
      }
    }
  }
3.5.武器系统
武器系统主要由键盘事件,主角类和子弹类共同实现。
bullet_normal类中有子弹的初始化方法。
void init_normal(color c, int vel, int rad) {
    velborn = vel;
    ms = 0.5;
    damp = 0.99;
    maxvel = 20;
    tagaccN = 1;
    setcolor(c);
    setrad(rad);
  }
在速度之外,我还在初始化中添加了颜色和子弹大小。
然后在bullet类中,使用了一个switch-case语句,来进行武器的选择。
 void addbs(PVector loc, PVector vel, int mod, boolean powerup) {
    switch(mod) {
    case 1:
      addbn1(loc, vel, powerup);
      return;
    case 2:
      addbn2(loc, vel, powerup);
      return;
    case 3:
      addbn3(loc, vel, powerup);
      return;
    case 4:
      addUltimateB(loc, vel, powerup);
      return;
    }
  }
可以看到,mod变量不同,提供的子弹类别也不同。
关于变量mod的改变,主要是在键盘事件中。
if (key !=CODED) {
    if (keyCode == '1') {
      moe.setcolor(color(161, 23, 21));
      mod = 1;
    }
    if (keyCode == '2') {
      moe.setcolor(color(0, 90, 171));
      mod = 2;
    }
    if (keyCode == '3') {
      moe.setcolor(color(6, 128, 67));
      mod = 3;
    }
我们可以使用数字键切换武器,同时调用主角类的方法,改变主角机体的颜色。就像《雷电》里一样。机体颜色对应着武器。

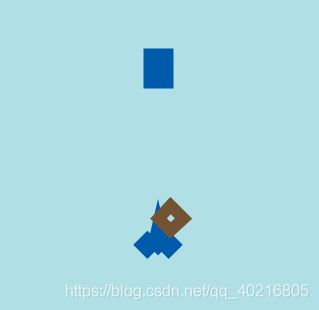
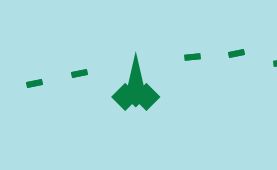
当然,我也给他添加了一个终极技能,每次游戏开始有三次释放机会,图示在我们最开始的一张图中。
4.一些问题
虽然磕磕碰碰,过程中看了很多的示例,最后的还原度也就到这个程度了。
没有能够实现的点有这么几个:
道具系统——武器应该是根据道具来改变,并且提升强度
卷轴效果——画面能与角色同步移动并且没有严格意义上的边界
素材加载——不是使用函数绘制而是通过素材加载展现内容
难度选择——可以手动选择难度
这些问题有一些是因为平台限制实现起来不方便,有一些是还没有想好怎样解决,希望以后可以实现优化,自己做一个好玩的stg弹幕射击游戏。
5.总结
经过这段时间的学习,对processing编程有了更深的理解,学会了更加灵活地使用向量,在程序中使用物理法则等等。
总之,这次的作业到这儿就暂告一段落了,搭建框架和后期微调都花了不少的时间,整个游戏几遍玩下来,也算有趣,但就是游戏内容不多,容易腻味,希望之后有时间能优化或者用别的工具重新写一下。
