在Ubnutu虚拟机上,JLINK + GDB + codeblocks 实现图形化编译调试
最近在准备公司SDK发布,参考公司内部一位大神的文章,实现了图形化调试。这么简单的配置(Ubuntu 免费,GDB免费,codeblocks免费,Jlink某宝上100 RMB左右) 至少可以媲美 codeviser 了吧,并且还可以将编译功能集成进去。
准备环境:
- Ubuntu 18.04.2 LTS ,我用的是虚拟机。
- JLink - https://www.segger.com/downloads/jlink/#J-LinkSoftwareAndDocumentationPack
下载安装JLink_Linux_x86_64.deb - Code::Blocks 是一个开放源码的全功能的跨平台C/C++集成开发环境 - http://www.codeblocks.org/
下载Linux安装包codeblocks_17.12-1_amd64_stable.tar.xz,逐一安装解压后的*.deb 。安装过程中可能会提示 有些依赖的包找不到。 用 sudo apt-get -f install ,然后 ls *.deb | xargs -i sudo dpkg -i {} 安装即可。
启动codeblocks
配置: Code::Blocks 导入makefile项目
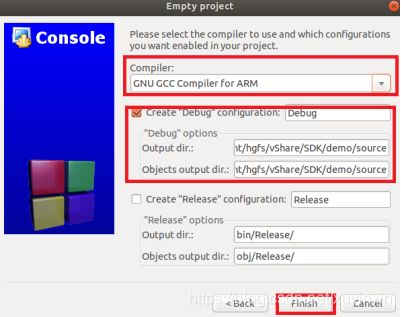
“File -> New -> Project”,选择“Empty Project”并创建
next之后,选择 GNU GCC Compile for ARM ,
Output dir和Objects output dir 与makefile指定的输出路径相同,如
下面是配置编译,如果不需要编译,可以跳过:
选中 Project,右键,选择“Add files recursively”,将h/c/cpp 加入工程;
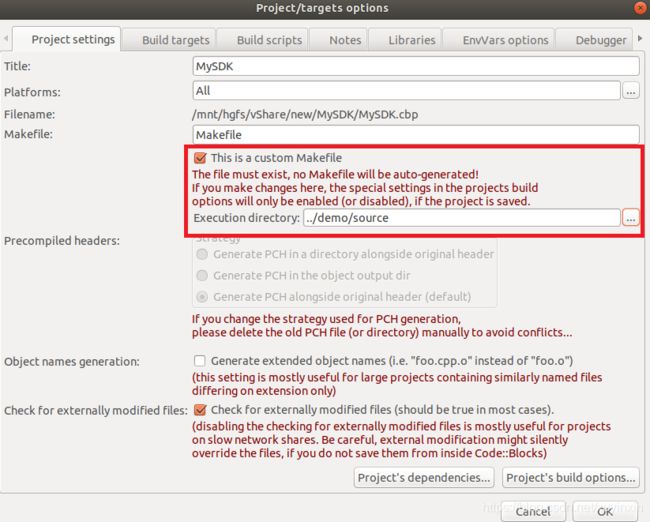
选中 Project,右键,选择“Properties”,“Project settings”选项卡中的“Makefile”填入Makefile 文件名,并勾选“This is a custom Makefile”;
设置Execute directory:../demo/source
在菜单栏选择settings->compiler->Global compile settings
compiler设置为GNU GCC Compiler for ARM,将debugging选项-g勾选上。然后点击Toolchain executables。进入下图:
分别设置tool chain路径,和使用的tool chain,以及make program。设置完成,点击OK。
选中 Project,右键,选择“build options”,其中compiler选择GNU GCC Compiler for ARM,由于我的工程Makefile比较简单,make时,没有带入其他参数,所以make commands直接写$make就可以了(如果需要带入参数,在Custom variables中添加,然后再make commands将参数带入)。
选中 Project,右键,选择“build”,“rebuild”(make clean + make),“clean”等选项,就可以build整个工程了。这种build 方式在terminal 中执行make,效果是一样的。
下面是配置调试:
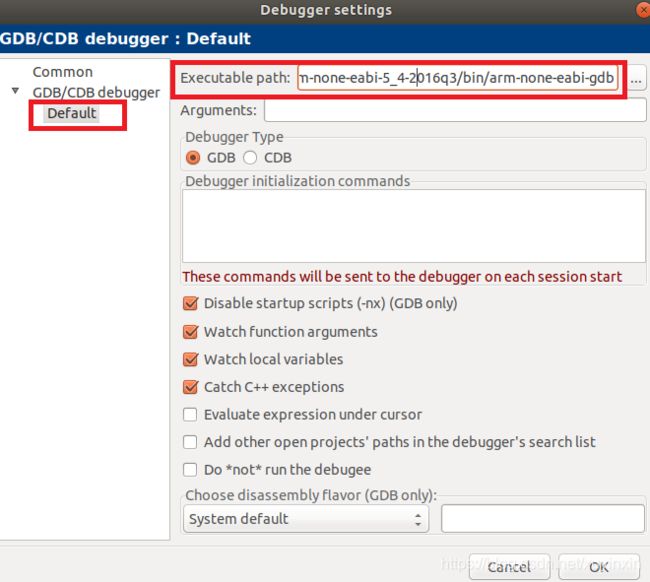
设置debug的toolchain路径
"Settings→Debugger...",设置Debugger,Executable path:/usr/local/bin/gcc-arm-none-eabi-5_4-2016q3/bin/arm-none-eabi-gdb
选中 Project,右键,选择“Properties”,Debugger”选项卡,选择Select target:Debug,设置Remote connection,Connection type:TCP,IP address:localhost,Port:2331
如果J-Link GDB Server 不在本机,可以设置localhost为安装J-Link GDB Server的IP地址
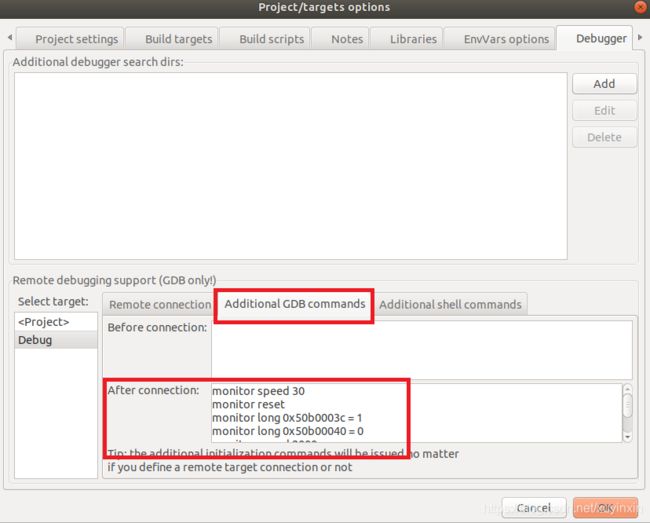
设置Additional GDB commands,After connection输入(确保build 带上-g):
monitor speed 30
monitor reset
monitor long 0x50b0003c = 1
monitor long 0x50b00040 = 0
monitor speed 2000
file /mnt/hgfs/vShare/new/demo/source/mysdk.elf
load
其中 两个地址和具体平台相关
启动J-Link GDB Server,在Linux 终端中执行,
JLinkGDBServer -select USB -device Cortex-M3 -endian little -if JTAG -speed 4000 -noir -LocalhostOnly -vd
启动成功有如下信息输出:
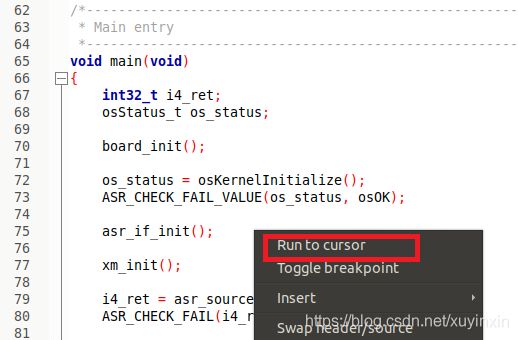
打开C文件,在选定的位置,右键,设置断点或运行到此处,开始调试
这样就可以方便愉快的debug了
这100 RMB的效果,看起来还真不错

