Android Studio 中集成 OpenCV (Java 和 NDK 均可,不使用Manager)
软件版本
这里最重要的是选择合适的 OpenCV 版本,其他的我都用的是最新版,问题不大。SDK、NDK 和 CMake 都是使用 Android Studio 的 SDK Manager 下载的。
- 操作系统:macOS Big Sur Beta
- Android Studio:已经测试 3.6.3 和 4.0.1,均可使用
- OpenCV for Android:已经测试 3.4.9、3.4.10、4.2.0 和 4.3.0,只有 3.4.9 可以使用,下载地址是opencv-3.4.9-android-sdk.zip
- SDK:30.0.1
- NDK:21.0.6113669
- CMake:3.10.2.4988404
- Gradle:6.1.1(Android Gradle Plugin Version 是 4.0.1)
创建Native C++项目
File -> New -> New Project … 选择Native C++模板

设置项目名称(这里为 OpenCVNDK),选择语言(Java)
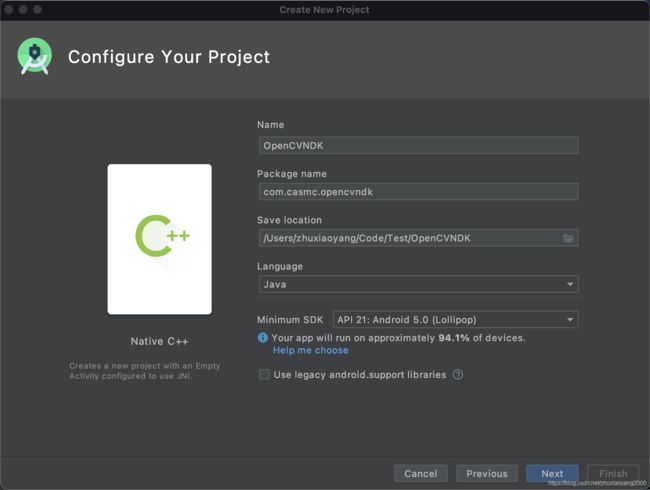
Next,Finish即可。
Java 接口配置
导入OpenCV模块
将 opencv-3.4.9-android-sdk.zip 解压缩。
File -> New -> Import Module … 找到上述解压缩位置,并依次找到 java 文件夹位置 /OpenCV-android-sdk/sdk/java ,点击 Next,Finish 即可。

这时,在 Android 视图下,即可看到导入了 openCVLibrary349。

根据 build.gradle (Module:app) 修改 build.gradle (Module:openCVLibrary349) 的 compileSdkVersion、buildToolsVersion、minSdkVersion 和 targetSdkVersion,修改完成后如下所示。
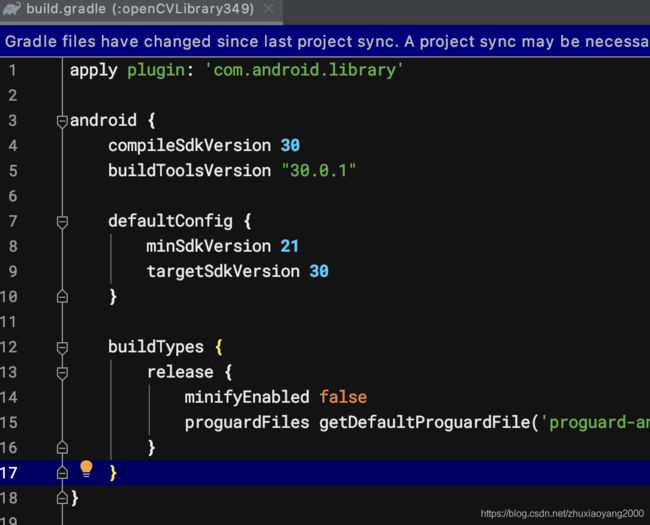
根据提示,点击 Sync Now。
这里可能会报错:
The minSdk version should not be declared in the android manifest file. You can move the version from the manifest to the defaultConfig in the build.gradle file.
根据提示点击 Remove minSdkVersion and sync project, 再双击如下语句
-sdk android:minSdkVersion="8" android:targetSdkVersion="21" />
即可打开 AndroidManifest.xml文件,将上述语句注释。之后选择 Build -> Rebuild Project 消除上述错误。
设置模块依赖
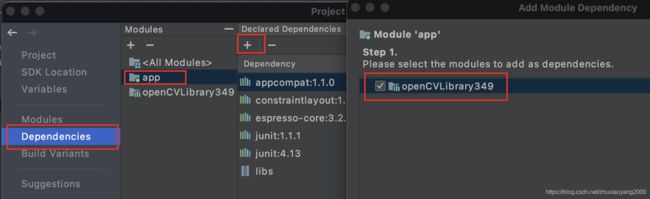
File -> Project Structure -> Dependencies,点击 app,然后点击其右侧的➕号,选择第3项:Module Dependency,勾选 openCVLibrary349,点击两次 OK 关闭对话框。
Java 接口测试
这时,如果在 MainActivity 的 onCreate 函数中输入 Mat,即可看到代码补全提示。

但是,如果运行程序,则程序会闪退,在 Logcat 里会提示如下错误:
java.lang.UnsatisfiedLinkError: No implementation found for long org.opencv.core.Mat.n_Mat()
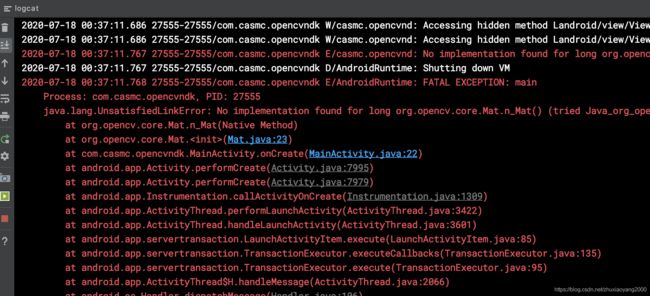
这是因为程序依赖 OpenCV Manager,而本地并找不到该库,下面将进行配置。
去除 OpenCV Manager 依赖
在 Android 视图下,右键点击 app,依次选择 New -> Folder -> JNI Folder,勾选 Change Folder Location,New Folder Location 重命名为 src/main/jniLibs,注意大小写。

将 OpenCV-android-sdk 的 sdk/native/libs 的所有文件夹(也可以按照项目需求进行删减)复制到上述 jniLibs 文件夹,复制完成后,其目录如下所示:
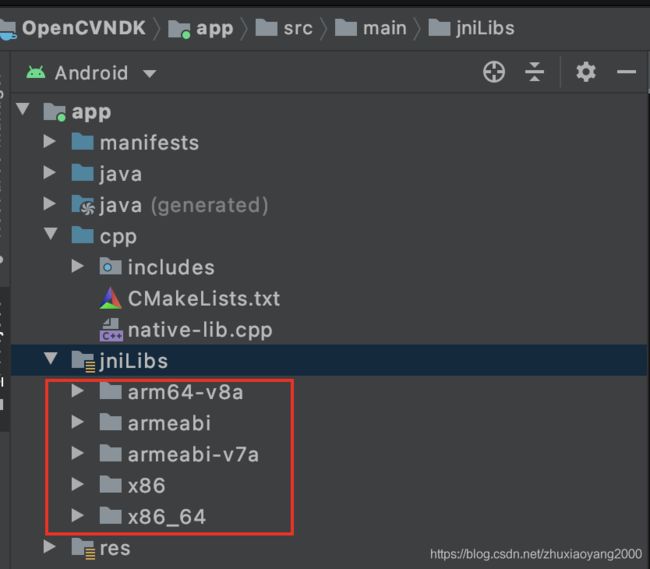
Rebuild项目并发布,程序可以不依赖OpenCV Manager正常运行了。当然,也可以构建更复杂的项目进行测试,但目前添加的两行程序就可以说明问题了。
NDK (C++) 接口配置
将 OpenCV-android-sdk 的 sdk/native/jni 下的 include 文件夹本身复制到项目 app/src/main/cpp 文件夹,复制完成后,其目录如下所示:

build.gradle (Module:app) 文件内容
apply plugin: 'com.android.application'

android {
    compileSdkVersion 30
    buildToolsVersion "30.0.1"

    defaultConfig {
        applicationId "com.casmc.opencvndk"
        minSdkVersion 21
        targetSdkVersion 30
        versionCode 1
        versionName "1.0"

        testInstrumentationRunner "androidx.test.runner.AndroidJUnitRunner"
        externalNativeBuild {
            cmake {
                cppFlags "-std=c++11 -frtti -fexceptions"
                arguments "-DANDROID_ABI=armeabi-v7a"
                arguments "-DCMAKE_BUILD_TYPE=Release"
            }
        }

        ndk{
            abiFilters "armeabi-v7a"
        }
    }

    buildTypes {
        release {
            minifyEnabled false
            proguardFiles getDefaultProguardFile('proguard-android-optimize.txt'), 'proguard-rules.pro'
        }
    }
    externalNativeBuild {
        cmake {
            path "src/main/cpp/CMakeLists.txt"
            version "3.10.2"
        }
    }

    packagingOptions {
        pickFirst 'lib/armeabi-v7a/libopencv_java3.so'
        pickFirst 'lib/arm64-v8a/libopencv_java3.so'
        pickFirst 'lib/x86_64/libopencv_java3.so'
        pickFirst 'lib/x86/libopencv_java3.so'
    }
}

dependencies {
    implementation fileTree(dir: "libs", include: ["*.jar"])
    implementation 'androidx.appcompat:appcompat:1.1.0'
    implementation 'androidx.constraintlayout:constraintlayout:1.1.3'
    implementation project(path: ':openCVLibrary349')
    testImplementation 'junit:junit:4.13'
    androidTestImplementation 'androidx.test.ext:junit:1.1.1'
    androidTestImplementation 'androidx.test.espresso:espresso-core:3.2.0'

}
CMakeLists.txt 文件内容
# For more information about using CMake with Android Studio, read the
# documentation: https://d.android.com/studio/projects/add-native-code.html

# Sets the minimum version of CMake required to build the native library.

cmake_minimum_required(VERSION 3.4.1)

# ====================================================================================
set(CMAKE_VERBOSE_MAKEFILE on)
set(libs "${CMAKE_SOURCE_DIR}/../jniLibs")
include_directories(include)

add_library(libopencv_java3 SHARED IMPORTED )
set_target_properties(libopencv_java3 PROPERTIES
        IMPORTED_LOCATION "${libs}/${ANDROID_ABI}/libopencv_java3.so")

set(CMAKE_CXX_FLAGS "${CMAKE_CXX_FLAGS} -std=gnu++11 -fexceptions -frtti")
# ====================================================================================

# Creates and names a library, sets it as either STATIC
# or SHARED, and provides the relative paths to its source code.
# You can define multiple libraries, and CMake builds them for you.
# Gradle automatically packages shared libraries with your APK.

add_library( # Sets the name of the library.
             native-lib

             # Sets the library as a shared library.
             SHARED

             # Provides a relative path to your source file(s).
             native-lib.cpp )

# Searches for a specified prebuilt library and stores the path as a
# variable. Because CMake includes system libraries in the search path by
# default, you only need to specify the name of the public NDK library
# you want to add. CMake verifies that the library exists before
# completing its build.

find_library( # Sets the name of the path variable.
              log-lib

              # Specifies the name of the NDK library that
              # you want CMake to locate.
              log )

# Specifies libraries CMake should link to your target library. You
# can link multiple libraries, such as libraries you define in this
# build script, prebuilt third-party libraries, or system libraries.

target_link_libraries( # Specifies the target library.
                       native-lib

                       # ===========
                       libopencv_java3
                       # ===========

                       # Links the target library to the log library
                       # included in the NDK.
                       ${log-lib} )
这里涉及到的文件夹都需要 以该文件为基准, 根据实际情况设置。
测试
native-lib.cpp 文件内容
#include activity_main.xml 文件内容
<?xml version="1.0" encoding="utf-8"?>
:android="http://schemas.android.com/apk/res/android"
xmlns:app="http://schemas.android.com/apk/res-auto"
xmlns:tools="http://schemas.android.com/tools"
android:layout_width="match_parent"
android:layout_height="match_parent"
tools:context=".MainActivity">
:id="@+id/img"
android:layout_width="wrap_content"
android:layout_height="wrap_content"
app:srcCompat="@drawable/boy"
android:layout_centerInParent="true" />
MainActivity.java 文件内容
package com.casmc.opencvndk;

import android.graphics.Bitmap;
import android.graphics.drawable.BitmapDrawable;
import androidx.appcompat.app.AppCompatActivity;
import android.os.Bundle;
import android.view.View;
import android.widget.Button;
import android.widget.ImageView;

public class MainActivity extends AppCompatActivity {

    // Used to load the 'native-lib' library on application startup.
    static {
        System.loadLibrary("native-lib");
    }

    private Button bt_photo = null;

    @Override
    protected void onCreate(Bundle savedInstanceState) {
        super.onCreate(savedInstanceState);
        setContentView(R.layout.activity_main);

        // adding
        bt_photo =  findViewById(R.id.bt_Gray);
        bt_photo.setOnClickListener(new Button.OnClickListener() {
            @Override
            public void onClick(View v) {
                // TODO Auto-generated method stub
                ImageView img = (ImageView)findViewById(R.id.img);
                Bitmap bitmap = ((BitmapDrawable) getResources().getDrawable(
                        R.drawable.boy)).getBitmap();
                int w = bitmap.getWidth(), h = bitmap.getHeight();
                int[] pix = new int[w * h];
                bitmap.getPixels(pix, 0, w, 0, 0, w, h);
                int[] resultPixes = getGrayImage(pix,w,h);
                Bitmap result = Bitmap.createBitmap(w,h, Bitmap.Config.RGB_565);
                result.setPixels(resultPixes, 0, w, 0, 0,w, h);
                img.setImageBitmap(result);
            }
        });

    }

    /**
     * A native method that is implemented by the 'native-lib' native library,
     * which is packaged with this application.
     */
    public native int[] getGrayImage(int[] pixels, int w, int h);
}
拷贝图片,并测试
找一张图片,命名为 boy.jpg,并将其放置到 app/res/drawable 文件夹。
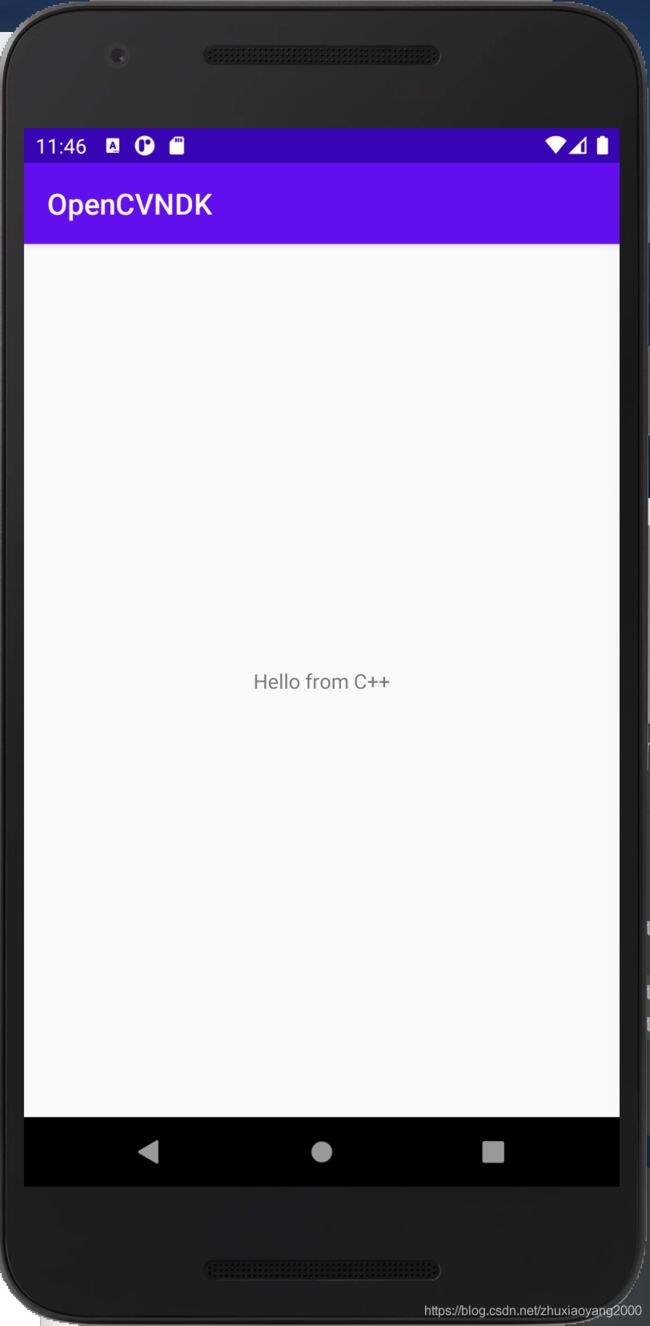
程序打开后
点击 GRAY 按钮后
至此,顺利完成。
参考资料
参考链接1: Android openCV integration without openCV manager
参考链接2: Android NDK environment configuration: Android Studio 3.0.1 + CMAKE + OpenCV3.4.1