监控篇 | Prometheus 安装
点击蓝字关注这个神奇的公众号~
![]()
prometheus安装
官方给出了多重部署方案,比如:Docker容器、Ansible、Chef、Puppet、Saltstack等。
Prometheus用Golang实现,因此具有天然可移植性(支持Linux、Windows、macOS和Freebsd)。
| 安装包 | 说明 |
|---|---|
| prometheus-2.0.0.linux-amd64.tar.gz | 主程序包【必须】 |
| alertmanager-0.12.0.linux-amd64.tar.gz | 报警管理 |
| blackbox_exporter-0.11.0.linux-amd64.tar.gz | |
| consul_exporter-0.3.0.linux-amd64.tar.gz | |
| graphite_exporter-0.2.0.linux-amd64.tar.gz | |
| haproxy_exporter-0.8.0.linux-amd64.tar.gz | HAProxy统计信息 |
| memcached_exporter-0.3.0.linux-amd64.tar.gz | |
| mysqld_exporter-0.10.0.linux-amd64.tar.gz | MySQL服务器指标 |
| node_exporter-0.15.2.linux-amd64.tar.gz | 客户端 |
| pushgateway-0.4.0.linux-amd64.tar.gz | |
| statsd_exporter-0.5.0.linux-amd64.tar.gz |
安装Prometheus server
shell> tar xf prometheus-2.0.0-rc.2.linux-amd64.tar.gz
shell> cd prometheus-2.0.0-rc.2.linux-amd64
shell> ./prometheus  --config.file=prometheus.yml    ## 启动服务验证【后续用启动脚本】
shell> ./prometheus --version
prometheus, version 2.0.0 (branch: HEAD, revision: 0a74f98628a0463dddc90528220c94de5032d1a0)
  build user:       root@615b82cb36b6
  build date:       20171108-07:11:59
  go version:       go1.9.2
创建用户
创建专门用于运行prometheus的用户,主目录为
/var/lib/prometheus用作prometheus的数据目录
shell> groupadd prometheus
shell> useradd -g prometheus -m -d /var/lib/prometheus -s /sbin/nologin prometheus
创建systemd服务
shell>  vim /etc/systemd/system/prometheus.service

[Unit]
Description=prometheus
After=network.target
[Service]
Type=simple
User=prometheus
ExecStart=/usr/local/prometheus/prometheus -config.file=/usr/local/prometheus/prometheus.yml -storage.local.path=/var/lib/prometheus
Restart=on-failure
[Install]
WantedBy=multi-user.target
启动Prometheus服务
shell> systemctl start prometheus验证Prometheus是否启动成功
通过浏览器访问:http:<服务器IP地址>:9090,验证是否安装成功
安装node_exporter
shell> tar xf node_exporter-0.15.0.linux-amd64.tar.gz
shell> cd node_exporter-0.15.0.linux-amd64
shell> ./node_exporter ## 启动节点
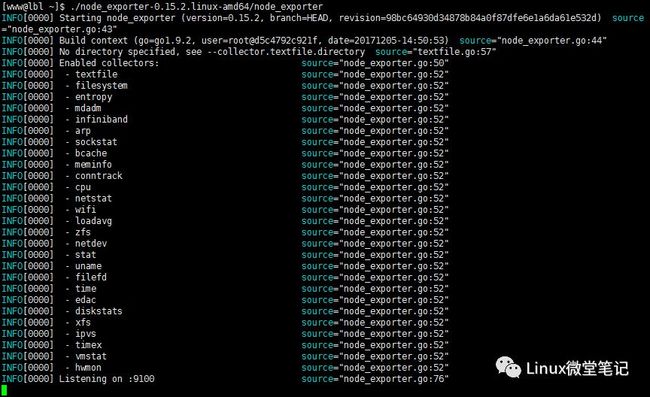
检查node启动端口和进程
node启动过程
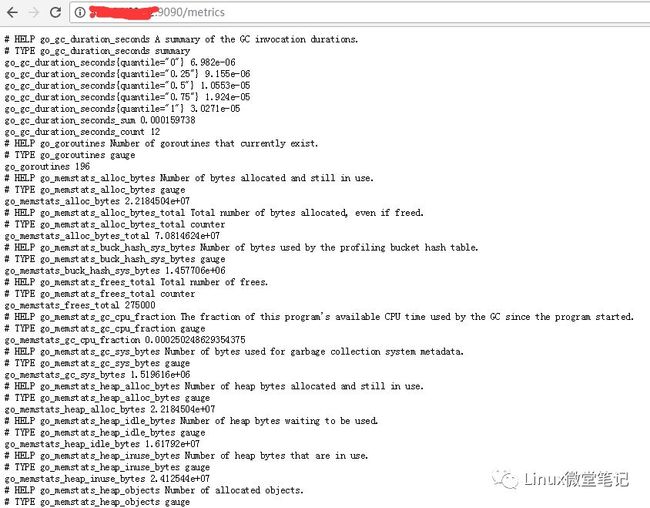
查看node启动返回的性能指标都有哪些
使用表达式浏览器
prometheus本身自带exporter,可以通过 http://插卡从expoter中能具体抓到哪些数据
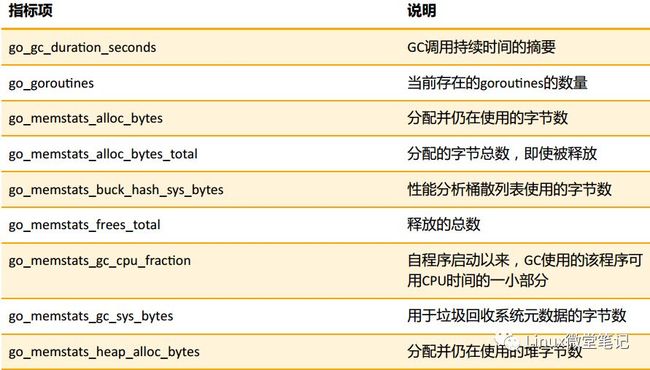
默认包括的监控指标项
如果我们只对导致HTTP代码的请求感兴趣 200,那么我们可以使用这个查询来检索这些信息:
http_requests_total{code="200"}要计算返回的时间序列的数量,您可以编写:
count(http_requests_total)使用Prometheus监控Linux服务器
监控Linux主机时,必须启动 node_exporter服务且修改 prometheus.yml,步骤如下:
修改
prometheus.yml文件重启prometheus主程序
prometheus.yml中一共定义了两个监控:一个是监控prometheus自身服务,另一个是监控Linux服务器。
shell> vim  /usr/local/prometheus/prometheus.yml

scrape_configs:
  - job_name: 'prometheus'

    static_configs:
      - targets: ['localhost:9090']

  - job_name: 'linux'

    static_configs:
      - targets: ['localhost:9100']
        labels:
          instance: node1
访问Prometheus Web,在Status->Targets页面下,我们可以看到我们配置的两个Target,它们的State为UP。
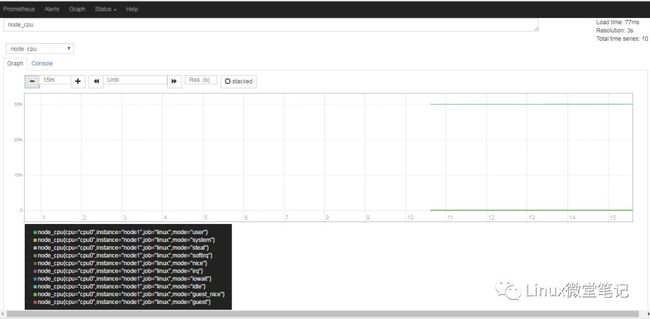
使用Prometheus Web来验证Node Exporter的数据已经被正确的采集。
a) 查看当前主机的CPU使用情况
Prometheus Web界面自带的图表是非常基础的,比较适合用来做测试。如果要构建强大的Dashboard,还是需要更加专业的工具才行。
未
完
待
续
关
注
关注精彩内容
扫描下方二维码哦


