springcloud 入门示例(代码拷贝后可直接运行)
springcloud是基于springboot开发的,如果想学习springcloud,希望读者有springboot的基础;
该示例是讲解的springcloud2版本的, 闲言碎语不多讲,对于开发来说最重要的就是想看到代码,所以下面就开始上单机版的简单示例代码,哈哈!!!
第一步:maven导入需要的jar包文件,请看下面:
第二步:搭建eureka服务中心 ,代码如下:
(1)编写服务中心的启动类:
import org.springframework.boot.SpringApplication;
import org.springframework.boot.autoconfigure.SpringBootApplication;
import org.springframework.cloud.netflix.eureka.server.EnableEurekaServer;
@SpringBootApplication
@EnableEurekaServer//标签的意义是开启注册中心
public class Application9090 {
public static void main(String[] args) {
SpringApplication.run(Application9090.class, args);
}
}
(2)编写application.yml配置文件:
###服务设置文件
server:
###服务端口号
port: 9090
spring:
application:
###服务的别名
name: xiaoyin
eureka:
instance:
###注册中心ip地址
hostname: 127.0.0.1
client:
serviceUrl:
###注册地址
defaultZone: http://${eureka.instance.hostname}:${server.port}/eureka/
###因为自己是注册中心,是否需要将自己注册给自己的服务中心(集群的时候需要将该值设置为true)
register-with-eureka: false
###因为自己是注册服务中心所以不需要检索服务信息
fetch-registry: false
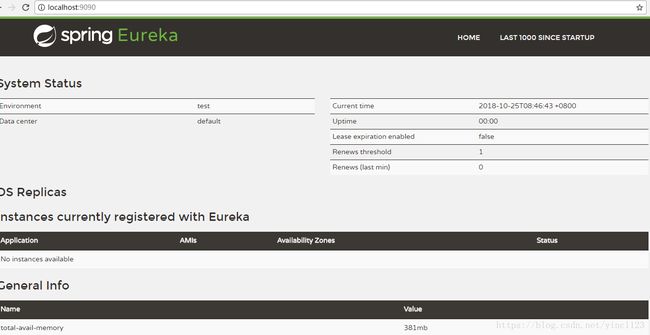
将以上代码复制到你的开发工具中后,只要运行你 Application9090 中的main函数后,在浏览器中访问localhost:9090后就可以看到eureka注册服务中心的控制台了,如下图:
第三步:搭建生产者 ,代码如下:(引入服务中心相同的pom文件)
(1)、编写生产者启动类,代码如下:
import org.springframework.boot.SpringApplication;
import org.springframework.boot.autoconfigure.SpringBootApplication;
import org.springframework.cloud.netflix.eureka.EnableEurekaClient;
@SpringBootApplication
@EnableEurekaClient //该标签的 功能是将服务注册到eureka注册服务中
public class applicationUser {
public static void main(String[] args) {
SpringApplication.run(applicationUser.class,args);
}
}
(2)、生产者application.yml配置文件代码:
###端口号设置
server:
port: 9092
###服务别名
spring:
application:
name: xiaoyinUser
eureka:
client:
service-url:
###将当前服务注册到eureka注册中心中
defaultZone: http://localhost:9090/eureka/
register-with-eureka: true
fetch-registry: true
(3)、创建一个服务接口类:
import org.springframework.beans.factory.annotation.Value;
import org.springframework.web.bind.annotation.RequestMapping;
import org.springframework.web.bind.annotation.RestController;
@RestController
public class UserApiController {
@Value("${server.port}")
String port;
@RequestMapping("/testUserApi")
public String userApiTest(){
return "this is test userApiTest,测试springcloud用户中心api服务 +端口号:"+port;
}
}
到此处,启动该服务的启动类后,就可以在eureka注册服务中心看到如下画面:
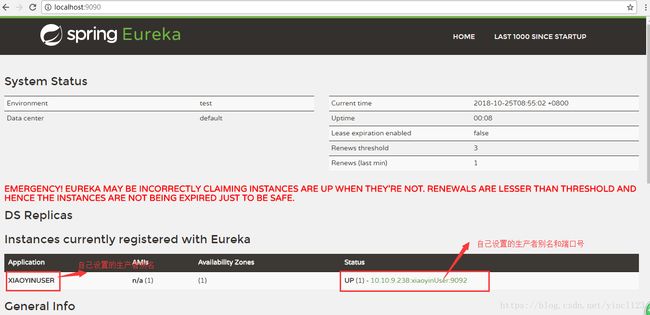
到此处你的生产者服务就算是搭建完成了;
第四步:搭建消费者 ,代码如下:(引入服务中心相同的pom文件)
(1)、编写消费者启动类,代码如下:
import org.springframework.boot.SpringApplication;
import org.springframework.boot.autoconfigure.SpringBootApplication;
import org.springframework.cloud.client.loadbalancer.LoadBalanced;
import org.springframework.cloud.netflix.eureka.EnableEurekaClient;
import org.springframework.context.annotation.Bean;
import org.springframework.web.client.RestTemplate;
@SpringBootApplication
@EnableEurekaClient
public class applicationUser2 {
public static void main(String[] args) {
SpringApplication.run(applicationUser2.class, args);
}
@Bean
@LoadBalanced//该标签可以使RestTemplate能够有负载均衡的功能
RestTemplate restTemplate(){
return new RestTemplate();
}
}
(2)、消费者application.yml配置文件代码:
###端口号设置
server:
port: 9093
###服务别名
spring:
application:
name: xiaoyinUser2
eureka:
client:
service-url:
###将当前服务注册到eureka注册中心中
defaultZone: http://localhost:9090/eureka/
register-with-eureka: true
fetch-registry: true
(3)、创建一个服务接口类:
import org.springframework.beans.factory.annotation.Autowired;
import org.springframework.web.bind.annotation.RequestMapping;
import org.springframework.web.bind.annotation.RestController;
import org.springframework.web.client.RestTemplate;
@RestController
public class user2ApiController {
@Autowired
RestTemplate restTemplate;
@RequestMapping("/testUser2Api")
public String user2Test(){
//return "this is user2Test,这是一个调用服务";
String url = "http://xiaoyinUser/testUserApi";
String ss = restTemplate.getForObject(url, String.class);
System.out.println("user2调用user1后的结果:::"+ss);
return ss;
}
}
到此处,启动该服务的启动类后,就可以在eureka注册服务中心看到如下画面:

到此处就是讲生产者和消费者都注册到eureka服务中心啦;
下面就是消费者的调用了,当访问localhost:9093的测试接口时,就能看到如下画面:

好啦;到这里就证明你的单机版的springcloud服务已经搭建完成啦!集群的我这也有代码,如果想共同研究可以找我要示例源码!