Ubuntu18.04 搭建 OpenGL+Qt 4.8.6 的开发环境
Ubuntu18.04搭建OpenGL+Qt 4.8.6的开发环境
- OpenGL 环境的搭建
- 安装过程
- 验证是否成功
- Qt 4.8.6 环境搭建
- 下载Qt 4.8.6
- 安装Qt 4.8.6
OpenGL 环境的搭建
我们的第一步是在 Ubuntu18.04 之中加入 OpenGL 环境,因为 Qt 在安装的时候会根据计算机中是否存在 OpenGL 来决定是否安装 OpenGL 相关的库文件,因此,我们要先安装 OpenGL。
安装过程
基本编译库和 OpenGL 库安装
sudo apt-get install build-essential
sudo apt-get install libgl1-mesa-dev
如果需要GLEW(OpenGL Extension)库的安装则去https://sourceforge.net/projects/glew/files/glew/2.1.0/选择 glew-2.1.0.tgz 下载。然后执行以下操作即可加入该拓展。
tar xzvf glew-2.1.0.tgz
cd glew-2.1.0
make
sudo make install
验证是否成功
将一下代码保存成 test4opengl.cpp
#include 然后编译运行
gcc -o test4opengl test4opengl.cpp -lGL -lGLU -lglut
./test4opengl
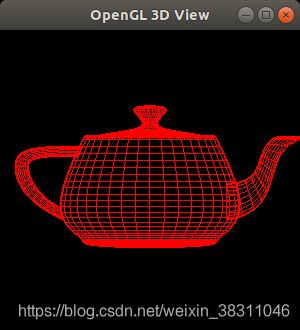
如果能正常运行显示如下则表示成功
Qt 4.8.6 环境搭建
下载Qt 4.8.6
首先从 https://download.qt.io/archive/qt/4.8/4.8.6/ 下载 qt-everywhere-opensource-src-4.8.6.tar.gz,
然后解压
tar xzvf qt-everywhere-opensource-src-4.8.6.tar.gz
安装Qt 4.8.6
在进行 ./configure 操作之前需要将 libx11 的开发包先安装完成
sudo apt-get install libx11-dev libxext-dev libxtst-dev
然后到解压完的目录下面进行 ./configure
cd ./qt-everywhere-opensource-src-4.8.6
./configure
接着输入o表示使用开源版,然后输入yes表示同意协议。
./configure 操作完成之后,请按照https://blog.csdn.net/baidu_33850454/article/details/79147161里面的操作修改相关文件,注意是gnu不是gun[捂脸]。
修改完成后进行 make 操作,请根据实际情况选择线程数
make -j4
make 操作完成后
sudo make install
至此Qt 4.8.6的安装应该就完成了