Swift-录制视频、预览并保存
写在前面
最近一直使用 Swift 进行开发,以前写的录制视频的例子也不能用了,所以就想着再写一个。然后在网上找到不少很详细的教程,我就选了个最简单的一个手动写了一份,也便于以后用到的时候可以回头看看。毕竟这一块用的不是很多,一些比较生疏的类很容易忘记。
参考链接: Swift录制视频
代码正文
技术介绍
AVFoundation提供了AVCaptureSession类。用它实现视频的捕捉功能。- 同
AVPlayer类似,影像视频是不能直接展示到View上的,而AVCaptureVideoPreviewLayer可以将摄像头捕捉到的画面实时显示在ViewController上。 - 对于录制的视频,使用
AVCaptureMovieFileOutput将其保存到指定路径下。 - 开启闪光灯、前后摄像头转换,这里都是直接调用的原生的方法。
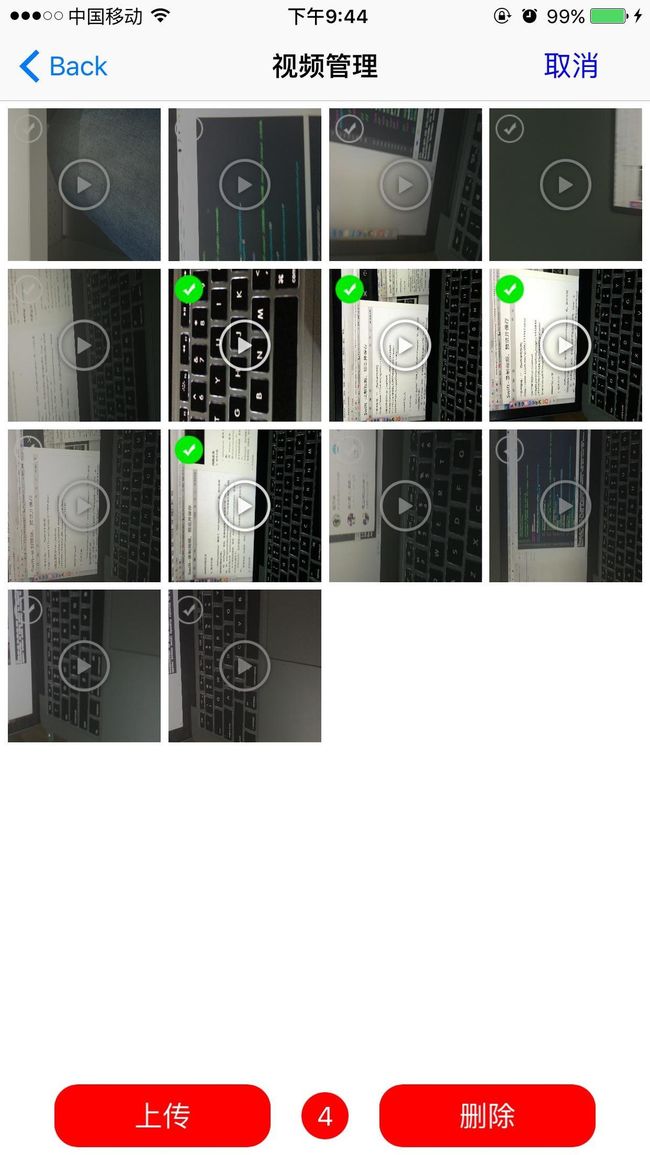
- 管理视频,即删除、预览。
所有需要解释的都写在代码的注释里了。为了以后可以直接拿来用,我把视频录制写在一个单独的 Swift 文件里,需要从前面
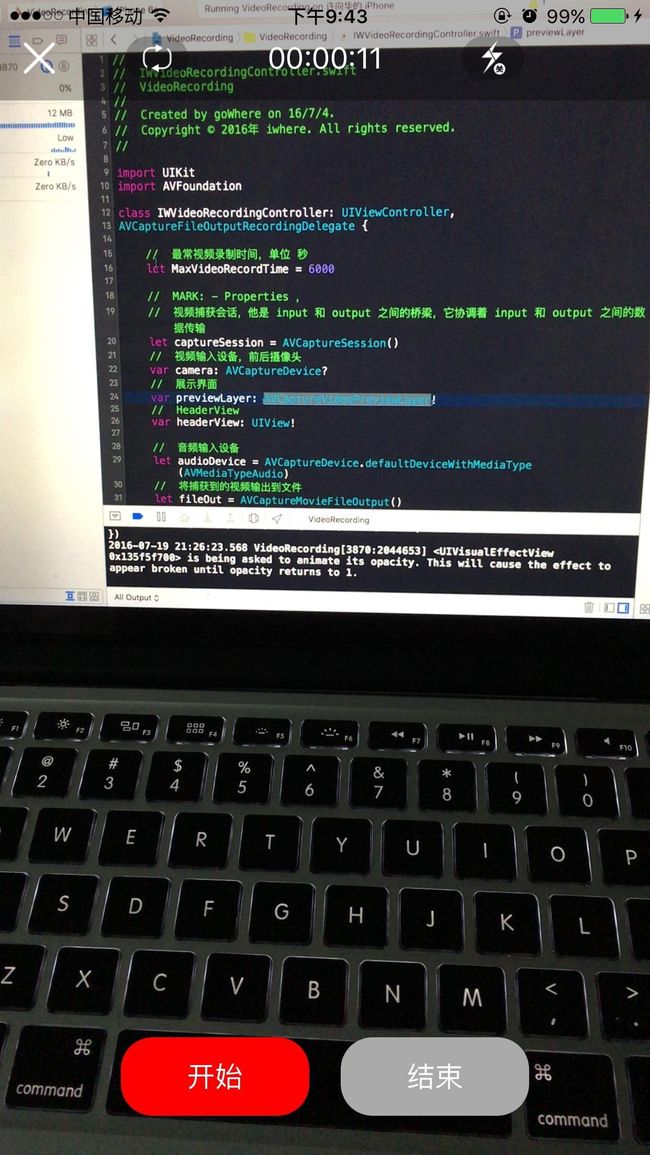
push过来即可。Step1: 创建录制页面。这个就是视频录制的所有点。
import UIKit
import AVFoundation

class IWVideoRecordingController: UIViewController,
AVCaptureFileOutputRecordingDelegate {

    //  最常视频录制时间,单位 秒
    let MaxVideoRecordTime = 6000

    //  MARK: - Properties ,
    //  视频捕获会话,他是 input 和 output 之间的桥梁,它协调着 input 和 output 之间的数据传输
    let captureSession = AVCaptureSession()
    //  视频输入设备,前后摄像头
    var camera: AVCaptureDevice?
    //  展示界面
    var previewLayer: AVCaptureVideoPreviewLayer!
    //  HeaderView
    var headerView: UIView!

    //  音频输入设备
    let audioDevice = AVCaptureDevice.defaultDeviceWithMediaType(AVMediaTypeAudio)
    //  将捕获到的视频输出到文件
    let fileOut = AVCaptureMovieFileOutput()

    //  开始、停止按钮
    var startButton, stopButton: UIButton!
    //  前后摄像头转换、闪光灯 按钮
    var cameraSideButton, flashLightButton: UIButton!
    //  录制时间 Label
    var totolTimeLabel: UILabel!
    //  录制时间Timer
    var timer: NSTimer?
    var secondCount = 0

    //  视频操作View
    var operatorView: IWVideoOperatorView!

    //  表示当时是否在录像中
    var isRecording = false

    //  MARK: - LifeCycle
    override func viewDidLoad() {
        super.viewDidLoad()

        //  录制视频基本设置
        setupAVFoundationSettings()

        //  UI 布局
        setupButton()
        setupHeaderView()


    }

    override func viewWillAppear(animated: Bool) {
        super.viewWillAppear(animated)

        navigationController?.navigationBarHidden = true
    }

    override func viewWillDisappear(animated: Bool) {
        super.viewWillDisappear(animated)

        navigationController?.navigationBarHidden = false
    }

    //  MARK: - Private Methods
    func setupAVFoundationSettings() {
        camera = cameraWithPosition(AVCaptureDevicePosition.Back)

         //  设置视频清晰度,这里有很多选择
        captureSession.sessionPreset = AVCaptureSessionPreset640x480

        //  添加视频、音频输入设备
        if let videoInput = try? AVCaptureDeviceInput(device: self.camera) {
            self.captureSession.addInput(videoInput)
        }
        if let audioInput = try? AVCaptureDeviceInput(device: self.audioDevice) {
            self.captureSession.addInput(audioInput)
        }

        //  添加视频捕获输出
        self.captureSession.addOutput(fileOut)

        //  使用 AVCaptureVideoPreviewLayer 可以将摄像头拍到的实时画面显示在 ViewController 上
        let videoLayer = AVCaptureVideoPreviewLayer(session: self.captureSession)
        videoLayer.frame = view.bounds
        videoLayer.videoGravity = AVLayerVideoGravityResizeAspectFill
        view.layer.addSublayer(videoLayer)

        previewLayer = videoLayer

        //  启动 Session 回话
        self.captureSession.startRunning()
    }

//  选择摄像头
    func cameraWithPosition(position: AVCaptureDevicePosition) -> AVCaptureDevice? {
        let devices = AVCaptureDevice.devicesWithMediaType(AVMediaTypeVideo)
        for item in devices as! [AVCaptureDevice] {
            if item.position == position {
                return item
            }
        }
        return nil
    }


    //  MARK: - UI Settings
    /**
     创建按钮
     */
    func setupButton() {
        //  开始按钮
        startButton = prepareButtons(btnTitle: "开始", btnSize: CGSizeMake(120, 50), btnCenter: CGPointMake(view.bounds.size.width / 2 - 70, view.bounds.size.height - 50))
        startButton.backgroundColor = UIColor.redColor()
        startButton.addTarget(self, action: #selector(onClickedStartButton(_:)), forControlEvents: .TouchUpInside)


        //  结束按钮
        stopButton = prepareButtons(btnTitle: "结束", btnSize: CGSizeMake(120, 50), btnCenter: CGPointMake(view.bounds.size.width / 2 + 70, view.bounds.size.height - 50))
        stopButton.backgroundColor = UIColor.lightGrayColor()
        stopButton.userInteractionEnabled = false
        stopButton.addTarget(self, action: #selector(onClickedEndButton(_:)), forControlEvents: .TouchUpInside)

    }
    //  开始、结束按钮风格统一
    func prepareButtons(btnTitle title: String, btnSize size: CGSize, btnCenter center: CGPoint) -> UIButton {
        let button = UIButton(frame: CGRectMake(0, 0, size.width, size.height))
        button.center = center
        button.clipsToBounds = true
        button.layer.cornerRadius = 20
        button.setTitle(title, forState: .Normal)
        button.setTitleColor(UIColor.whiteColor(), forState: .Normal)
        view.addSubview(button)

        return button
    }

    //  headerView
    func setupHeaderView() {
        headerView = UIView(frame: CGRectMake(0, 0, view.bounds.size.width, 64))
        headerView.backgroundColor = UIColor(red: 0, green: 0, blue: 0, alpha: 0.3)
        view.addSubview(headerView)

        let centerY = headerView.center.y + 5
        let defaultWidth: CGFloat = 40

        //  返回、摄像头调整、时间、闪光灯四个按钮
        let backButton = UIButton(frame: CGRectMake(0, 0, 20, 20))
        backButton.setBackgroundImage(UIImage(named: "iw_back"), forState: .Normal)
        backButton.addTarget(self, action: #selector(backAction), forControlEvents: .TouchUpInside)
        backButton.center = CGPoint(x: 25, y: centerY)
        headerView.addSubview(backButton)

        cameraSideButton = UIButton(frame: CGRectMake(0, 0, defaultWidth, defaultWidth * 68 / 99.0))
        cameraSideButton.setBackgroundImage(UIImage(named: "iw_cameraSide"), forState: .Normal)
        cameraSideButton.center = CGPoint(x: 100, y: centerY)
        cameraSideButton.addTarget(self, action: #selector(changeCamera(_:)), forControlEvents: .TouchUpInside)
        headerView.addSubview(cameraSideButton)

        totolTimeLabel = UILabel(frame: CGRectMake(0, 0, 100, 20))
        totolTimeLabel.center = CGPoint(x: headerView.center.x, y: centerY)
        totolTimeLabel.textColor = UIColor.whiteColor()
        totolTimeLabel.textAlignment = .Center
        totolTimeLabel.font = UIFont.systemFontOfSize(19)
        totolTimeLabel.text = "00:00:00"
        view.addSubview(totolTimeLabel)

        flashLightButton = UIButton(frame: CGRectMake(0, 0, defaultWidth, defaultWidth * 68 / 99.0))
        flashLightButton.setBackgroundImage(UIImage(named: "iw_flashOn"), forState: .Selected)
        flashLightButton.setBackgroundImage(UIImage(named: "iw_flashOff"), forState: .Normal)
        flashLightButton.center = CGPoint(x: headerView.bounds.width - 100, y: centerY)
        flashLightButton.addTarget(self, action: #selector(switchFlashLight(_:)), forControlEvents: .TouchUpInside)
        headerView.addSubview(flashLightButton)

    }

    //  MARK: - UIButton Actions
    //  按钮点击事件
    //  点击开始录制视频
    func onClickedStartButton(startButton: UIButton) {
        hiddenHeaderView(true)

        //  开启计时器
        timer = NSTimer.scheduledTimerWithTimeInterval(1.0, target: self, selector: #selector(videoRecordingTotolTime), userInfo: nil, repeats: true)

        if !isRecording {
            //  记录状态: 录像中 ...
            isRecording = true

            captureSession.startRunning()


            //  设置录像保存地址,在 Documents 目录下,名为 当前时间.mp4
            let path = NSSearchPathForDirectoriesInDomains(.DocumentDirectory, .UserDomainMask, true)
            let documentDirectory = path[0] as String
            let filePath: String? = "\(documentDirectory)/\(String(NSDate())).mp4"
            let fileUrl: NSURL? = NSURL(fileURLWithPath: filePath!)
            //  启动视频编码输出
            fileOut.startRecordingToOutputFileURL(fileUrl!, recordingDelegate: self)

            //  开始、结束按钮改变颜色
            startButton.backgroundColor = UIColor.lightGrayColor()
            stopButton.backgroundColor = UIColor.redColor()
            startButton.userInteractionEnabled = false
            stopButton.userInteractionEnabled = true
        }

    }

    //  点击停止按钮,停止了录像
    func onClickedEndButton(endButton: UIButton) {
        hiddenHeaderView(false)

        //  关闭计时器
        timer?.invalidate()
        timer = nil
        secondCount = 0

        if isRecording {
            //  停止视频编码输出
            captureSession.stopRunning()

            //  记录状态: 录像结束 ...
            isRecording = false

            //  开始结束按钮颜色改变
            startButton.backgroundColor = UIColor.redColor()
            stopButton.backgroundColor = UIColor.lightGrayColor()
            startButton.userInteractionEnabled = true
            stopButton.userInteractionEnabled = false
        }

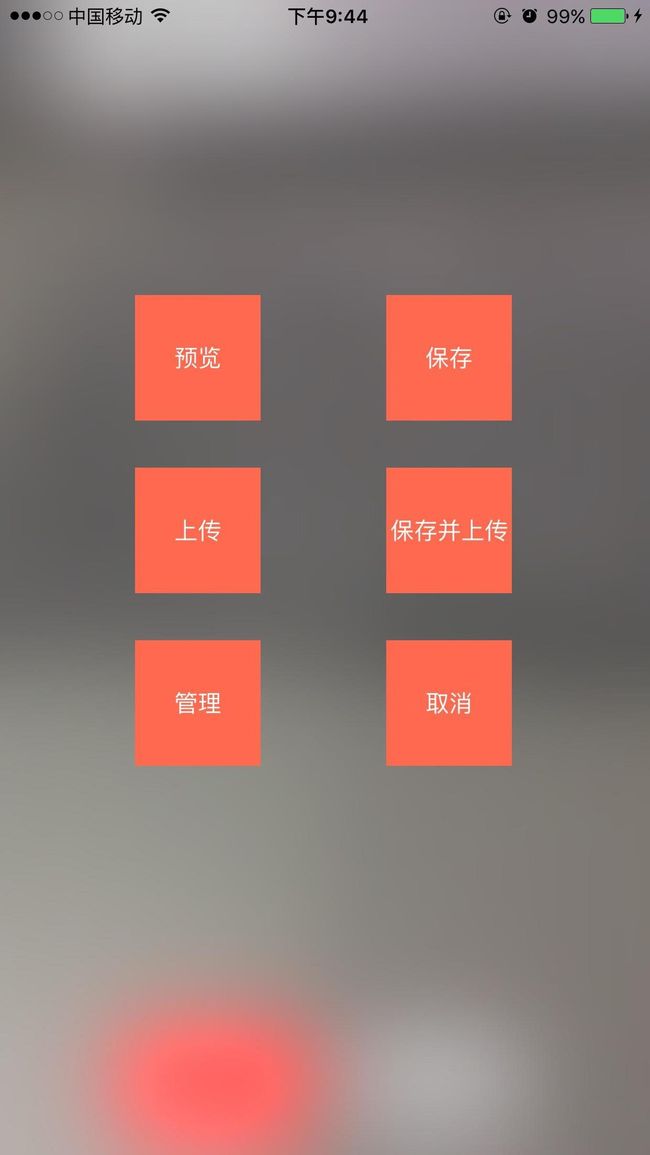
        //  弹出View
        operatorView = NSBundle.mainBundle().loadNibNamed("IWVideoOperatorView", owner: self, options: nil).last as! IWVideoOperatorView
        operatorView.getSuperViewController(self)

        operatorView.frame = CGRectMake(0, self.view.bounds.height, view.bounds.width, view.bounds.height)
        view.addSubview(operatorView)

        UIView.animateWithDuration(0.4, delay: 0, usingSpringWithDamping: 0.8, initialSpringVelocity: 20, options: UIViewAnimationOptions.CurveEaseInOut, animations: {
            self.operatorView.frame.origin.y = 0
            }, completion: nil)


    }

    //  录制时间
    func videoRecordingTotolTime() {
        secondCount += 1

        //  判断是否录制超时
        if secondCount == MaxVideoRecordTime {
            timer?.invalidate()
            let alertC = UIAlertController(title: "最常只能录制十分钟呢", message: nil, preferredStyle: .Alert)
            alertC.addAction(UIAlertAction(title: "确定", style: .Cancel, handler: nil))
            self.presentViewController(alertC, animated: true, completion: nil)
        }

        let hours = secondCount / 3600
        let mintues = (secondCount % 3600) / 60
        let seconds = secondCount % 60

        totolTimeLabel.text = String(format: "%02d", hours) + ":" + String(format: "%02d", mintues) + ":" + String(format: "%02d", seconds)
    }

    //  是否隐藏 HeaderView
    func hiddenHeaderView(isHidden: Bool) {
        if isHidden {
            UIView.animateWithDuration(0.2, animations: {
                self.headerView.frame.origin.y -= 64
            })
        } else {
            UIView.animateWithDuration(0.2, animations: {
                self.headerView.frame.origin.y += 64
            })
        }
    }

    //  返回上一页
    func backAction() {
        self.navigationController?.popViewControllerAnimated(true)
    }

    //  调整摄像头
    func changeCamera(cameraSideButton: UIButton) {
        cameraSideButton.selected = !cameraSideButton.selected
        captureSession.stopRunning()
        //  首先移除所有的 input
        if let  allInputs = captureSession.inputs as? [AVCaptureDeviceInput] {
            for input in allInputs {
                captureSession.removeInput(input)

            }
        }

        changeCameraAnimate()

        //  添加音频输出
        if let audioInput = try? AVCaptureDeviceInput(device: self.audioDevice) {
            self.captureSession.addInput(audioInput)
        }

        if cameraSideButton.selected {
            camera = cameraWithPosition(.Front)
            if let input = try? AVCaptureDeviceInput(device: camera!) {
                captureSession.addInput(input)
            }

            if flashLightButton.selected {
                flashLightButton.selected = false
            }

        } else {
            camera = cameraWithPosition(.Back)
            if let input = try? AVCaptureDeviceInput(device: camera!) {
                captureSession.addInput(input)
            }
        }
    }

    //  切换动画
    func changeCameraAnimate() {
        let changeAnimate = CATransition()
        changeAnimate.delegate = self
        changeAnimate.duration = 0.4
        changeAnimate.type = "oglFlip"
        changeAnimate.subtype = kCATransitionFromRight

        previewLayer.addAnimation(changeAnimate, forKey: "changeAnimate")
    }

    override func animationDidStart(anim: CAAnimation) {

        captureSession.startRunning()
    }

    //  开启闪光灯
    func switchFlashLight(flashButton: UIButton) {
        if self.camera?.position == AVCaptureDevicePosition.Front {
            return
        }
        let camera = cameraWithPosition(.Back)
        if camera?.torchMode == AVCaptureTorchMode.Off {
            do {
                try camera?.lockForConfiguration()
            } catch let error as NSError {
                print("开启闪光灯失败 : \(error)")
            }

            camera?.torchMode = AVCaptureTorchMode.On
            camera?.flashMode = AVCaptureFlashMode.On
            camera?.unlockForConfiguration()

            flashButton.selected = true
        } else {
            do {
                try camera?.lockForConfiguration()
            } catch let error as NSError {
                print("关闭闪光灯失败: \(error)")
            }

            camera?.torchMode = AVCaptureTorchMode.Off
            camera?.flashMode = AVCaptureFlashMode.Off
            camera?.unlockForConfiguration()

            flashButton.selected = false
        }
    }

    //  MARK: - 录像代理方法
    func captureOutput(captureOutput: AVCaptureFileOutput!, didStartRecordingToOutputFileAtURL fileURL: NSURL!, fromConnections connections: [AnyObject]!) {
        //  开始
    }
    func captureOutput(captureOutput: AVCaptureFileOutput!, didFinishRecordingToOutputFileAtURL outputFileURL: NSURL!, fromConnections connections: [AnyObject]!, error: NSError!) {
        //  结束
        self.operatorView.getVideoUrl(outputFileURL)
    }
}
Step2: 创建操作页面 IWVideoOperatorView 。
Step3: 创建视频管理页面IWManagerVideosViewController。
后两步都是一些很常规的代码了,就不贴出来了。详细的下载源码看吧:
完整代码


