####lnmp架构的搭建——源码编译(Mysql,php,nginx)####
LNMP架构介绍:
- LNMP是指一组通常一起使用来运行动态网站或者服务器的自由软件名称首字母缩写(L指Linux,N指Nginx,M一般指MySQL,也可以指MariaDB,P一般指PHP,也可以指Perl或Python)
LNMP代表的就是:Linux系统下Nginx+MySQL+PHP这种网站服务器架构。
Linux是一类Unix计算机操作系统的统称,是目前最流行的免费操作系统。代表版本有:debian、centos、ubuntu、fedora、gentoo等。
Nginx是一个高性能的HTTP和反向代理服务器,也是一个IMAP/POP3/SMTP代理服务器。
Mysql是一个小型关系型数据库管理系统。
PHP是一种在服务器端执行的嵌入HTML文档的脚本语言。
这四种软件均为免费开源软件,组合到一起,成为一个免费、高效、扩展性强的网站服务系统。
LNMP工作原理:
特点:
Nginx是一个小巧而高效的Linux下的Web服务器软件,是由 Igor Sysoev 为俄罗斯访问量第二的 Rambler 站点开发的,已经在一些俄罗斯的大型网站上运行多年,相当的稳定。
Nginx性能稳定、功能丰富、运维简单、处理静态文件速度快且消耗系统资源极少。
优点:
作为 Web 服务器:相比 Apache,Nginx 使用更少的资源,支持更多的并发连接,体现更高的效率。
作为负载均衡服务器:Nginx 既可以在内部直接支持Rails和PHP,也可以支持作为 HTTP代理服务器对外进行服务。Nginx 用C编写,不论是系统资源开销还是CPU使用效率都比Perlbal要好的多。
作为邮件代理服务器:Nginx同时也是一个非常优秀的邮件代理服务器(最早开发这个产品的目的之一也是作为邮件代理服务器),Last/fm 描述了成功并且美妙的使用经验。
Nginx 安装非常的简单,配置文件非常简洁(还能够支持perl语法)。Nginx支持平滑加载新的配置,还能够在不间断服务的情况下进行软件版本的升级。
实验环境:rhel7.3虚拟机,firewalld 、selinux关闭状态
########源码编译安装nginx########
[root@westos1 lnmp]# tar zxf  nginx-1.15.9.tar.gz  ##解压nginx-1.15.9.tar.gz
[root@westos1 lnmp]# cd nginx-1.15.9   ##切换到解压后的 nginx-1.15.9目录会有生成文件
[root@westos1 ~]# cd /root/lnmp/nginx-1.15.9/src/core
[root@westos1 core]# vim nginx.h  #编辑该文件只是为了nginx安装
#define nginx_version      1015009
#define NGINX_VERSION      "1.15.9"
#define NGINX_VER          "nginx/"   #只更改这一处 不显示nginx的版本信息
[root@westos1 nginx-1.15.9]# vim auto/cc/gcc  #编辑该文件只是为了nginx安装
171  #debug  #注释是为了nginx最小安装
172 #CFLAGS="$CFLAGS -g"
[root@westos1 nginx-1.15.9]# ./configure --prefix=/usr/local/lnmp/nginx --with-http_ssl_module   ##指定在/usr/local/lnmp/nginx 位置 增加http_ssl_module模块
checking for OS
 + Linux 3.10.0-514.el7.x86_64 x86_64

checking for C compiler ... not found
[root@westos1 nginx-1.15.9]#yum install -y gcc  ##编译过程中会出现报错,缺少的软件安装上就可以了
./configure: error: the HTTP rewrite module requires the PCRE library.
You can either disable the module by using --without-http_rewrite_module
option, or install the PCRE library into the system,
[root@westos1 nginx-1.15.9]#  yum install -y pcre-devel
./configure: error: SSL modules require the OpenSSL library.
[root@westos1 nginx-1.15.9]#  yum install -y openssl-devel
[root@westos1 nginx-1.15.9]# make && make install   ##编译完成后安装
安装成功后会有以下文件生成
[root@westos1 nginx]# cd conf/
[root@westos1 conf]# vim nginx.conf
#user  nobody;   ##添加用户
worker_processes  1;

#error_log  logs/error.log;
#error_log  logs/error.log  notice;
#error_log  logs/error.log  info;
[root@westos1 conf]# id nginx  ##源码编译不会自动生成用户id
id: nginx: no such user
[root@westos1 conf]# useradd nginx  ##添加用户
[root@westos1 conf]# id nginx  ##用户id
uid=1001(nginx) gid=1001(nginx) groups=1001(nginx)
[root@westos1 conf]# vim nginx.conf
user  nginx  nginx;   ##添加用户名或id都可以
worker_processes  1;

#error_log  logs/error.log;
#error_log  logs/error.log  notice;
#error_log  logs/error.log  info;
为了nginx操作方便,做个软链接
[root@westos1 conf]# cd /usr/local/lnmp/nginx/sbin/   ##切换到这个目录
[root@westos1 sbin]# ln -s /usr/local/lnmp/nginx/sbin/  /usr/local/sbin/  ##将/usr/local/lnmp/nginx/sbin/ 连接到 /usr/local/sbin/ 下
[root@westos1 sbin]# ln -s /usr/local/lnmp/nginx/sbin/  /usr/local/bin/ ##将/usr/local/lnmp/nginx/sbin/ 连接到 /usr/local/bin/ 下
[root@westos1 sbin]# cd
[root@westos1 ~]# ls
lnmp
[root@westos1 ~]# ln -s /usr/local/lnmp/nginx/sbin/nginx /usr/local/sbin/   ##将/usr/local/lnmp/nginx/sbin/nginx连接到 /usr/local/sbin/ 下
[root@westos1 ~]# nginx   ##打开nginx
[root@westos1 ~]# nginx
nginx: [emerg] bind() to 0.0.0.0:80 failed (98: Address already in use)
nginx: [emerg] bind() to 0.0.0.0:80 failed (98: Address already in use)
nginx: [emerg] bind() to 0.0.0.0:80 failed (98: Address already in use)
nginx: [emerg] bind() to 0.0.0.0:80 failed (98: Address already in use)
^C
[root@westos1 ~]# netstat -antlp   ##查看端口
Active Internet connections (servers and established)
Proto Recv-Q Send-Q Local Address           Foreign Address         State       PID/Program name
tcp        0      0 0.0.0.0:80              0.0.0.0:*               LISTEN      16736/nginx: master    ##端口打开
tcp        0      0 0.0.0.0:22              0.0.0.0:*               LISTEN      768/sshd
tcp        0      0 127.0.0.1:25            0.0.0.0:*               LISTEN      838/master
tcp        0      0 172.25.40.11:22         172.25.40.250:47670
访问访问到nginx界面:

###nginx前端页面##
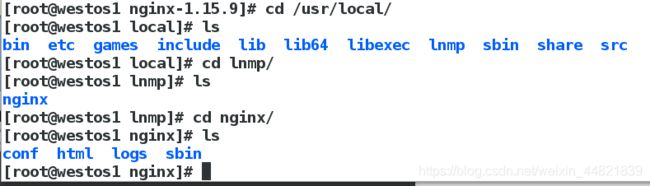
[root@westos1 ~]# cd /usr/local/lnmp/nginx/
[root@westos1 nginx]# ls
client_body_temp  fastcgi_temp  logs        sbin       uwsgi_temp
conf              html          proxy_temp  scgi_temp
[root@westos1 nginx]# cd html/
[root@westos1 html]# ls
50x.html  index.html
[root@westos1 html]# >index.html
[root@westos1 html]# vim index.html   ##编写前端页面
westos:nginx
[root@westos1 html]# cd /usr/local/lnmp/
[root@westos1 lnmp]# du -sh nginx/
980k   	nginx/  ##980K 最小安装
访问:

[root@westos1 lnmp]# cd /usr/local/lnmp/nginx/conf/
[root@westos1 conf]# vim nginx.conf ##编辑文件(内容如下图)

  server {
         listen           80;   #端口80
         server_name   www.westos.org;  ##访问的内容
         location  / {      ##服务前端页面的位置
                  root  html/www;   在/html/www/index.html(文件中填写的文件路径必须存在)
                  index index.html;
              }
       }
}

[root@westos1 conf]# pwd
/usr/local/lnmp/nginx/conf
[root@westos1 conf]# cd ..
[root@westos1 nginx]# ls
client_body_temp  fastcgi_temp  logs        sbin       uwsgi_temp
conf              html          proxy_temp  scgi_temp
[root@westos1 nginx]# cd html/
[root@westos1 html]# mkdir www   ##创建文件中填写的前端页面目录
[root@westos1 html]# mkdir bbs
[root@westos1 html]# mkdir blog
[root@westos1 html]# ls
50x.html  bbs  blog  index.html  www
[root@westos1 html]# cd bbs/
[root@westos1 bbs]# vim index.html##创建文件中填写的前端页面
[root@westos1 bbs]# cat index.html
bbs.westos.org
[root@westos1 bbs]# cd ..
[root@westos1 html]# cd www/
[root@westos1 www]# vim index.html
[root@westos1 www]# cat index.html
www.westos.org
[root@westos1 www]# cd ..
[root@westos1 html]# cd blog/
[root@westos1 blog]# vim index.html
[root@westos1 blog]# cat index.html
blog.westos.org
[root@westos1 blog]# nginx -t   ##查看文件能否加载成功
nginx: the configuration file /usr/local/lnmp/nginx/conf/nginx.conf syntax is ok
nginx: configuration file /usr/local/lnmp/nginx/conf/nginx.conf test is successful
[root@westos1 conf]# nginx -s reload  ##重启动nginx
客户端:添加解析
vim /etc/hosts
172.25.40.11 www.westos.org bbs.westos.org blog.westos.org
测试:访问不同可以看到不同前端页面
[root@foundation40 ~]# curl www.westos.org
www.westos.org
[root@foundation40 ~]# curl bbs.westos.org
bbs.westos.org
[root@foundation40 ~]# curl blog.westos.org
blog.westos.org
###负载均衡###
[root@server1 conf]# pwd
/usr/local/lnmp/nginx/conf
[root@server1 conf]# vim nginx.conf
17 http {
 18     include       mime.types;
 19     default_type  application/octet-stream;
 20       upstream westos {
 21                server 172.25.46.2:80;   ##负载均衡的真实主机ip
 22                server 172.25.46.3:80;
 23 }


119 server {
120         listen 80;
121         server_name www.westos.org;
122         location / {
123                proxy_pass http://westos;
124 }
125 }
126 }
[root@server1 conf]# nginx -t    ##检查文件是否有语法错误
nginx: the configuration file /usr/local/lnmp/nginx/conf/nginx.conf syntax is ok
nginx: configuration file /usr/local/lnmp/nginx/conf/nginx.conf test is successful  #成功
[root@server1 conf]# nginx -s reload  ##重新登陆
server2、server3 环境配置
[root@server2 html]# yum install -y httpd
[root@server2 ~]# cd /var/www/html/
[root@server2 html]# vim index.html
[root@server2 html]# cat index.html
server2:nginx
[root@server2 html]# systemctl start httpd

[root@server3 html]# yum install -y httpd
[root@server3 ~]# cd /var/www/html/
[root@server3 html]# vim index.html
[root@server3 html]# cat index.html
server3:nginx
[root@server3 html]# systemctl start httpd
测试:
真实主机作地址解析
172.25.46.1 www.westos.org

########Mysql数据库源码编译#############
1.解压mysql源码包
[root@server1 lnmp]# tar zxf mysql-boost-5.7.17.tar.gz
2.安装源码编译的工具cmake(支持编译C++语言) cmake(相当于configure),用来编译mysql
- cmake 跨平台工具用来编译mysql源码,用于设置mysql编译参数;如:安装目录、数据存放目录、字符编码、排序规则…
[root@server1 lnmp]# yum install -y cmake-2.8.12.2-2.el7.x86_64.rpm
3.编译:
[root@server1 lnmp]# cd mysql-5.7.17/
[root@server1 mysql-5.7.17]# cmake -DCMAKE_INSTALL_PREFIX=/usr/local/lnmp/mysql  #安装目录
-DMYSQL_DATADIR=/usr/local/lnmp/mysql/data #数据库存放目录
-DMYSQL_UNIX_ADDR=/usr/local/lnmp/mysql/data/mysql.sock  #Unix socket 文件路径-DWITH_MYISAM_STORAGE_ENGINE=1 -DWITH_INNOBASE_STORAGE_ENGINE=1   #安装 myisam 存储引擎
-DDEFAULT_CHARSET=utf8 #使用 utf8 字符
-DDEFAULT_COLLATION=utf8_general_ci  #校验字符
 -DEXTRA_CHARSETS=all #安装所有扩展字符集
###解决依赖性###
CMake Error at cmake/boost.cmake:81 (MESSAGE):
  You can download it with -DDOWNLOAD_BOOST=1 -DWITH_BOOST=

  This CMake script will look for boost in .  If it is not there,
  it will download and unpack it (in that directory) for you.

  If you are inside a firewall, you may need to use an http proxy:

  export http_proxy=http://example.com:80

Call Stack (most recent call first):
  cmake/boost.cmake:238 (COULD_NOT_FIND_BOOST)
  CMakeLists.txt:455 (INCLUDE)


-- Configuring incomplete, errors occurred!  ##第一次编译会报错:解决依赖性
See also "/root/lnmp/mysql-5.7.17/CMakeFiles/CMakeOutput.log".
See also "/root/lnmp/mysql-5.7.17/CMakeFiles/CMakeError.log".
[root@server1 mysql-5.7.17]# yum install -y gcc gcc-c++ ncurses-devel -y
[root@server1 mysql-5.7.17]# ls
boost            Docs                 mysql-test  strings
BUILD            Doxyfile-perfschema  mysys       support-files
client           extra                mysys_ssl   testclients
cmake            include              packaging   unittest
CMakeCache.txt   INSTALL              plugin      VERSION
CMakeFiles       libbinlogevents      rapid       VERSION.dep
CMakeLists.txt   libbinlogstandalone  README      vio
cmd-line-utils   libevent             regex       win
config.h.cmake   libmysql             scripts     zlib
configure.cmake  libmysqld            sql
COPYING          libservices          sql-common
dbug             man                  storage
[root@server1 mysql-5.7.17]# make clean   ##编译失败会生成的 CMakeCache.txt 一定要删除,并make clean
make: *** No rule to make target `clean'.  Stop.
[root@server1 mysql-5.7.17]# rm -fr CMakeCache.txt
'重新编译时,需要清除原来的对象文件和缓存信息'
'make clean;rm -fr CmakeCache.txt'
在编译
[root@server1 mysql-5.7.17]# cmake -DCMAKE_INSTALL_PREFIX=/usr/local/lnmp/mysql -DMYSQL_DATADIR=/usr/local/lnmp/mysql/data -DMYSQL_UNIX_ADDR=/usr/local/lnmp/mysql/data/mysql.sock -DWITH_MYISAM_STORAGE_ENGINE=1 -DWITH_INNOBASE_STORAGE_ENGINE=1 -DDEFAULT_CHARSET=utf8 -DDEFAULT_COLLATION=utf8_general_ci -DEXTRA_CHARSETS=all

报错:

CMake Error at cmake/boost.cmake:81 (MESSAGE):
  You can download it with -DDOWNLOAD_BOOST=1 -DWITH_BOOST=

  This CMake script will look for boost in .  If it is not there,
  it will download and unpack it (in that directory) for you.

  If you are inside a firewall, you may need to use an http proxy:

  export http_proxy=http://example.com:80

Call Stack (most recent call first):
  cmake/boost.cmake:238 (COULD_NOT_FIND_BOOST)
  CMakeLists.txt:455 (INCLUDE)


-- Configuring incomplete, errors occurred!
See also "/root/lnmp/mysql-5.7.17/CMakeFiles/CMakeOutput.log".
See also "/root/lnmp/mysql-5.7.17/CMakeFiles/CMakeError.log".
[root@server1 mysql-5.7.17]# make clean
make: *** No rule to make target `clean'.  Stop.
[root@server1 mysql-5.7.17]# rm -fr CMakeCache.txt
再次编译:

[root@server1 mysql-5.7.17]# cmake -DCMAKE_INSTALL_PREFIX=/usr/local/lnmp/mysql -DMYSQL_DATADIR=/usr/local/lnmp/mysql/data -DMYSQL_UNIX_ADDR=/usr/local/lnmp/mysql/data/mysql.sock -DWITH_MYISAM_STORAGE_ENGINE=1 -DWITH_INNOBASE_STORAGE_ENGINE=1 -DDEFAULT_CHARSET=utf8 -DDEFAULT_COLLATION=utf8_general_ci -DEXTRA_CHARSETS=all -DWITH_BOOST=boost/boost_1_59_0/
出现警告:

需要安装软件再编译:
[root@server1 mysql-5.7.17]# yum install -y bison
[root@server1 mysql-5.7.17]# make clean
[root@server1 mysql-5.7.17]# rm -fr CMakeCache.txt
[root@server1 mysql-5.7.17]# cmake -DCMAKE_INSTALL_PREFIX=/usr/local/lnmp/mysql -DMYSQL_DATADIR=/usr/local/lnmp/mysql/data -DMYSQL_UNIX_ADDR=/usr/local/lnmp/mysql/data/mysql.sock -DWITH_MYISAM_STORAGE_ENGINE=1 -DWITH_INNOBASE_STORAGE_ENGINE=1 -DDEFAULT_CHARSET=utf8 -DDEFAULT_COLLATION=utf8_general_ci -DEXTRA_CHARSETS=all -DWITH_BOOST=boost/boost_1_59_0/

出现上图,没有报错和警告就可以安装了##时间有点长,
- 可以在make 前关掉其他虚拟机,把内存加大(加内存时可以在真机free -m 查看真机内存大小),
- 增加cpu核数
[root@server1 mysql-5.7.17]# make && make install
编译成功后可以看见如下图文件生成
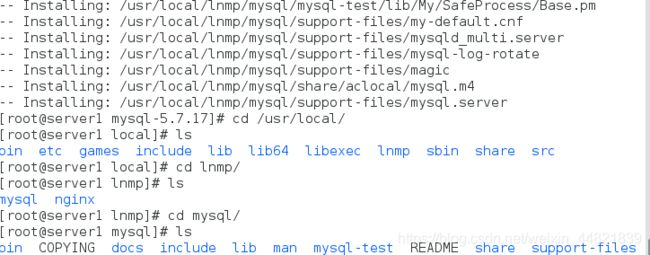
配置mysql
1.将编译完的mysql的启动脚本复制到系统启动服务的默认目录复到/etc/init.d/
[root@server1 lib]# cd
[root@server1 ~]# ls
lnmp  nginx
[root@server1 ~]# cd lnmp/
[root@server1 lnmp]# cd mysql-5.7.17/
[root@server1 mysql-5.7.17]# cd support-files/
[root@server1 support-files]# cp mysql.server /etc/init.d/mysqld   ##复制启动脚本
[root@server1 support-files]# cd /etc/
[root@server1 etc]# cp my.cnf my.cnf.bak  ##将原来的/etc/my.cnf备份,重新拷贝安装包里的过去
[root@server1 etc]# chmod +x /etc/init.d/mysqld  ##添加权限
2.进入源码编译目录,再进入mysql安装的位置,将编译完成的默认配置文件放到/etc/my.cnf
[root@server1 etc]# cd -
/root/lnmp/mysql-5.7.17/support-files
[root@server1 support-files]# cp my-default.cnf /etc/my.cnf   #将编译完成的默认配置文件放在/etc/my.cnf
cp: overwrite ‘/etc/my.cnf’? yes
[root@server1 support-files]# cd -
/etc
[root@server1 etc]# vim my.cnf  ##编辑该文件

 17 # These are commonly set, remove the # and set as required.
 18 basedir = /usr/local/lnmp/mysql
 19 datadir = /usr/local/lnmp/mysql/data
 20 # port = .....
 21 # server_id = .....
 22 socket = /usr/local/lnmp/mysql/data/mysql.sock
3.建立mysql用户和用户组,对mysql服务进行限制(只在mysl用户的家目录)
[root@server1 etc]# groupadd -g 27 mysql  ##源码编译不自动生成用户id ,自己手动建立
[root@server1 etc]# useradd -u 27 -g 27 mysql  (id=27是因为rpm默认安装时mysql用户的id为27,并非强制)
[root@server1 etc]# id mysql
uid=27(mysql) gid=27(mysql) groups=27(mysql)
[root@server1 etc]# chown mysql.mysql /usr/local/lnmp/mysql/ -R(修改mysql目录的权限,使其对mysql用户可写)
4.#将编译生成的mysql二进制命令放进系统环境变量文件,保证可以直接调用该二进制命名
[root@server1 etc]# vim ~/.bash_profile   #将编译生成的mysql二进制命令放进系统环境变量文件,保证可以直接调用该二进制命名
PATH=$PATH:$HOME/bin:/usr/local/lnmp/mysql/bin
[root@server1 etc]# source ~/.bash_profile  ##加载/.bash_profile文件
[root@server1 etc]# /etc/init.d/mysqld start
##执行mysql的配置初始化文件初始化mysql
[root@server1 etc]# mysqld --user=mysql --initialize   ##(以mysql用户身份初始化)
初始化会生成一个临时密码,用于登录mysql(要记住此密码)
2019-06-30T10:04:47.918427Z 0 [Warning] No existing UUID has been found, so we assume that this is the first time that this server has been started. Generating a new UUID: 7e24ecb7-9b1e-11e9-bfd8-525400cdfe7c.
2019-06-30T10:04:47.954616Z 0 [Warning] Gtid table is not ready to be used. Table 'mysql.gtid_executed' cannot be opened.
2019-06-30T10:04:47.956433Z 1 [Note] A temporary password is generated for root@localhost: ((poTrStO6L1  ##自动生成的初始化密码
[root@server1 etc]# chown mysql /usr/local/lnmp/mysql/data/ -R ##数据目录所有者必须是mysql,不然mysql用户不能写
 [root@server1 etc]# chown root /usr/local/lnmp/mysql/ -R##为了安全,再将mysql目录的所有者改为root
5.开启mysql
[root@server1 etc]# /etc/init.d/mysqld start
Starting MySQL.Logging to '/usr/local/lnmp/mysql/data/server1.err'.
. SUCCESS! )
进入mysql:mysql -uroot -pr#9VqAoA/au: #使用刚才的临时密码
执行:show databases; 会报错
需要执行:mysql_secure_installation,然后会提示是否启用密码检测插件,直接回车不启用,否则会要求密码有大小写和特殊字符等要求
剩余全部选 y

[root@server1 etc]# mysql_secure_installation ##更改数据库密码

Securing the MySQL server deployment.

Enter password for user root:

The existing password for the user account root has expired. Please set a new password.

New password:

Re-enter new password:

[root@server1 etc]# mysql -uroot -pWestos+001  ##登陆数据库看是否可进入
mysql: [Warning] Using a password on the command line interface can be insecure.
Welcome to the MySQL monitor.  Commands end with ; or \g.
Your MySQL connection id is 7
Server version: 5.7.17 Source distribution

Copyright (c) 2000, 2016, Oracle and/or its affiliates. All rights reserved.

Oracle is a registered trademark of Oracle Corporation and/or its
affiliates. Other names may be trademarks of their respective
owners.

Type 'help;' or '\h' for help. Type '\c' to clear the current input statement.

mysql> show databases;
+--------------------+
| Database           |
+--------------------+
| information_schema |
| mysql              |
| performance_schema |
| sys                |
+--------------------+
4 rows in set (0.00 sec)
########PHP源码编译#######
1.解压安装包
[root@server1 lnmp]# tar jxf php-5.6.35.tar.bz2
解决依赖性:
[root@server1 lnmp]# yum install -y bzip2
3.进入解压目录建立编译路径和模块
[root@server1 lnmp]# cd php-5.6.35

[root@server1 php-5.6.35]#./configure --prefix=/usr/local/lnmp/php  ##安装php的位置
--with-config-file-path=/usr/local/lnmp/php/etc   ##php配置文件所在的位置
 --with-openssl     ##支持openssl 加密
 --with-snmp   ##
 --with-gd
  --with-zlib  #打开zlib库支
  --with-curl
   --with-libxml-dir
    --with-png-dir
     --with-jpeg-dir
      --with-freetype-dir  # 打开对freetype字体库的支持
       --with-gmp
       --with-gettext
        --with-pear
        --enable-mysqlnd
        --with-mysql=mysqlnd   安装目录,对mysql的支持
         --with-mysqli=mysqlnd  文件目录,优化支持
          --with-pdo-mysql=mysqlnd
           --enable-inline-optimization
            --enable-soap
             --enable-ftp
             --enable-sockets
              --enable-mbstring
              --enable-fpm
              --with-fpm-user=nginx    ##对php服务限制通过nginx用户实现
                编译时添加了--with-fpm-user=nginx --with-fpm-group=nginx 参数
             所以添加 nginx 用户

              --with-fpm-group=nginx   ##php以nginx用户组身份运行
               --with-mcrypt   ##提供对多中算法模块的支持,主要用来实现加密等算法
                --with-mhash   ##加密算法
PHP-FPM是一个PHP FastCGI管理器,是只用于PHP的,它其实是PHP源代码的一个补丁,旨在将Fast-CGI进程管理整合进PHP包中。必须将它patch到你的PHP源代码中,在编译安装PHP后才可以使用。新版的PHP已经集成了php-fpm,在./configure的时候带 –enable-fpm参数即可开启PHP-FPM
#以上为php需要编译的模块,把刚才编译mysql的参数要加进来,添加mysqlnd(这是mysql的驱动,php开发的)
解决依赖性:
[root@server1 php-5.6.35]#  yum install -y libxml2-devel libcurl-devel

[root@server1 php-5.6.35]#  yum whatprovides */jpeglib.h  ##查找报错时的软件包
 [root@server1 php-5.6.35]#  yum install -y libjpeg-turbo-devel-1.2.90-5.el7.x86_64
  [root@server1 php-5.6.35]#  yum install -y libpng-devel-1.5.13-7.el7_2.x86_64
  [root@server1 php-5.6.35]# yum install -y freetype-devel-2.4.11-12.el7.x86_64
  [root@server1 php-5.6.35]# yum install -y gmp-devel-6.0.0-12.el7_1.x86_64
  [root@server1 php-5.6.35]#  cd ..
   [root@server1 lnmp]#   ls
 [root@server1 lnmp]#   yum install -y libmcrypt-2.5.8-9.el6.x86_64.rpm libmcrypt-devel-2.5.8-9.el6.x86_64.rpm re2c-0.13.5-1.el6.x86_64.rpm  ##这几个安装包要自己在官网下载
[root@server1 php-5.6.35]#   yum install -y net-snmp-devel net-snmp

没有报错:
[root@server1 php-5.6.35]# make && make install
作php配置(时区和配置pid)
[root@server1 etc]# cd /usr/local/lnmp/php/
[root@server1 php]# ls
bin  etc  include  lib  php  sbin  var
[root@server1 php]# cd etc/
[root@server1 etc]# ls
pear.conf  php-fpm.conf.default
root@server1 etc]# cp php-fpm.conf.default  php-fpm.conf
[root@server1 etc]# ls
pear.conf  php-fpm.conf  php-fpm.conf.default
[root@server1 etc]# vim php-fpm.conf
 25 pid = run/php-fpm.pid   ##去掉注释
 149 user = nginx    ##用户和用户组都是nginx
150 group = nginx
[root@server1 etc]# cd /root/lnmp/php-5.6.35
[root@server1 php-5.6.35]# cp php.ini-production /usr/local/lnmp/php/etc/php.ini  拷贝更改php主配置文件
[root@server1 php-5.6.35]# cd /usr/local/lnmp/php/etc/
[root@server1 etc]# pwd
/usr/local/lnmp/php/etc
 936 date.timezone = Asia/Shanghai   ##设置时区,和建虚拟机选定时区一致
拷贝php启动脚本至/etc/init.d/
[root@server1 etc]# cd -
/root/lnmp/php-5.6.35
[root@server1 sapi]# cd fpm/
[root@server1 fpm]# pwd
/root/lnmp/php-5.6.35/sapi/fpm
[root@server1 fpm]# cp init.d.php-fpm /etc/init.d/php-fpm   ##将编译完成的启动脚本init.d.php-fpm拷贝到/etc/init.d/php-fpm
[root@server1 fpm]# chmod +x /etc/init.d/php-fpm  ##给脚本可执行权限
[root@server1 fpm]# /etc/init.d/php-fpm  start
Starting php-fpm  done[root@server1 fpm]# /etc/init.d/mysqld start
Starting MySQL.. SUCCESS!

[root@server1 fpm]# netstat -antlp  ##查看php服务的监听端口(9000)
Active Internet connections (servers and established)
tcp        0      0 127.0.0.1:9000          0.0.0.0:*               LISTEN      1132/php-fpm: maste
tcp6       0      0 :::3306                 :::*                    LISTEN      1293/mysqld