在 Ubuntu 上使用 uWSGI 和 Nginx 部署 Flask 项目
在 Ubuntu 上使用 uWSGI 和 Nginx 部署 Flask 项目
创建一个简单的 Flask 项目 ~/myproject/myproject.py:
from flask import Flask
app = Flask(__name__)
@app.route("/")
def hello():
return "Hello There!
"
if __name__ == "__main__":
app.run(host='0.0.0.0')
运行 python myproject.py ,然后访问 http://0.0.0.0:5000 将会看到:

当然直接使用 python run.py 的方法只适合本地开发,线上的话速度太慢,我们需要使用 uwsgi。
安装uWSGI
用pip怎么也装不上,使用conda安装
conda install -c conda-forge uwsgi
出现错误
uwsgi: error while loading shared libraries: libiconv.so.2: cannot open shared object file: No such file or directory
解决方法
conda install -c conda-forge libiconv
安装了 uwsgi之后,运行:
uwsgi --socket 0.0.0.0:5000 --protocol=http -w myproject:app
protocol 说明使用 http 协议,-w 指明了要启动的模块,run 就是项目启动文件 run.py 去掉扩展名,app 是 run.py 文件中的变量 app,即 Falsk 实例。然后访问 http://server_domain_or_IP:5000,同样会看到上图。说明 uwsgi 可以正常运行。
安装nginx
sudo add-apt-repository ppa:nginx/stable
sudo apt-get update
sudo apt-get install nginx
# 启动
sudo /etc/init.d/nginx start
启动nginx之后,在浏览器中输入http://0.0.0.0,可见到下图

然后配置nginx
单独安装的nginx配置文件目录一般为/etc/nginx/sites-available
在nginx的配置目录新建一个nginx的配置文件myproject,内容如下:
sudo vim /etc/nginx/sites-available/myproject

server {
	listen 80;
    server_name 0.0.0.0;

    location / {
        include uwsgi_params;
        uwsgi_pass unix:/home/hadoop/桌面/Python代码/Flask/Web界面/sock/myproject.sock;
    }
}
listen表示监听80端口,server_name则是你的域名或者ip。
localtion /则表示对于域名或者ip/的请求处理方式。首先通过包含uwsgi_params来加载一些默认的uWSGI参数。然后uwsgi_pass转发请求给我们定义的socket。
这只是创建了可用的配置文件,如果要启用,还需要将其软连接到enable目录:
ln -s /etc/nginx/sites-available/myproject /etc/nginx/sites-enabled
检查我们的配置文件是否编写正确:
nginx -t
如果提示ok,则重启nginx:
systemctl restart nginx
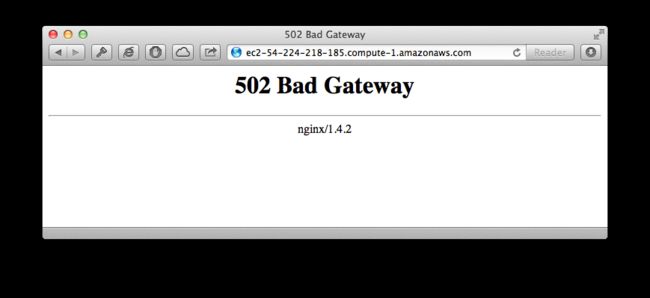
这是因为我们还没有配置uWSGI
在工作目录下新建myproject.ini,加入以下内容
[uwsgi]
#application's base folder
base = /home/hadoop/桌面/Python代码/Flask/Web界面

#python module to import
app = myproject
module = %(app)

#socket file's location
socket = /home/hadoop/桌面/Python代码/Flask/Web界面/sock/%n.sock

#permissions for the socket file
chmod-socket = 666

#the variable that holds a flask application inside the module imported at line #6
callable = app

#location of log files
logto = /home/hadoop/桌面/Python代码/Flask/Web界面/log/%n.log
切换到工作目录,执行以下命令
cd ./桌面/Python代码/Flask/Web界面
uwsgi --ini myproject.ini
接下来访问你的服务器,现在Nginx可以连接到uWSGI进程了。
参考
https://juejin.im/entry/5a1f7bee51882561a20a3f74
https://www.oschina.net/translate/serving-flask-with-nginx-on-ubuntu?print
https://lufficc.com/blog/how-to-serve-flask-applications-with-uwsgi-and-nginx-on-ubuntu
